With ArcGIS Connectors for Power Automate, you can create automatic notifications every time a feature is added in ArcGIS Field Maps. Notifications are customizable and can include anything from a detailed email to a quick message sent to Microsoft Teams.
Microsoft Power Automate provides a low-code to no-code environment to create webhooks, meaning you can connect to your data in ArcGIS and automate workflows with little to no coding experience. This is accomplished by creating a flow of triggers and actions to perform a task.
Scenario
In this blog post, we’ll walk through a debris reporting scenario. We’ll configure a flow in Power Automate that sends an email notification each time a mobile worker creates a new debris feature in Field Maps.
Video demo
The following video demonstrates the steps outlined in this blog post and may be helpful to reference while following along. Note: The video does not have audio.
Requirements
- ArcGIS organizational account with a Publisher role
- Subscription to Microsoft 365
- Access to premium Power Automate connectors, some of which aren’t included with all licenses (Microsoft offers a 90-day free trial).
Prepare a map and layer
You must create a map with at least one feature layer before creating a flow in Power Automate. If you already have a map and layer, skip ahead to the next section. If you don’t, create a map and layer in Field Maps Designer. For step-by-step instructions, see Create a map with Field Maps Designer (help section).
You must also ensure that change tracking is enabled for the feature layer; otherwise, the flow will not work. You can verify this by going to the Settings page of the layer’s item details and ensuring the Keep track of changes to the data check box is checked.

Create a flow in Power Automate
After creating a map and feature layer, you can begin creating the flow in Power Automate.
Step 1—Browse to https://make.powerautomate.com and sign in to your Microsoft 365 account.
Step 2—On the left navigation pane, click Create.

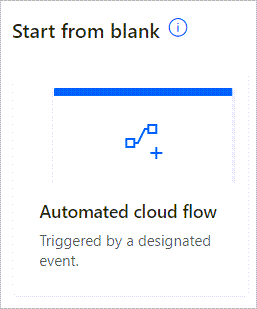
Step 3—Under Start from blank, select Automated cloud flow.
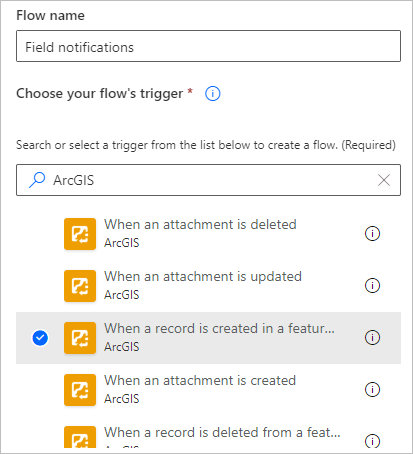
Step 4—In the Build an automated cloud flow window, name your flow and select a trigger.
The trigger is what initiates the flow. In this example, we’ll select a trigger that checks for new features being added to a layer. Enter the following information in the window:
- Flow name—Enter a name for the flow. In this example, I’m naming the flow Field notifications.
- Choose your flow’s trigger—In the search box, type “ArcGIS” and select When a record is created in a feature layer. If you’re using ArcGIS Online, you’ll select the orange trigger. If you’re using ArcGIS Enterprise, you’ll select the purple trigger.
Step 5—Click Create.
The cloud flow designer opens with the selected trigger.
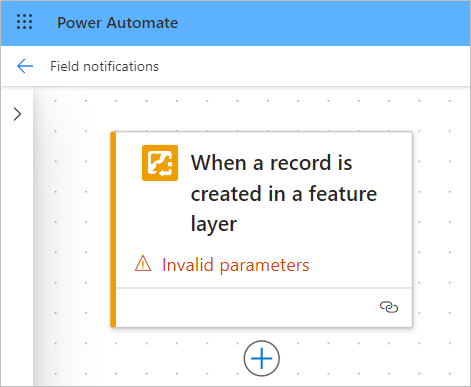
Step 6—Establish the connection to your ArcGIS account.
Click the When a record is created in a feature layer trigger. In the pane that appears, click Change connection and follow the prompts to sign in to your ArcGIS organization.
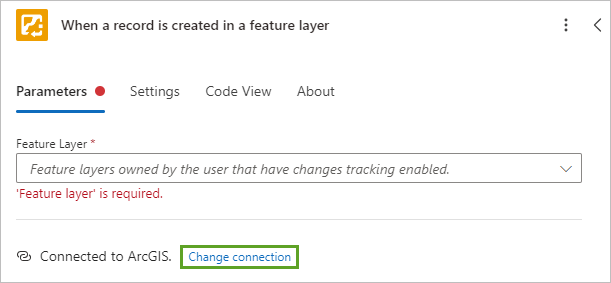
If you’re using ArcGIS Enterprise, there are additional steps you must take to connect your organization to Power Automate. For step-by-step instructions, see Set up the ArcGIS Enterprise connector (help topic).
Step 7—Select the feature layer used to trigger the flow.
When a feature is created in the selected feature layer, the flow will be triggered in Power Automate.
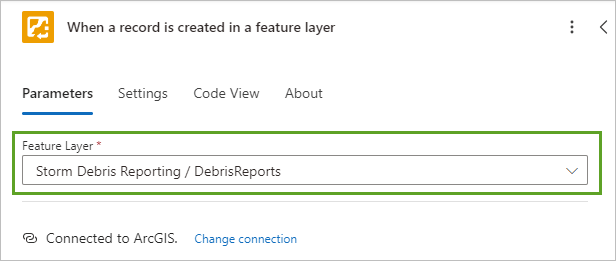
For this example, I’m selecting a Storm Debris Reporting layer, so I’m notified each time a new debris feature is created in the field.
Step 8—Click the add button below the ArcGIS connector, click Add an action, and search for and add the Apply to each control.
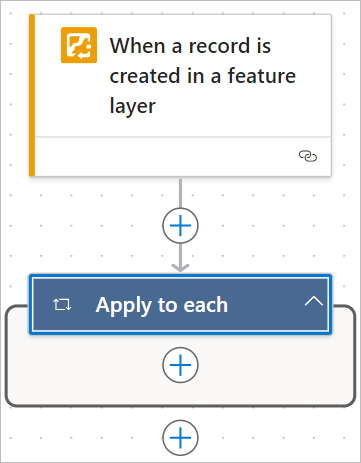
There may be multiple items in the payload (the content sent from ArcGIS to Power Automate), so this control will loop through all of them.
Step 9—Select the Apply to each control and click the lightning bolt button next to the Select An Output From Previous Steps text box.
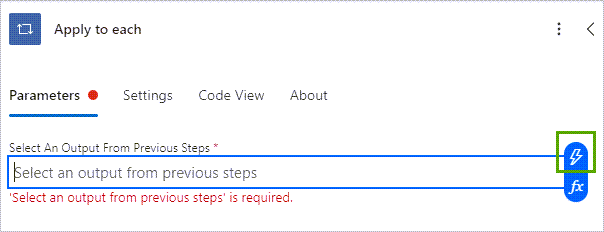
Step 10—Select Body as the output from the previous step.
This is the content included in the payload.
Step 11— Add the Fetch updates, changes, or deletions from the feature layer action to the Apply to each control.
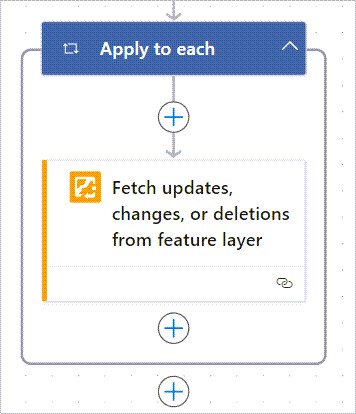
This is the action that will retrieve any changes made to the feature layer.
Step 12—Under the Parameters tab for the Fetch updates, changes, or deletions from feature layer, action, enter the following information:
- Feature Layer—Select the same feature layer you’ve been working with.
- Get Changes From—Select the lightning bolt button and select Changes URL.
- Feature Layer ID—Select the lightning bolt button and select Feature ID.
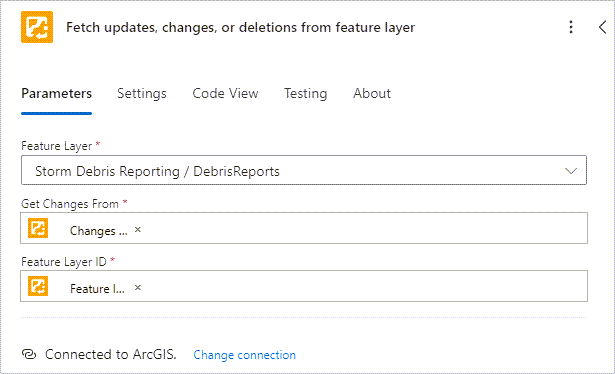
Step 13—Add another Apply to each control beneath the Fetch updates, changes, or deletions from feature layer action but still within in the original Apply to each control.
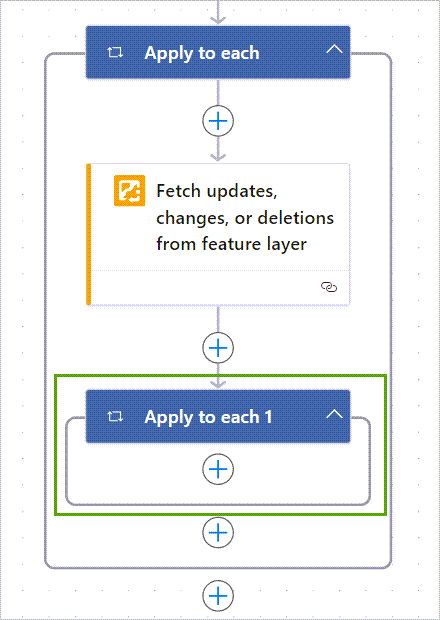
Step 14—In the parameters for this control, in the Select An Output From Previous Steps text box, click the lightning bolt button and select items.
This will cycle through each change item (such as multiple feature creations) and generate a notification for each one.
Step 15—In the second Apply to each action, add the Send an email (V2) action from Office 365 Outlook (you can also use a different email provider, such as Gmail, or a different messaging app, such as Microsoft Teams or Slack).
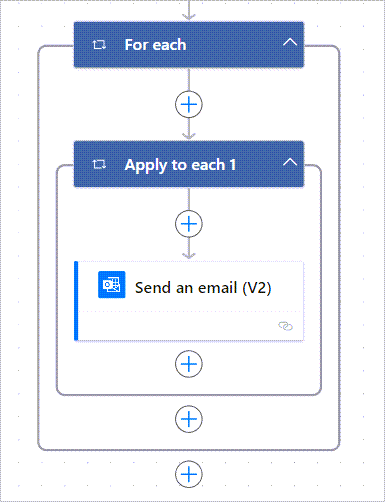
Step 16—Create a connection to your email provider if you haven’t already.
Step 17—Configure the contents of your email.
Specify who the email should be sent to (such as your email or group alias), enter a subject line, and write the body of the email. You can use the lightning bolt button to include dynamic information from fields within the layer.
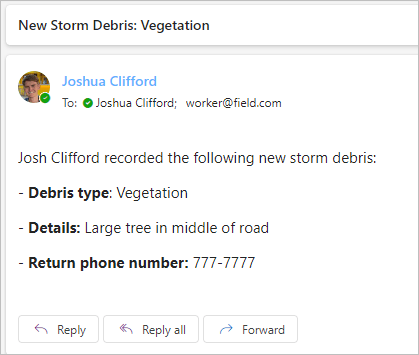
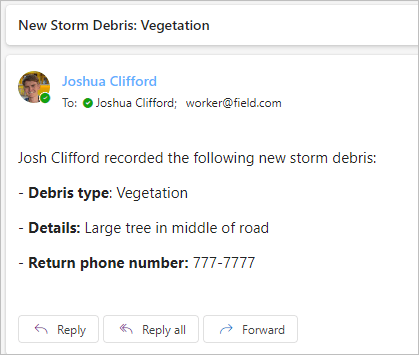
For this example, I included information that mobile workers will enter in the form, such as type of debris, additional details, and a return phone number. I also included an email field value in the To line so mobile workers have a receipt of their submission.
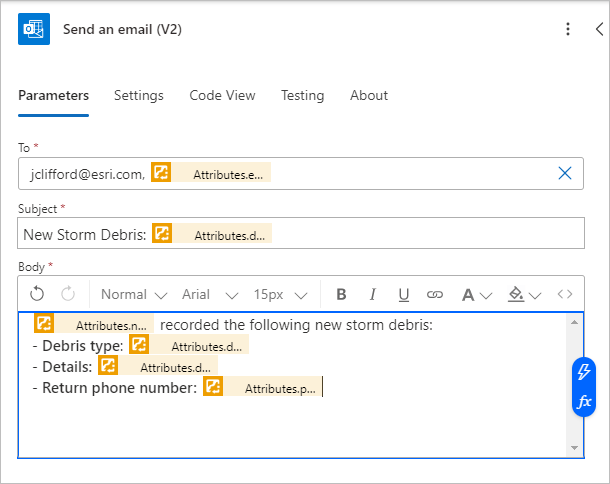
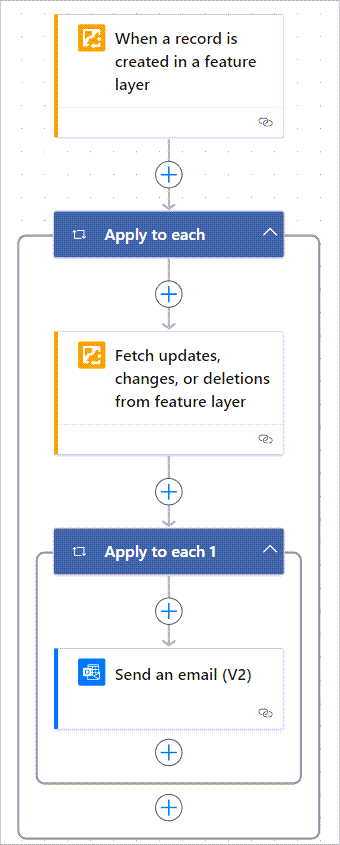
With that, your flow is complete and should look like the following image:

Step 18—Click the Save button to save your work.
Test the flow
Now it’s time to test your flow. Click the Test button (next to the Save button). In the Test Flow pane, select Manually and click Test.
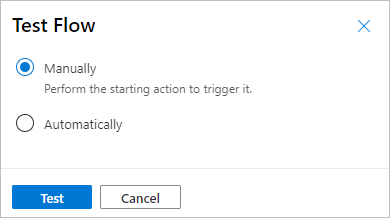
A blank screen appears, waiting for you to trigger the flow (submit a new feature in Field Maps). On your mobile device, open the map in the Field Maps mobile app, fill out the form, and tap Submit to add the new feature to the layer.
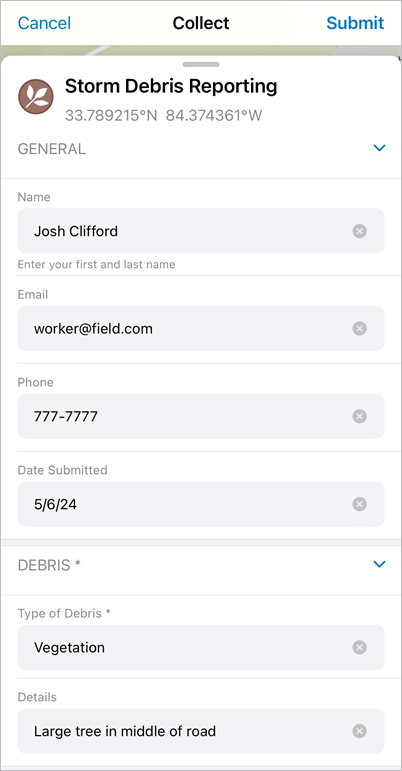
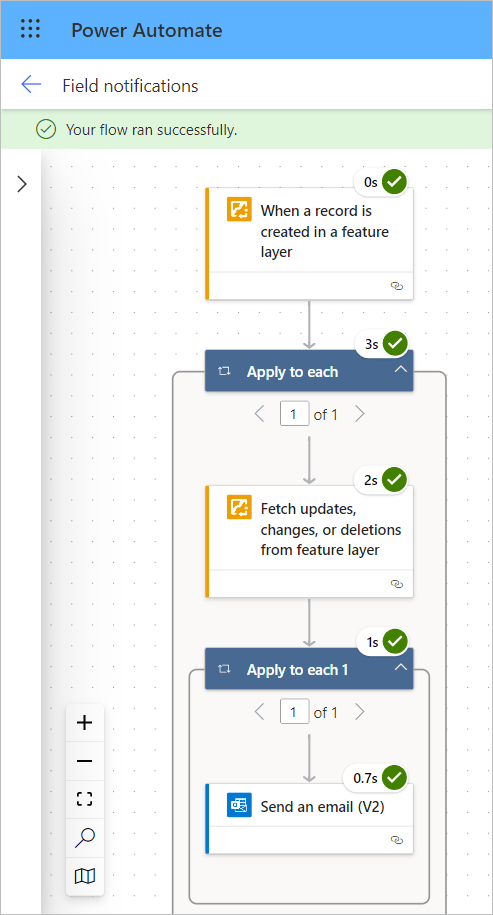
In a few minutes, the flow will be triggered, and the test screen will return the results in Power Automate. If the flow was successful, it should look like the following image:
You should also receive an email that represents what you configured in your flow.
Once you’ve confirmed your flow is error-free, return to the previous page in Power Automate. Click the Turn on button to enable your flow (it may be turned on automatically). Once on, the flow will be checking for new features added to the layer.
You can check the run history for the flow, noting each time the flow was run, its success, and the run duration. If you click an individual run, you can view the inputs and outputs for the flow, which can be helpful for troubleshooting.

In this blog post, you learned how to create a flow in Power Automate that sends an email notification each time a feature is created in Field Maps. This is just one of many flows you can create with Power Automate, so be sure to try out different combinations of triggers and actions. To keep exploring, try creating the following flows:
- Send a Teams message every time a feature is deleted
- Notify a Slack workspace when features are updated
- Send both a Teams message and email when a feature is updated or created
There are also several templates for ArcGIS workflows that you can search for on Power Automate, so be sure to check those out as well.
Additional resources
To learn more about Power Automate and ArcGIS Connectors, see the following resources:
- ArcGIS Connectors for Power Automate (documentation)
- Microsoft Power Automate (documentation)


Hi Josh and Justin – At the very beginning of the video, after you have connected to ArcGIS, you have a dropdown in the Feature Layer box that automagically populates the map and feature you wish to use. Even though I am connected to ArcGIS mine does not populate. Therefore, I have been trying to test with a custom value. This entry is accepted but my flow fails every time. I am certain this first step not populating is a clue that I have more to do before creating a flow. Can you please help me out?
Thank you,
WLargent