ArcGIS Field Maps allows mobile workers to collect data and perform inspections using their mobile device. To collect data, mobile workers fill out forms like the tree inventory form shown below.
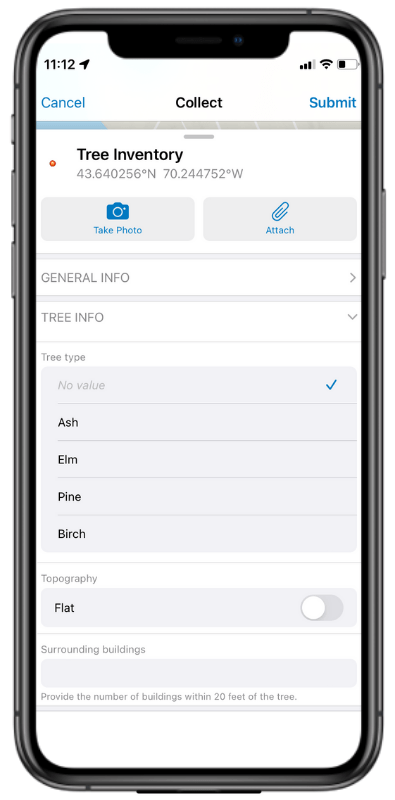
You can build and customize forms using the Field Maps Designer web app. Here’s what the final configuration looks like for the same tree inventory form.
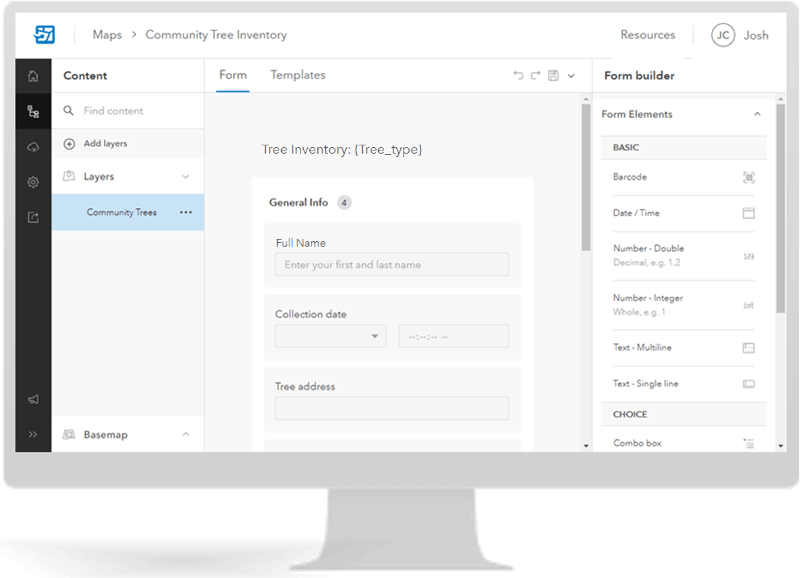
The form building capabilities in Field Maps Designer allow you to edit existing forms, as well as build them from scratch—meaning you can start building a form for an empty layer without any existing fields. This blog post will cover the basics of form building in Field Maps, showing you how to build forms that are clear, organized, and easy to work with when collecting data in the field.
Start with a layer and a map
Before you start building a form in Field Maps, you’ll need at least one editable layer and a map. Layers store the features mobile workers create and edit in the field and are the foundation for creating a form. When you add an editable layer to a map, you can configure the form in Field Maps. When mobile workers use the form to submit data, that information is then updated in the layer.
In this blog post, I’m creating a form for a tree inventory project in the state of Maine. I used the New map button in Field Maps Designer to create the map and layer required for this project.
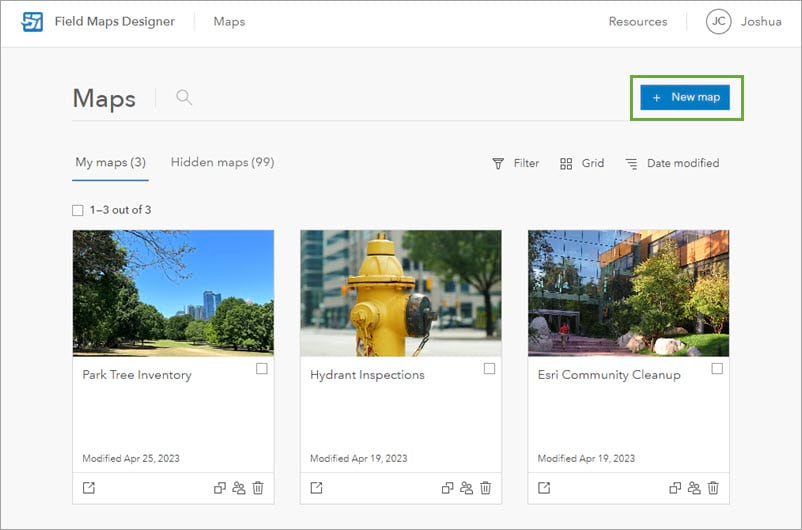
To learn how to create maps and layers for data collection, see Create a map with ArcGIS Field Maps (blog post). Creating a map with Field Maps Designer is supported in ArcGIS Online and ArcGIS Enterprise 11.1 and later.
Open the form builder
After you’ve created a map in Field Maps Designer, the form builder opens automatically. If you didn’t just create the map, you can browse to Field Maps Designer via the app launcher and click on the map, or you can browse to the map’s item details page and click Open in Field Maps Designer.
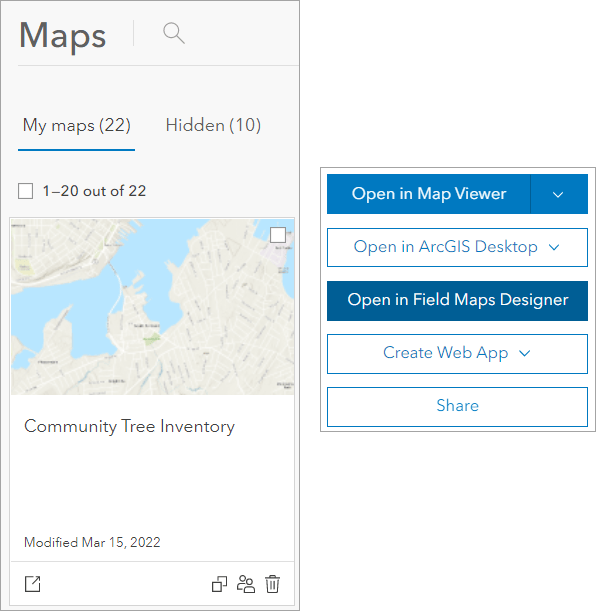
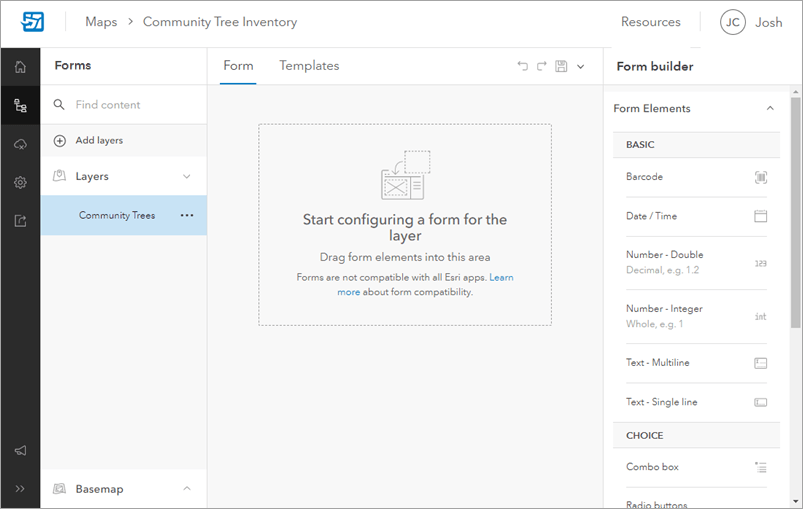
The Forms page opens with the form builder, and you’re ready to start building the form.
Add form elements
Form elements are the building blocks of the form and define the type of information mobile workers provide in the field. These elements are found in the Form Elements list.
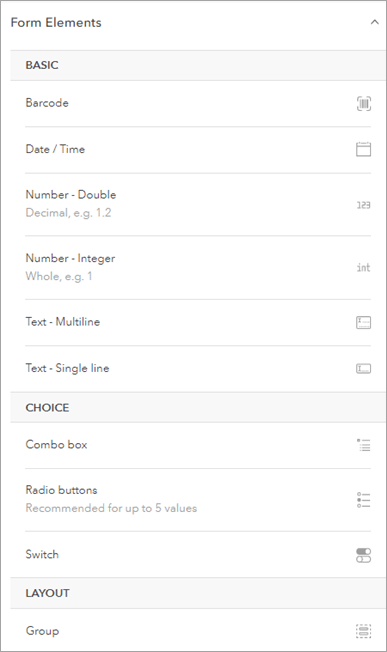
There are three categories of form elements:
- Basic—Mobile workers provide text, number, date, or barcode information.
- Choice—Mobile workers select from a list of options you define.
- Layout—Organize elements on the form.
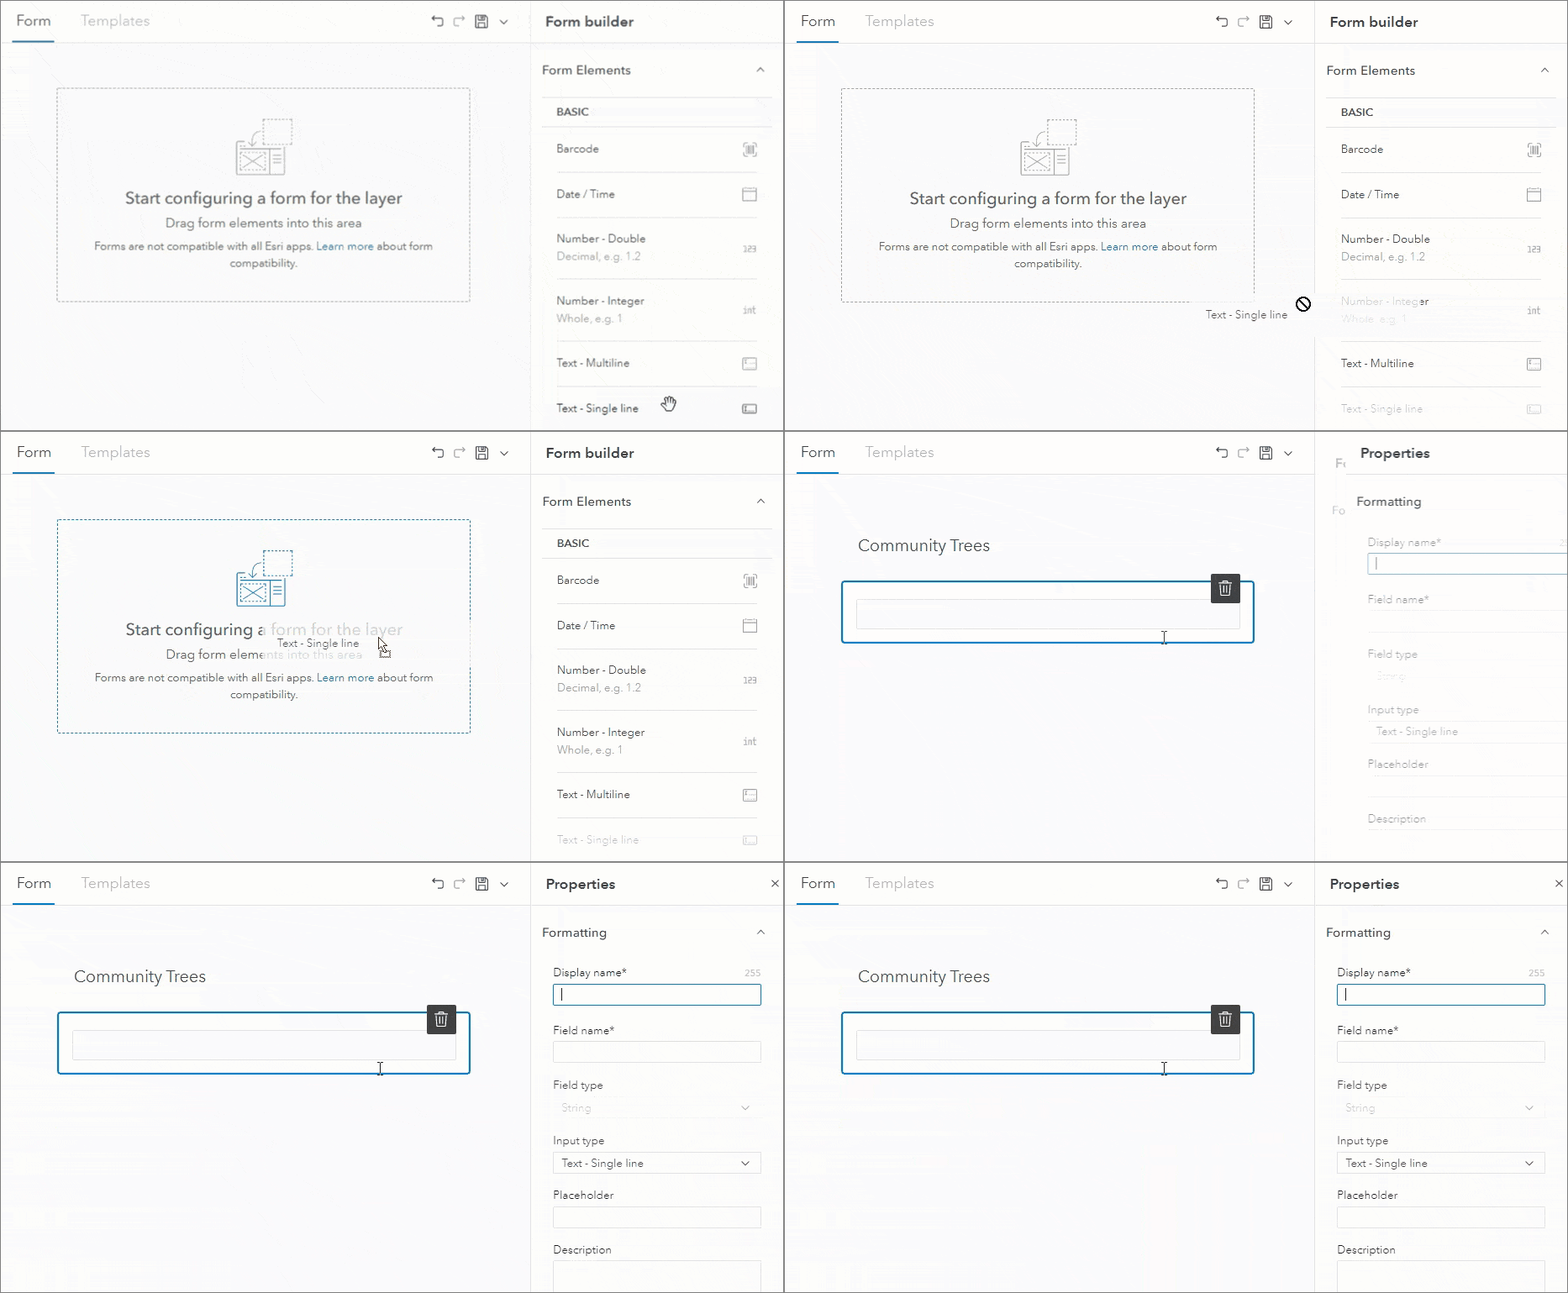
Each basic and choice form element appears as an entry in the form that mobile workers fill out in the Field Maps mobile app. To add a form element, you can either double-click it or drag it onto the form canvas as shown below.
Configure form element properties
After you add a form element to the canvas, the Properties pane appears. Here, you can customize how the form element functions and displays in the form. First, you’ll decide the name of the element as it appears in the form by providing a Display name value.
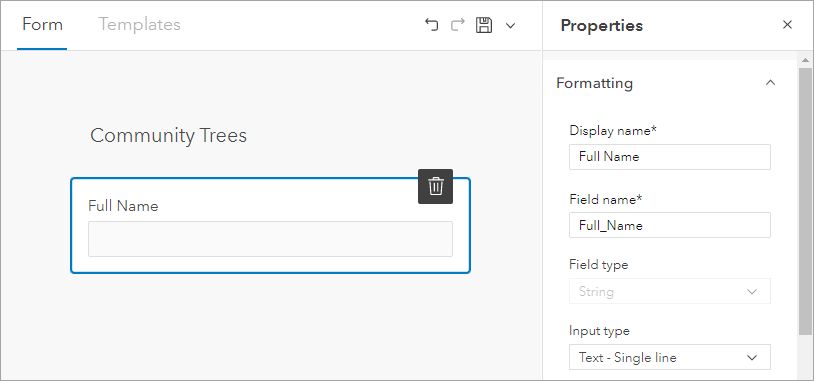
When form elements are saved, they are added as fields to the layer. Because of this, you’re required to provide a field name, type, and length (if the type is string). The field name is derived from the display name (but can be changed), and the field type is derived from the form element you selected.
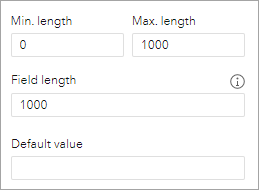
You can also provide a minimum and maximum value for strings and provide a default value.
If you’re configuring a date element, you can also set a valid date range.
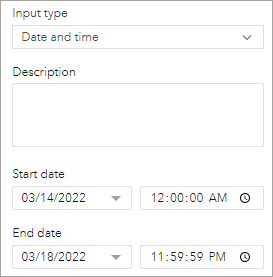
The remaining formatting options depend on the type of form element you added.
Format basic elements
Basic form elements allow mobile workers to input text, numbers, dates, and scan barcodes when filling out the form. For this tree inventory form, I’ll add the following elements to collect general information about each tree being collected:
- Full name (Text – Single line)
- Collection date (Date / Time)
- Street address (Text – Single line)
- Surrounding buildings (Number – Integer)
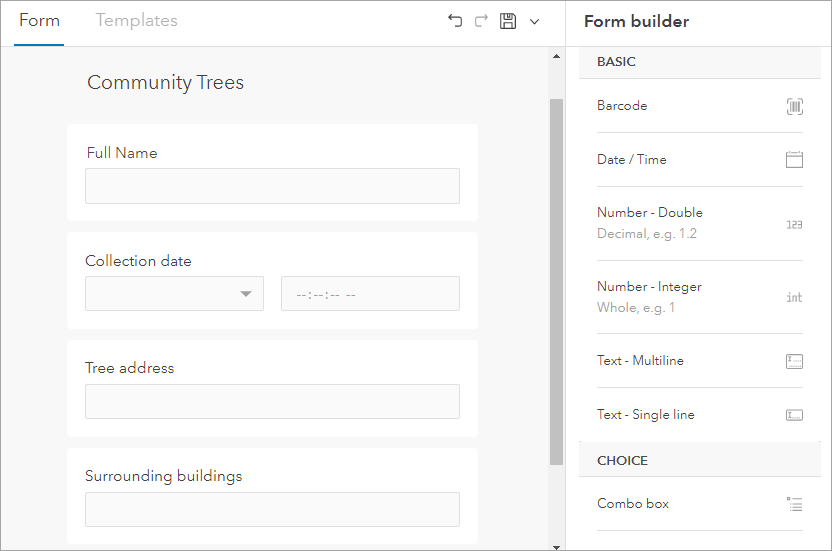
To help mobile workers complete the form in the field, I’ll provide helper text for a few elements using the Description and Placeholder properties. For the Full Name element, I’ll type “Enter your first and last name” for the Placeholder property.

For the Surrounding buildings element, I’ll add description text to further explain the information that should be provided. I’ll type “Provide the number of buildings within 20 feet of the tree.” for the Description property.

Format choice elements
Choice form elements allow you to define a list of values that mobile workers choose from when providing data in the field. Providing pre-defined values saves time in the field for mobile workers and ensures data consistency. There are three choice elements you can add:
- Combo box—Provide values displayed in a drop-down menu.
- Radio buttons—Provide values displayed as buttons.
- Switch—Provide two values displayed as a switch.
I’ll start by adding a combo box that mobile workers can use to select the city they’re working in. After I input the required display name and field information, I’ll click Create list.

The List of values window appears. Here, you’ll provide the values mobile workers can choose from.
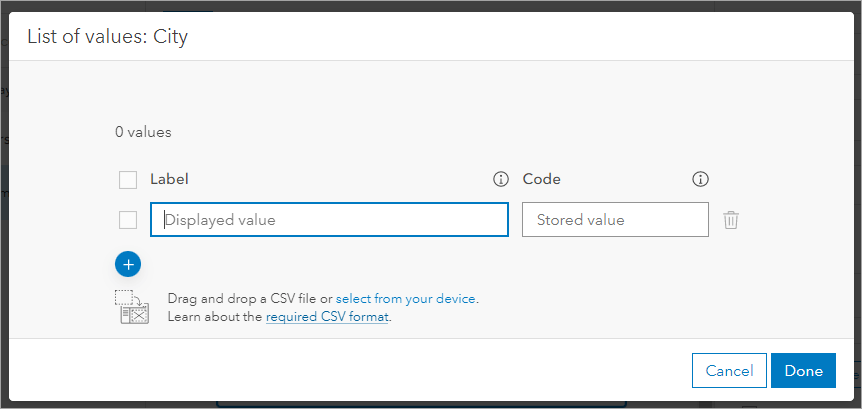
Each value must include a Label that’s displayed in the form and a Code that’s used to store the value in the layer. If you’re familiar with creating a list of values in ArcGIS Online or ArcGIS Enterprise, or creating a coded value domain in ArcGIS Pro—this functionality is the same.
You can add values one by one, or automatically populate them by uploading a CSV file that contains the values you want to add. Since there are 430 cities in Maine, I’ll upload a CSV file that contains these cities. To do this, I’ll drag and drop the CSV file onto the window.
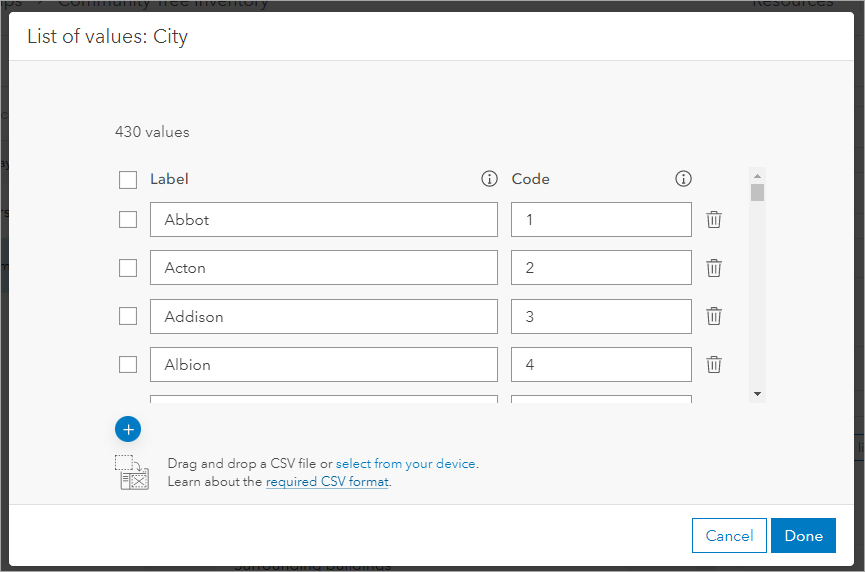
When the CSV file is uploaded, all 430 values (with labels and codes) are added. To learn more about adding a list of values, including the CSV file and code requirements, see Create a list of values.
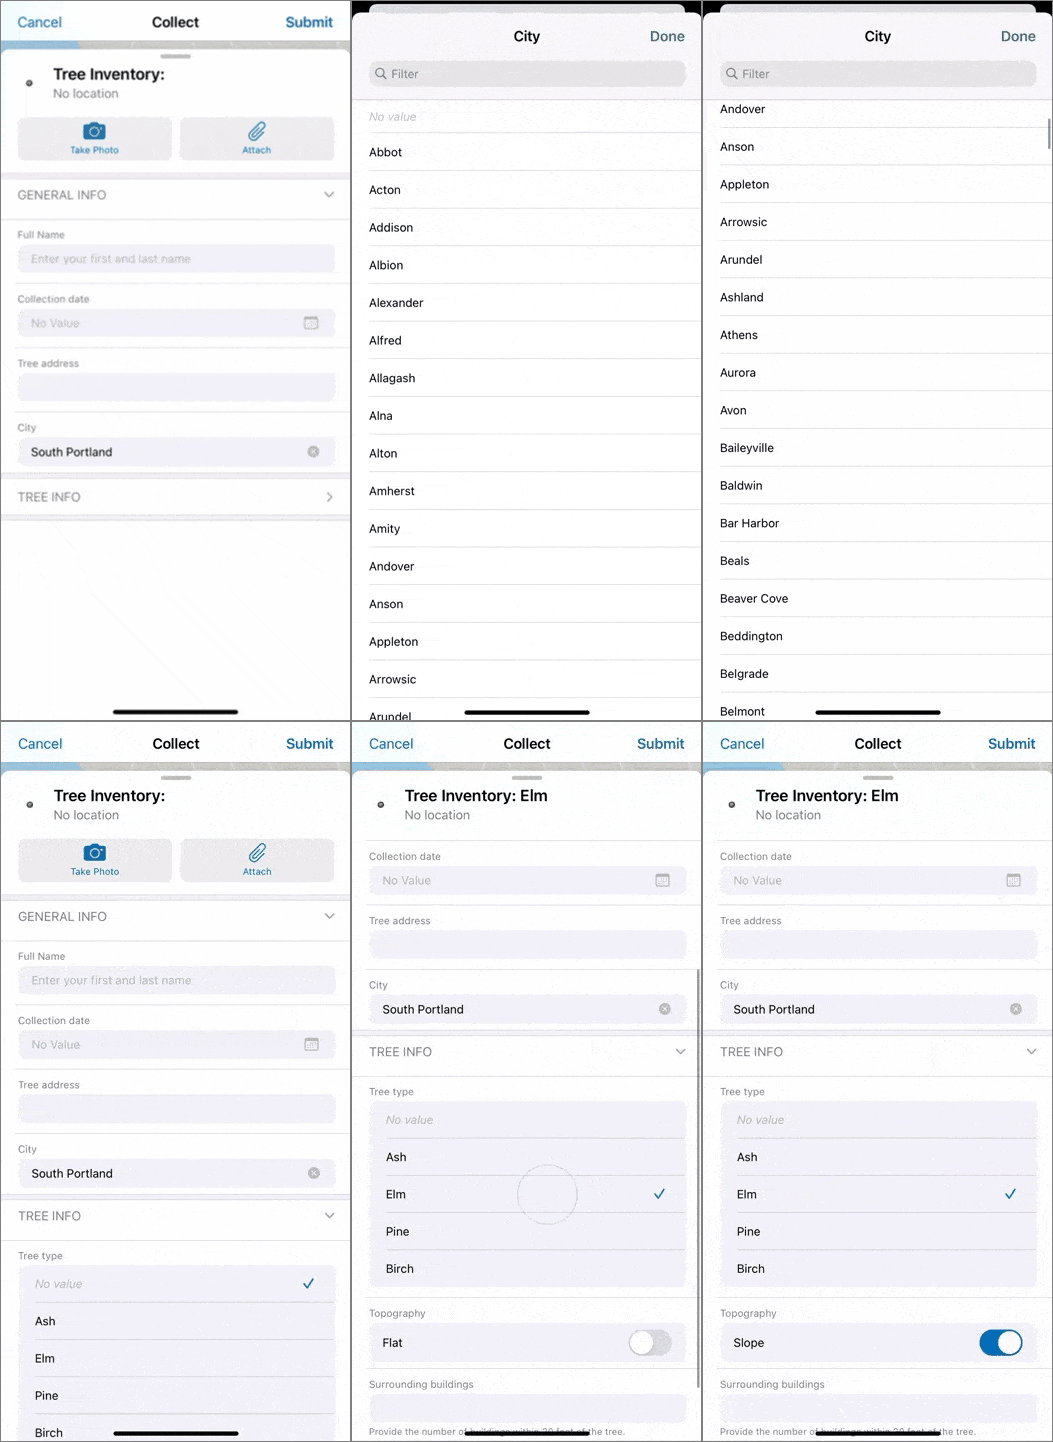
Once I’m satisfied with the list, I’ll click Done. I’ll also add a default value of South Portland because I know this is where most tree collections will take place. This saves mobile workers from having to scroll to this value each time they collect a new tree.

Next, I’ll add a radio buttons element to capture the type of tree being collected. I’ll follow the same steps as the combo box element, except this time I’ll add the tree type values one by one (since there are only four).
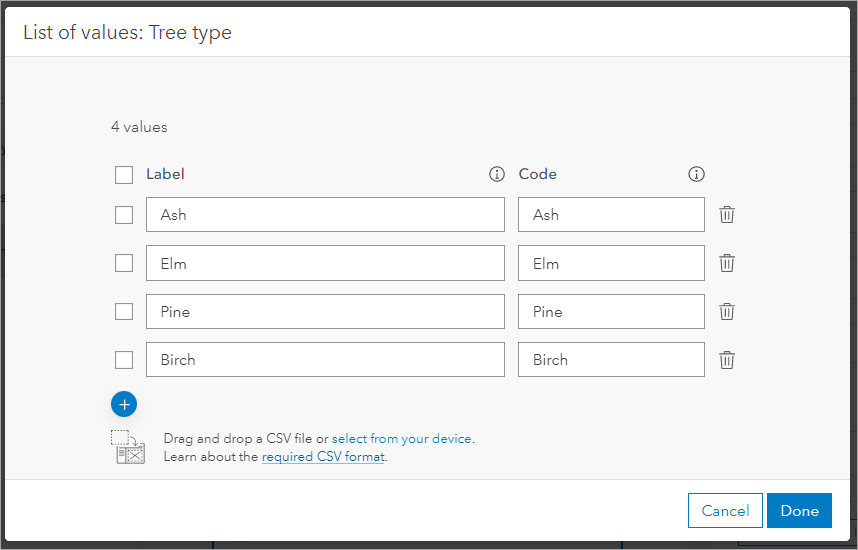
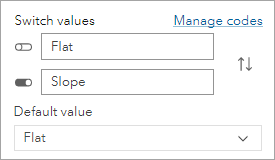
Finally, I’ll add a switch element to capture whether the tree is on flat ground or a slope. When I add a switch element, I can edit its labels directly from the Properties pane. I’ll use Flat and Slope as the options. Codes are automatically generated for each switch value, but I can manage those if I want to by clicking Manage codes. Default values are required for switch elements, so I’ll add a default value of Flat as well.
Add logic to form elements
Adding logic to form elements allows you to control whether they are editable, required, and visible on the form. You can set logic from the Logic section of the Properties pane (shown below). You can also use Arcade expressions to conditionalize the behavior of form elements and to calculate and populate field values automatically. To learn more about adding logic to form elements, see Add logic (help section).

Group elements together
Grouping form elements together allows you to create collapsible sections on the form. This is useful for minimizing the amount of scrolling mobile workers have to do when working with a large number of form elements.
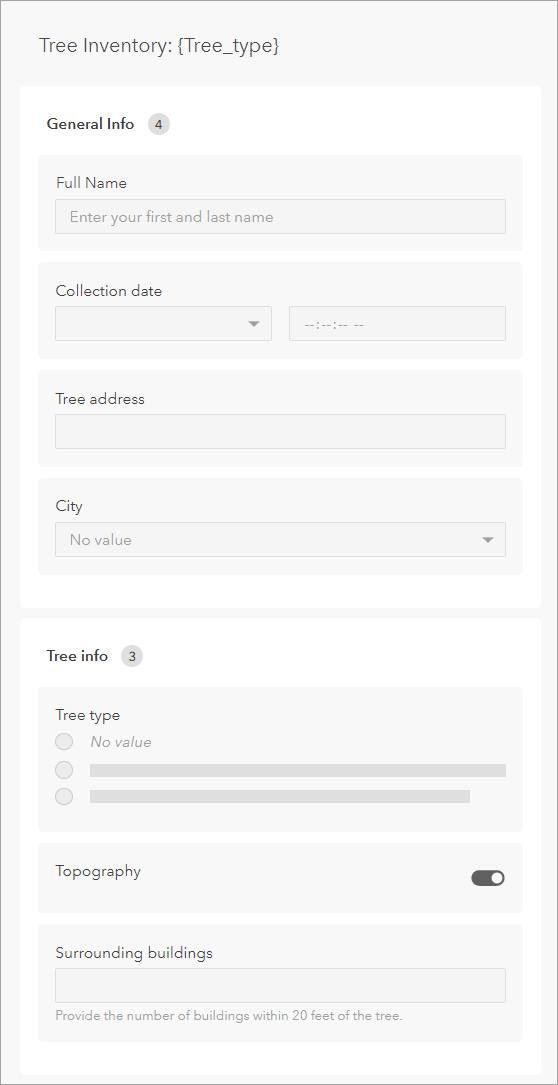
For this form, I’ll create two groups: one for general information and one for information related to the tree. First, I’ll add the group elements to the form and provide a display name for each.
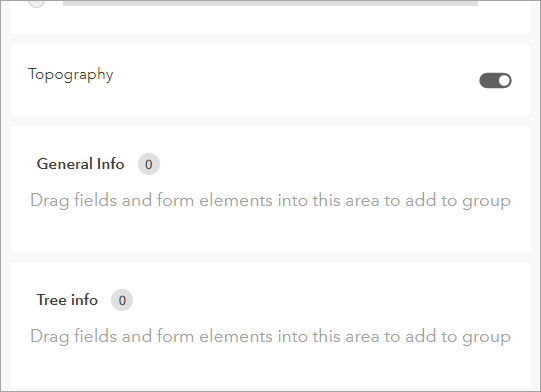
Then, I’ll drag each form element into its appropriate group. I can drag elements one by one or use Ctrl + Click to drag multiple elements at once. The number next to the group name represents the number of elements it contains.
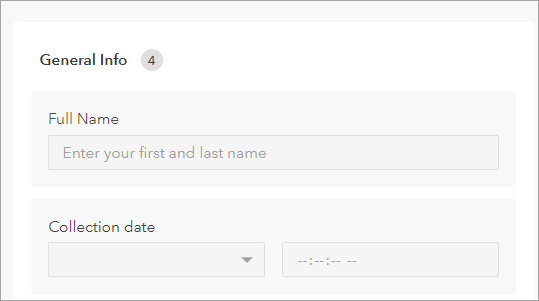
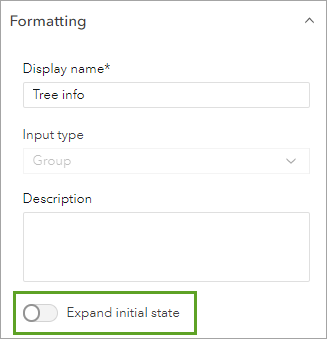
I can also decide if each group is collapsed by default in the Field Maps mobile app by disabling the Expand initial state property. For this example, I’ll have the Tree information group collapsed by default.
Finally, I’ll add a title to the form.
Provide a title
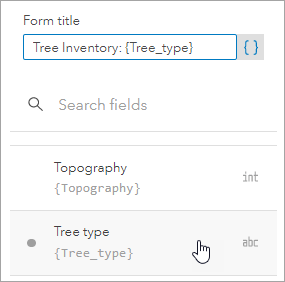
The title of the form should represent the data being collected. You can use field values in the form title to make it more relevant to the data being collected. For this example, I’ll title my form Tree Inventory: and append the tree type field. After collection, the form title appears with the tree type in its name.
After I’ve added the title, I’ll click the Save button and the form is complete! Here’s what the final form configuration looks like:
Fill out the form in the Field Maps mobile app
After you save your form, share the map so mobile workers can access it in the Field Maps mobile app. When I open the Community Tree Inventory map in Field Maps and start collecting data, the form I configured appears:
Learn more
This blog post walked you through the basics of form building in Field Maps Designer. The form builder includes many additional options for customizing smart forms, such as adding calculated expressions and applying conditional visibility. To learn about all of the different ways you can configure forms in Field Maps, see the Configure the form help topic.
For a step-by-step tutorial on the basic capabilities of Field Maps Designer, see the Get started with Field Maps Designer tutorial series. To learn more about ArcGIS Field Maps, see the ArcGIS Field Maps Resources page.
This blog post was originally published on March 29th, 2022 and has been updated.




Commenting is not enabled for this article.