Site Scan Flight for ArcGIS has just released and is now available to all Site Scan users. This release includes support for a new drone and major improvements to mission planning and execution that we are excited to share with you.
What’s new in this release?
- DJI M300RTK with P1 sensor support
- Defining mission area from a polygon
- Flight speed setting
- Post-Flight checklist
New Drone Support
DJI M300 RTK with P1 sensor support
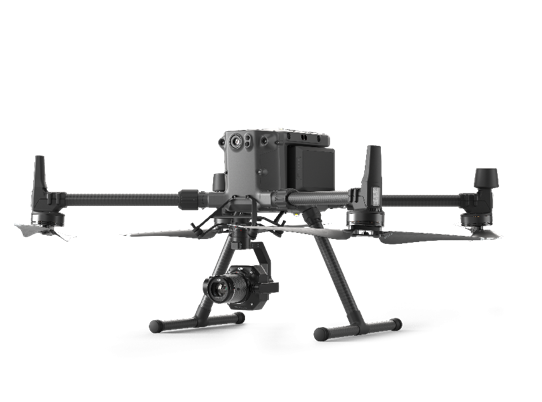
Support for the DJI Matrice 300RTK with the P1 mapping camera is here! One of the most requested drones to add to the Flight app’s supported drones lineup has finished development and testing, and we are excited for you to start using your M300s in Site Scan Flight. The M300RTK offers up to 55 minutes of flight time and increases your mapping efficiency. The P1 camera captures high resolution images at 45 MP, allowing you to fly higher and capture large areas faster, while still creating the same resolution outputs as before with lower resolution sensors. To stay up to date on the latest drones and sensors we’re adding support for in Site Scan Flight, be sure to sign up to our product news email list below.
Mission Planning
Define a mission area from a polygon
Another user requested update, Site Scan now allows you to use polygons saved in ArcGIS Online, ArcGIS Enterprise, or Site Scan Manager for ArcGIS as your mission area.
Previously, you were able to view a polygon layer when planning your flights, but had to manually trace the mission area over it. Now, simply display the desired polygon showing the area to be mapped, and tap the area to automatically use it as your mission area boundary.
Defining a mission area from a polygon is useful when planning missions over complex areas, improves collaboration when mapping areas assigned by other members of your organization, and saves time when creating new flight plans.
Here’s how you can get started with this new feature:
Note: This feature is available only for Area Survey and Crosshatch Survey flight modes.
There are two options for you to use KML, SHP or Feature layer polygons as your mission area.
Using an ArcGIS Online or ArcGIS Enterprise polygon layer:
- Choose Area Survey or Crosshatch Survey
- Enter a Mission Name and tap Next
- Tap Define Mission Area from Polygon
- Select ArcGIS Layers
- Sign in with your ArcGIS Online or ArcGIS Enterprise account
- Toggle on the feature layer of interest. If your feature is saved in a web map, you may instead toggle on the web map containing the feature layer
- On the Map, tap on the desired polygon for the mission area. Site Scan will automatically use this as your mission boundary
Using an overlay uploaded to Site Scan Manager (KML or Shapefile):
- Choose Area or Crosshatch Survey mission
- Enter a Mission Name and tap Next
- Tap Define Mission Area from Polygon
- Under Site Scan Project Overlays, toggle the desired KML or Shapefile polygon layer
- On the Map, tap on the desired polygon for the mission area. Site Scan will automatically use this as your mission boundary
With either method, if your feature layer contains multiple polygons, you must select one to be used as your mission boundary.
Flight speed setting

Site Scan Flight automatically optimizes the drone’s flight speed to ensure sharp images are captured and no images are skipped. These are key elements to process your images into high quality and high accuracy data products. The drone and camera model, flight height and overlap settings all affect the preselected flight speed. With this update, you can now view the default flight speed and manually adjust it to make the drone fly faster or slower.
This setting will allow pilots to increase the drone’s speed by up-to 50% to perform missions within a shorter amount of time, when capturing video for example. You can also reduce the speed down by 50% if you are flying in low light conditions with a reduced camera shutter speed.
The new speed setting is located in the Advanced Mission Settings for all automated flight modes.
Post-flight checklist
You may already be aware of the ability to create pre-flight checklists, but now with this release you can create post-flight checklists. When a post-flight checklist is assigned to a project, pilots will be prompted to fill out the checklist after the drone has completed its mission. This is useful to document your vehicle’s condition or post-flight notes.
Both pre- and post-flight checklists are created and assigned in the same way. To create a checklist, you must be an administrator. Log into Site Scan Manager, navigate to Organization Settings > Forms > New checklist. Once you have created and saved your new checklist, you can Assign to all projects and make it the default for all new projects or navigate to each project where you want the checklist to be used, click Forms, and assign the checklist.
New Site Scan for ArcGIS Community
The team has been working hard to give you these new features and enhancements, let us know what you think in the new Esri Community page for Site Scan for ArcGIS. You can also ask questions, submit your ideas for new functionalities, and find helpful tips from other users. If you want to be the first to know about the latest Site Scan news and announcements you can sign up for emails here.

Article Discussion: