Note: This blog article covers the classic Esri Story Maps which are in mature support and scheduled to be retired in late 2025. Story authors are strongly encouraged to use the new ArcGIS StoryMaps to create stories.
For more information about transitioning to the new StoryMaps, see ArcGIS StoryMaps resources. For more information about the transition from classic Esri Story Maps to the new ArcGIS StoryMaps, see Esri Story Maps: Now in mature support.

Story Maps cover a broad range of storytelling, including narratives on social issues, how-to tutorials, and regional or global topics of interest. Yet other stories are more focused on local places, for example a tour of city’s historic area, cultural highlights in a town, or interesting places to go and see. For locally-focused stories, especially those intended to provide a tour or showcase of places to visit, it may be beneficial to allow the reader to show their current location in the context of your story. Here’s how.
Find my location
The Find my location button places your current location on the map. It’s especially useful in a Story Map if one of the goals of the story is to enable readers to explore places, for example, a walking tour (or even a driving tour) of things to see in a city.
Some Places to Eat in San Diego is a Story Map Tour of interesting restaurants. When the story is viewed on a mobile device (iPhone X shown below), readers can click the locate button to see their present location in relation to the restaurants highlighted in the Story Map.
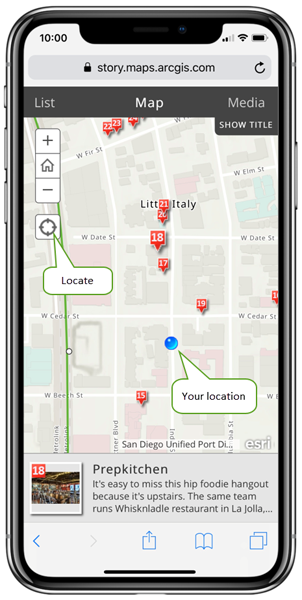
Where am I?
The following story maps allow you to enable location using settings found within the Story Map builder. Location is supported on most browsers, but only appears when the story map is accessed over HTTPS. The location button will not appear if the story map is embedded.
Story Map Tour
Story Map Tour is perfect when you want to present a set of photos or videos along with captions that are linked to an interactive map. It’s ideal for walking tours or any sequence of places you’d like your readers to follow. Choose between three different layout options, including a new Side Panel layout that makes your beautiful photos fill most of the display.
Location can be enabled when in builder mode. When using the Side Panel layout, click the gear icon to open Settings.
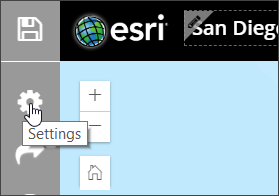
When using other layouts, click Settings at the top of the builder.

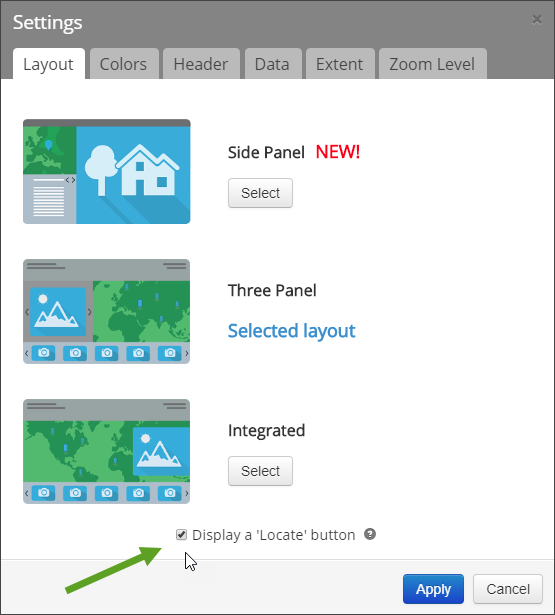
In the Layout tab in Settings, check Display a Locate button, then click Apply.
Story Map Shortlist
Story Map Shortlist enables you to present a large number of places organized into tabs based on themes, for example, food, hotels, and attractions. As your readers navigate around the map, the tabs update to show them just the places in their current map extent.
In the Shortlist builder, click Settings.

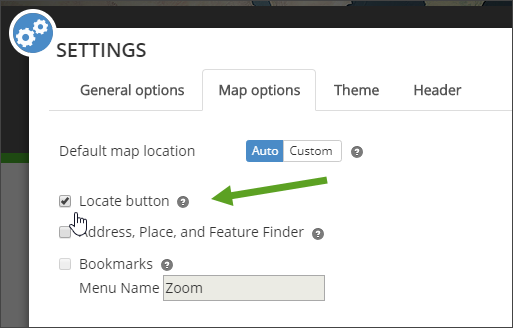
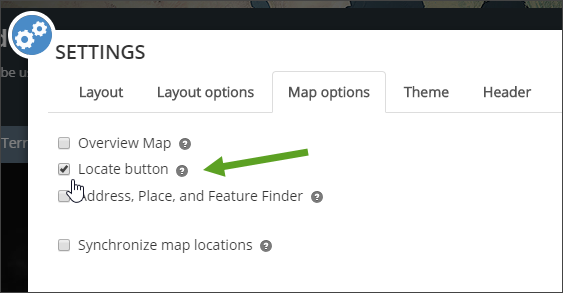
Open the Map options tab in Settings, then check Locate button, and click Apply.
Story Map Series
Story Map Series allows you to present a series of maps that your readers can easily browse using tabs, numbered bullets, or an expandable side accordion. An optional description panel presents narrative text and other content associated with each map. In addition to maps, you can display images, videos and other embedded web content, such as other web apps and even other Story Maps.
In the Map Series builder, click Settings.

In the Map options tab, check Locate button, then click Apply.
Story Map Swipe & Spyglass
Story Map Swipe & Spyglass lets your readers compare maps by swiping back and forth, or by peering through one map to see another using a spyglass tool. You can present two different maps, or enable readers to compare different layers in the same map.
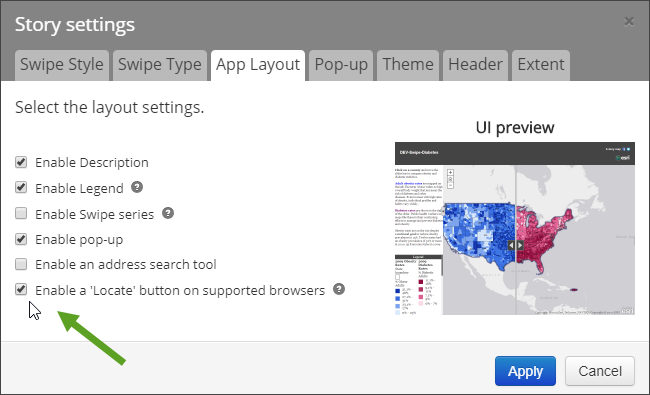
In builder mode, click Settings.

In the App Layout tab, check Enable a locate button, then click Apply.
More information
For more information, see the following resources.
For more information about the new StoryMaps, see ArcGIS StoryMaps resources.

Commenting is not enabled for this article.