Summer is the prime time for a classic American adventure: the road trip. If you have kids, they’re out of school for a few months, or, if you’re a recent college grad like myself, you’re out of school forever. Whether you’re moving across the country or traveling for pleasure, you may find yourself packing up a car and hitting the road.
It was my own drive from New Jersey to southern California that inspired this post, but the real reason you should know how to use Esri Story Maps to document your road trip is that they are the perfect medium for this sort of travel story. You can add pictures, videos, and text to a visualization of your route and share it online with your friends and family.
Here are a few of the story map templates that are best-suited to document your travels.
Get started with Story Maps
To make a story map, all you need is an ArcGIS Online account, which is free. The Story Maps webpage contains all the information you’ll need as well as some inspiring examples and templates.
Use the Map Tour template for maximum efficiency.
As its name suggests, the Map Tour template was designed to take people on a virtual tour: in this case, the stops you took on your trip. It’s a relatively simple matter of organizing your photos and deciding what you want to say about them. This template offers three distinct layouts and the ability to configure colors, change the basemap, and customize the zoom level, so you’ll get a story that’s uniquely yours.
I went through the process of creating a map tour with some of my media from my road trip this summer and compiled a list of tips and tricks.
Organize the media you want to use. A simple but essential tip: start by storing everything in the same folder and give photos recognizable names.
Decide if you are using video or not. If you’re using video, you’ll have to access your media from online (more on that later). If you don’t plan to use video, you can upload image files from your computer.
If you’re hosting your media online, I recommend Flickr for photos and Vimeo or Youtube for videos Note: Though Flickr supports video, Story Maps currently do not accept Flickr videos.
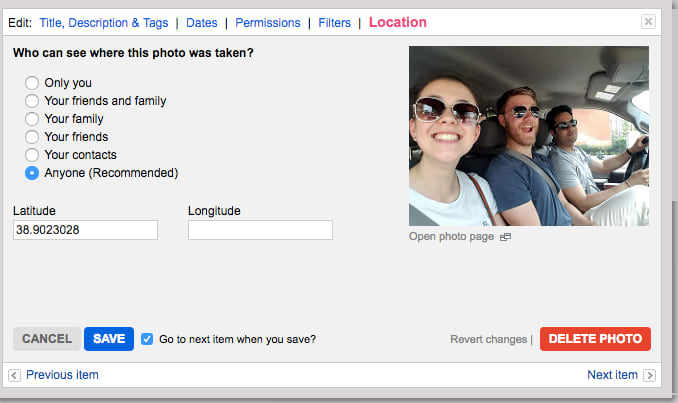
You can add location in the story map or in advance. The story map needs to know where to place each point on the map. Depending on your camera, there may already be a location associated with each photo. If not, you can input latitude and longitude in the file’s information using Flickr, Google Photos, or a desktop photo management software. I manually added the latitude and longitude values from the Google map of my trip to my photos in the Organizr in Flickr, but you can also upload your photos and choose their location manually within the story map app.
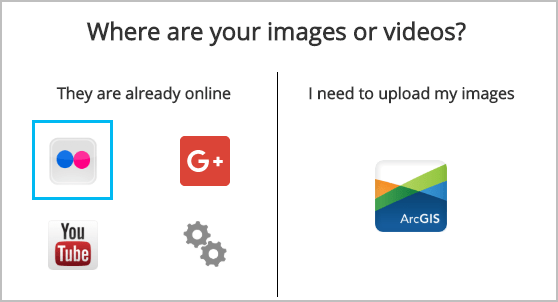
Add photos first, then videos. Once you’ve uploaded images to Flickr or Google Plus, and videos to Vimeo or Youtube, it’s time to add both to the map. When you create a new Map Tour, you’ll be prompted to select where your media is.
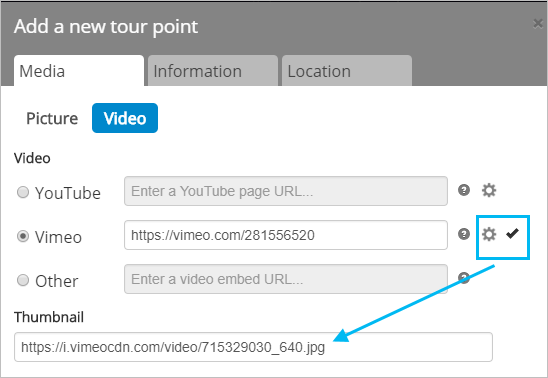
Start by choosing the site where you’re hosting your images, and configure each event. Then, you can add videos individually by creating new events. To do this, click the Add button along the bottom of the window. In the pop-up, select Video and paste the video URL into the appropriate box. Finally, click the cog next to the URL to get the default thumbnail.
Use Map Journal to emphasize your route
If you want to enhance your road trip narrative with custom maps you made on ArcGIS Online or Desktop, the Map Journal template offers more options (Note: You’ll need an ArcGIS subscription to use Desktop apps and for full access to ArcGIS Online options. You can get a free trial here). There’s room for creativity here, too. For example, I chose to re-work my story using a custom basemap, a line feature to show my route, and some added texture for the Grand Canyon. You can check out my map journal here.
Because you’re representing a road trip, it’s important to choose a large map that encompasses your entire route, and to change the custom extent for each stop so the map slides along with the progress of your trip.
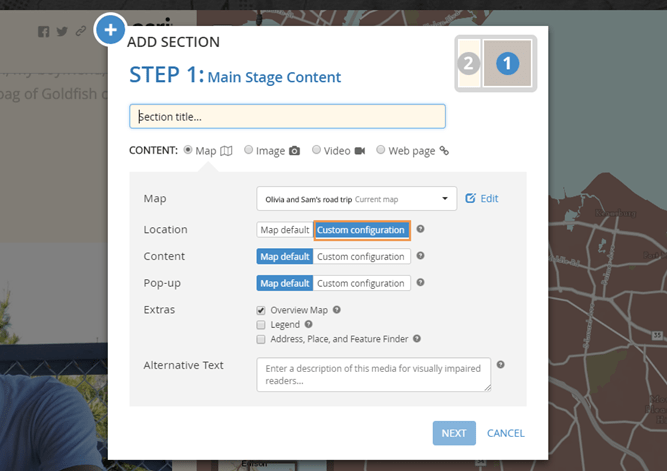
Most of the above tips still hold for this template, except for the last two. In this case, pins are not generated for each image, so having precise location coordinates for each image is unnecessary – instead, you’ll configure the map view to shift with each image. Also, you won’t be prompted to choose a batch of images when opening the app, but will have options to add media throughout the Main Stage or Side Panel content.
Get even more creative!
There are many other ways to document your road trip with an Esri Story Map, and each template has its own set of advantages. If you’re more interested in emphasizing your travel narrative than the route itself, check out the awesome Cascade story map by Lauren Herbine featured here.
Enjoy your story-mapping journey!

Commenting is not enabled for this article.