ArcUser Online
Spring 2011 Edition
Changing Lanes
Converting DS Map Books to ArcGIS 10 Data Driven Pages
By Mike Price, Entrada/San Juan, Inc.
This article as a PDF.
What You Will Need
- ArcGIS Desktop 10 (ArcView, ArcEditor, or ArcInfo license)
- Sample dataset
- ArcGIS Maplex extension (optional)
- ArcGIS Desktop 9.3 (optional)
With the release of ArcGIS 10, public safety mappers have a new technology called Data Driven Pages (DDP) to create and manage information within tile pages. This exercise presents a standardized methodology to convert an existing ArcGIS 9.3 DS Map Book series into an ArcGIS 10 DDP map book.
This exercise shows how to take a map book created in the DS Map Book Sample and port it over to Data Driven pages in ArcGIS 10.
This is a sequel to "Finding It Fast: Deploying better map books for emergency responders" in the Winter 2008 issue of ArcUser magazine, which presented procedures for preparing and printing map books for public safety personnel. This tutorial used ArcGIS Desktop 9.3 and an Esri developer sample called DS Map Book to generate and print multiple pages with extents of one mile and one-quarter mile square located in Fire District 21 in Whatcom County, Washington.
Map pages were exported as individual Adobe PDF files that could be printed and bound in map books. These files were also prepared so they could be indexed, loaded, and displayed on mobile data terminals in fire apparatus. The pages used best available data and simple labeling to quickly display street names, address numbers, water supply, and other features.
This exercise uses actual fire district mapping data (simplified and synthesized where appropriate) and expands the western extent of District 21 to include nearly 60 square miles. It adds and refines many data layers to create complex—yet useful—map documents that are included in these maps. The ArcGIS Maplex labeling extension (if available) can be used for carefully placing text labels.
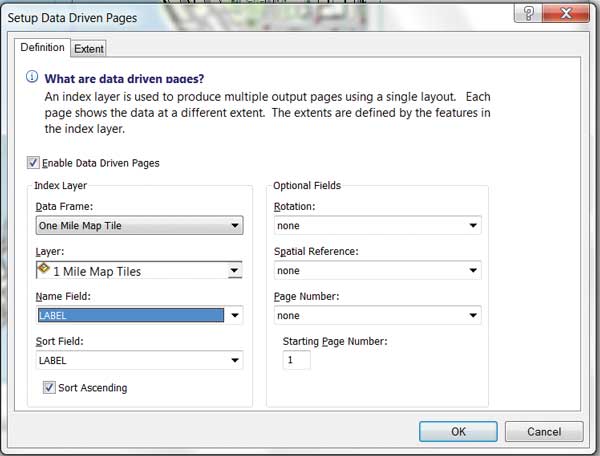
Use the setup wizard to define the basic characteristics of DDP.
Getting Started
The DS Map Book developer sample has been used for nearly 10 years to compile, manage, and print digital and paper map book pages. Although very robust, the sample had some shortcomings and occasionally required scripting or workarounds to produce adequate maps. DDP was developed in ArcGIS 10 to replace DS Map Book and standardized the building, managing, and exporting of map book pages not only for first responders but also for anyone needing a map series development tool.
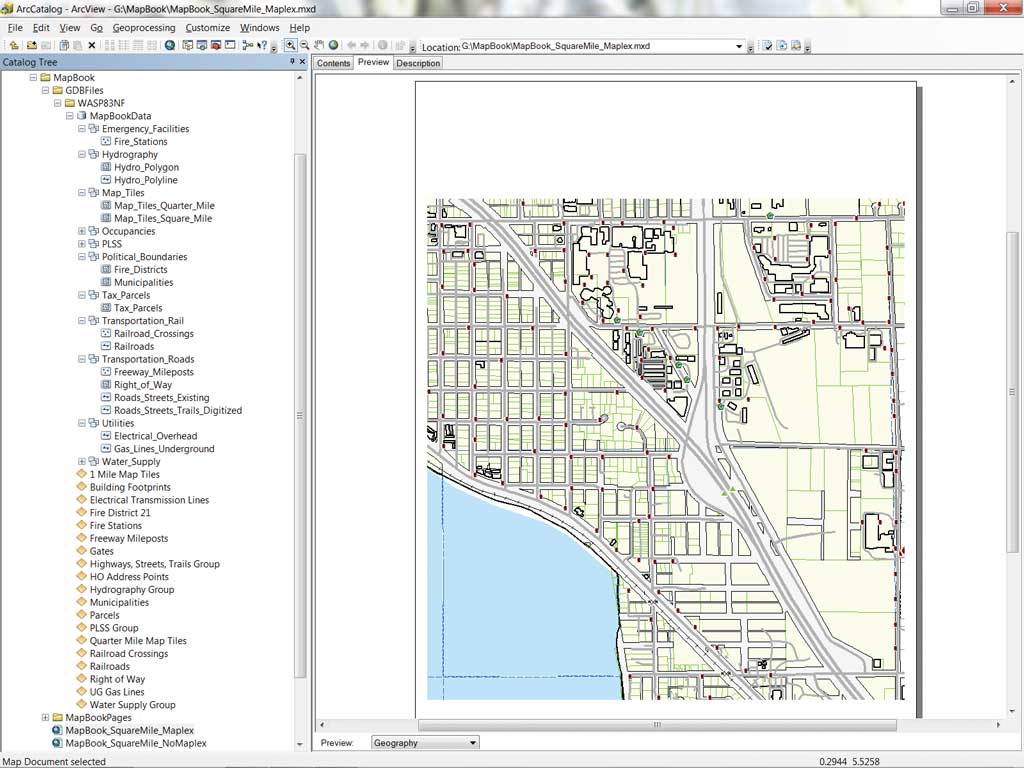
To begin this exercise, download the sample dataset from the ArcUser website at esri.com/arcuser. Unzip this dataset and preview the contents in ArcGIS 10 ArcCatalog. This training set contains two MXD files. MapBook_SquareMile_Maplex uses the ArcGIS Maplex labeling extension. The other file uses the standard Esri labeling engine. If possible, use Maplex for this exercise. A 60-day evaluation copy of the ArcGIS Maplex extension is available.
Mapping Data
Several recent ArcUser articles have presented summaries of data often used by public safety mappers. Using ArcCatalog, preview the feature classes within the MapBookData file geodatabase. Refer to MapBookDatasets.pdf, included in the sample dataset. It shows District 21 datasets summarized by data type and source. After reviewing this list, think of similar data available locally. Use ArcCatalog to preview the layer files for these data. Look at the One Mile Map Tiles that were used to create our DS Map Book series and will be used in ArcGIS 10.
Looking at Data in ArcGIS 9.3
This portion of the exercise is optional. If a copy of ArcGIS Desktop 9.3 and DS Map Book are available, start ArcMap, copy the dataset, and open the file MapBook_SquareMile_Maplex.mxd (or MapBook_SquareMile_NoMaplex, if Maplex is not available). [If ArcGIS 9.3 Desktop is not available, skip down to the next section, Look at a DS Map Book Page.]
This map document displays tile B19, the busiest map in the study area. Examine the order of data layers in the data frame. The datasets in Table 1 are listed in the table of contents (TOC). If DS Map Book is installed and loaded, you should see the Map Book tab at the bottom of the TOC. Switch to this tab and explore the 59 map tiles in this project. The challenge: present each tile in DDP.
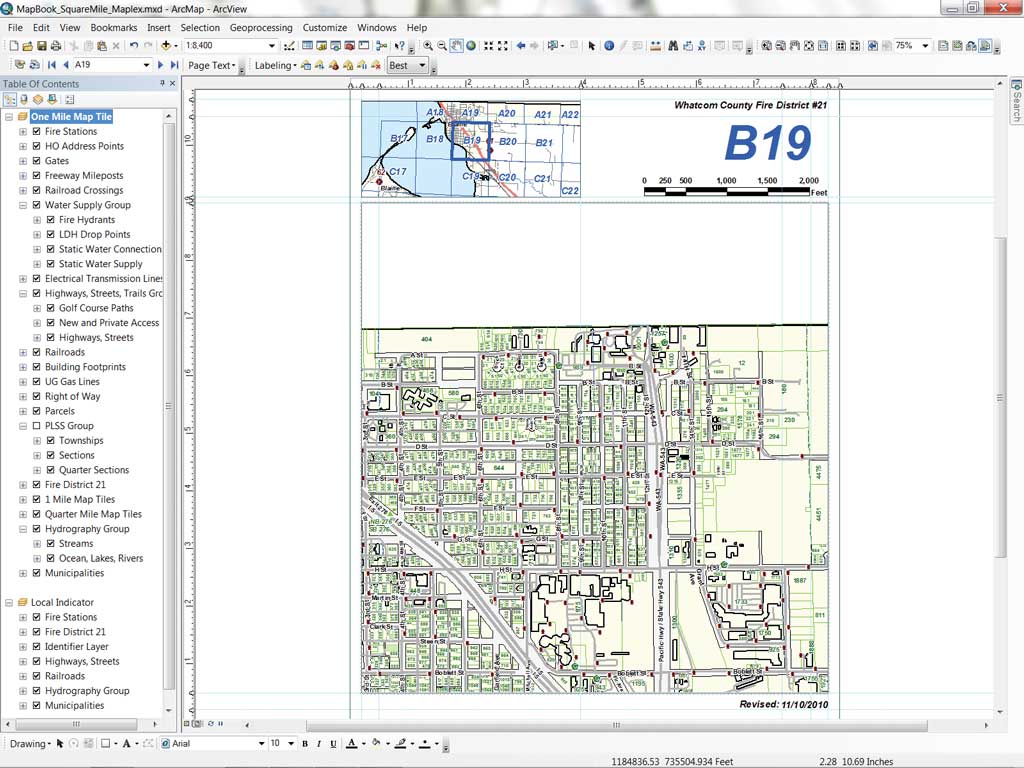
Tile B19 is the busiest map in the study area. Examine it in both DS Map Book and DDP.
In the TOC, open the properties for One Mile Map Tiles under the General tab. Notice that the reference scale is set to 1:8,400. This is the presentation scale and is required by Maplex. Click the Data Frame tab and notice that Extent is set to Automatic. Although setting the DS Map Book scaling was not needed, in ArcGIS 10 it will be required. While on the General tab, notice that the Label Engine is specified (either Esri Maplex Label Engine or Esri Standard Label Engine).
Open properties for the Local Indicator data frame. This frame manages the location or index map that is shown at the top of the layout. In DS Map Book, both Local Indicator and Identifier Layer are reserved names. Changing these names destroys the map series. Notice that its reference scale is 1:100,000 and its Data Frame scale is also 1:100,000. In ArcGIS 10, the data frame scale must be allowed to float. These are two important differences between map books in ArcGIS 9 and ArcGIS 10.
Continue exploring data in ArcGIS 9.3. Verify there are no broken data links and that all links point to the MapBookData geodatabase. Load the Labeling toolbar and look at the labeling rules. Properly placing text on a complex map book page typically requires testing and customized rules.
In the original project, lots of time was spent creating labeling rules. It would sure be nice if these rules transitioned from ArcGIS 9.3 to ArcGIS 10. Can you think of a few things that might not translate directly into ArcGIS 10? (Hint: There are only three, and they are all cartographic or cosmetic objects placed outside the map frames.) Remember the creeping scales in the DS Map Books sample? This issue was sidestepped by converting the scale bar to a graphic object, but that locked in one display scale. Wouldn't it be nice if scale bars became dynamic in DDP?
Look at a DS Map Book Page

Insert a new dynamic scale, making it the same size as the original.
To show how similar (or different) map book pages are in DDP, one DS Map Book tile was exported so it can be compared to a DDP page. It is tile WC_B19_093, located in \MapBook\MapBookPages\. Using Windows Explorer, locate and open this file in Acrobat Reader. Look at the Layers tab and notice the amount of information stored in this page.
If you have been looking at the DS Map Book project in ArcMap 9.3, it is no longer needed, so close it without saving the project.
Installing Data Driven Pages
Open MapBook_SquareMile_Maplex.mxd (or MapBook_SquareMile_NoMaplex) in ArcGIS 10. Inspect tile B19 and verify that it looks like the sample PDF just previewed.
This map just happened to open to a layout displaying tile B19 in both the One Mile and Indicator frames. This could be exported right now, but what would happen if another tile is selected?
To install the Data Driven Pages toolbar, right-click in the open toolbar area at the top of the map document and select Data Driven Pages.
Getting a Fix on Sliding Scales
The next task is to fix the link between the Local Indicator map and the map tile displayed.
Remember the importance of setting reference and data frame scales? Let's establish some safety procedures to keep our maps on the road. In this exercise, the one-square-mile tiles must fit on a letter size (8.5" x 11") printed page in portrait orientation. To efficiently display and label one square mile of data with minimal overlap, a 1:8,400 scale for the data frame works quite well.
Before creating DDP, right-click the One Mile Map Tile data frame and choose Properties. Click the Data Frame tab and set Extent to Fixed Scale and Scale to 8,400.
After setting the scale, preview the data and the supporting attribution. Check out the Local Indicator data frame, too. Select cartographic elements and see how they behave. With a few exceptions, the map document continues updating, but panning around in the One Mile Map Tile data frame (oops, the scale is now locked) reveals the index map and title are out of sync. We must fix this. Do not save the project just yet because a few changes should be made.
Opening and Testing DDP
With ArcMap 10 started and MapBook_SquareMile_Maplex.mxd or MapBook_SquareMile_NoMaplex open, start configuring DDP.
- On the Data Driven Pages toolbar, locate and click the leftmost DDP Setup button. In the DDP setup wizard Definition tab, check Enable Data Driven Pages; under Index Layer, set Data Frame to the One Mile Map Tile, Layer to 1 Mile Map Tiles, and both Name Field and Sort Field to LABEL. Check Sort Ascending. By carefully predefining and building a countywide map tiling and indexing scheme, this same setup could be used anywhere in Whatcom County. Leave all other settings on the Definition tab unchanged.
- Switch to the Extent tab. Set Map Extent to Center and Maintain Current Scale. If this selection is grayed out, return to the Definition tab and verify that Enable Data Driven Pages is checked. To print tiles at varying scales, the scale is a tile attribute. For this series, the scale fits all.
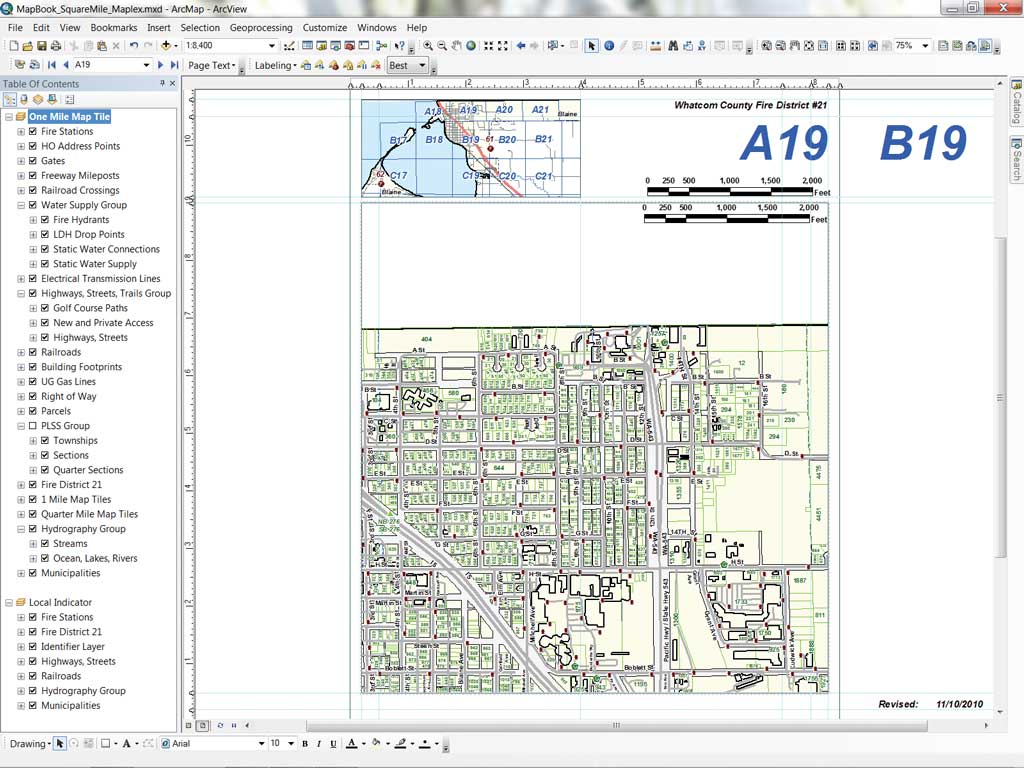
- Click OK on the Setup Data Driven Pages dialog box and watch the Data Driven Pages toolbar's Show Name window. Wait while the series finds its extent and builds the map pages. When finished, the One Mile Map Tile data frame pans to A19, the first tile. However, the Local Indicator and map title remain unchanged.
- Use the Data Driven Pages toolbar to make sure the page is set on tile A19. The link to the Local Indicator and map title are certainly broken. Since the DDP is behaving reasonably well, let's save the map as a new ArcGIS 10 document, calling it MapBook10_SquareMile_Maplex.
Installing and Calibrating Dynamic Labels
Use dynamic text to display the contents of the DATE_MODIF field on the map tile.
DDP uses dynamic text to link specific information to each map tile so a dynamic label should be set for the map name and the map revision date. The scale from the old map book, which is a graphic object, should be replaced with a dynamic scale.
- Individually select the map name (B19), the scale graphic, the revision label (Revised:), and the revision date (11/10/2010) and move them just outside the active layout, but do not delete them (yet).
- To set the appropriate map name, choose Insert > Dynamic Text > Data Driven Page Name from the standard menu.
- Choose Edit > Select All Elements and look very closely at the center of the map tile to locate the tiny A19. Deselect all elements and select the A19 label. Move it to the upper right.
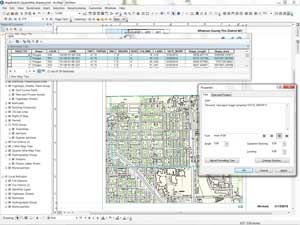
- Double-click the A19 label to open it and change the label alignment to right-aligned. Note the dynamic expression in the Text box and select Change Symbol. Note the colors and fonts. Set the text to 60 point, bold, italic, and Lapis Lazuli (dark blue). Click OK twice to apply and reposition the corrected label.
- Now let's insert a dynamic scale. Choose Insert > Scale bar > Alternating Scale Bar 2. Click Properties. On the Scale and Units tab, change the number of subdivisions to 2. On the Format tab, set all text symbols to 10 points and bold. Click OK. Place the new dynamic scale below the map name and stretch it to show the full width of 2,000 feet.
- Drag the old scale bar under the new scale. If they are not identical in size, carefully check the data frame scaling. Once the new and old scale bars match, delete the old scale bar and the old map name.
- Because map book pages are frequently updated or replaced, the current revision date should appear for every page. Tiles are often updated in small groups, so the attribute table for One Mile Map Tiles has a field called [DATE_MODIF] that can be used to track changed tiles. Since the sample is a new map book series, another date appears on all tiles. Dynamic text will be used to replace this date on the map.
- Once again, choose Insert > Dynamic Text > Data Driven Page Name. Select the same tiny A19 in the center of the tile, drag it to the lower right part of the tile, and double-click to open it. In the Text box, change the formula to read <dyn type="page" property="DATE_MODIF"/>. Right-align the text, change the font to 12-point bold italic, then click OK twice to apply. Reposition the text, verify the new date, and delete the previous text string date. Save the document.
Fixing the Local Indicator

When finished, compare PDFs generated by the DS Map Book (left) and DDP (right).
The original index map named Local Indicator was built and aligned in DS Map Book, so a few more things should be reset:
- Right-click the Local Indicator Data Frame and activate it. Choose Properties.
- Click the Data Frame tab. In the Extent section, note that the scale is locked at 1:100,000. This worked in ArcGIS 9.3 but will not work in ArcGIS 10. Set Extent to Other Data Frame and specify One Mile Map Tile for Derive extent from another data frame's extent. Set Margin to 3000 and Specify Using to Map Units. Click OK.
- Under Extent Used by Full Extent Command, choose Other. Click the Specify Extent button and verify that Current Visible Extent is selected. Click OK.
- Click the Extent Indicators tab and move One Mile Map Tile into the Show extent indicator box. Click the Frame button and change the border color to Lapis Lazuli. Click OK once to apply extent indicators.
- Click the General tab and change Name from Local Indicator to Map Index. Click OK. The index map should be repositioned to center on the A19 tile. Clear all selections to highlight only A19. Save map.
Taking a Test Drive
To test these pages, use the Show Name box on the Data Driven Pages toolbar to travel around the district map. To quickly navigate between tiles, just type a location code into the Show Name box. (Hint: Use index map labels to quickly reposition adjacent tiles.)
Before printing this map series, let's make two more quick changes.
- In the renamed Index Map frame, rename Identifier Layer 1 to Mile Map Tiles. Reactivate the One Mile Map Tile data frame and turn on labels for Quarter Mile Map Tiles.
- Navigate through a few more tiles to check these changes. Review tile F19, which shows dense development around a resort area. The Quarter Mile Map Tile labels suggest that this dense page could be later subdivided and printed at a larger scale to show additional detail. Save the map.
Printing a Map Series
After reviewing the DDP map document, let's print pages:
- Select File > Export Map from the main menu.
- In the Export Map wizard, select Export to \MapBook\MapBookPages and name the series WC. Specify PDF for Save as Type and set Resolution to 150.
- Open the Format tab and check Embed All Document Fonts. Switch to the Pages tab and specify All (59 pages).
- Click Save to start the engine. Printing 59 tiles will take a few minutes, so take a break.
- When printing is finished, use Windows Explorer to navigate to \MapBook\MapBookPages. Locate copies of WC_B19 and WC_B19_093, open them in Acrobat Reader and inspect both map pages. Look for similarities and differences.
Summary and Acknowledgments
Map books created with the ArcGIS 9 DS Map Book can be converted to ArcGIS 10 DDP.
The author thanks Whatcom County, Washington, Fire District 21 and Whatcom County GIS/administrative staff for providing the excellent source data. He is also grateful to Esri Technical Support for technical assistance and help in developing this exercise.