Buffer Contiguous Polygons
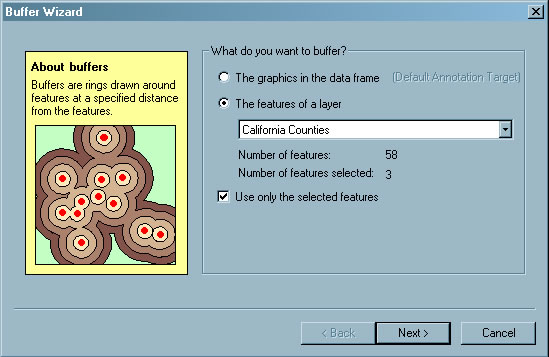 After adding the Buffer Wizard button to the ArcMap interface, choose click on it. In the first pane, select "Features of a Layer" and the layer containing the objects to buffer. |
Contiguous polygons can be buffed as one unit for display or analysis purposes using the ArcMap Buffer wizard. The buffer is created as a separate shapefile that is added to the map document. The Buffer wizard is not part of the default ArcMap interface but can easily be added to the interface.
- Start ArcMap in ArcGIS Desktop (ArcInfo, ArcEditor, or ArcView) and open the desired map document.
- Customize the interface by choosing Tools > Customize. In the left pane of the Customize dialog box, scroll down and select Tools. In the right pane, choose Buffer Wizard and drag it to the toolbar.
- In the map document, use the Selection tool to select the polygons to buffer. Hold down the Shift key to select multiple polygons.
- Click the Buffer wizard button. In the first pane of the Buffer wizard, choose "Features of a Layer" and choose the layer containing the selected polygons. Click Next.
- In the second wizard pane, select "As multiple buffer rings," then set the number of rings to 1 and the distance between rings to the desired width for the buffer. Set Buffer Distance Units to one appropriate for the coordinate system used in the map document. Click Next.
- In the third wizard pane, select "Yes" for "Dissolve barriers between and create buffer only outside the polygon." Set the path and select a name for the output layer. Click Finish. The buffer is added to the map document. If desired, it can be symbolized with a more noticeable color than the default brown.
 In the second wizard pane, choose multiple rings and set number of rings to 1 and the units ones that are appropriate for coordinate system used. |