ArcWatch: GIS News, Views, and Insights
February 2012
Creating an ArcGIS Viewer for Flex Step by Step
Flex Your Skills
From designing a clean user interface to adding functionality and geographic data, the new ArcGIS Viewer for Flex application builder guides you through the steps to create great web mapping applications for your organization.
The application builder is interactive, so you can choose the map layers, functionality, and map layout. You can customize the look of the application by choosing the colors and the title. The preview pane lets you see what your web mapping application will look like after it is published.
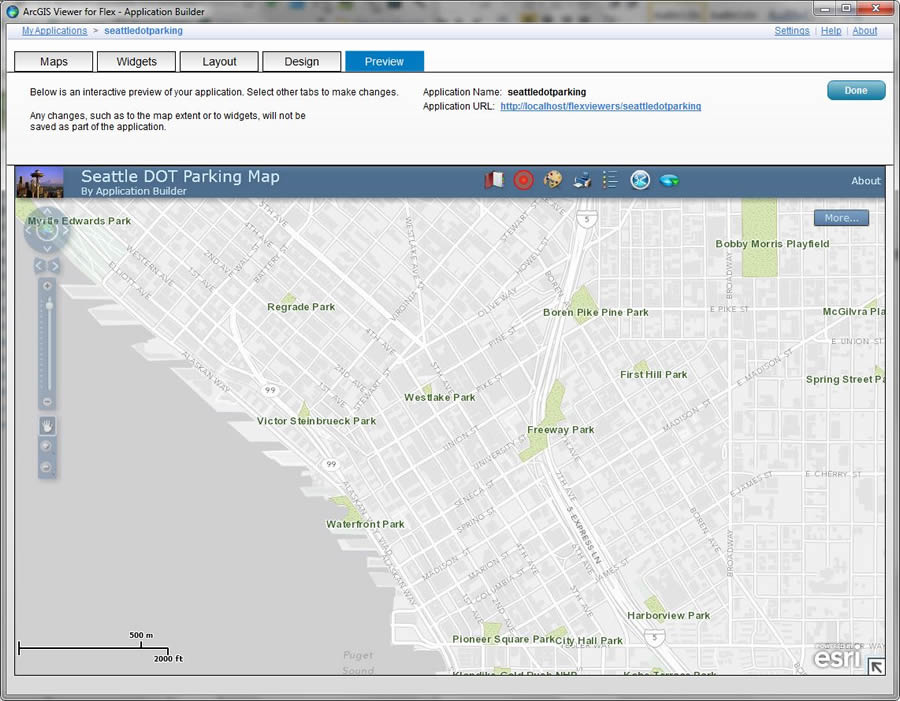
Preview your application from the Preview pane before it goes live.
Follow the steps below to make your first map using the ArcGIS Viewer for Flex application builder.
Step 1
See the requirements link. You may need to install a web server such as Internet Information Services (IIS) and may also have to install Adobe Air.
Download and install the application builder.
Step 2
If it's not already open, launch the application builder from the Windows Start menu or from the desktop shortcut. If it's your first time launching application builder, you'll be prompted to set the default web server base folder and the web server base folder URL. Click Save when you're done.
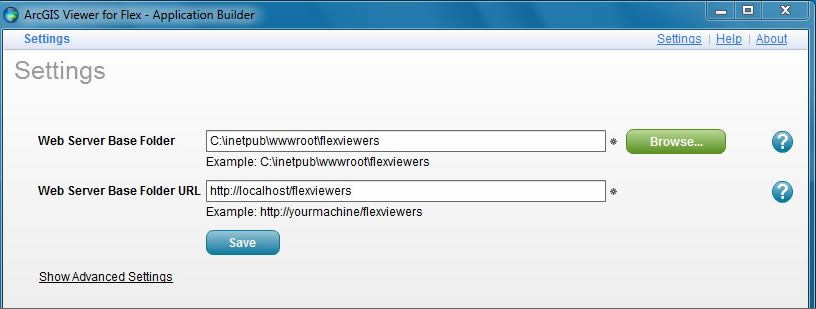
Settings must be applied the first time the application builder loads.
Step 3
Once the settings are applied, a new screen called My Applications will launch. It lists all your existing web applications. This will be the start screen from now on when you launch application builder. To start building your first web application, click the Create a New application button.
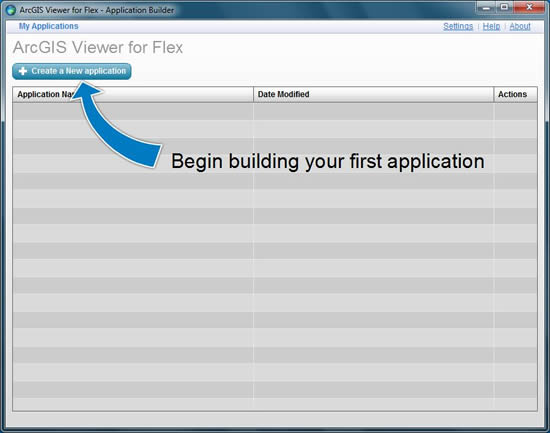
View previously created applications or create new ones all in one window.
When the Create a New Application dialog box appears, give your application a name by entering it in the Application Name box. This name will appear in the URL of your web application. For this exercise, name the map seattledotparking and click Create.
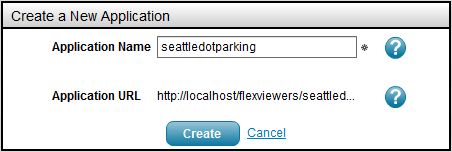
Name your application and instantly see your URL.
Step 4
With the name and URL set, the next step is designing your web application. The screen that appears has two icons—the Web Maps icon and Basemaps and Operational Layers icon The Web Maps icon on the left creates a new application based on maps that already exist on ArcGIS Online at arcgis.com. ArcGIS for Server is not required to make a web application with the application builder. There are many great web maps available to choose from on ArcGIS Online. To use one of these maps, simply select the Web Maps icon on the left.
The Basemaps and Operational Layers icon on the right lets you add a combination of maps and services from other sources including your own organization so if you have ArcGIS Server and your own public services available, you can click on this icon. Choosing this icon will let you connect to your server and select your services.
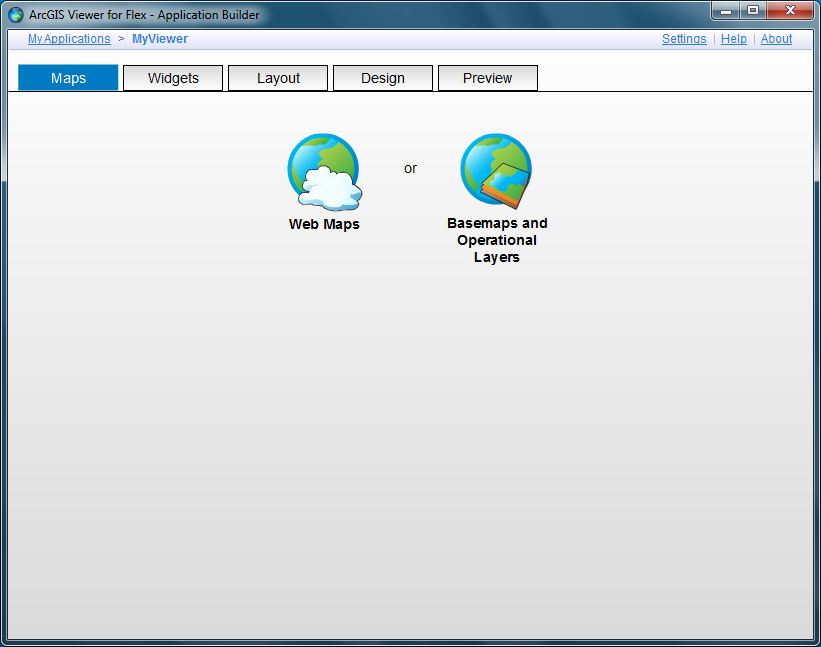
Start with web maps from ArcGIS Online or basemaps and layers from a variety of sources.
Step 5
If you select the Web Maps icon, you'll see a list of featured web maps from ArcGIS Online on the left panel. You can also search for any web map available on ArcGIS Online that has been contributed by the Esri user community. Search for "seattle dot." In the search results, locate the Seattle DOT Parking Map and double-click on its Select button. Notice that on the right panel under Selected Web Map, the layer selected is displayed with a thumbnail. In the Selected Web Map panel, you can also change the map extent by clicking the Customize Map Extent button at the bottom right of the Selected Web Map panel. Click the Save and Next button to advance to the Widgets step.

Create an application from maps available on ArcGIS Online.
Step 6
The Widgets tab is where you add functionality you want or remove functionality you don't want. The Catalog panel lists the available widgets. Include them in your application by selecting one you're interested in and clicking the Select button. For this exercise, select the Data Extract widget and click the Include button. You'll be given the option to configure its functionality, look, and default name. Click OK and it appears in the list of Widgets in the application. Click Save and Next to move to the Layout tab.
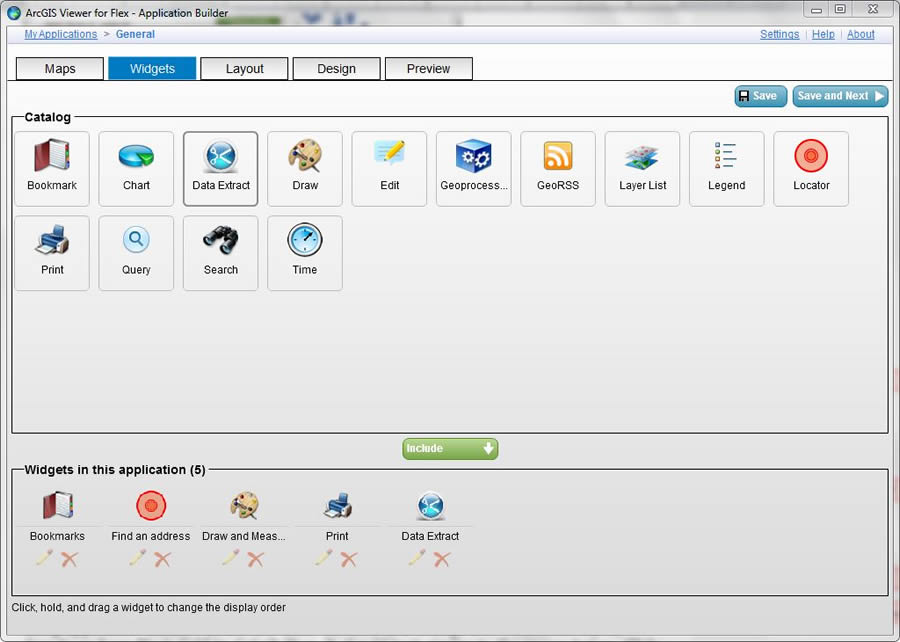
Widgets add functionality to your application. Easily choose or remove widgets you want to use.
Step 7
The Layout tab is like a blueprint for the placement of all the widgets in the application. It illustrates where they'll open on the screen and lets you turn them on or off. Click Save and Next to accept the defaults for the Layout tab.
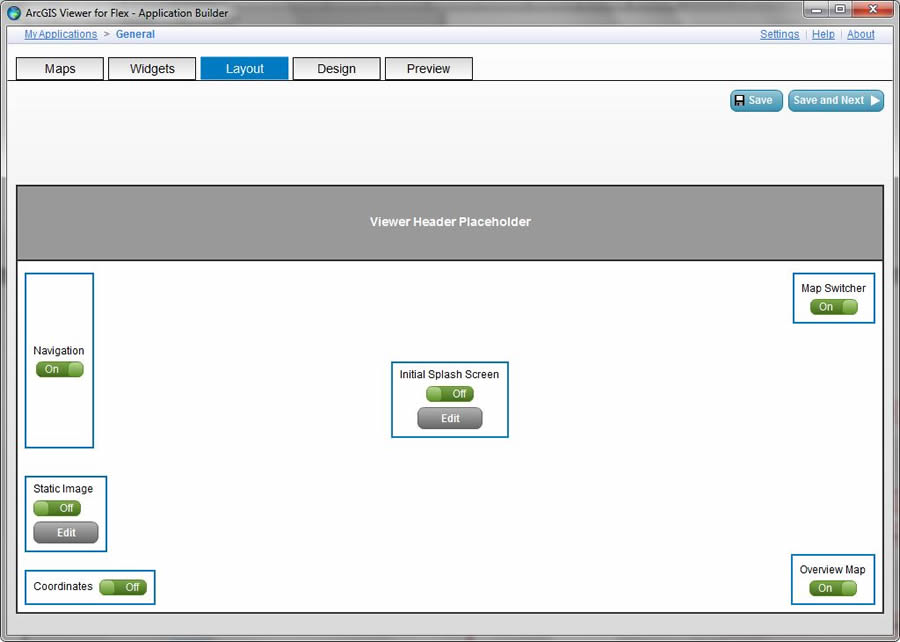
Visualize the layout of widgets in your application and choose to turn them on or off.
Step 8
On the Design tab, you can change and customize the logo, title, fonts, and color scheme of the web application. Click the Title & Fonts tab on the upper left part of the dialog box. Leave the title as Seattle DOT Parking Map. In the subtitle box, change it from default sample application to Built using application builder. Select the Color Scheme tab and change the choice on the Predefined Styles drop-down from Black Gold to Cobalt Blue. It should look similar to the image below. Click Save and Next.
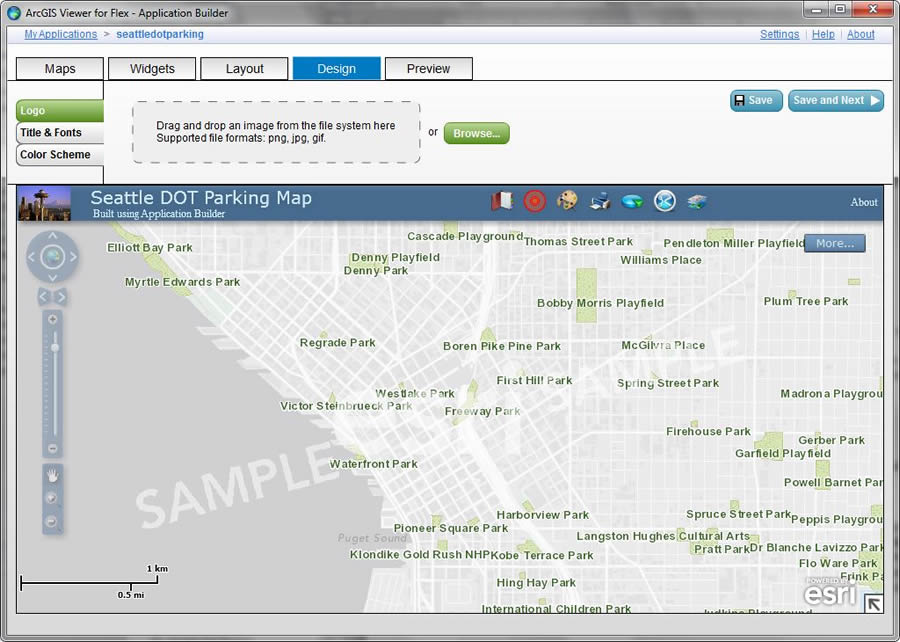
Customize logos, colors, and titles without searching for HTML tags.
Step 9
The final tab, called the Preview tab, is a live map that lets you test and interact with the data and widgets. If you want to make changes, select any tab to go back at any time. If you're satisfied with the application, click Done to return to the My Applications start screen. To preview the map in a web browser, click the Application URL link positioned by the Done button on the top right of the screen. This will launch your web application in your default web browser.

The application builder is a WYSIWYG application.
Resources
There are some great resources with which to learn more about ArcGIS Viewer for Flex. The help system for Flex is a great place to start.
If you are a developer and want a fully customized web experience, you can build exactly what you need with one of the ArcGIS web APIs. The ArcGIS API for Flex will provide you with information on concepts, samples, and ideas for creating web applications in the Flex environment.