Editor's Note: This method for streamlining metadata creation works best when creating metadata for feature classes that lack metadata. Use another method for updating feature classes that have existing metadata, particularly if geoprocessing history should be preserved.
Create Metadata Faster
Metadata is an important part of any GIS data that gets shared. Without metadata, how would your users know how the data was collected, what they can use it for, and even how recent it is? If you have a group of data with common metadata characteristics, it is easy to feel like you have to keep repeating yourself when you enter those characteristics. You open the Metadata Editor in ArcCatalog, fill in the fields, close the editor, open the editor again, fill in the same fields, close the editor, and so on. If you want a well-documented project, you have to do this for each feature class.
Fortunately, there is a better way. Here's how you do it: First, identify the characteristics that are common to all the feature classes for which you want to create metadata. For example, look for things like the project name and number, your organization's contact information, the project's spatial reference information, and perhaps even the information on data access and use constraints.
Next, use one of the ArcCatalog metadata editors to create metadata for one of the project's feature classes. At this point, enter only the characteristics you identified as being common to all your project data. When you're done, export the metadata you just created to XML format.
 Click the Metadata toolbar's Export button to export the metadata to XML format. This is the information that is common to all the feature classes in your project. |
Thus far, you've created an XML file containing metadata that is common to all the feature classes in your project. To bring this information into the metadata for all project feature classes, select that feature class in ArcCatalog, then import the XML file using the Metadata toolbar's functionality.
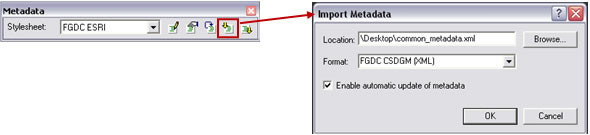 To bring the information contained in the XML file into the metadata for each feature class, click the Metadata toolbar's Import button. |
 The metadata for each feature class in your project is now complete. It contains the information common to all feature classes in your project as well as the information unique to that particular feature class. |
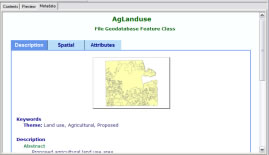
Repeat this process for every feature class in your project. Although each feature class would have common metadata characteristics at this point, they are not yet complete. The final step of this process is to complete the metadata for each feature class by editing it to add the characteristics that are unique to that feature class. For example, edit the metadata to add the feature class abstract, description, status, and keywords.
Exporting and importing the common metadata characteristics are convenient alternatives to typing in common characteristics for every related feature class. Remember that although metadata is typically applicable to digital data, its principles can be extended to many other forms of geographic data such as maps, charts, and textual documents as well as nongeographic data.