Export Maps for Better Results
 Easily create high-resolution map images in ArcMap. | |
 The resolution of the output image, as well as many other parameters specific to each file format, is easy to set on the Export Map dialog box. |
For most people, creating a screen capture is the most common method for generating an image of an ArcMap document for inclusion in a Microsoft PowerPoint presentation, report, or other document. However, exporting maps and layouts directly from ArcMap is simple and gives superior results.
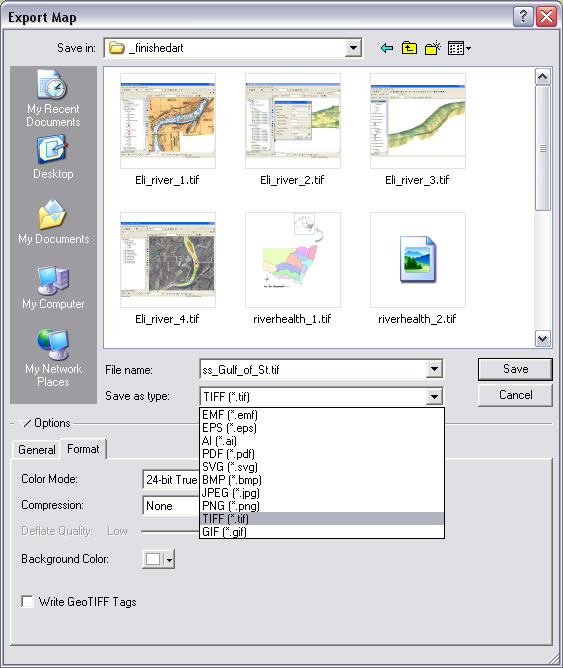
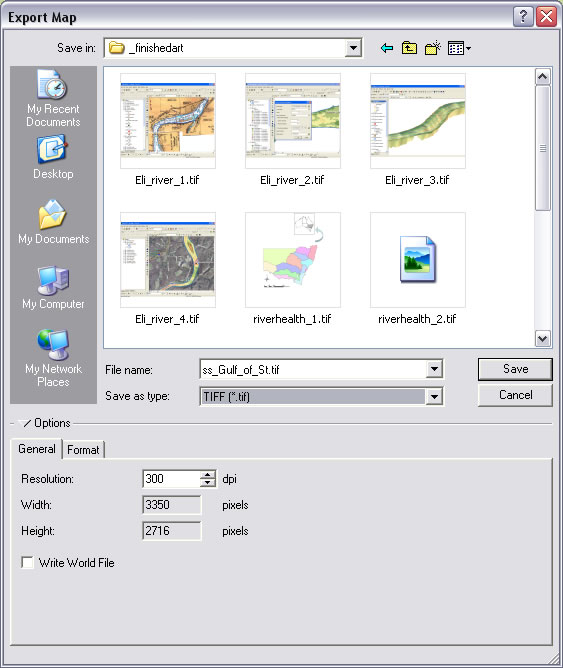
Open the map you wish to export in ArcMap and zoom to the desired map extent. Choose File > Export Map. The Export Map dialog box lets you choose from 10 file formats. On the General tab, you can adjust the image resolution.
Click the Format tab to choose the color mode, compression applied to the image, and background color. If the image will be created from data view, you can also write a world file that can be used for georeferencing the image. If the map is in layout view, you can clip the output to the graphics extent.
Screen captures are typically saved in a raster format. This format handles maps with many different colors such as satellite images or hillshades. Raster formats available with ArcMap are BMP (Microsoft Bitmap), JPEG (Joint Photographic Experts Group), PNG (Portable Network Graphics), TIFF (Tagged Image File Format), and GIF (Graphic Interchange Format).
ArcMap also exports maps in several vector formats. The advantage of a vector image is its scalability—it can be enlarged without appearing blocky or jaggy. The vector formats available are PDF (Portable Document Format), AI (Adobe Illustrator), SVG (Scalable Vector Graphics), EPS (Encapsulated PostScript), and EMF (Windows Enhanced Metafile Format).
The available choices on the Format tab for file compression, color mode, color space, transparency, and other options display based on the choice selected in Save as type: (e.g., JPEG, TIFF, SVG). For detailed information on the choices for each file type, see the ArcGIS Help topic "Exporting a map."
Note: The map used in this demonstration is one of several available at the Esri Mapping Center that explain how to achieve a variety of cartographic effects using ArcGIS software. Visit the site to take advantage of these and other resources that will help you make better maps.