Hillshading Effects Are Easy in ArcMap
New Option in ArcGIS Desktop 9.2
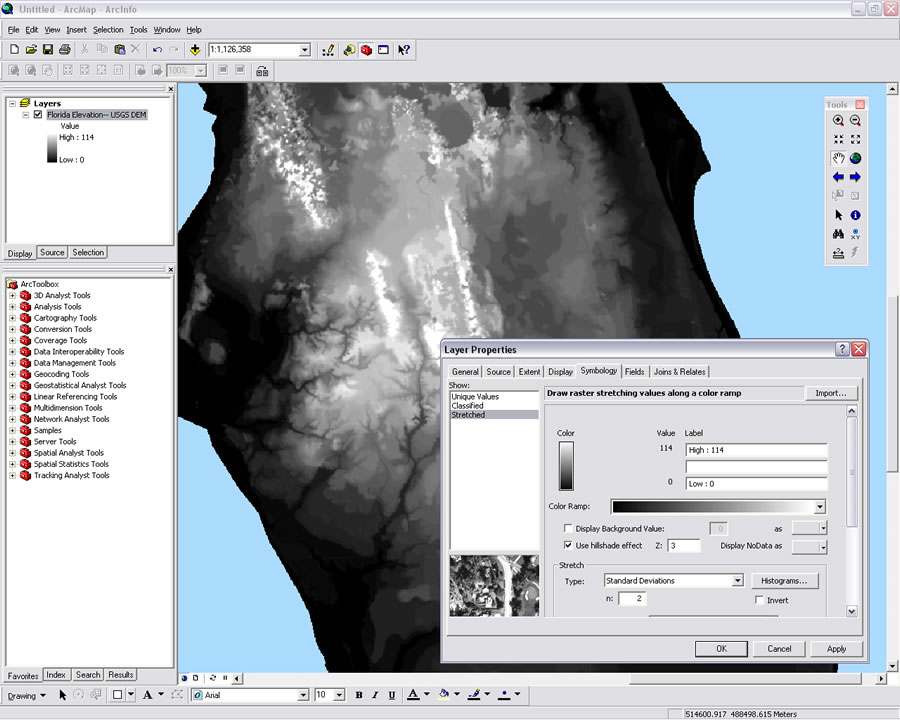 Use options on the Symbology tab of the Layer Properties dialog box to display an elevation layer as a hillshade. | |
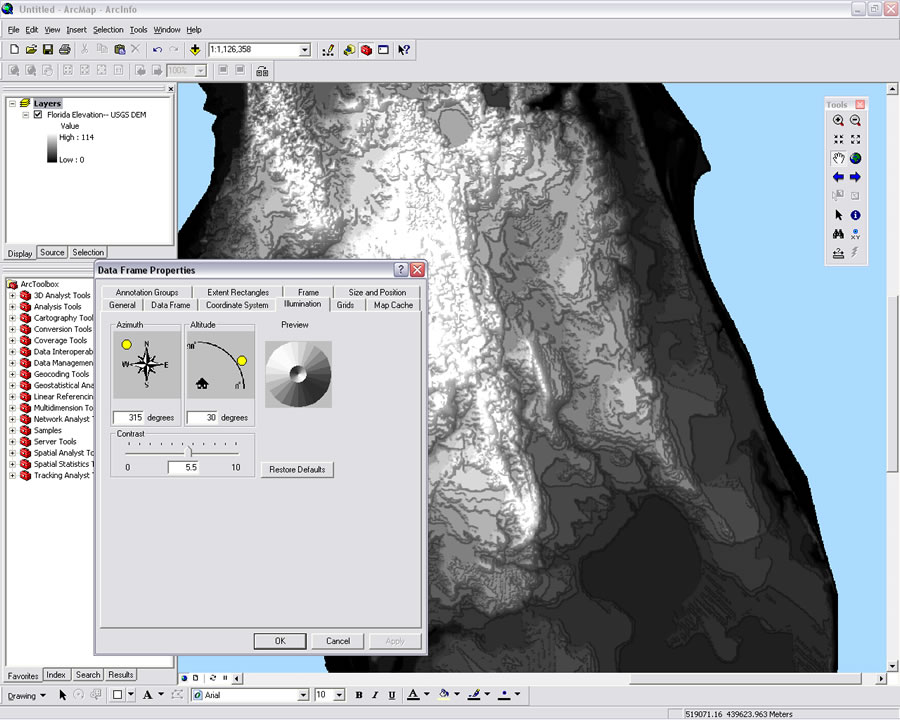 Use the illumination and contrast settings for the Data Frame for additional control over the hillshade's appearance. |
This option, added with ArcGIS Desktop 9.2, displays elevation rasters with hillshading without requiring the ArcGIS Spatial Analyst extension.
- Add a digital elevation model (DEM) data layer to an ArcMap document.
- Right-click that layer in the table of contents and choose Properties from the context menu.
- Click the Symbology tab and select Stretched as the Show option. Check the Use hillshade effect check box and adjust the z-value to add vertical exaggeration, if desired. Click OK.
The hillshade display can be further controlled by changing the illumination angle and/or the contrast of the hillshade.
- Right-click the data frame containing the DEM and choose Properties from the context menu.
- Click the Illumination tab and adjust the values for the Azimuth and/or the Altitude angles. The contrast for the hillshade can also be adjusted by moving the slider. Click Apply to save the changes and OK to close the dialog box.