ArcWatch: Your e-Magazine for GIS News, Views, and Insights
September 2011
Symbolizing Trees Realistically with ArcMap
Do you want to symbolize your tree point features so they look more like real trees? It's easy when you combine tree symbols that you can download with some of the advanced symbology options available with ArcMap. Although this tip is for symbolizing trees, you can use the same effects to add realism to your map by slightly varying and reordering the symbols for other point features as well, such as other vegetation (bushes), street furniture (benches), and landscape ornamentation (rocks).
This tip uses the Campus Basemap Template, which you can download from the Map Template Gallery on the ArcGIS Resource Center. Download it to follow along or try out the techniques later. Because tree data is often stored in a single feature class, the four tree-type feature classes in the sample data were combined to create a single Trees feature class, and a Type attribute was added to designate the tree type. If you have polygon data for the location of treed areas instead of point data, consider using the Create Random Points tool to create points within the polygons that you can then symbolize using the steps outlined below.
Step 1. Download the Trees style. You can either use the style that is included in the Campus Basemap Template or the Trees style from the Mapping Center Styles page.
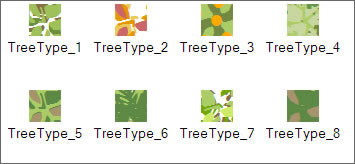
The contents of the tree style that can be downloaded from the Mapping Center.
Step 2. To reference the style, click Customize on the top menu bar in ArcMap, click Style Manager, click the Styles button, then click Add Style to List. Navigate to the location of the downloaded style and click Open to select it. Click OK to accept all the changes; the style will now be referenced so that you can use it.
Step 3. To apply the symbology, right-click the Trees layer in the ArcMap table of contents and click Properties. On the Symbology tab, you can apply one of the tree symbols to all your tree features using the Features > Single symbol option.
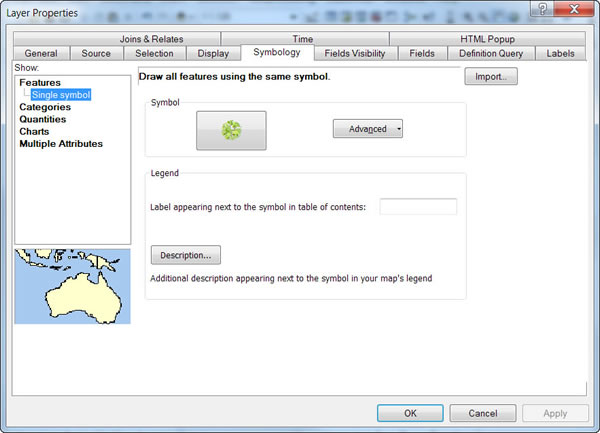
The Features > Single symbol renderer will apply the same symbol to all the point features.
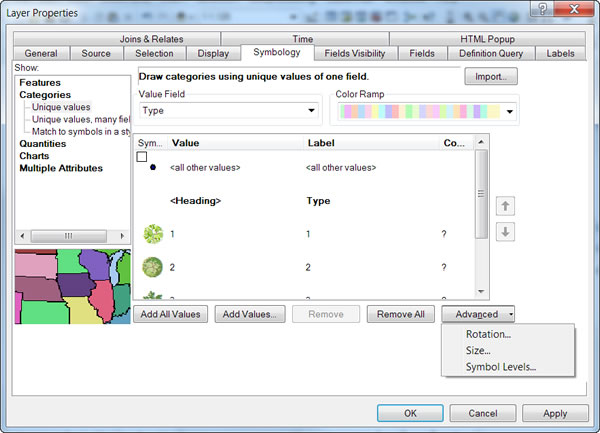
If your tree data has an attribute for various tree types, you can use the Categories > Unique values renderer with the Type attribute as the Value field. Then select the appropriate symbol for each tree type.

The Categories > Unique values renderer will apply different symbols to different types of features.
Step 4. Take a minute to inspect one of the tree symbols. Double-click one of the symbols to open the Symbol Selector and then click Edit Symbol. In the Symbol Property Editor, you can see from the layers at the left of the dialog box that it is a multilayer symbol. You can also see that the layers were created as Character Marker Symbols using the ESRI US Forestry 2 font. Variations in the character, size, angle, and color create a symbol that appears more realistic. Feel free to experiment with these settings to create symbols for the trees in your area or in different seasons.
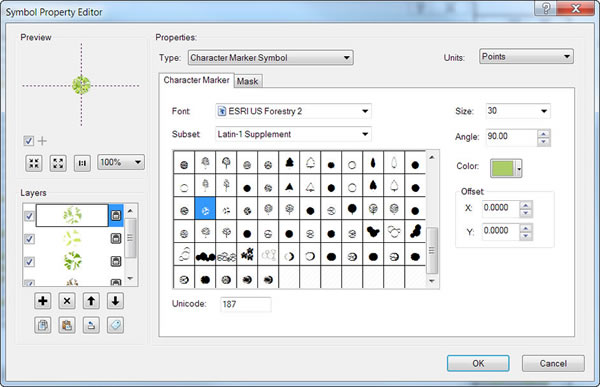
The Symbol Property Editor dialog box showing a multilayer tree symbol.
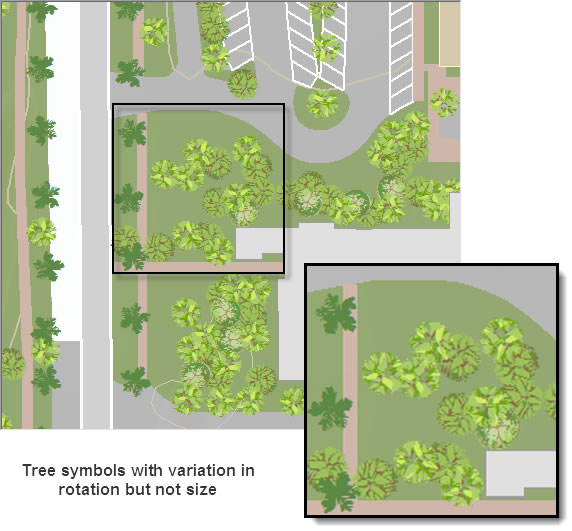
Click OK to close all the dialog boxes until you are back at the Layer Properties dialog box, and then click Apply to see the changes. The result is a pleasing set of symbols for the various tree types; however, if you look closely, you will see that all symbols for a single type are the same size and at the same angle.

Appropriate tree symbols are now applied to the various tree types.
You will also see that the tall palm trees, shown with the darkest symbol, are being drawn under some of the other symbols.
Step 5. You can change the order in which the symbols are drawn using Symbol Level Drawing. On the Symbology tab, click the Advanced button and click Symbol Levels.
The Advanced drop-down menu on the Symbology tab allows access to options for Symbol Levels, as well as Rotation and Size.
On the Symbol Levels dialog box, check the option to Draw this layer using the symbol levels specified below. Use the arrow buttons to move the symbol for the palm trees above the other layers.
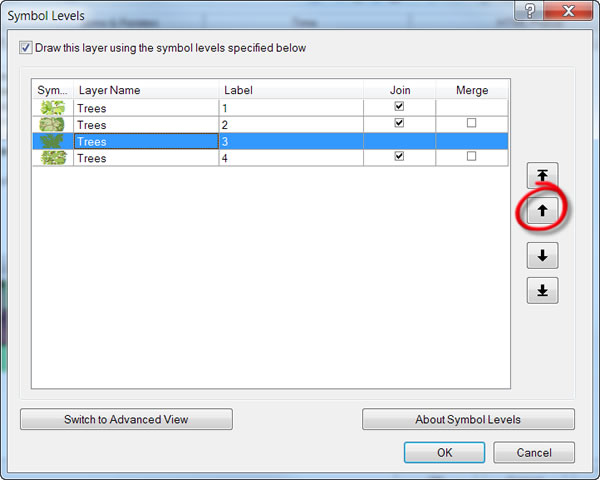
The arrow buttons on the Symbol Levels dialog box can be used to change the drawing order of the symbols; symbols at the top are drawn last.
Click OK and click Apply to see the changes. The result is subtle, but it more correctly reflects reality.

The trees are now drawn in the correct order.
Step 6. Now you can add a bit more realism by varying the rotation of the symbols. (See Rotating point feature symbols in the ArcGIS Resource Center.) On the Symbology tab of the Layer Properties dialog box, click the Advanced button and click the Rotation option. For Rotate Points by Angle in this field, choose the
Click OK and click Apply to see the changes. The result adds a little more realism.
The tree symbols are now drawn with variation in rotation.
Step 7. One other thing you can do is slightly vary the symbol size. This is done using the Size option with the Advanced drop-down menu on the Symbology tab on the Layer Properties dialog box. When you choose this option, you can set the minimum and maximum symbol sizes.
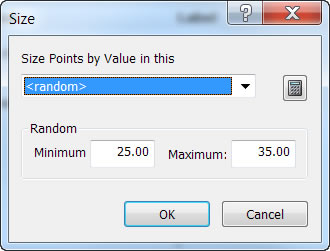
Inputting the minimum and maximum symbol sizes when the Random Size option is selected.
Since the original symbol size for the trees was 30 points, you may want to set the values here slightly larger and smaller than that. Click OK twice to see the changes. The symbols now randomly vary in size between the minimum and maximum sizes you set.
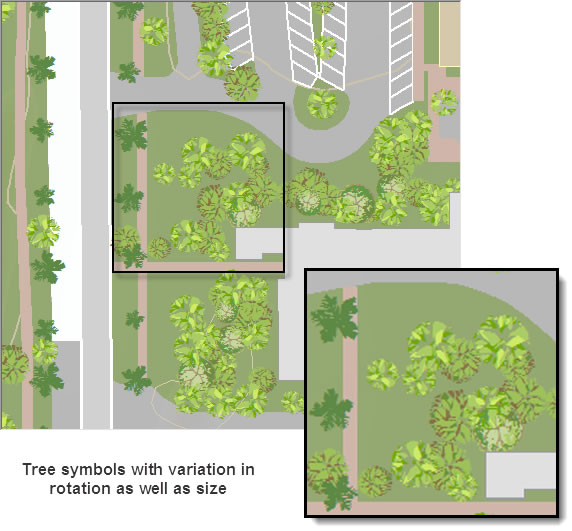
The final result is trees that are symbolized using appropriate marker symbols, the correct drawing order, and random variation in size and rotation.
You now know how to add a bit of realism to your map by correcting the drawing order of and creating visual variation in the symbols for your tree point features. This is an approach you can also take for other point features on your maps when you want symbols to more closely replicate what you would see in the real world.