ArcWatch: GIS News, Views, and Insights
September 2012
Import Geotagged Photographs into ArcMap
You can easily import geotagged digital photographs into your map and integrate them directly into your existing geodatabase using the new GeoTagged Photos To Points tool available in ArcMap 10.1.
The tool creates a point feature class in the geodatabase and, as an option, attaches the photos to the point feature class so they can be easily managed along with your other data. You will need at least an ArcGIS for Desktop Standard license and your output feature class must be in an ArcGIS 10 or higher geodatabase.
Import photos from your smartphone into ArcMap using the new GeoTagged Photos To Points tool.
Here's how to use the tool to display geotagged photographs in ArcMap:
Step 1
Start by copying your photos to a designated folder. This will help keep them organized. You may also want to create a geodatabase to store the new point feature class if you don't already have one.Step 2
In ArcMap, locate the GeoTagged Photos To Points tool in the Photos toolset in ArcToolbox. Hint: Use the Search window and use the keyword "photos" or "geotagged" to easily find the toolset.
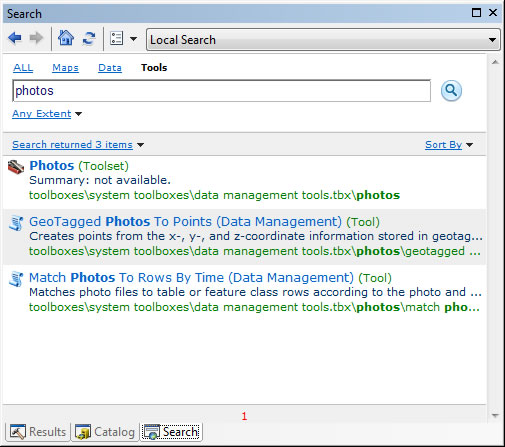
Use the Search box in ArcMap to find the new Photos toolset.
Click GeoTagged Photos To Points (Data Management) to launch the tool.
Step 3
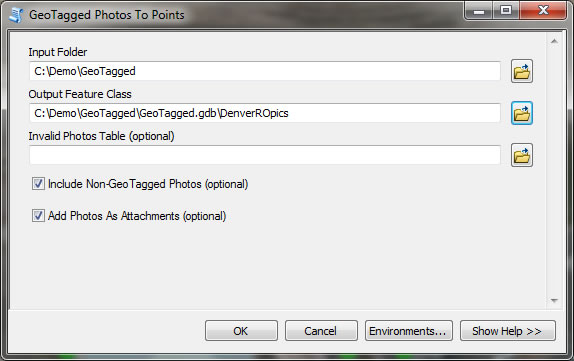
In the GeoTagged Photo to Points dialog box, select the folder where your digital photos exist. Click the folder icon next to the Input Folder box, navigate to your folder, and click Add.
Step 4
Next, give the new feature class a name and save it in a geodatabase. In the Output Feature Class box, click the folder, navigate to a geodatabase, and type the name of the feature class in the Name box to create the new point feature class. Click Save.
Step 5
Optionally, create an output table that will list any photo files in the input folder with invalid Exif metadata or empty GPS coordinates. For this exercise, we will omit that step so leave that line in the dialog box blank.
Check the Include Non-GeoTagged Photos check box. This will add photos to the geodatabase even if the photos don't have GPS coordinate information.
Check the Add Photos As Attachments check box. This option will attach a copy of the photos to the output point feature class, which will be stored internally in the geodatabase.
The dialog box should look like the screen capture below. Click OK.
Use the new GeoTagged Photos To Points tool to import geotagged photos from your smartphone.
When the process is complete, the newly created point feature class is added to your map. You may want to increase the size of the point symbol so it's easier to see.
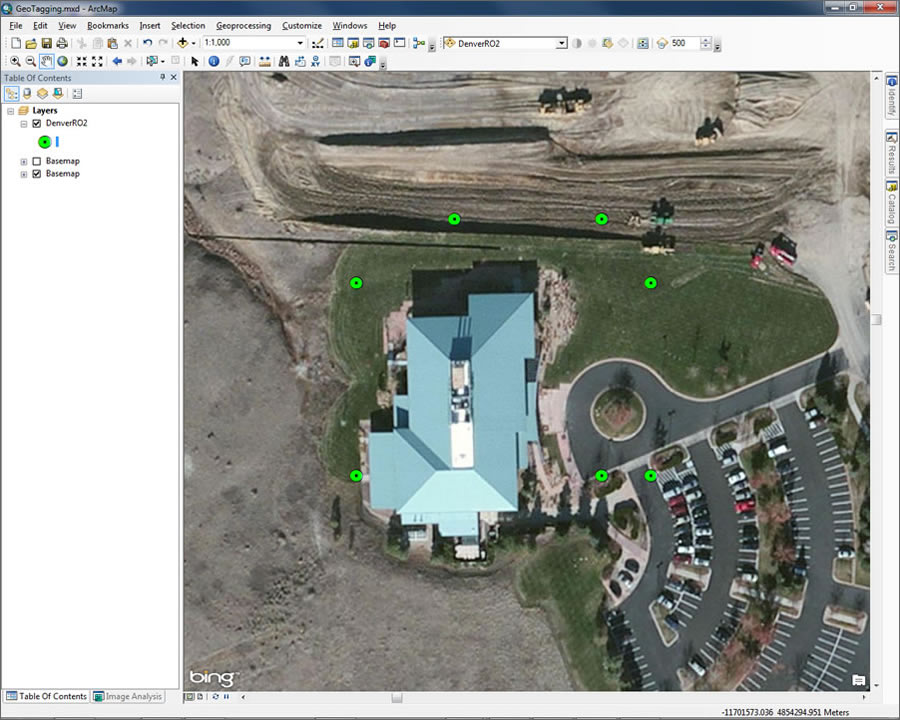
Digital photos are copied internally into a point feature class and represented in your maps.
To see the photos in ArcMap, click the HTML Popup tool on the Tools toolbar.
![]()
Use the handy HTML Popup tool on the Tools toolbar to view geotagged photos in ArcMap.
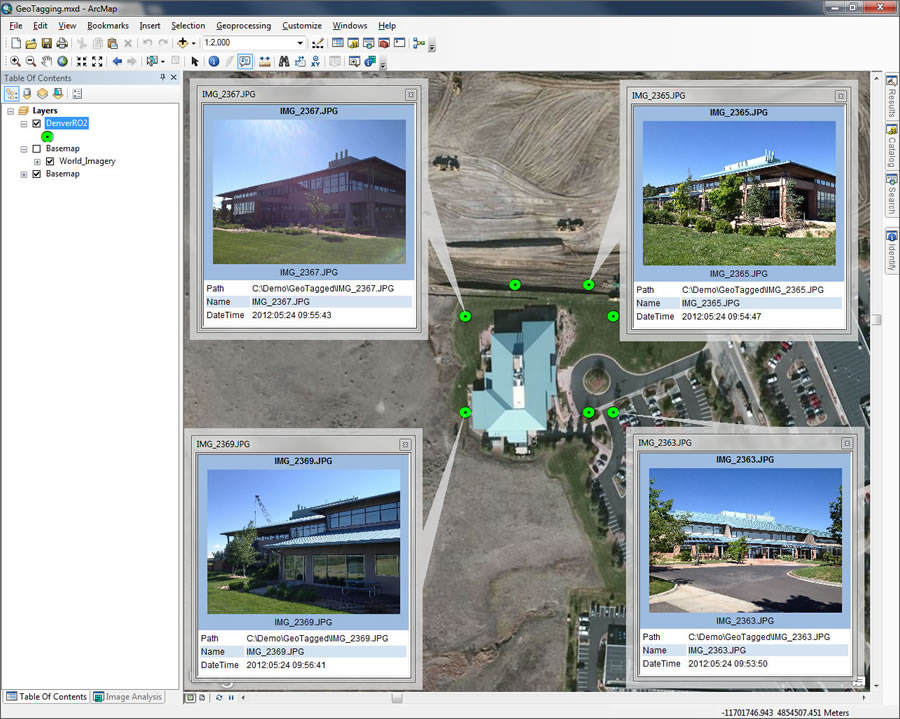
Now, simply click a point feature to display its pop-up window that contains the photograph as well as the associated metadata.
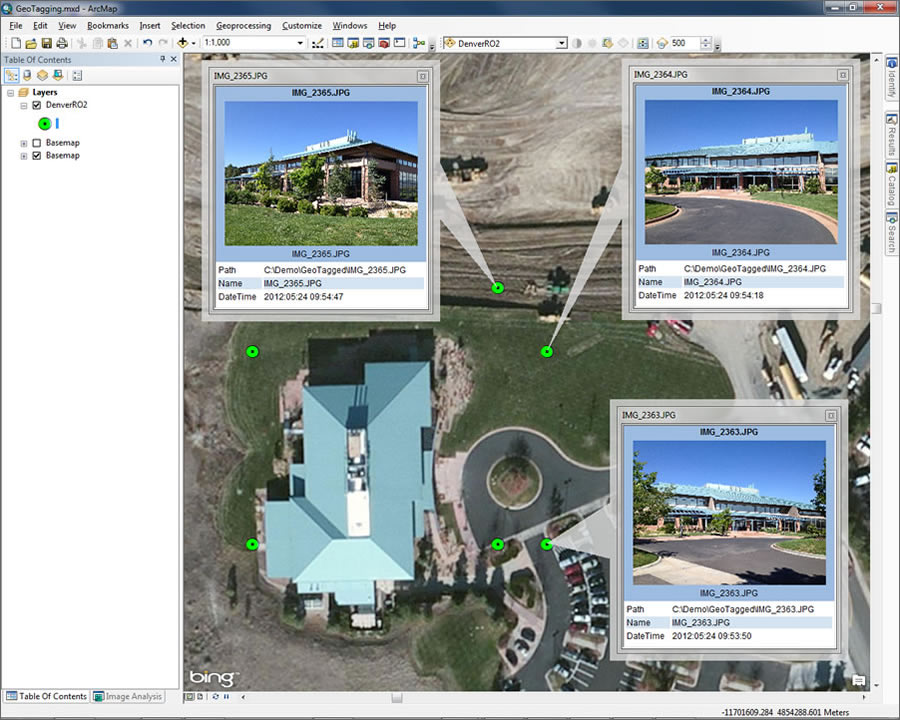
With HTML pop-up windows, viewing geotagged photos in ArcMap is easy.
The GeoTagged Photos To Points tool provides the quickest and easiest way to view your geotagged photographs in ArcMap. It's now built directly into ArcGIS 10.1, so it's readily accessible and can easily be integrated into existing workflows.