ArcWatch: GIS News, Views, and Insights
November 2010
Save Time with Map Templates
By Heather Burrow, Esri Technical Marketing
Creating ready-to-use map templates that your entire team can access saves time and energy. When someone needs to make a map, the basemap layers, data, and page layouts you commonly use will automatically be incorporated into your map.
If you have used templates in previous releases you will notice changes in how to create these templates in ArcGIS 10. With the new release, Esri no longer supports map template files (.mxts) for use with the Select Template, New Document, or Getting Started dialog boxes. These dialog boxes now only work with map document files (.mxds). So if you created .mxts in the past as a way to jump-start your map production, you will need to resave them as .mxds or begin fresh with new templates. If you've never created map templates before, now is your chance. It only takes a few minutes and is well worth the effort.
Create and Share a Map Template in ArcGIS 10
This tip covers how to change the default location where map templates are stored to a network or shared location as well as how to create a basemap template to store there.
Step 1: Click twice on the ArcMapAdvancedSettings.exe located at C:\Program Files\ArcGIS\Desktop10.0\Utilities to run the utility application. It allows you to change the default location where the map templates are stored from the ArcGIS installation directory at C:\Program Files\ArcGIS\Desktop10.0\MapTemplates\ to a networked or shared location that your whole team can access.
Open the ArcMap Advanced Settings Utility.
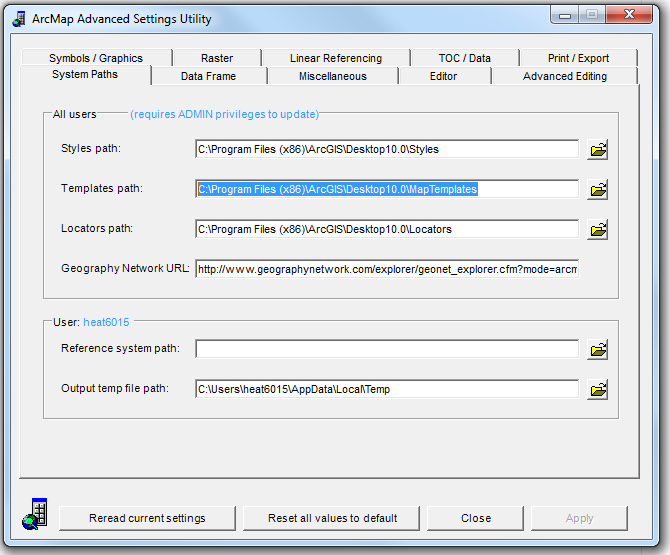
Step 2: Once the ArcMap Advanced Settings Utility application is open, navigate to the System Paths tab and change the directory path by browsing to the new location or typing it into the input area next to the Templates path label. Once done, click Apply, then click Close. Template map documents will now be listed under the Templates section within the New Maps section of the Getting Started dialog box within ArcMap. (If ArcMap is running, you must restart it for the changes to take effect.)

Change the template path.
Step 3: Create a new template by opening ArcMap. First, create a new blank map by selecting New Maps > My Templates > Blank Map from the Getting Started or New Document dialog box. If needed, change the default geodatabase location to the workspace you most commonly use and click OK.
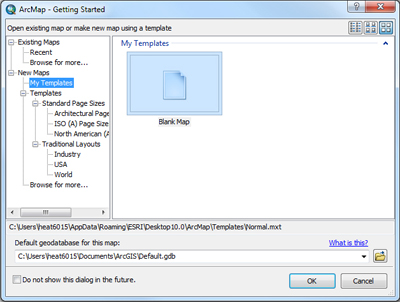
Create a new template.
Step 4: Add a basemap layer to the document by clicking the drop-down arrow next to the Add Data button and select Add Basemap.
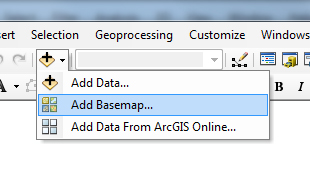
Add a basemap.
Step 5: This will open the Add Basemap window and allow you to choose from the dozen basemaps Esri offers including Bing Maps Aerial, Imagery, Streets, and Topographic. Choose Imagery and click the Add button within the window.
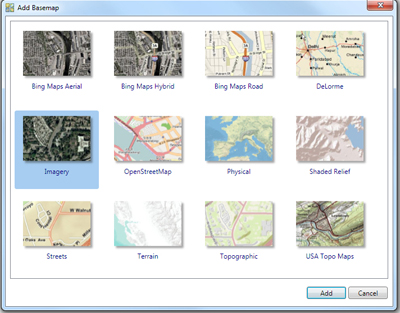
Choose the Imagery basemap.
Step 6: Save the map document to the network location identified earlier for map templates. (To create a template for just your user profile on the computer, save the document to C:\Users\

Save the template.
Step 7: Now you can quickly start a new map document with imagery as the basemap by opening a new document (File > New) and choosing the Imagery template document from the network location you just set.

Open the template map document.
To learn more about map templates or change the default location to multiple template locations, visit What's new for map templates in ArcGIS 10 from the ArcGIS Resource Center.