ArcWatch: Your e-Magazine for GIS News, Views, and Insights
November 2011
Explore Raster Data Using the Pixel Inspector
When working with raster data, it is not unusual to notice inconsistencies where, for example, in a digital elevation model (DEM) the elevation in a certain area appears higher or lower than that of the surrounding terrain. You would usually use the ArcMap identify window in ArcGIS for Desktop to isolate and identify anomalous pixel values, but this can only be done one pixel at a time.
However, in this type of circumstance it's easier and more efficient to quickly view and explore the inconstant values as a group or array of pixels instead of as single pixel values. You can use the Pixel Inspector tool to explore the pixel values of a raster dataset in ArcMap.
Pixel Inspector is similar to the Identify tool, but instead of providing a single pixel value, it displays an array of pixel values. You can control the number of pixels identified by changing the size of the Pixel Inspector window. To see more or fewer pixel values, expand or reduce the window's size.
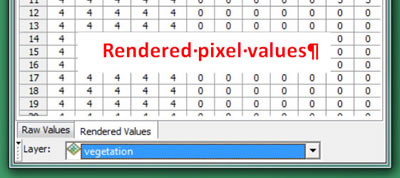
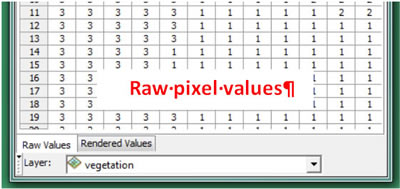
The Pixel Inspector allows either raw or rendered pixel values to be displayed. In the case of a DEM, the raw values would represent the actual elevation values, whereas the rendered values would represent the elevation as a percentage of grayness where lower elevations would appear lighter than higher elevations, which would be darker. This is typically achieved by assigning values in a range from 0 (white) to 255 (black).
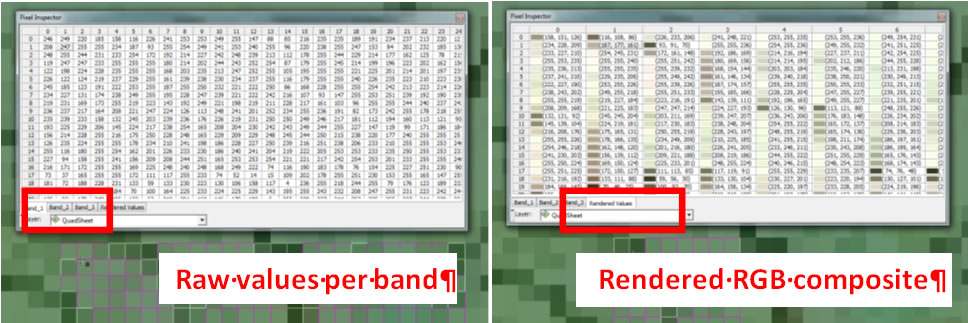
A color raster dataset using a composite Red, Green, and Blue (RGB) renderer will allow you to choose to display the raw pixel values of any of the three bands that make up the raster. You also can display the composite rendered values together with color tiles.
Add the Pixel Inspector to an ArcMap toolbar
Step 1: In ArcMap, click the Customize menu and then the Customize mode

Step 2: Click the Commands tab.
Step 3: In the Categories list, scroll down and click Raster.
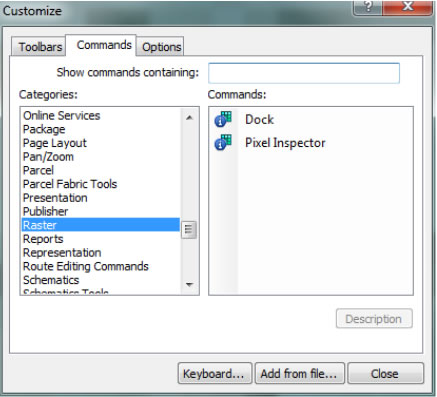
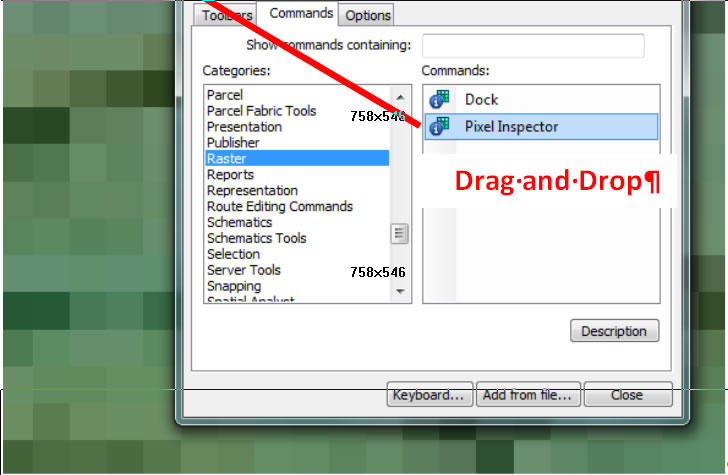
Step 4: From the Commands list, drag and drop the Pixel Inspector item onto any toolbar.
You have now successfully added the Pixel Inspector tool to your ArcMap interface. Now let's start using the tool.
Use the Pixel Inspector
Step 1: Add one or more raster datasets you wish to explore to the ArcMap Table of Contents (TOC).
Step 2: Zoom to the area of the raster you want to explore
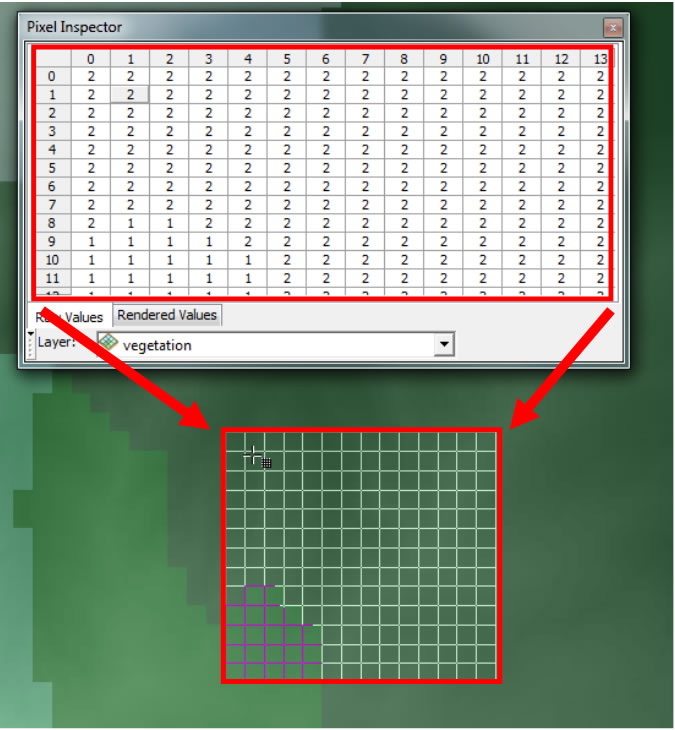
Step 3: Using the Pixel inspector button, click on an area you wish to explore. Notice how the Pixel Inspector window now displays in ArcMap. When you initially click the Pixel Inspector tool, the Pixel Inspector window opens with the pixel values of the upper left corner displayed.
Step 4: If you like, you can dock the Pixel Inspector window.

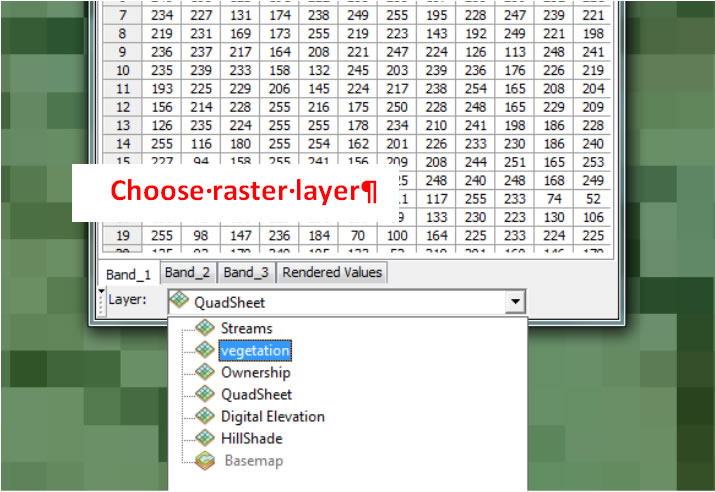
Step 5: If you added more than one raster to the TOC, from the Layer drop-down arrow on the Pixel Inspector choose the raster layer you want to explore.
Step 6: To view the pixel values for another area of the raster, migrate to the new area and using the mouse, click on the location you wish to investigate. Notice how your mouse pointer shows a query grid that reflects the same number of columns and rows that the Pixel Inspector window is sized to show.
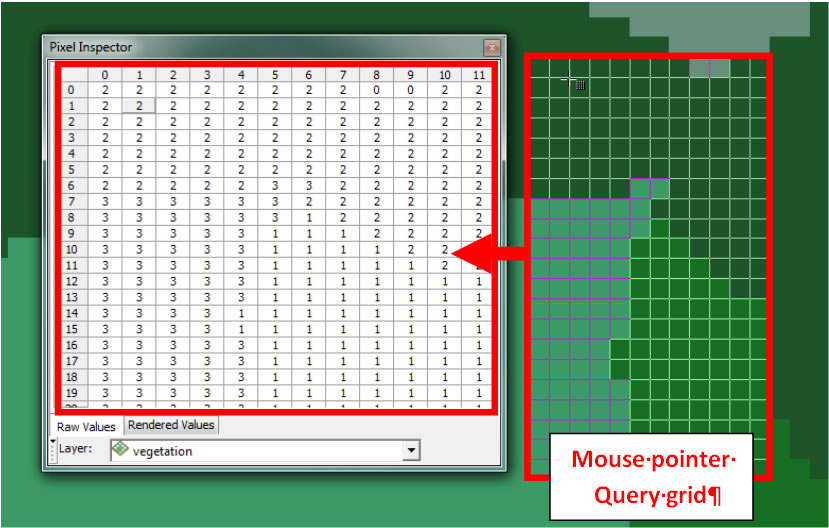
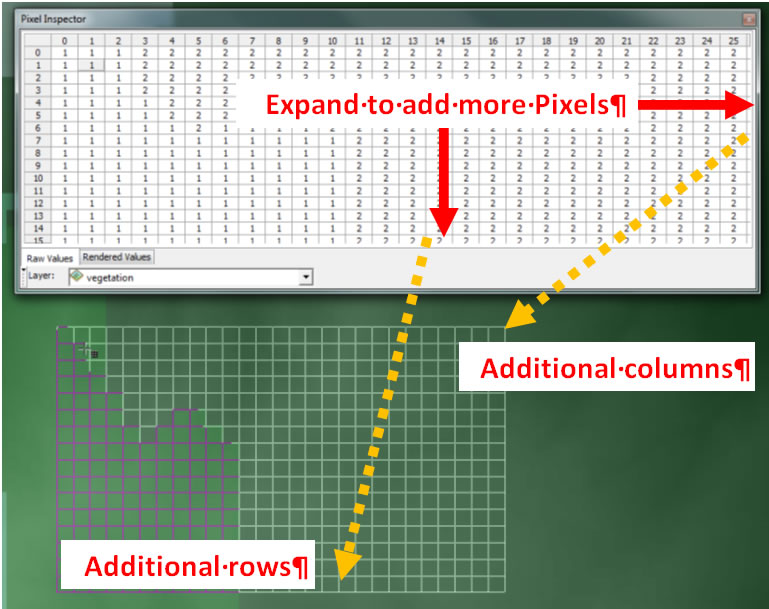
Step 7: You can modify the number of columns and rows that the Pixel Inspector window displays by resizing the window; this will also adjust the query grid surrounding your mouse pointer.
Step 8: You may want to expand your data exploration by moving and holding down the mouse button. As you move around, notice that Pixel Inspector updates the pixel values.
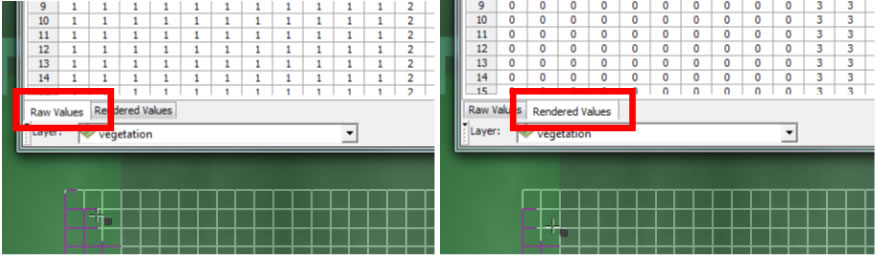
Step 9: On the Pixel Inspector window, click the Rendered Values tab to view the symbol value that is being used for the pixels you are exploring.
Step 10: If you added a single band image, you can click the Raw Values tab to see the raw pixel values. These represent the actual pixel values of the raster.
Step 11: If you added a multiband image, you can explore the individual band information by clicking one of the Band tabs (for example, Band_1, Band_2, or Band_3. This will show you the raw band pixel values.
Step 12: If you want to remove the Pixel Inspector tool from the toolbar, open the Customize dialog box, click the Pixel Inspector tool, drag and drop it off the toolbar, then close the Customize dialog box.
Using the Pixel Inspector, you have been able to view and explore an array of pixel values both in their raw and rendered state. The Pixel Inspector is a very useful tool for exploring raster data that complements the Identify tool. Pixel Inspector offers an enhanced and more versatile way of investigating groups of pixel values.