ArcWatch: GIS News, Views, and Insights
December 2010
Simplify Date and Time Calculations
To go beyond simple visualization of temporal data, you may need to perform calculations using dates and times. Months and years aren't all the same length; and hours, minutes, and seconds aren't based on multiples of 10, so date/time calculations can become very complicated. You can simplify these complex calculations using functions in ArcGIS.
You can perform date/time calculations using the ArcMap Field Calculator or the Calculate Field tool in ArcToolbox. Open the Field Calculator and select the radio button labeled Date to see a list of the date/time functions available:
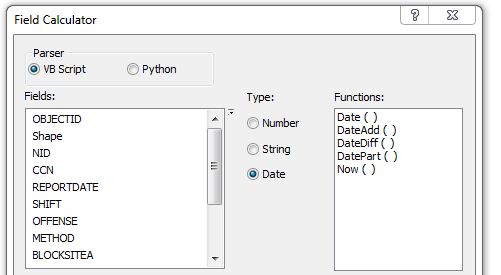
Date Functions in the Field Calculator
These functions work with DATE fields, so if your date/time information is stored as numbers or strings, use the Convert Time Field tool in the Data Management toolbox to convert it to a DATE field first.
Grouping Features by Day, Week, or Month
For some mapping or analysis projects, you may want to group features by day, week, month, or other calendar unit. The DatePart function extracts a specific portion of a date field, which you can then store in another field for symbolization or analysis.
Step 1: Add a field to your feature class to hold the results. The result will be a day, week, or month number, so this field must be numeric.
Step 2: Open the Field Calculator. Select the Date radio button and the DatePart function. DatePart takes two inputs: a character that identifies which part you want to extract from the date ("d" for day, "m" for month, and so on) and the date or date field from which you want to extract it. To extract the month from a field called REPORTDATE, use this expression: Month = DatePart("M",[REPORTDATE]).
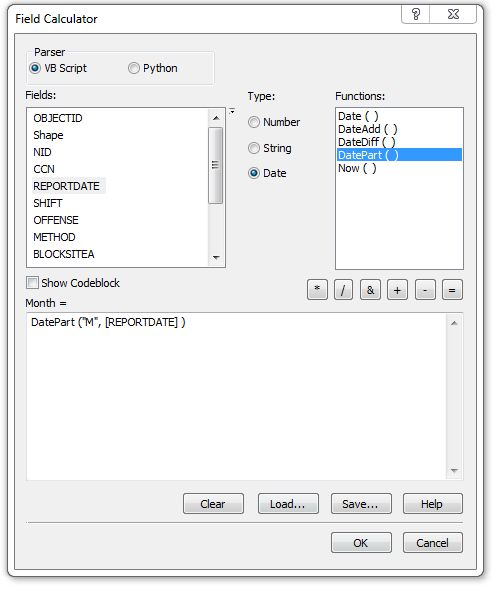
Determining Months Using DatePart()
Calculating a Past or Future Date
If your features have a single date and time, and you need to calculate a second date or time relative to the first, use the DateAdd function. It adds or subtracts a specific interval from the original date and returns the resulting second date.
Step 1: Add a second date field to your feature class to hold the calculated date.
Step 2: Open the Field Calculator. Select the Date radio button and the DateAdd function. DateAdd takes three inputs: the type of interval you want to add to the existing date (month, day, hour, etc.), the number of intervals to add (using a negative number to subtract), and the date or field to which you want to add the intervals. To calculate an end date field by adding 30 days to an existing start date field, for example, use this expression: EndDate = DateAdd("d",30,[StartDate]).
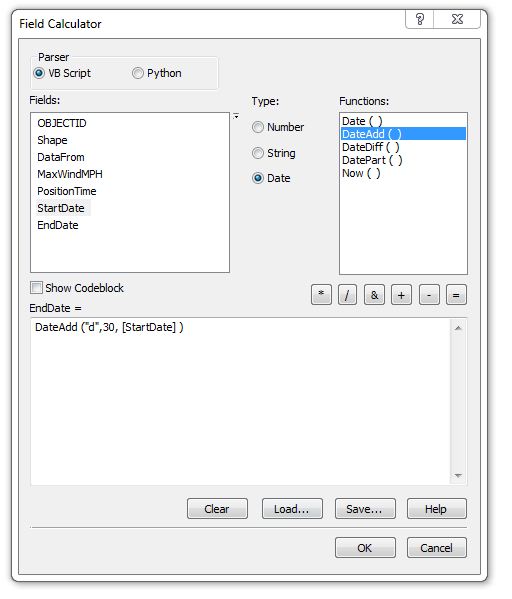
Calculating a Future Date Using DateAdd()
Calculating Durations
To calculate the number of days, hours, minutes, or some other interval between two existing time fields, use the DateDiff function. This lets you calculate the duration between a start and end time, for example.
Step 1: Add a numeric field to your feature class to hold the results of the calculation.
Step 2: Open the Field Calculator. Select the Date radio button and the DateDiff function. DateDiff takes three inputs: a character specifying the units in which to express the duration, the beginning date/time, and the ending date/time. To calculate the duration in days from a start to an end date, use this expression: Duration = DateDiff("d",[StartDate],[EndDate]).
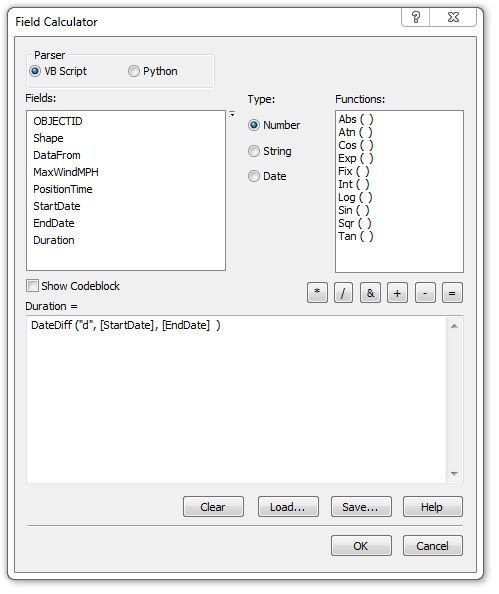
Calculating Durations Using DateDiff()
These functions make date/time calculations simple. Now you can take greater advantage of the temporal nature of your data to better visualize, analyze, and understand it.