ArcGIS Pro brings labeling tools front and center in the interface. Instead of burrowing through a series of dialog boxes, the Labeling tab on the ArcGIS Pro ribbon lets you immediately change basic type, placement, and scale settings for labels.
Labels are automatically positioned pieces of text that are based on feature attributes. Annotation and graphic text are the other kinds of text you can place on a map. However, labels are the fastest and easiest way to add descriptive text for individual features to a map.

Quickly Style Labels
The Labeling tab on the ArcGIS Pro ribbon gives you direct access to the most commonly used tools for styling labels. Select a feature layer and the Labeling tab becomes active and lets you turn labeling off or select a field for labeling. You can also change font type, size, color, and weight. The font selection drop-down provides an example of each typeface of each font available.
As you set these parameters, ArcGIS Pro immediately updates the display. If you want to suspend label drawing on the map, the Pause button is available.
Choose the scale range at which labels will be visible. The Labeling tab allows you to change the visibility range of labels. You can also view unplaced labels. The Labeling tab lets you access and modify all labels.
By default, ArcGIS Pro uses the Maplex Labeling Engine with its sophisticated label placement capabilities. However, you can switch to the standard labeling engine if you like. Basic label placement choices are also available from the ribbon.
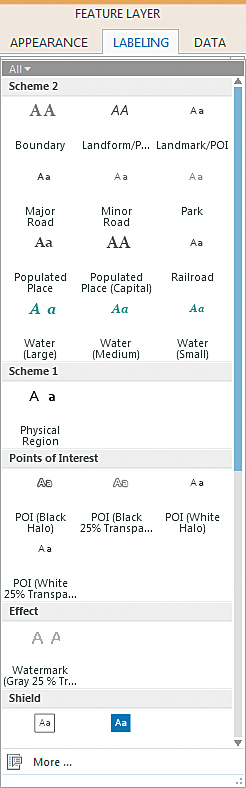
The ribbon provides direct access to text symbol styles. These are smart defaults for font, size, color, and style that incorporate cartographic conventions for labeling types of features.
Even More Control with the Label Class Pane
Using the basic tools provided on the Labeling tab may be all you need or you can use them to take a first cut at labeling to determine if and where there are positioning issues or conflicts.
If the map is more complex, Label classes will help you resolve conflicts and establish a hierarchy systematically. Label classes restrict labels to certain features or specify the attribute fields used for labels, symbols, scale ranges, label priorities, and placement options for a group of labels. For example, you could use a label class to query out a subset of cities with populations over 100,000 and label only those cities using a specific font and font style with a text size and color.
You work with label classes using the Label Class pane. Access it by expanding the Text Symbol or Label Placement sections on the Labeling tab or clicking the SQL or Expression buttons in the Label Class pane. The pane has three sections: Class, Symbol, and Position.
In the Class Section
Under the Class section, you have options for filtering the attributes to be displayed by applying a SQL query or creating an expression using Python, VBScript, or JScript so you can create labels that combine text from two fields or insert text you provide.
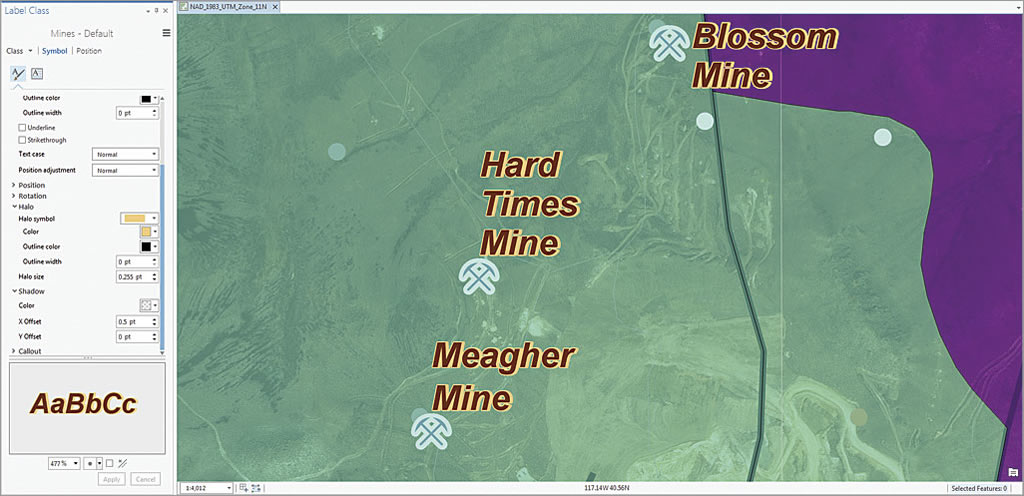
In the Symbol Section
Under the Symbol section, choices under the General icon include font, size, and style. You can also use the Text Fill Symbol setting so text will be treated as enclosed polygons that can have fills and strokes. Settings for alignment and offsets, as well as rotation, are available. Halos are supported with additional options for masking underlying features (especially when labeling imagery). These include using a gradient fill, thin gray outline, or any color from the palette for the halo. Callouts and shadows can be manipulated.
Click the Formatting icon, and you have control over the spacing of both words and letters and can adjust letter width, line spacing, ligature, and determine how glyphs are handled.
The same options are available when labeling 3D scenes, although by default labels will billboard and rotate automatically as the viewer moves through the scene.
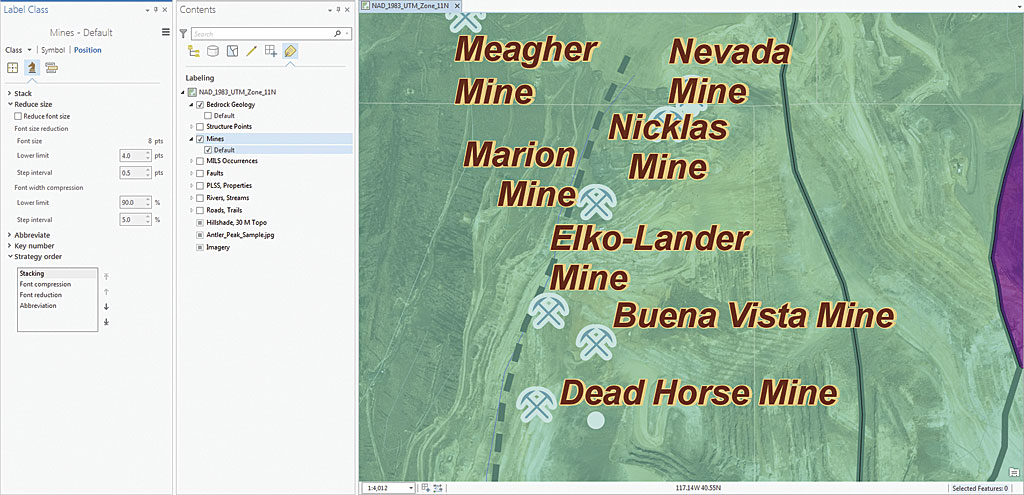
In the Position Section
Choices available from this section let you exploit the fine control of label placement provided by the Maplex Labeling Engine. Click the Fitting Strategy icon to set preferences for stacking, font size reduction, abbreviations, and key numbers and to choose the strategy used for applying these tools. Handling duplicate and unplaced labels, setting buffers, applying feature weights, and the placement of background labels are set using choices under the Conflict Resolution icon.
And There’s More
Go to the Map section of the ribbon. Click More to access additional tools for setting label priorities and weights, as well as Abbreviation Dictionaries available from the drop-down.
Abbreviation Dictionaries let you tell the Maplex Labeling Engine how you would like to abbreviate text when it needs to shorten long labels to fit within small spaces. Abbreviations are applied to individual label classes and are used on freestanding words or groups of words, not parts of words (except for certain non-English words). Labels containing text formatting tags are not abbreviated.
This overview of the highly available and extensive labeling controls in ArcGIS Pro is a starting point for further exploration of the high-end capabilities now available for producing maps with superior typography and design.