ArcUser Online
Why Use the .NET Framework for Geoprocessing?At ArcGIS 9.2, Esri introduced the Geoprocessor .NET assembly, which opened up the geoprocessing toolbox to .NET developers. There are several reasons you might want to use the .NET Framework for your geoprocessing tasks. Maybe your company's IT department is already a .NET shop. The .NET Framework is enterprise tested and accepted. If you have non-GIS .NET developers, they can be a valuable resource to you when learning the ins and outs of .NET programming. .NET solutions are also extremely scalable. The entire library with thousands of ArcObjects components is exposed to you (more on this later), providing you have low-level access to the very objects that the core geoprocessing tools and framework are built with. As we will soon see, communication with the geodatabase is well integrated. Last but not least, .NET applications are fast and efficient. Getting StartedBefore you proceed, you need to open the listing files in the exercise archive downloaded so you can refer to them. Next, verify that you have the Microsoft .NET Framework installed. To find out if you have .NET Framework version 2.0 or greater installed, go to C:\WINDOWS\Microsoft.NET\Framework. If you have a v2.xx folder there, you already have the .NET Framework 2.0 installed (you may have several folders here, ranging from versions 1.x up to 3.5). If you do not have a licensed version of Visual Studio 2005/2008 Professional, Microsoft provides a lightweight but fully functional version for both the VB.NET and C# languages. To follow along with the examples in this article, download and install Visual C# 2008 Express Edition. Installing Visual Studio 2005 (any licensing level) will also install the .NET Framework 2.0, while installing Visual Studio 2008 (also any licensing level) will install the 3.x .NET Framework. To make compiling at the command line a little easier, set up a User Environmental Variable on your user PATH to the .NET 2.xx directory. This will allow you to run the C# command line compiler from any directory with ease. Right-click My Computer, click the Advanced tab, click Environment Variables, find the PATH variable in the list of User variables, click edit, and add ;C:\WINDOWS\Microsoft.NET\Framework\v2.x.xxx to the end of the existing PATH variables list. Make sure you get the version correct, and don't forget the semicolon in the front to separate it from the previous environmental variable in the PATH list. Hello World!The .NET Framework supports both the Visual Basic and C# languages. For the purposes of this article, all code listings will be in C#. There are a number of ways to write and compile .NET applications. Writing your code in Notepad and compiling using the C# command line compiler is by far the simplest way of constructing a .NET application. Start Notepad (or your plain text editor of choice) and type the code from Listing 1. This is a simple C# program that prints the classic "Hello world!" to standard output at the command prompt. Save this file as HelloWorld.cs, where .cs is the file extension for a C# file. In this example, I'm working in the directory I created at C:\testing\csharp. Before we can run our code, we must compile it into an executable file. To compile this example, we will use the C# command line compiler. Assuming you have your PATH environmental variable set up, open a command prompt window (Start > Run > type cmd), and compile your code, as in Listing 2. Typing csc calls the C# compiler, the /out: flag tells the compiler where to put the output executable file, and the final argument we pass in is our input C# file. Now, at the command prompt, navigate to your executable's directory and run it (as shown in Listing 3). Congratulations, you just wrote, compiled, and ran your first .NET program! Not so hard, eh? Stepping Things Up a NotchThe next section will get an Integrated Development Environment (IDE) up and running. With the classic "Hello world!" under our belts, let's get down to business. Launch Visual Studio/Visual C# 2008 Express (which I will hereafter collectively refer to as just Visual Studio), go to File > New Project, and select Console Application. Give your project an appropriate name, click OK, and Visual Studio creates a new solution for you that includes references to assemblies we will be using and a C# file named Program.cs by default. Before we can use any geoprocessing tools (or any ArcObjects components) in our program, we must add references to the proper Esri assemblies to expose those functionalities. If the Solution Explorer pane is not visible in Visual Studio, go to the View menu and select Solution Explorer. In the Solution Explorer, expand your projects tree and expand the References tree. You should see references to several System assemblies that Visual Studio sets automatically for you when it builds your solution. Right-click References and select Add Reference. The Add Reference window may take a few seconds to come up, and when it does, select the .NET tab, scroll down through it and examine the assemblies that are available to you, especially those that begin with Esri, as those are all the Esri assemblies that contain the geoprocessing and ArcObjects functionalities that we want to expose for our use in Visual Studio. Select Esri.ArcGIS.Geoprocessor from the list and click OK. Notice that the assembly has been added to the References in your project. Now let's focus on Program.cs and writing some code. Writing Geoprocessing CodeTo access the Geoprocessor object's methods and properties, we still need to do one more thing: add a using directive to our code. The using directive has two uses: to permit the use of types and create an alias for a namespace or a type. Every variable and constant has a type, as does every expression that evaluates to a value in a namespace (i.e., a collection of different classes), so you don't have to qualify the entire namespace. This will soon make more sense. In Program.cs (which is where we will be typing from here on), on the line below the current last existing using directive, type the following:
Add the following line inside your Main function, and instantiate (create an instance of) a Geoprocessor object: static void Main(string[] args) Note that as you started typing "geoprocessor", Intellisense kicked in and took you right to the Geoprocessor class in the drop-down list of items available to you. Now, comment out using Esri.ArcGIS.Geoprocessor;. Do you notice that Geoprocessor loses its green color? Hover over it. Nothing, right? That's because you just removed its reference. Now add Esri.ArcGIS.Geoprocessor. before Geoprocessor, so you have this: static void Main(string[] args) You now have effectively fully qualified the entire namespace and told Visual Studio where to look for the Geoprocessor class. You can use whichever method you choose. However, the first method, employing the using directive, seems to be the preferred method and is the method I will employ in the examples here. Next, add a new line and type gp.;. You should get an AutoComplete list with all the Geoprocessor methods that are now available to you. Pretty nice, eh? Now that we have a Geoprocessor object available to us, let's put it to use on a small, simple file geodatabase of Arkansas data that I assembled from Geostor (geostor.arkansas.gov) and the U.S. Geological Survey National Hydrography Dataset (nhd.usgs.gov). Listing 4 goes into every geodatabase in C:\Data and prints the feature class names to standard output. This is not very useful by itself, but getting access to datasets is crucial to virtually all geoprocessing tasks. There are several different ways to execute your program. To run your program from within Visual Studio (also known as "debugging"), go to Debug > Step Into or press the F11 key. This will start your program in the Main() method. Once there, press F10 to step through your code. Notice that a command prompt window gets launched, and any Console.Writeline() statements get printed to this. Another way is to build your application (Ctrl + Shift + B or Build menu > Build Solution) to an executable file (.exe), open a command prompt window and navigate to the Debug directory where your compiled executable is stored by default. (My Debug directory is C:\VS\ArcUserArticle\Geoprocessing\GpExample\GpExample\bin\Debug) Run the executable. Listing 5 shows how to run the executable (by navigating to the directory, typing the executable's name, then pressing Enter) and the results you will get. Compiling an executable and running it from the command line is a common method of running .NET console programs. You can easily schedule processes this way through Windows Scheduled Tasks or an enterprise scheduler. Performing Basic Geoprocessing TasksNow that we have created a Geoprocessor object, set up a workspace on our file geodatabase, and iterated through the feature classes in the geodatabase, let's see how to set up and perform some basic geoprocessing tasks with ArcToolbox tools. First, it is important to note that any geoprocessing tool available to you in ArcToolbox is available to you programmatically through .NET—all you need to do to get access to a tool is add a reference to its assembly, or toolbox.
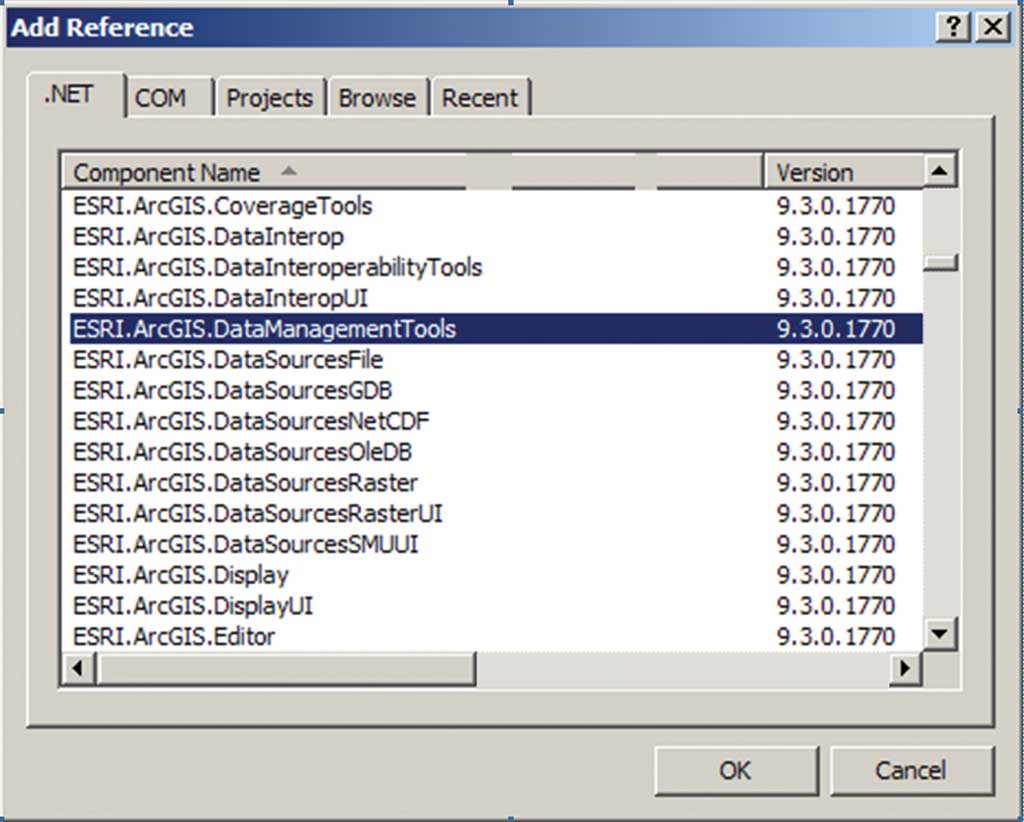
To do this, in the Solution Explorer in Visual Studio, right-click the References folder of your project and select Add Reference. Scroll down until you start seeing Esri assemblies. What you get should resemble Figure 1. The assembly Esri.ArcGIS.DataManagementTools is the assembly that houses all the tools available to us in the Data Management toolbox in ArcToolbox. To expose assemblies for use in your solution, you would add references to Esri.ArcGIS.Geoprocessor, Esri.ArcGIS.Geoprocessing, Esri.ArcGIS.DataManagementTools, and Esri.ArcGIS.AnalysisTools, then add them using directives for each assembly to your program file. To illustrate how to programmatically set up tool inputs and outputs, let's perform some relatively simple geoprocessing tasks—selecting, clipping, buffering, and exporting—on our file geodatabase feature classes. Along the way, we'll also do some logging to a text file. For more information on accessing the geoprocessor from C#, see the post "Overview of accessing geoprocessing functionality" at the ArcGIS Resource Center," both available from the ArcGIS Resource Center for Geoprocessing. Listing 6 is a program that performs basic geoprocessing tasks on feature classes in the ArkansasData file geodatabase. This listing is verbosely commented, so I won't go into the details. Essentially, we go into the streams polyline feature classes, select all the perennial streams that intersect the city limits polygons, clip those streams to the city limits, sum up the stream lengths for each new feature class, and write those results to a text file. If you need to process every feature class in your geodatabase, you could employ the code in Listing 4 and use it to dynamically fetch the list of feature classes for iteration at run time instead of explicitly listing your inputs as is done in Listing 6 on lines 27�28. Working with ArcSDESo far we have worked with file geodatabases, but what about ArcSDE (both Enterprise and Workgroup)? Let's dig a little deeper into using ArcObjects in .NET by connecting to instances of Enterprise ArcSDE running on SQL Server (2005, in this case) and Workgroup ArcSDE running on SQL Server Express 2008. (Apologies to those working in Oracle shops: I don't have access to an Oracle ArcSDE instance to test against.) For more information on connecting to geodatabases (including Oracle ArcSDE). Connecting to ArcSDE generally entails setting up your connection properties, using those properties to open up a workspace within the geodatabase, then opening a feature dataset within that workspace. Listing 8 shows how to connect to Enterprise ArcSDE on SQL Server 2005 and Workgroup ArcSDE on SQL Server Express 2008. Note the similarities in the connection properties between Enterprise and Workgroup ArcSDE. Also note that opening up the database for either instance uses the same code—only different connection properties. If you are unsure of any of the connection properties you need, ask your database administrator. Working with ArcGIS ServerThe Esri.ArcGIS.Server assembly exposes hundreds of methods we can use to interact with ArcGIS Server. Using ArcObjects, we can connect to ArcGIS Server and get a list of running services. Listing 9 is a simple example showing how to connect to an ArcGIS Server instance and return a list containing each service along with its status (as illustrated in Listing 10). Keep in mind that the account this process runs on must have the required privileges to access your ArcGIS Server instance. A script written by Sam Berg of Esri, called AGSSOM, is an excellent example of how to use ArcObjects to more fully interact with ArcGIS Server. AGSSOM can be found on the Esri ArcScripts site (arcscripts.esri.com/details.asp?dbid=16293). Documentation, Help, and Additional ResourcesEsri provides a wealth of information to help you build .NET applications. The ArcGIS Resource Center for Geoprocessing is your one-stop shop for searching for reference materials, forum postings, and sample code. The Developer Resources section will provide you with the ArcObjects API reference, the geoprocessing tool reference, and the Geoprocessing Object Model Diagram (OMD). Of course, the ArcGIS Engine Forums are always a good place to search for help and sample code. Lastly, the .NET Framework Developer Center on the Microsoft Developer Network (MSDN) (msdn.microsoft.com/en-us/library/aa139615.aspx) is a great place to find reference materials for anything related to general .NET development. ConclusionThere is no denying that the .NET platform is complex and daunting when viewed by a beginning programmer. That said, I truly hope that the samples provided here have shown that creating simple geoprocessing programs with .NET is within your reach. No matter the data format used—from shapefiles to file geodatabases—and whether you are working with ArcSDE or ArcGIS Server, the Esri geoprocessor and .NET are a powerful and well-tested combination that can automate both simple and incredibly complex processes. For more information, contact Chad Cooper About the AuthorChad Cooper, who has been working in GIS for seven years in technician and analyst positions, has worked with Southwestern Energy Company for the last five years. Cooper holds a bachelor's degree from Mississippi State University and a master's degree from the University of Arkansas, both in geology. He realized he could both have fun and earn a living in working with GIS. A huge fan of the Python programming language for several years, Cooper wrote his first .NET program two years ago. Cooper lives in Texas with his beautiful wife and two handsome, lively young boys. In his free time, he enjoys fishing with his boys, photography, and occasionally riding a bike. |