If you’re familiar with editing data using ArcGIS Online, you may already know that Map Viewer offers out-of-the-box tools that allow you to do things like update attribute values or add new features to the map. This article will make you aware of the latest capabilities that make editing and managing data even easier by exploring five tips you can use right away to improve your editing experience in Map Viewer.
-
Enable Editing at the Map Level
-
Create Views
-
Author Forms
-
Save Forms
-
Save Group Layers
1. Enable Layer Editing at the Map Level
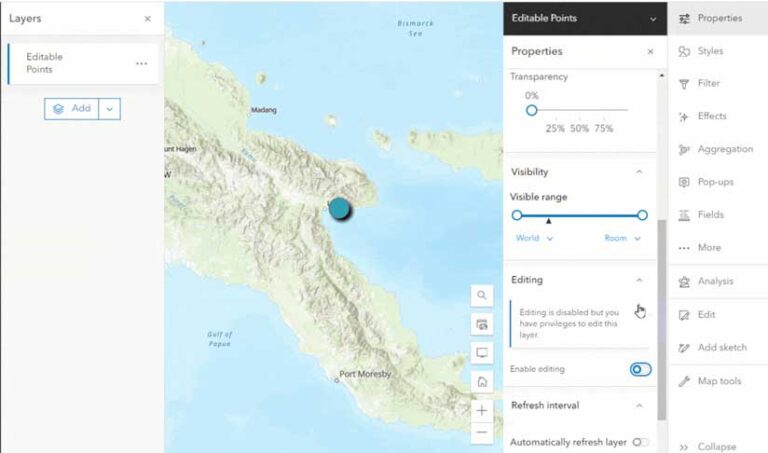
As a data manager, you know you can enable editing for a layer on the Settings tab of the layer item details page. But did you know that you can enable editing for layers at the map level? For each editable layer in a map, you can disable editing for that layer in that map. This is especially useful when your map includes editable layers that you want to use to provide context, such as roads or addresses, but you don’t want map users to edit those layers.
To enable editing for a layer in the map, follow these steps:
- Click to select the layer. The Properties panel will open in the pane on the right side of the screen.
- Scroll down in the Properties panel until you reach the Editing section.
- In the Editing section, find a toggle switch to enable or disable editing for the selected layer.
- Toggle the switch to the desired position. If the switch is turned on, editing is enabled. If the switch is turned off, editing is disabled.
Note: Disabling editing in the map doesn’t affect the editing settings for the layer itself; it only applies to the layer in this map.
2. Create Views for More Flexibility
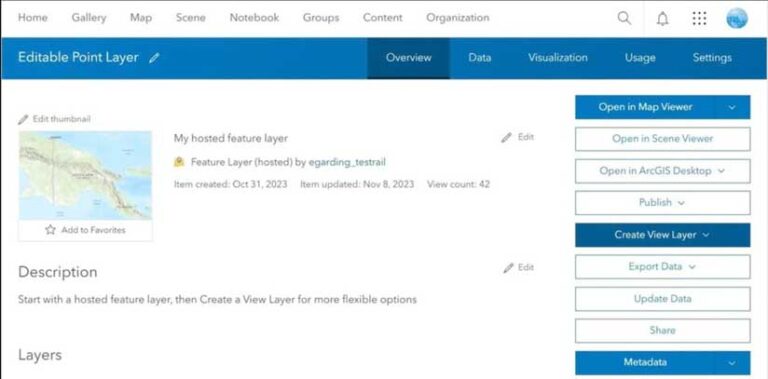
Data can serve many purposes. In some cases, you create a dataset for editing, while in other cases, you simply want people to view or interact with the data on a map. There are times when you may want a single dataset to fulfill both purposes. That’s when you can use hosted feature layer views.
Using views gives you options. They allow you to create separate views of the same layer for different purposes. For example, you can create a public-facing dashboard for viewing data that uses a view that’s not editable and create a separate map for editing that uses an editable view. Both views point to the same layer, so there is no need to reconcile edits or manage multiple versions of the same dataset.
When creating views, you define the sharing level and editing settings independently from the settings of the hosted feature layer. You can create view layers on the layer’s item details page. Read the “Introducing the new create and update view layer experiences” blog post for detailed information on creating views.
3. Author Forms for Intuitive Editing Workflows
Creating a form tailored to fit a specific workflow can help make editing data easier and more efficient. You probably know Field Maps Designer provides a user-friendly form authoring experience with Form Builder. What you may not know is that Form Builder is also part of Map Viewer.
To get started creating your own custom forms in Map Viewer, follow these steps:
- Select your editable layer in the table of contents.
- Click Forms, located on the Settings (light) toolbar.
- Form Builder opens in a new window. This is where you can customize the form for your layer.
You can customize forms as much or as little as you like. You can order fields; format fields with tips or different input types; calculate values using ArcGIS Arcade expressions; and control the requirements, visibility, and editability of fields. Using forms ensures that the necessary data is organized and presented in a logical manner. This reduces the time and effort required to complete editing tasks. Simply put, a well-designed form can make editing easier.
See these blog posts, “Forms aren’t just for ArcGIS Field Maps anymore” and “From the Smart Editor to Smart Forms,” to learn more ways to use forms.
4. Save and Reuse Forms
When you author a form in a map and save the map, the form is saved within the map. If you plan to use the same layer in a different map, you can reuse the form you already created. When you add the layer to a new or existing map, the form is ready to go, saving you valuable time.
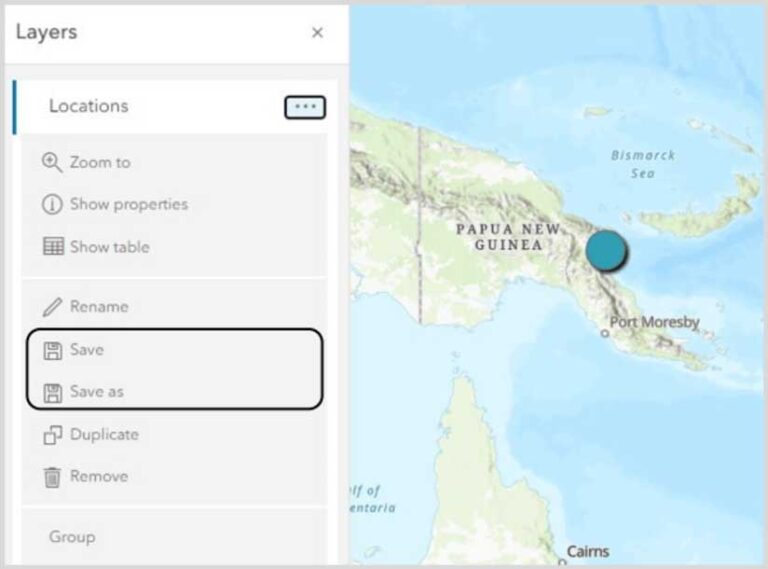
To save a layer,
- Click the Options menu (three dots) next to the layer name.
- From the drop-down menu, click Save or Save As—depending on your needs. The layer will be saved along with all the properties you configured in the map, including pop-ups, symbology, and labels as well as forms.
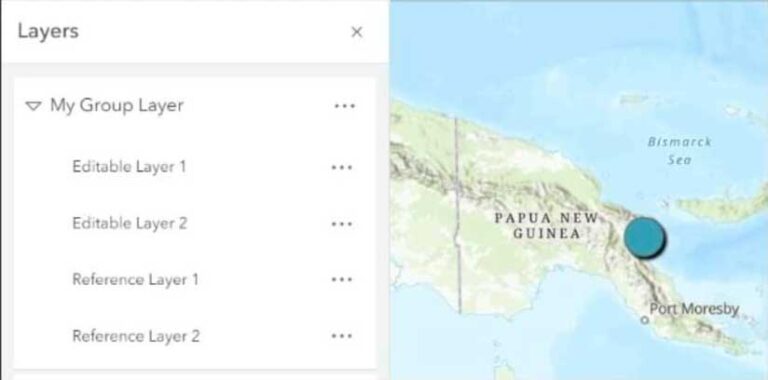
5. Save and Reuse Group Layers
When you’re managing an editing project with multiple maps, those maps may require some of the same layers. In an editing workflow, you could have a set of editable layers and helpful reference layers to provide context. How do you avoid adding and configuring each of these layers in new maps? One option is to save this set of layers as a group layer. With the October 2023 update of Map Viewer, you can create, save, and reuse your own group layers.
When you save a group layer, it preserves the properties you configured on each layer, including forms, pop-ups, symbols, and editing settings. Everything is in place when you add the group layer to new or existing maps. This saves you loads of time when creating new maps using the same set of layers.
Summary
The time-saving tips in this article will help you create more streamlined editing workflows and make editing in Map Viewer even easier. Visit Esri Community to provide feedback.
Note: Some tips mentioned in this article—such as enabling editing for a layer or authoring forms—require appropriate permissions and privileges.
About the author