
With ArcGIS Field Maps, you can collect and update your authoritative data wherever your work takes you—be that inside, outside, online, or offline. In this tip, you’ll learn the basics of data collection using a map and form in the Field Maps mobile app.
The map and form referenced in this blog post were created using the Field Maps Designer web app. To follow along, first complete the following tip: Create a Map with ArcGIS Field Maps
Step 1: Download ArcGIS Field Maps on your mobile device. Field Maps is available on Google Play for Android devices and the App Store for iOS devices.
Note: Field Maps is also supported on Windows with Windows Subsystem for Android. For more information, see FAQ: Is Field Maps supported on Windows?
Step 2: Open the Field Maps app and sign in to your ArcGIS account. Make sure your version of the Field Maps app is up-to-date and install the latest version if necessary.
Step 3: Tap the Park Asset Inventory map in the Maps list to open it. When prompted, allow Field Maps access to your location.

You can collect your example data anywhere, but if you are able, walk to a nearby park. Before you start collecting data, you’ll change the basemap so it displays satellite imagery. This can be a helpful reference when adding new data to a map.
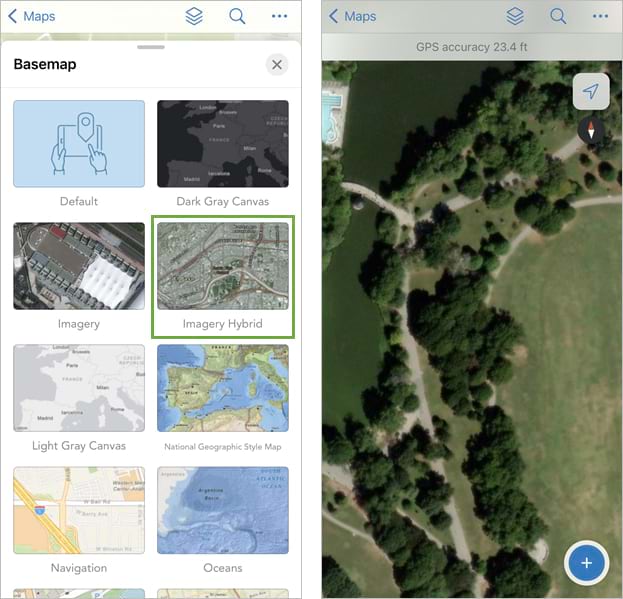
Step 4: Tap the three dots in the upper right corner to access the overflow menu, then tap Basemap.

Step 5: From the list of basemaps, select Imagery Hybrid.
The basemap now displays satellite imagery of the park.
Step 6: Walk to a park amenity, such as a picnic bench, and tap the Add (+) button in Field Maps to start a new data collection.
Step 7: Under Amenities, tap New Feature to open the form configured for the Amenities layer.
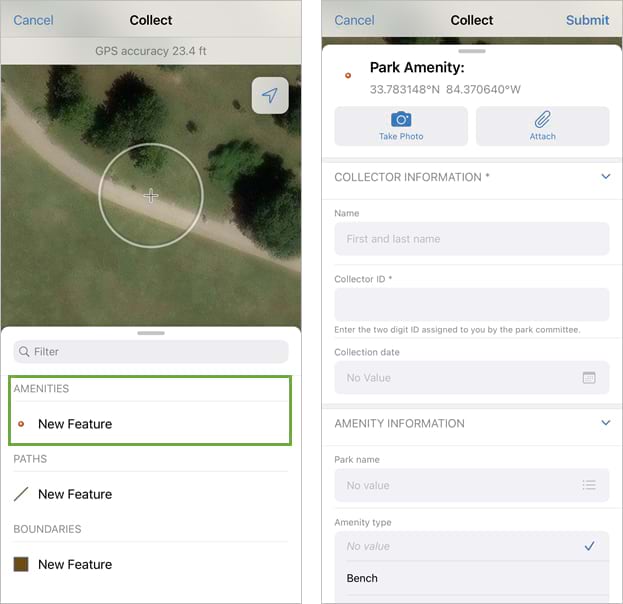
Step 8: Tap Take Photo to take a picture of the park amenity, then tap Use Photo to attach it to the feature.
Adding photos, videos, and documents to a feature can provide important context when reviewing data after it’s been collected.

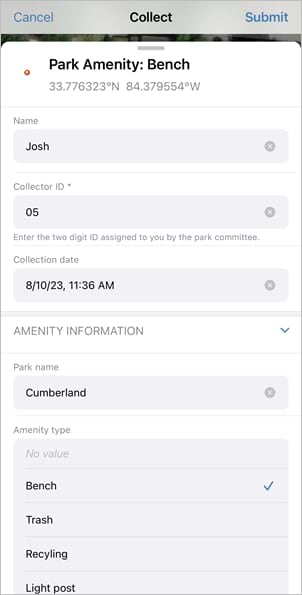
Step 9: Fill out the form with the following example data (or make up your own):
- Name: Enter your name.
- Collector ID: Enter 05.
- Collection date: Enter today’s date.
- Park name: Select Cumberland.
- Amenity type: Select Bench.
- Has damage: Tap the switch so the input is Yes.
Step 10: Once you’ve filled out the form, tap Submit.
The new feature and its attribute information (that you provided in the form) are added to the layer and appear on the map.
Imagine you see another damaged bench in the park. Rather than fill out the form for a new feature, you can copy the feature you just added along with its attributes.
Step 11: Tap the feature you just added to open its pop-up.
Step 12: Tap Copy Attributes.
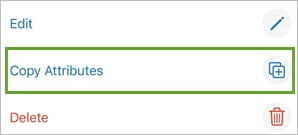
The location target and form appear. The form includes all the attribute information copied over from the initial park bench feature.
Step 13: Center the location target on the location of the new park bench and tap Add Point, and then tap Submit.
Next, you’ll collect a path in the park.
Step 14: Walk to the start of a sidewalk in the park and tap Add (+).
Step 15: Under Paths, tap New Feature.
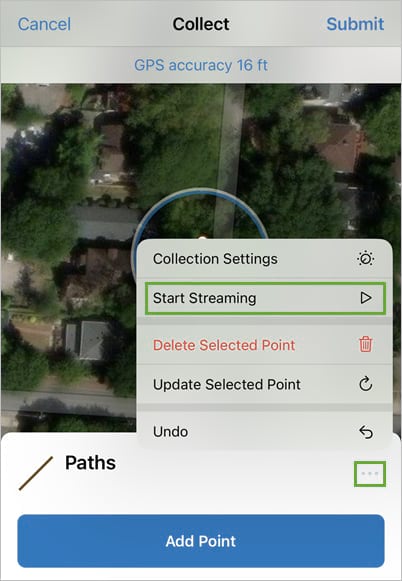
To collect the path, you’ll use a feature called streaming. When you start streaming, you can walk along the path while Field Maps automatically drops vertices that form the line feature you’re collecting.
Step 16: Tap three dots on the right side to access the overflow menu, then tap Start Streaming.
Step 17: Walk along the path, and it’s drawn on the map as you go.
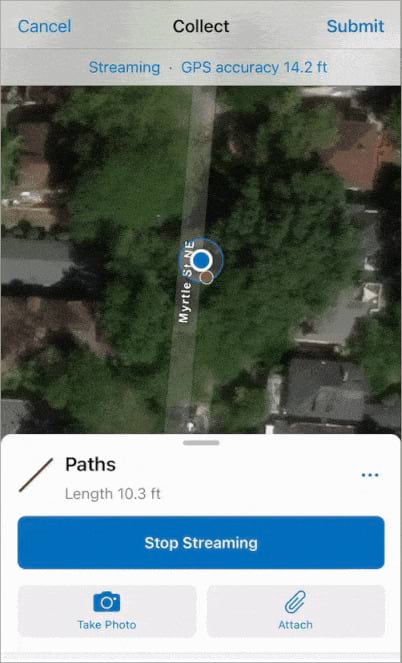
Step 18: Once you’ve finished walking along the path, tap Stop Streaming.
Step 19: Tap Submit.
On your own, you can capture more information about your park to add features to your map. Once you’re done, the park inventory is complete, and the data can be viewed throughout ArcGIS maps and apps.