
You can now create a map for data collection using the ArcGIS Field Maps web app. In this tip, you will learn to define layers enabled for editing, configure their settings, and incorporate everything into a new map. This means that you can create a map, build a form, and share it with mobile workers—all without leaving ArcGIS Field Maps. This workflow is perfect for getting started with a new data collection project that involves collecting point, line, or polygon features.
To do this tip, you will need an ArcGIS Online account with access to the ArcGIS Field Maps web app. To put the tip into practice, you will also need the ArcGIS Field Maps app on a smartphone or other mobile device, which can be downloaded for free from any app store.
The example used in this tip is an asset inventory project for a town’s park infrastructure team. You need to quickly create a map that your team can use to collect information, such as park amenities, paths, and boundaries. You’ll use the ArcGIS Field Maps web app to create the map and layers needed for your project.
Explore Map Creation in the ArcGIS Field Maps Web App
Step 1: Browse to https://www.arcgis.com/apps/fieldmaps and sign into your account.
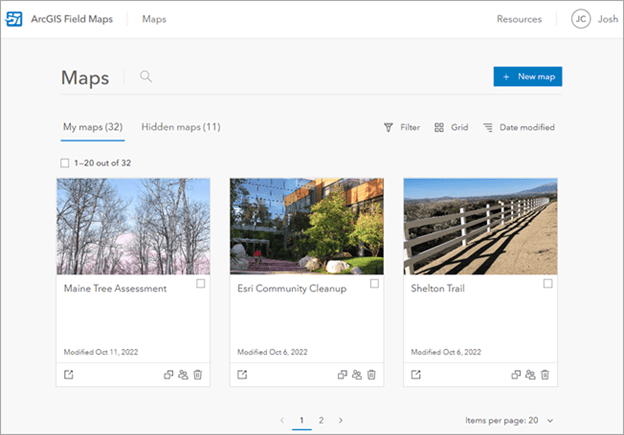
The Maps page opens, displaying all the maps you own or have privileges to edit.
Step 2: Click + New map.

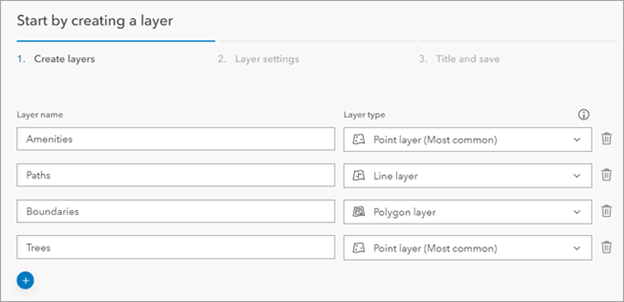
The New map page appears with on-screen instructions to guide you through the map creation process. On the Create layers tab, you’ll define the layers used for data collection.

Step 3: Under Layer name, replace Layer_1 with Amenities.
Keep the default Point layer type so that when mobile workers collect park amenities, they appear as points on the map. To learn about the different layer types and when to use them, click the Information button next to Layer types.
Step 4: Click the Add button three times to add three new layers.
Step 5: For these layers, enter the following information:
- Layer name: Paths | Layer type: Line
- Layer name: Boundaries | Layer type: Polygon
- Layer name: Trees | Layer type: Point
Your map should have four layers in total.
Step 6: Once you’ve added each layer, click Next to open the Layer settings tab.
Here, you can toggle settings for high-accuracy receivers used in data collection and the modeling and analysis of 3D spaces. Since neither are relevant in this example, leave each toggle button disabled.

Step 7: Click Next to open the Title and save tab.
Step 8: Give your map a title that mobile workers will recognize when opening the map in the field. For example: Park Asset Inventory.
Here, you can also change the feature layer title if you want. The feature layer is the item in ArcGIS Online that contains all the layers you added to the map. The default title is the layer name for the first layer you added.
Step 9: Click the Folder drop-down menu to select where to save the map. For this example, create a new folder and title it Park Inventory.
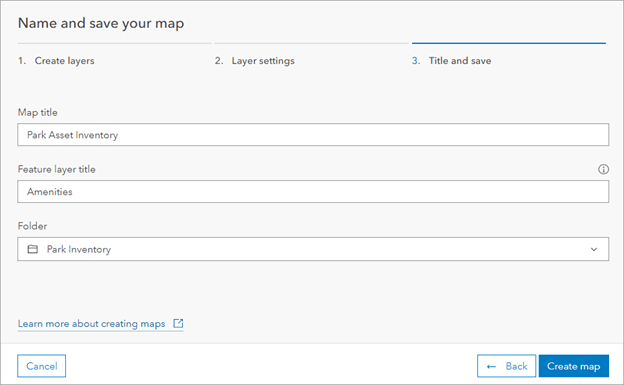
Step 10: Review all the information you’ve provided. When you’re ready, click Create map.
The new map and layers are created, saved, and added as items to your organization. Now that you have created a map, the Forms page displays, where you can build the forms used for data collection.
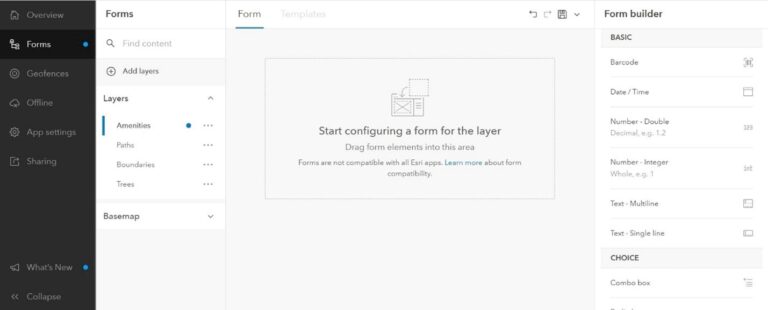
Configure a Basic Form
Basic form elements allow mobile workers to input text, numbers, dates, and scan barcodes when filling out the form. For this example, you will add elements allowing mobile workers to collect information about park amenities.
Step 1: Drag the Text – Single line element to the center of the page.
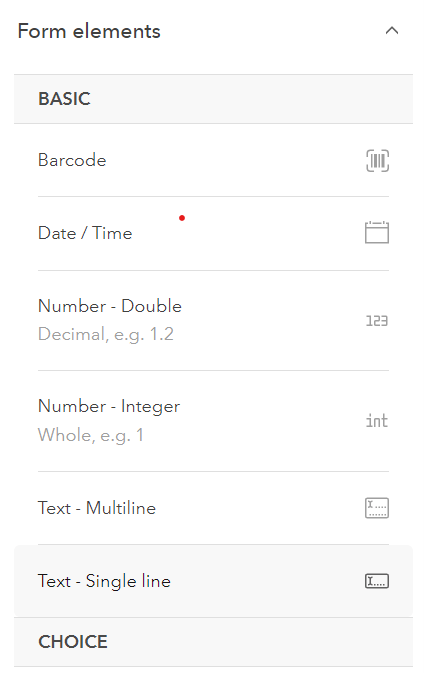
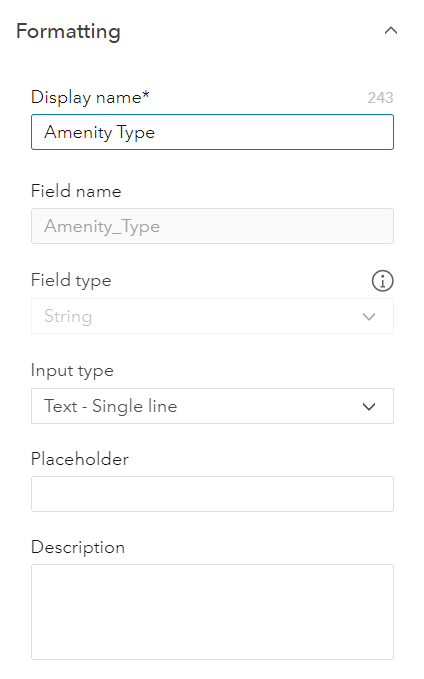
Step 2: Fill out the Display name field with a clear prompt. For example: Amenity Type. Click the save icon at the top of the form builder.
The field name is derived from the display name (but can be changed), and the field type is derived from the form element you selected.
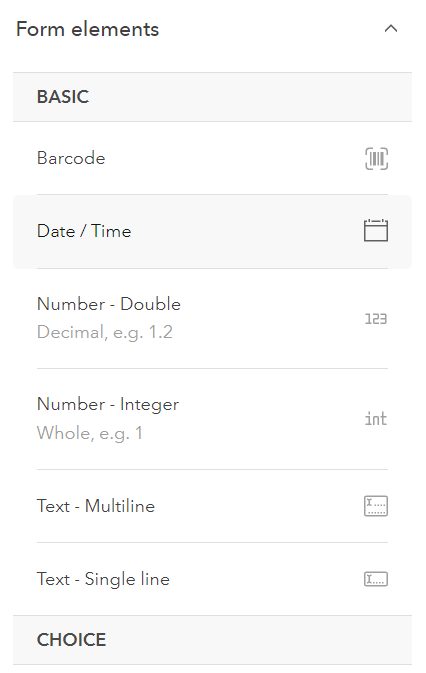
Step 3: Drag the Date/Time element to the center of the page.
Step 4: Again, fill out the Display name field with a clear prompt, in this case: Collection Date. Click the save icon.
Now that you have added basic form elements, you or a mobile worker using this map will be able to open the Field Maps app and see the form you created.
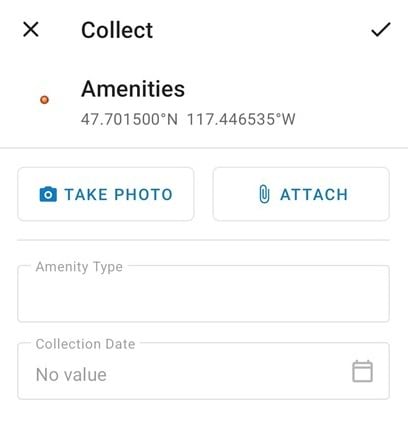
Step 5: Open the Field Maps app on your smartphone or other mobile device. Sign into your ArcGIS account, then tap Amenities to open the map you created.
Step 6: Tap the blue + circle in the bottom-right corner to add a new feature.
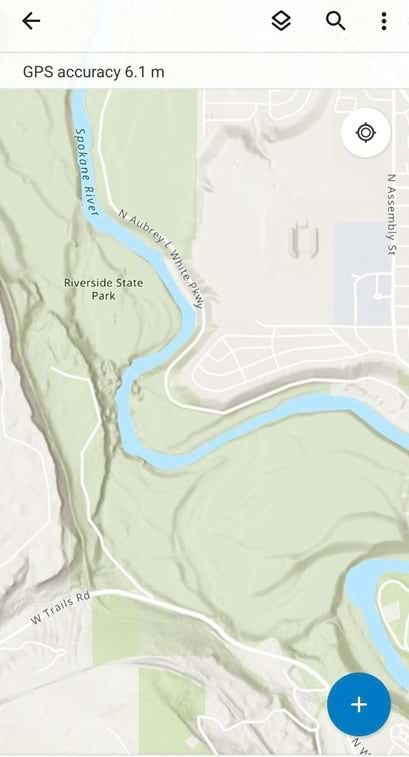
Step 7: Scroll down to see the form you created in the Field Maps App. Here, a mobile worker will be able to input data about the type of amenity and the date the data was collected.
You can also include other form elements so workers can add information such as the condition of amenities such as trash cans, water fountains, or park benches.
Once you have configured a form for each layer and shared the map, mobile workers are ready to begin collecting data in the field.
For more information, see: