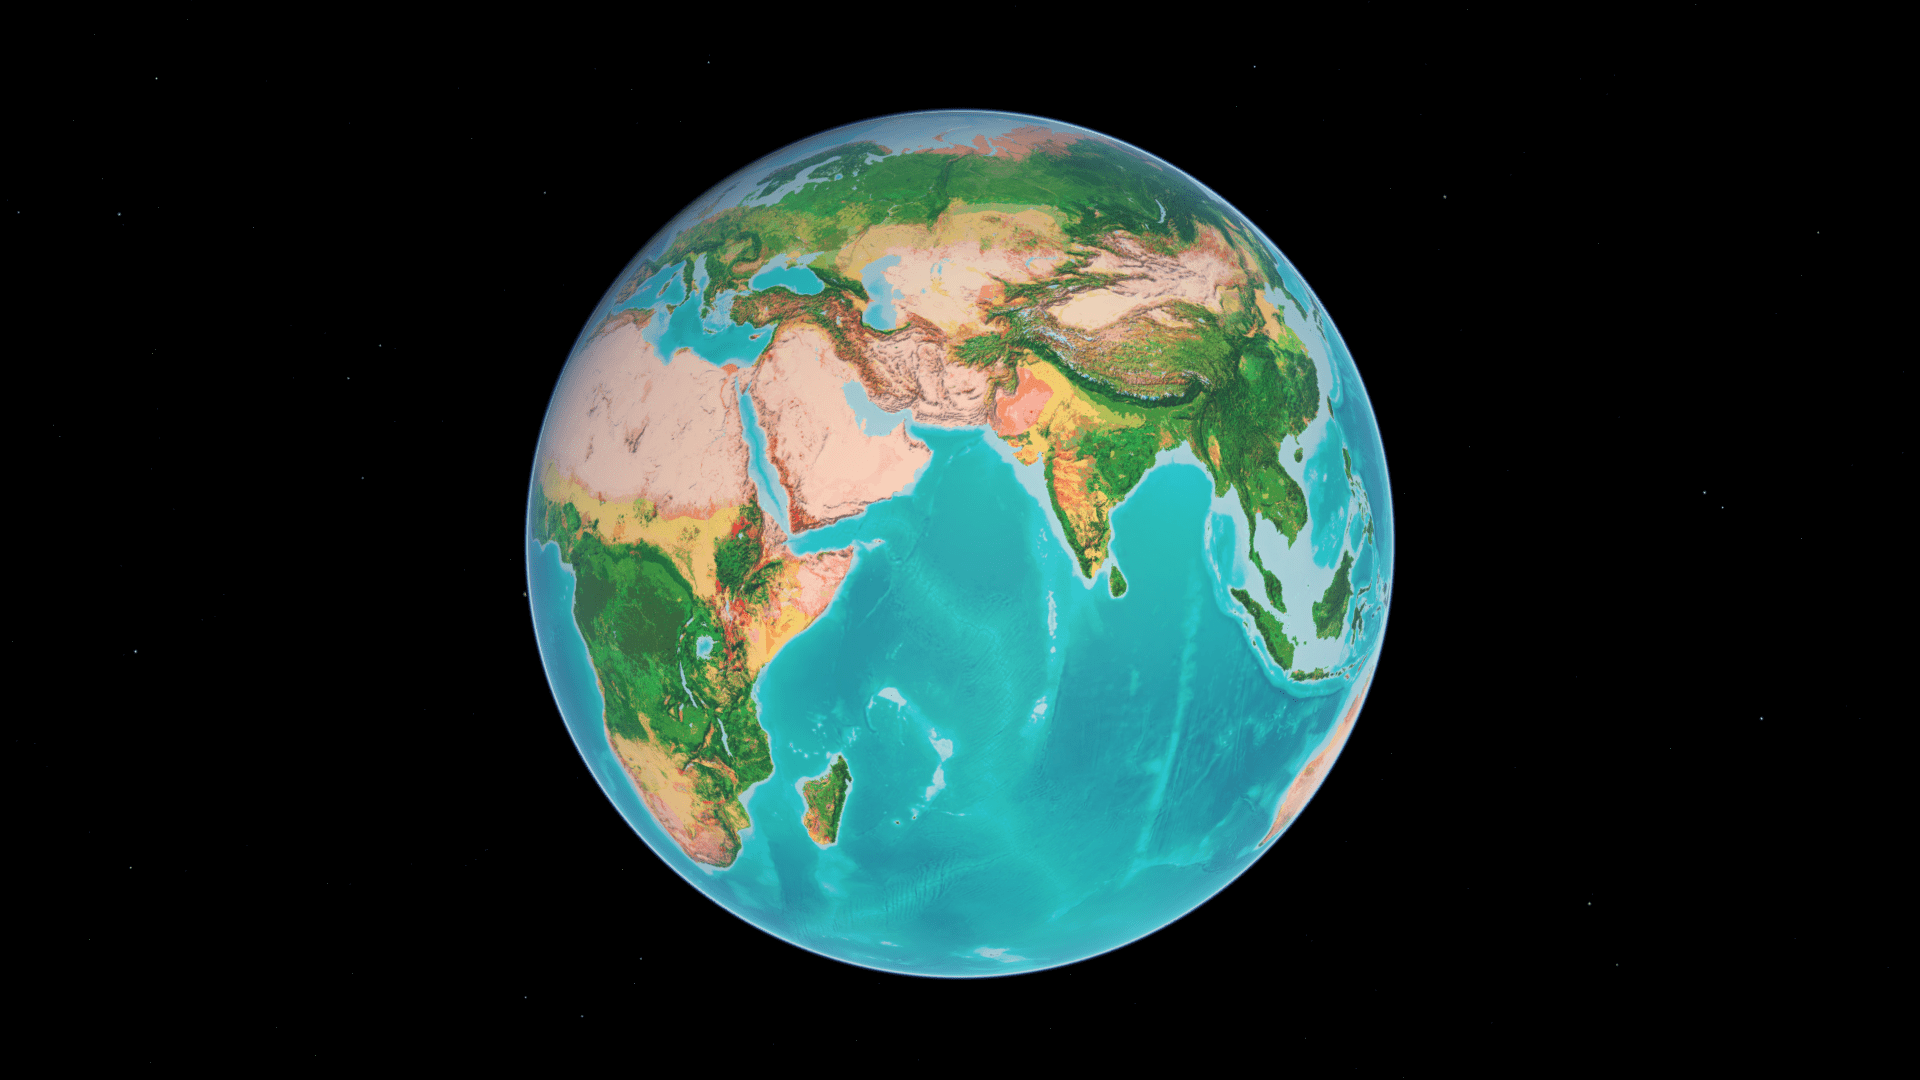
Rotating terrestrial globes have been around for centuries, and it’s easy to see why people have always found them useful—a globe can provide broader perspective on the world, often with topography and bathymetry you can see and touch.
Fortunately, using Scene Viewer in ArcGIS Online, ArcGIS Living Atlas of the World, and 3D Viewer, it’s simple to mimic this effect virtually and create an automatically rotating globe of your own.
Scene Viewer is used to author, view, and interact with 3D scenes. ArcGIS Living Atlas of the World includes authoritative live feeds and other global content. And 3D Viewer is an ArcGIS Instant Apps template that lets you showcase a scene using easily configured tools.
Learn to make your own rotating globe in this tip.
Make a Rotating Globe
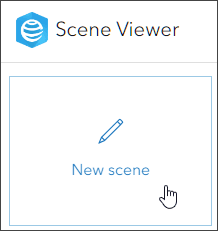
Step 1: Sign in to your ArcGIS Online account and open Scene Viewer. To begin, choose New scene.
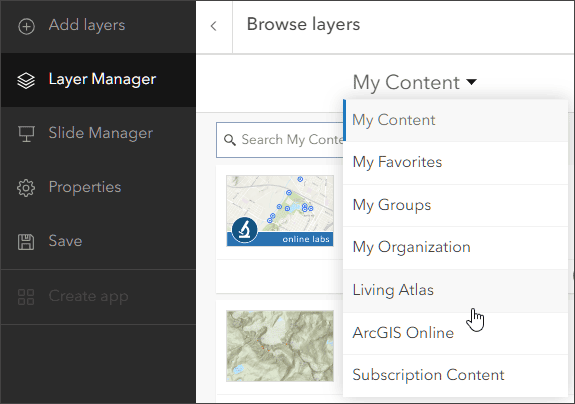
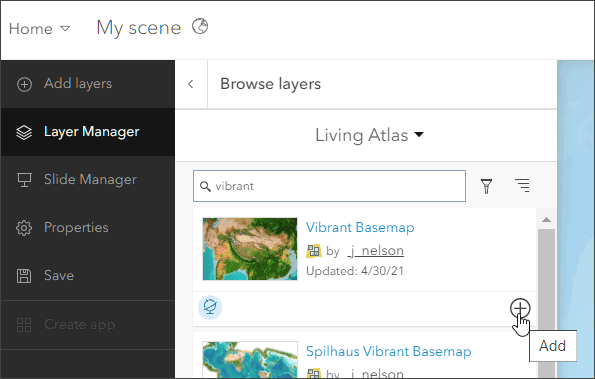
Step 2: On the Designer (dark) toolbar, click Add layers (+), then click Browse layers.
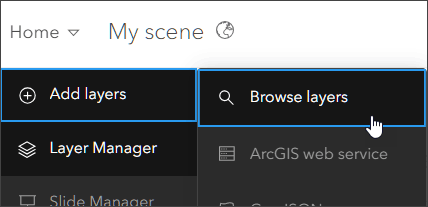
Step 3: Go to the Browse layers drop-down and choose Living Atlas.
Step 4: For this tip, we’ll use the Vibrant Basemap, which is actually a tile layer found in ArcGIS Living Atlas. Type “vibrant” in the search box and locate the layer. Click the plus sign (+) to add the layer to your scene.
Tip: You can also search for layers on the ArcGIS Living Atlas website. Use the Browse tab to search, filter, and find layers to begin creating your scenes.
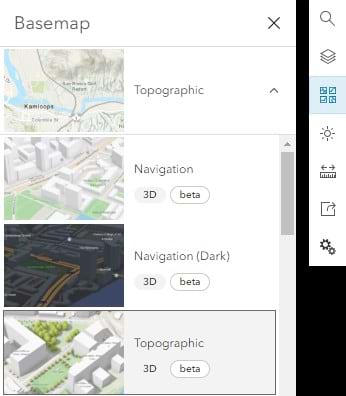
The Vibrant layer covers the entire globe but is not labeled. You can improve the functionality of your scene by using a reference layer or 3D labels found in the Scene Viewer basemap gallery.
Step 5: From the light toolbar, click the Basemap tool, then click the drop-down menu. Different basemaps will add different labels. The Enhanced Contrast basemap, for example, will add draped reference layer labels to the scene. For this tip, choose Topographic (3D) to add 3D Places and Labels.
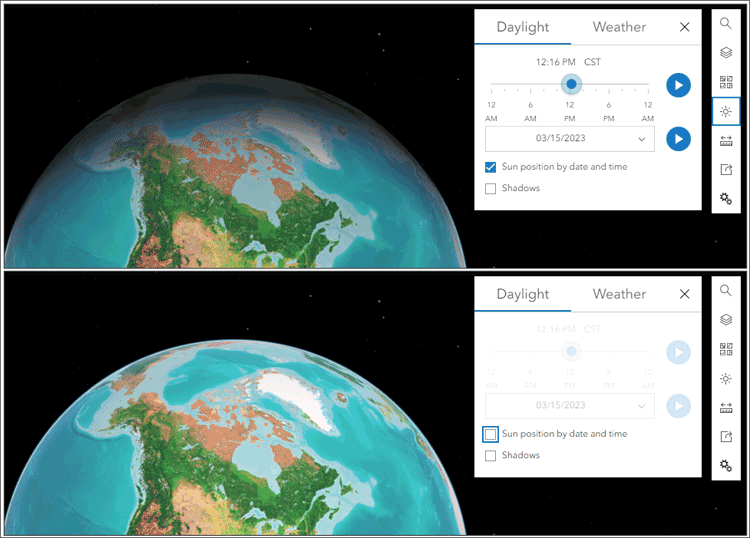
Tip: By clicking Daylight/Weather on the light toolbar, you can experiment with turning off Sun position by date and time (which is on by default). This will influence the appearance of the globe.
Step 6: Save your work.
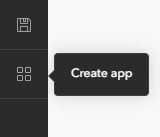
Step 7: On the Designer (dark) toolbar, click Create app. Select Instant Apps.
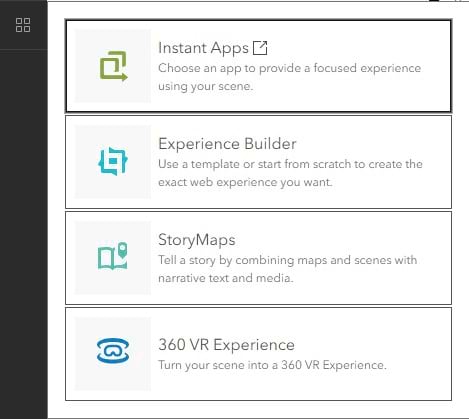
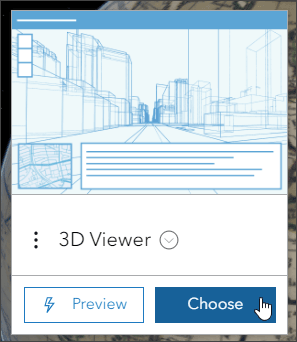
Step 8: From the Instant Apps gallery page, choose 3D Viewer.
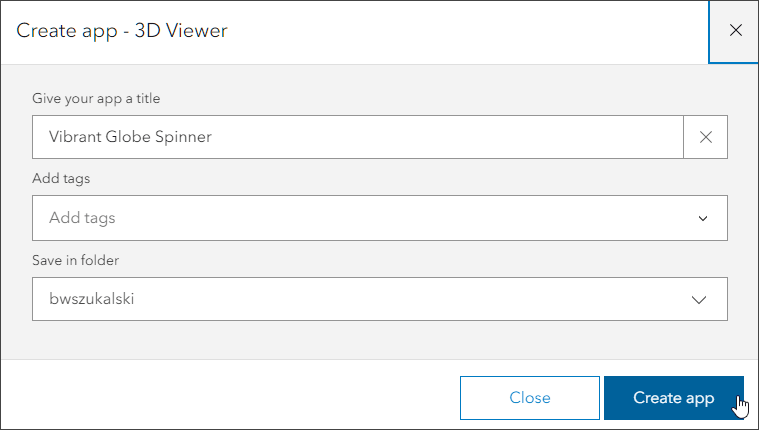
Step 9: In the Create app pane, name your app Vibrant Globe Spinner and, optionally, add tags. Then click Create app.
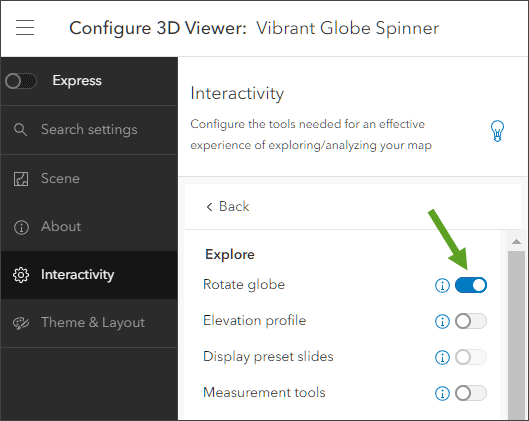
All Instant Apps templates open in the express setup mode, providing access to essential settings. One of the tools not found in express mode for 3D Viewer is the Rotate globe tool.
Step 10: To locate and enable the Rotate globe tool, point to the configuration (dark) panel, click Search settings, type in “rotate,” then choose Rotate globe.
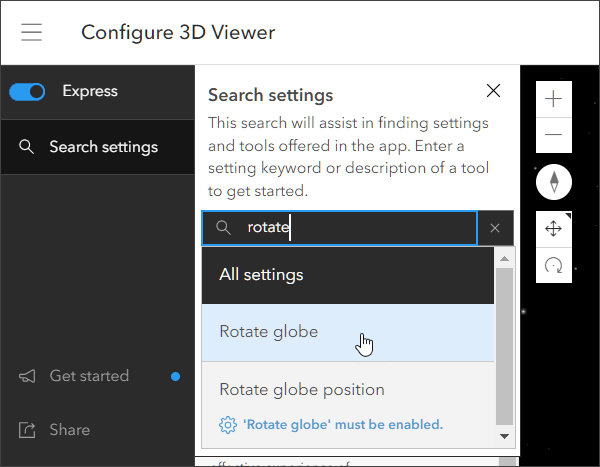
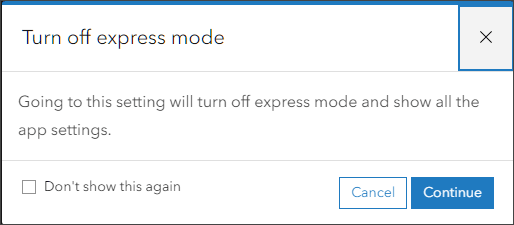
Step 11: The Rotate globe tool is available in full setup mode. Click Continue to acknowledge that you want to turn off express mode and enter full setup mode.
For more information, see Express and full setup modes.
Step 12: Enable the Rotate globe tool.
Step 13: Click Publish when finished. Confirm when prompted, adjust the sharing settings as desired, then click Launch to view the configured 3D Viewer app.
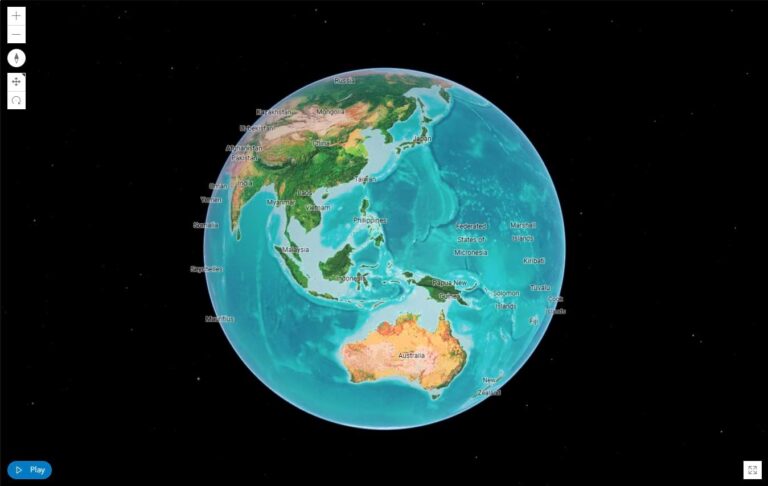
You’ve now created an autorotating globe app. When the app is opened, the globe will automatically rotate. Click Pause/Play to stop and resume the rotation.
Open the Vibrant Globe scene to review the steps above, or open the Vibrant Globe 3D Viewer app.
More Information
- Sample globe gallery (group content)
- Get started with Scene Viewer (help)
- ArcGIS Living Atlas of the World (website)
- ArcGIS Instant Apps (website)
- Choose global or local (help)
- How to design and animate a globe in ArcGIS Pro with ArcGIS Living Atlas content (ArcGIS Blog)