A web map in ArcGIS Online is an interactive map that displays geographic information to tell stories and answer questions. Web maps are built from layers—or geographic data used to create maps—and can share information with a wide audience. Geographic data represented as points, lines, or polygons, are called features and are grouped in feature layers.
In this tutorial, you’ll create an interactive web map of the five highest mountains in the world. First, you’ll create a feature layer from a .csv file. Then, you’ll add the feature layer to a web map. You can create this web map in ArcGIS Online or ArcGIS Enterprise.
In this tutorial, you will learn to:
- Create a feature layer from a .csv file.
- Set a basemap for your web map.
- Add your layer to the web map.
Requirements
- Publisher or Administrator role in an ArcGIS organization: ArcGIS Online (see options for software access or learn about free ArcGIS education licensing for K–12 instructional use) or ArcGIS Enterprise (learn more).
Prepare the Mountain Data
First, you will prepare a text file with data about five of the highest mountains in the world. Then, you will create a feature layer from this file.
You can create a feature layer from data saved in a comma-separated values (CSV) format text file (.csv). A .csv file has a row of data for each item with a comma between each value. The first row in the file contains the field names, which describe the type of data in the file.
The fields you’ll include for this file are:
- The lat field, which contains the latitude of the mountain.
- The lon field, which contains the longitude of the mountain.
- The name field, which contains the name of the mountain.
- The range field, which contains the parent range of the mountain.
- The elev_ft field, which contains the elevation of the mountain in feet.
- The thumb_url field, which includes a URL to an image of the mountain.
- The photo_credit field, which includes a URL to the source of the image of the mountain.
To appear on a map, each real-world item detailed in the file must include location data. In your text file, the first two fields contain the latitude and longitude of each mountain. After the first row, each subsequent row contains data about one mountain. Your text file will contain six rows: one for the field names and five for the mountains you’ll map.
1. Copy the following data into a plain text editing or spreadsheet application, such as Notepad, Notepad++, Microsoft Excel, or a similar program:
Note: If you use Microsoft Excel, you need to use Paste Special tool and choose Paste As Text to separate the rows on the sheet. Also, you must be sure to save the file as a .csv.
lat,lon,name,range,elev_ft,thumb_url,photo_credit
27.9879,86.9250,Mt. Everest,Himalayas,29029,https://upload.wikimedia.org/wikipedia/commons/thumb/d/d1/Mount_Everest_as_seen_from_Drukair2_PLW_edit.jpg/640px-Mount_Everest_as_seen_from_Drukair2_PLW_edit.jpg,https://commons.wikimedia.org/wiki/File:Mount_Everest_as_seen_from_Drukair2_PLW_edit.jpg
35.8825,76.513333, K2Chogori,Karakoram,28251,https://upload.wikimedia.org/wikipedia/commons/thumb/c/c9/Chogori.jpg/640px-Chogori.jpg,https://commons.wikimedia.org/wiki/File:Chogori.jpg
27.7025,88.1475,Kangchenjunga,Himalayas,28169,https://upload.wikimedia.org/wikipedia/commons/thumb/1/19/Kangchenjunga_India.jpg/960px-Kangchenjunga_India.jpg,https://commons.wikimedia.org/wiki/File:Kangchenjunga_India.jpg
27.9626,86.9336,Lhotse,Himalayas,27940,https://upload.wikimedia.org/wikipedia/commons/thumb/7/72/Lhotse-fromChukhungRi.jpg/640px-Lhotse-fromChukhungRi.jpg,https://commons.wikimedia.org/wiki/File:Lhotse-fromChukhungRi.jpg
27.8860,87.0912,Makala,Himalayas,27766,https://upload.wikimedia.org/wikipedia/commons/thumb/1/19/Makalu.jpg/640px-Makalu.jpg,https://commons.wikimedia.org/wiki/File:Makalu.jpg
2. Save the file on your computer with the name mountains.csv.
Open and Save a Map
Next, you will open a map in Map Viewer, change the basemap, and save the map.
1. Sign in to your ArcGIS organizational account or ArcGIS Enterprise account.
2. On the ribbon, click Map. A new map appears with your organization’s default basemap. The map does not currently contain any layers.

First, you will change the basemap. A basemap provides a background of geographic context for the content you want to display on a map.
3. On the Contents (dark) toolbar, click Basemap, then choose Charted Territory Map.
Note: Some ArcGIS organizations may have different default basemaps. If you don’t see the Charted Territory Map basemap, scroll to the end of the list and click Living Atlas. Search for “Charted Territory” and add the Charted Territory Map web map to your list of basemaps.

The basemap changes to Charted Territory.

4. In the Basemap pane, click the “X” to Close.

5. Before you continue, save the map. On the Contents (dark) toolbar, click Save and open, and choose Save as.
The Save map window appears.

6. In the Save map window, for Title, type Map the highest mountains and add your initials.
7. For Tags, type Elevation, Peaks, and Himalayas, and press Enter.
8. For Summary, type Information about the highest mountains in the world.

9. Click Save.
The map is saved to your ArcGIS Online account. Save your web map regularly so you don’t lose any changes.
Add Mountain Data to the Map
You’ll add the mountains.csv file you created earlier to your map.
1. On the Contents (dark) toolbar, click Layers. The Layers pane opens.

2. In the Layers pane, click the down arrow next to Add and choose Add layer from file.

The Add layer window opens.
3. Drag the moutains.csv file from its location on your device onto the Add Layer drop area.

The Add Layer window updates to ask if you would like to create a hosted feature layer from the file or upload the file as an item. A hosted feature layer is a feature layer that is available online through your ArcGIS account.
4. Select Create a hosted feature layer and add it to the map and click Next.

You can publish your maps and data as hosted layers to ArcGIS Online, which will host your layers and the data that populates them.
The window updates to show detected fields in the .csv file.
5. On the Fields page, confirm that the text in the Display name and Type fields is accurate and click Next.
6. On the Location settings page, click the down arrow in the box and select Latitude and Longitude from the drop-down menu. Confirm Latitude is set to the field lat and Longitude is set to the field long. Click Next.
7. On the next page, for Title, replace the existing text with highest mountains, followed by your initials (for example, highest mountains YN). Optionally, you may include Tags and a Summary.
Note: You cannot create two layers in an ArcGIS organization with the same name. Adding your initials to a layer name ensures that other people in your organization can also complete this tutorial. Once a layer has been created, you can rename it in the map to remove your initials, which will not affect the name of the underlying data layer.

8. Click Create and add to map.
The layer is added to the map and to your ArcGIS Online contents list. You can navigate to the item details page of the layer and add or update the layer information. This page shows what the item contains and how to use it.
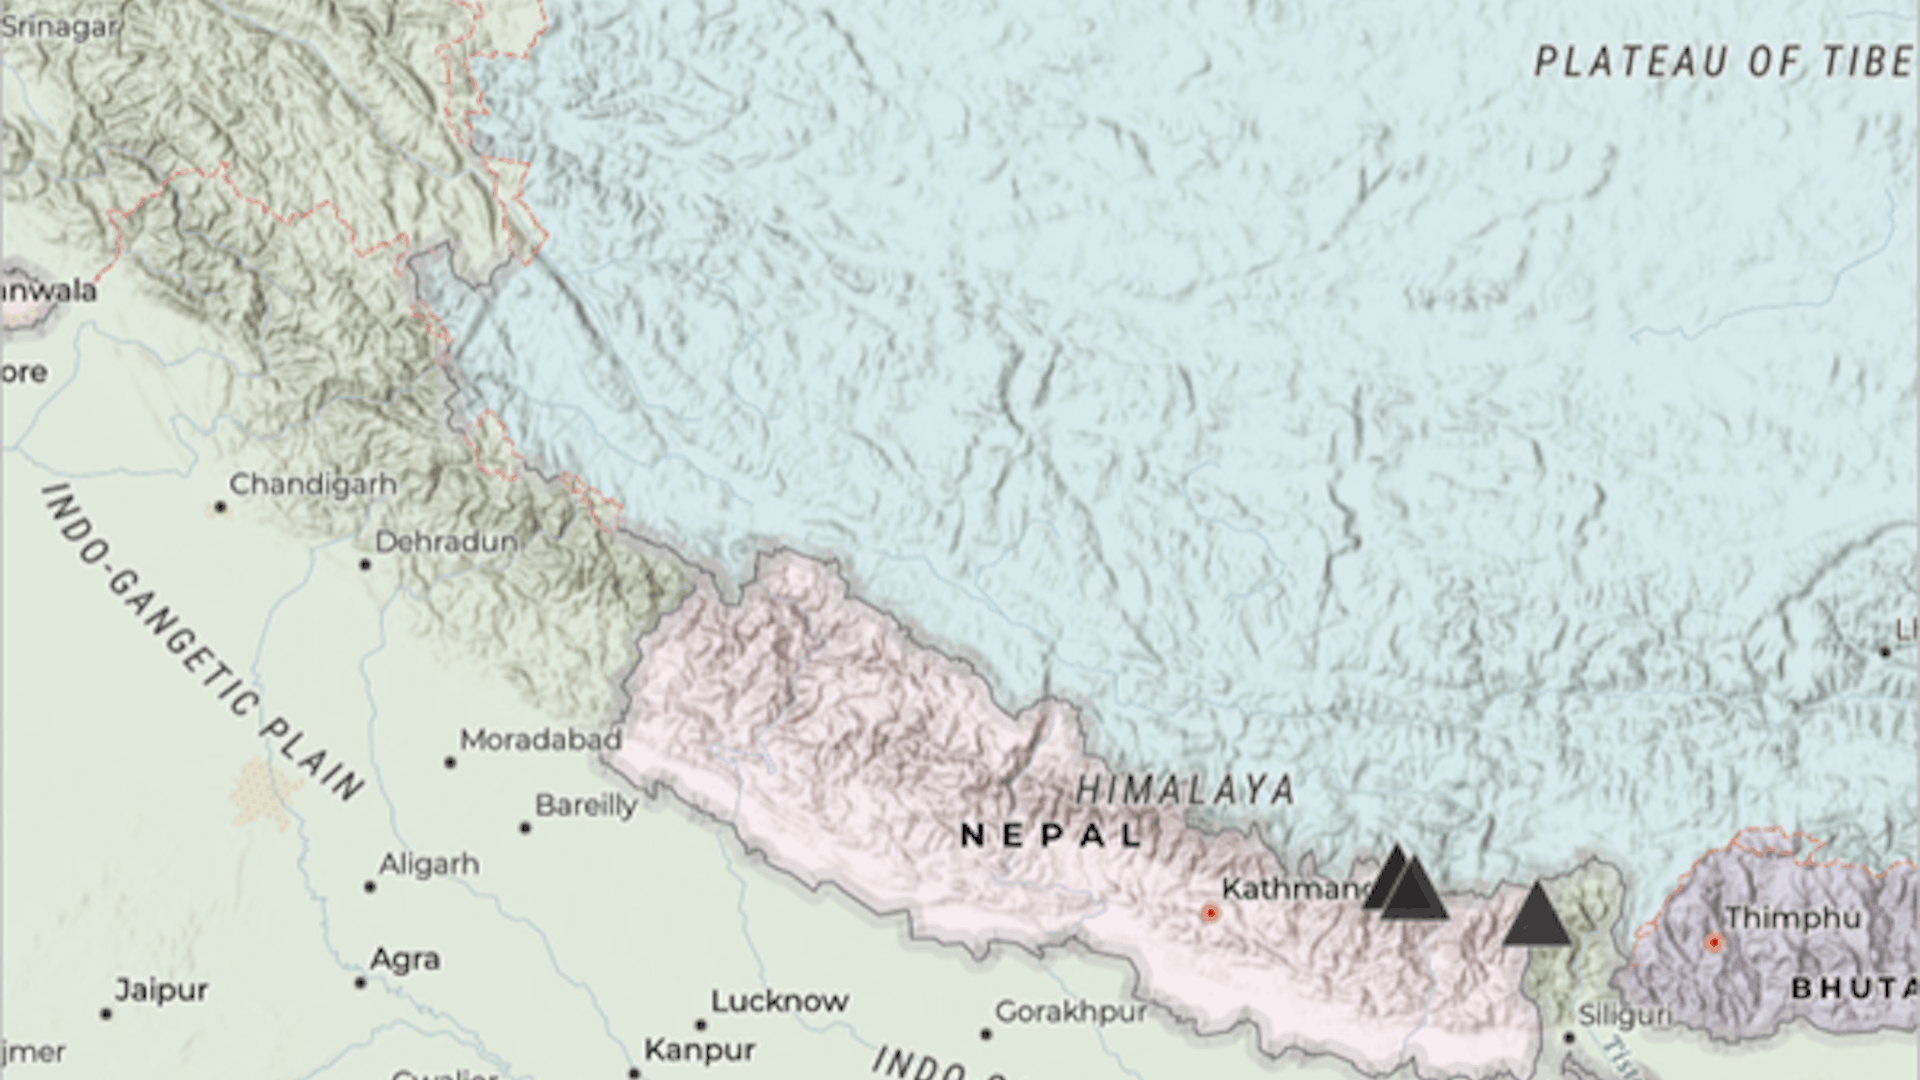
Tip: You may need to zoom in to see all five symbols because four are located close together in Nepal. If necessary, click Properties on the Settings (light) toolbar to close the Properties pane to see more of the map.

9. Next, you’ll change the symbols to better represent the mountains. Symbols in the shape of triangles are more appropriate.
In the Layers pane, ensure the highest mountains layer is selected. A blue line appears next to the layer to indicate that it is selected.
10. On the Settings (light) toolbar, click Styles. The Styles pane appears.

11. In the Styles pane and under Pick a style, go to Location (single symbol) and click Style options.

12. In the Style options pane, click the box under Symbol style.

The Symbol style pane appears.
13. In the Symbol style pane, click the box under Current symbol.

14. In the Change symbol pane, click the triangle and click Done.

15. For Size, type 30 and press Enter.

16. Click Fill color, and in the Select color window that appears, choose a black color.

17. Click Done and close the Symbol style pane.
The symbols on the map change to black triangles.

18. On the Styles pane, click Done two times.
19. On the Contents toolbar, click Save and open and choose Save to save the map.
In this tutorial, you saved data about mountains as a text file. Then, you added the file to ArcGIS Online to create a layer in a map locating each mountain.
Acknowledgments:
- The information about mountains is from the Wikipedia article, “List of highest mountains on Earth”
- Charted Territory Map sources: Esri, TomTom, Garmin, FAO, NOAA, USGS, OpenStreetMap contributors, and the GIS User Community
Visit the Esri tutorial gallery to explore additional topics and find other step-by-step workflows on a variety of products.