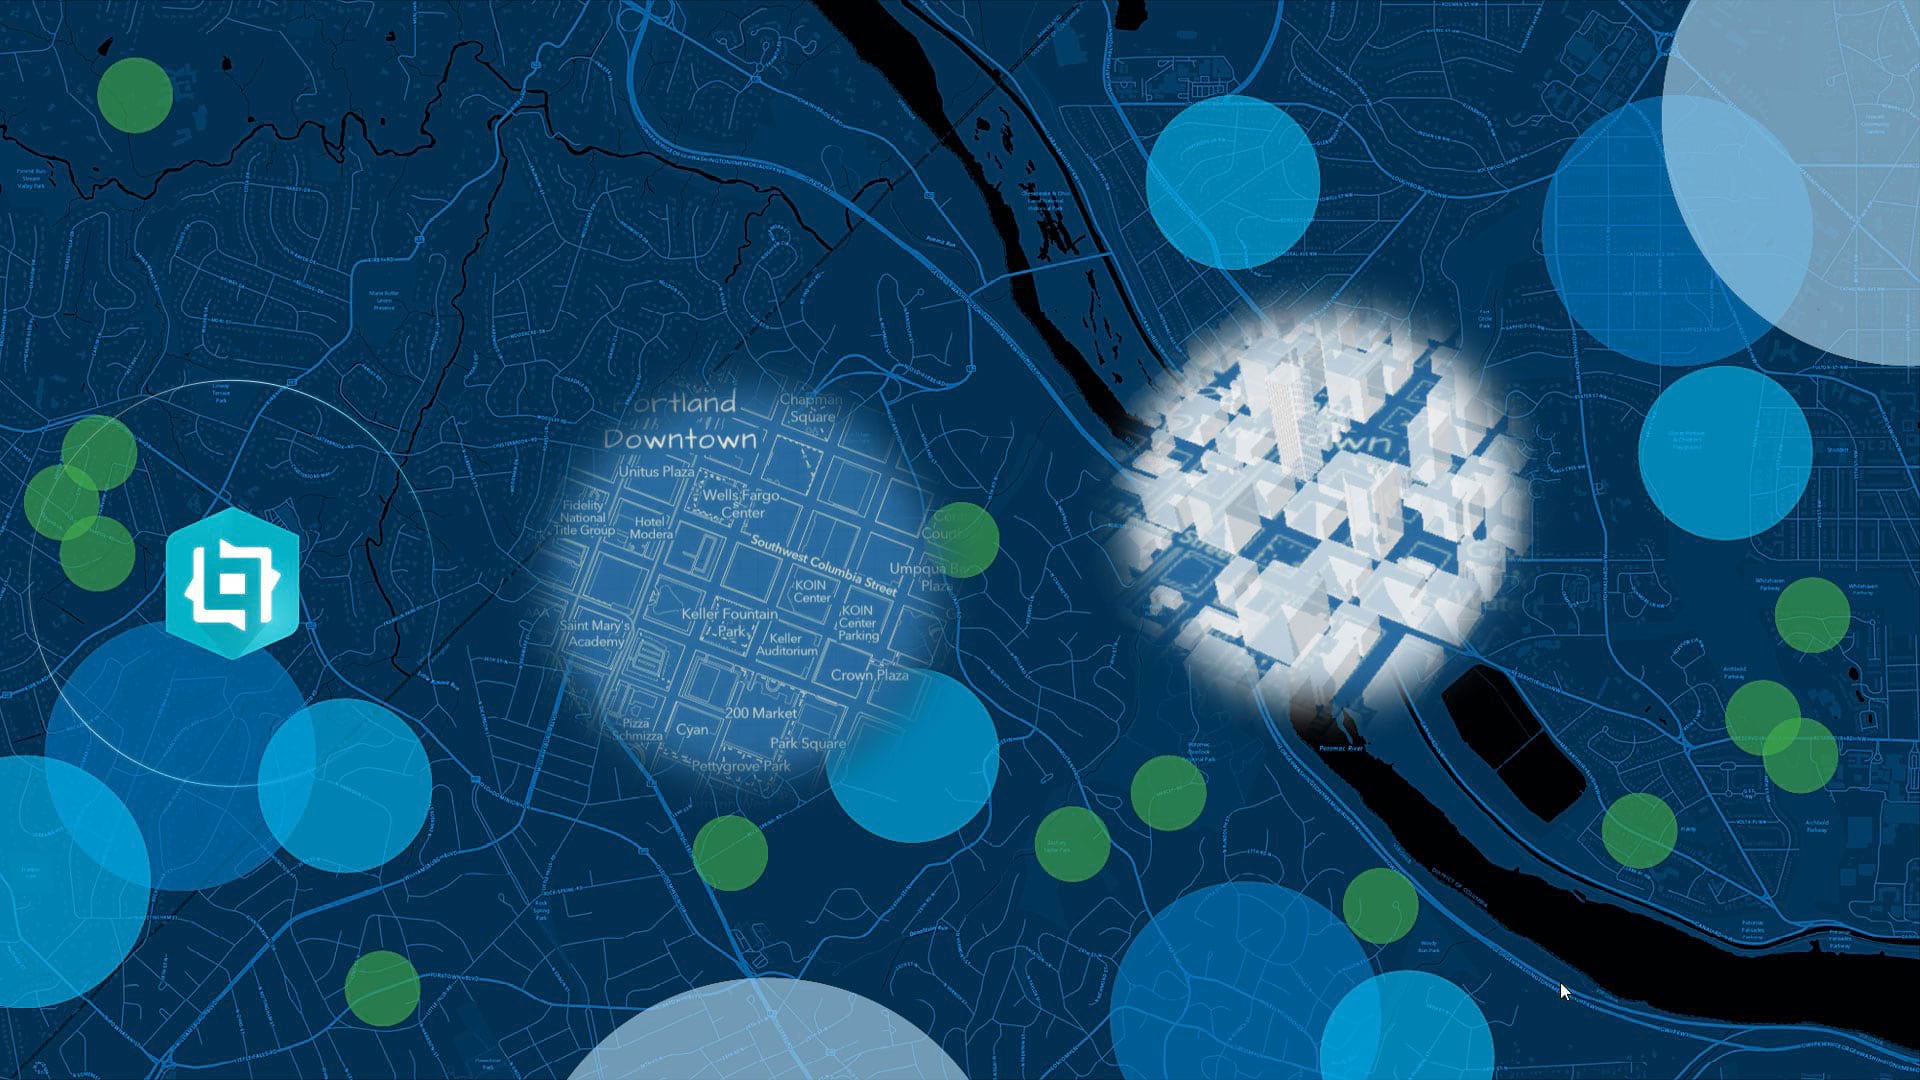
You can quickly create and deliver responsive web experiences—without writing any code—using ArcGIS Experience Builder, available in ArcGIS Online and ArcGIS Enterprise. Experiences can include web pages, web apps, or mobile apps that contain 2D and 3D maps, text, and media. You can focus on one type of content or combine and link many types of content to create a complete experience and destination for your audience.
To start, you can use templates built into ArcGIS Experience Builder or create your own from scratch. You can then drag, position, and configure components such as maps, images, text, and tools. You can add triggers and actions to make widgets work together—within a single app or across multiple apps and pages. You can leverage all your existing content from ArcGIS Online or ArcGIS Enterprise too. (For more information, read “ArcGIS Experience Builder Overview and Concepts” in ArcGIS Blog.)
In this Tech Time tip, you will learn how to sync 2D and 3D maps using triggers and actions. You can view the completed experience and follow along by using a partially completed tutorial template.
Interactions between widgets in Experience Builder can be configured using triggers and actions. Triggers drive actions in widgets. (See Add actions to widgets.)
In this tip, triggers and actions will be used to sync the extent of two maps: a 2D web map and a 3D web scene. Follow these steps to create a simple synced 2D/3D experience.
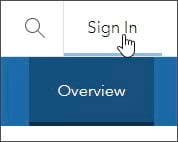
Step 1: Open the sample Web Experience Template and sign in with your ArcGIS credentials.
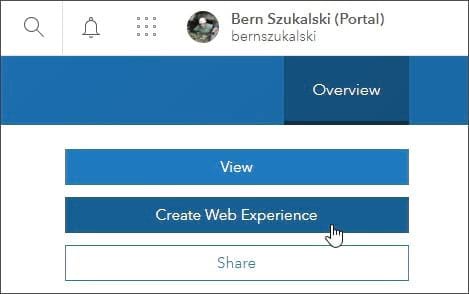
Step 2: Click Create Web Experience. This creates a new web experience from the tutorial template.
Step 3: Examine the sample Web Experience Template.
The template includes side-by-side Map widgets that contain a 2D web map and 3D web scene. Click each Map Widget on the screen or select each one from the page outline in the side panel to view their settings in the settings panel.
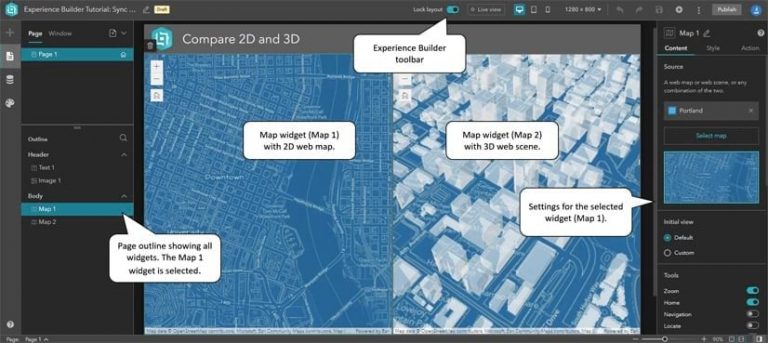
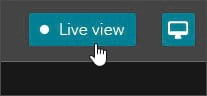
Click Live view from the Experience Builder toolbar to explore the maps. Note that the maps pan and zoom independently. In the following steps, you will configure the settings for both map widgets to sync them. Remember to turn off Live view when finished.
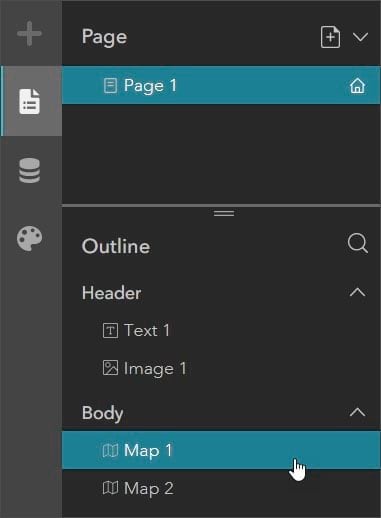
Step 4: Select the Map 1 Map widget.
Map 1 is the Map widget on the left side of the screen. It uses the 2D Portland web map. Click the widget to select it, or select it from the Outline panel to display the current settings.
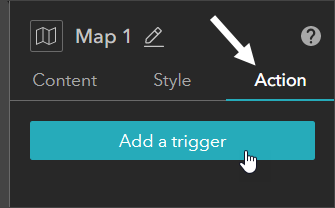
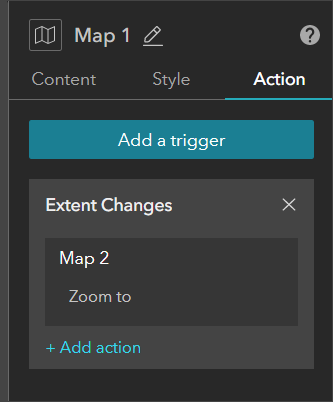
Step 5: In the settings panel on the right, click the Action tab, then click Add a trigger.
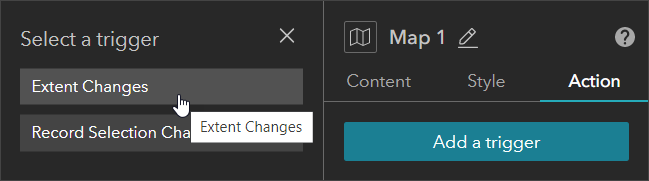
Step 6: You will use a change in the extent of Map 1 to trigger an action in Map 2. Click the Extent Changes trigger.
Step 7: Select Map 2.
This sets Map 2 as the target widget when a change in extent occurs in Map 1.

Step 8: Select Zoom to as the action for Map 2 when the trigger occurs.
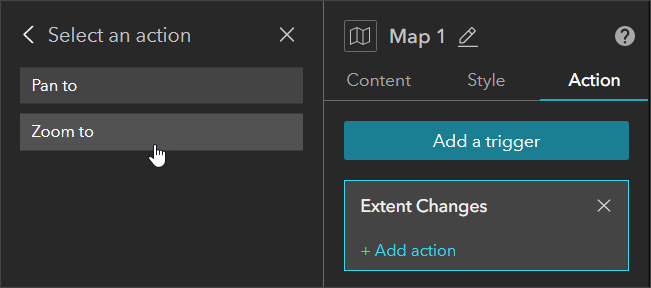
The Action panel for Map 1 should show the following: Extent Changes is the trigger, Map 2 is the target, and the Map 2 action is Zoom to.
Test your app by turning on Live view from the Experience Builder toolbar. Remember to turn off Live view when finished.
Note that Map 2 zooms when Map 1 is zoomed, but not the opposite.
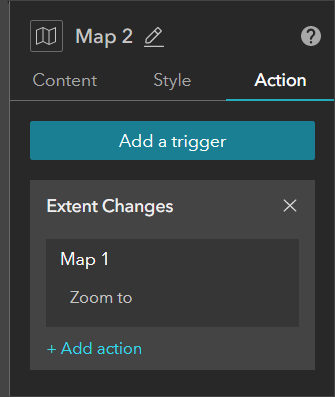
Step 9: To complete syncing both maps, repeat steps 4 through 8 above, using Extent Changes as the trigger and Map 1 as the target.
When finished, the Action panel for Map 2 should show the following: Extent Changes is the trigger, Map 1 is the target, and the Map 1 action is Zoom to.
Use Live view to test your settings. Click the Save button and then Publish when finished. You can use the template to build your own synced map experience by substituting two maps of your own in the Map widgets.
For more information, visit the following web pages: