This is the first in a series of blog posts intended for GIS professionals who have an interest in learning how to code geospatial workflows, using Esri’s ArcGIS Runtime API for Java.
In this blog, I’ll share a bite-sized geospatial code workflow to apply a hillshade renderer to open source LiDAR data in 3D.
Falling in love with hillshade
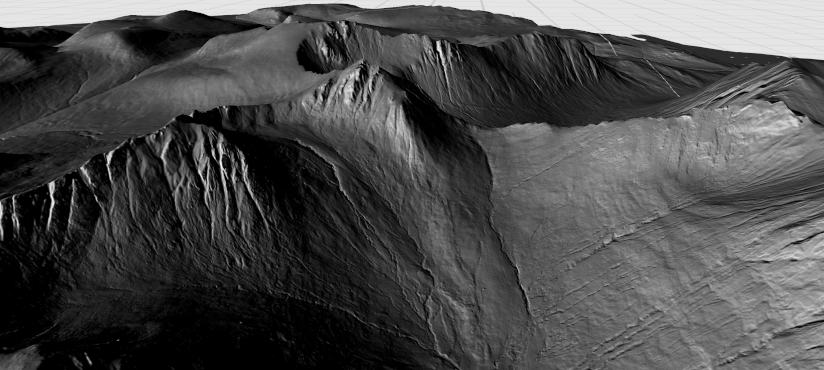
The first cartographic technique I really fell in love with during my early career as a geologist was that of applying hillshade renderers to raster data. I love how they transform a dull, flat, greyscale raster into life as a realistic 3D landscape with depth and dimension, using highlights and shadows. It is an invaluable tool in picking out subtle landscape features during the desk study phase of any geological investigation, and was one of my favourite tools when using ArcGIS Pro (well, ArcMap at the time!). Many an hour disappeared playing with the settings to maximise low-lying topographical features (e.g. glacially formed eskers or moraines) that could later become the focus of a field survey.
When I joined the ArcGIS Runtime API for Java team as a product engineer, I was delighted to discover much of the functionality I loved from ArcGIS Pro was present in their rich geospatial API.
Hillshade Rendering: ArcGIS Pro vs ArcGIS Runtime
There are many great blogs/tutorials out there on hillshade rendering in Esri’s flagship product ArcGIS Pro, so I won’t detail that here. Instead, I’ll share an alternative, coded approach to using ArcGIS Pro to achieve similar visually stunning hillshaded results using ArcGIS Runtime.
I’ll show how easy it is to:
- Load raster data into a desktop application using the ArcGIS Runtime API for Java
- Apply a hillshade renderer to it
- Create a 3D visually realistic virtual landscape
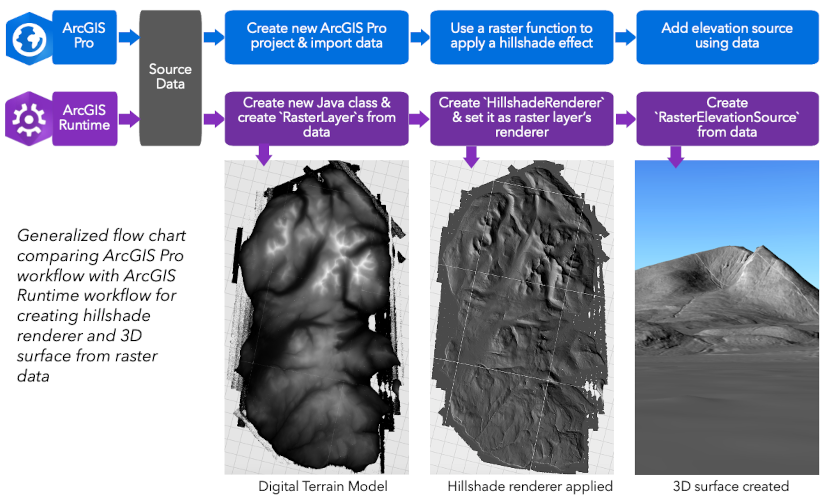
The results are as you would expect from ArcGIS Pro (see image below for generalised workflow comparison), but with the added fun of you getting to code it up yourself and customise your application however you want.
Data
I’m using the open source Scottish Public Sector LiDAR data from the Scottish Remote Sensing Portal, made available under the Open Government Licence v3 (copyright Scottish Government and SEPA (2014)).
This is an amazing resource with incredibly detailed data sets covering parts of Scotland, including complete 1m resolution coverage of the Isle of Arran (via the LiDAR for Scotland Phase II DTM dataset). Arran is a geological playground with spectacular varied topography, and having this caliber of data freely and openly available to play with is amazing. Let’s jump in!
Geospatial code and hillshade: using ArcGIS Runtime API for Java
In this blog, I’ll be dropping straight in to our geospatial code in a Java class to show you how to set up a hillshade renderer. If you want to learn more about setting up an application using the ArcGIS Runtime API for Java, see our getting started tutorial.
Note: whilst I’m using the Java API in this blog, please note any of the ArcGIS Runtime APIs, including the mobile ones, can be used in the same way.
To begin, we need a 3D space to create, display and render our data.
Start by creating an ArcGISScene class along with a new SceneView. The ArcGISScene is the equivalent of a 3D scene in ArcGIS Pro, and hosts layers that can be displayed in 3D. The SceneView is the user interface that displays scene layers and graphics in 3D, and is the equivalent of the view pane in ArcGIS Pro.
// create a scene and scene view
var scene = new ArcGISScene();
var sceneView = new SceneView();
Next, reference the data in the class (you can either download your own data, or access the LiDAR tiles for Arran via a hosted open item on ArcGIS Online):
List<String> geoTiffFiles = new ArrayList<>(Arrays.asList(
  new File("./data/arran-lidar-data/NS02_1M_DTM_PHASE2.tif").getAbsolutePath(),
  new File("./data/arran-lidar-data/NS03_1M_DTM_PHASE2.tif").getAbsolutePath(),
  new File("./data/arran-lidar-data/NS04_1M_DTM_PHASE2.tif").getAbsolutePath(),
  new File("./data/arran-lidar-data/NR82_1M_DTM_PHASE2.tif").getAbsolutePath(),
  new File("./data/arran-lidar-data/NR83_1M_DTM_PHASE2.tif").getAbsolutePath(),
  new File("./data/arran-lidar-data/NR84_1M_DTM_PHASE2.tif").getAbsolutePath(),
  new File("./data/arran-lidar-data/NR93_1M_DTM_PHASE2.tif").getAbsolutePath(),
  new File("./data/arran-lidar-data/NR92_1M_DTM_PHASE2.tif").getAbsolutePath(),
  new File("./data/arran-lidar-data/NR94_1M_DTM_PHASE2.tif").getAbsolutePath(),
  new File("./data/arran-lidar-data/NR95_1M_DTM_PHASE2.tif").getAbsolutePath()
));
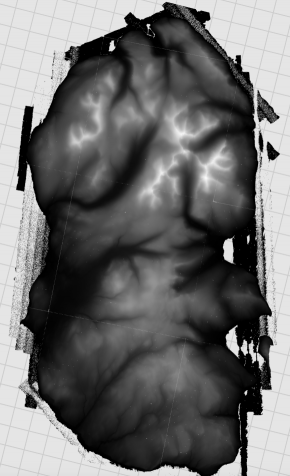
The raster data at this stage has no hillshade renderer applied: the topographical detail in the digital terrain model is visible but ghostly. We need a hillshade renderer to draw out the topographical features and make the stunning landscape of Arran pop!
Hillshade renderer settings
Now for the fun part! The hillshade renderer parameters are set up via the constructor for a new HillshadeRenderer class. If you are familiar with ArcGIS Pro’s hillshade toolset, you’ll recognise the same parameters:
altitude– light’s angle of elevation above the horizon, in degreesazimuth– light’s relative angle along the horizon, in degrees; measured clockwise, 0 is northzFactor– factor to convert z unit to x,y units
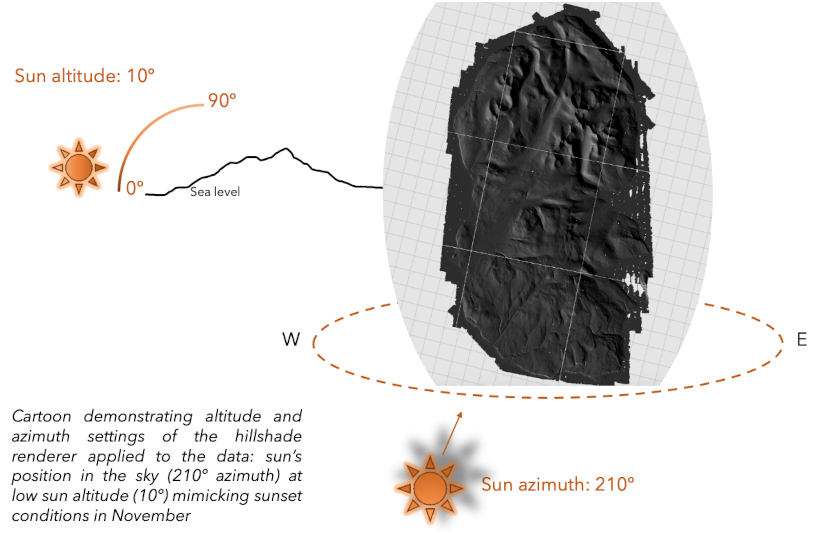
I’ll choose parameters that mimic sunset conditions in early winter, to create a visually striking hillshade effect and emphasize the deepening shadows in the valleys of the Isle of Arran before the sun falls below the horizon:
var hillshadeRenderer = new HillshadeRenderer(10, 210, 1); // altitude, azimuth, zFactor
This hillshade renderer instance can be applied to multiple raster layers, which we have to programatically make from the data.
Loop over each GeoTIFF. For each one of them, create a new Raster, and then create a RasterLayer from the raster. A Raster class represents raster data that can be rendered using a RasterLayer, and in this demo’s case, can be created from a raster file on device. A RasterLayer is required to display raster data in the scene.
for (String geoTiffFile : geoTiffFiles) {

  // create a raster from every GeoTIFF
  var raster = new Raster(geoTiffFile);
  // create a raster layer from the raster
  var rasterLayer = new RasterLayer(raster);
}
Now we can apply the hillshade renderer to the raster layers, and add them to the ArcGISScene‘s collection of operational layers in order to display them in the scene:
// set a hillshade renderer to the raster layer
rasterLayer.setRasterRenderer(hillshadeRenderer);
// add the raster layer to the scene's operational layers
arcGISScene.getOperationalLayers().add(rasterLayer);
The hillshade renderer is applied, and the raster data is displayed on the scene. It looks great, just like you’d expect from the equivalent ArcGIS Pro hillshade toolset. Already, features in the landscape are popping into life in the same exciting way I remember from my ArcGIS Pro days.
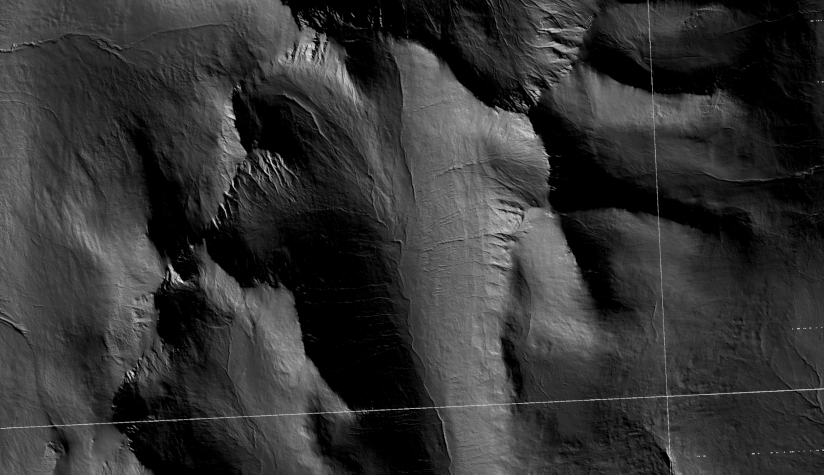
Creating a 3D surface from raster data
The final bonus twist in this bitesized geospatial coding tale is to make full use of the GeoTIFF data. Not only can we make the landscape look 3D, but we can actually make it 3D, by creating a 3D surface.
We do this by instantiating a new RasterElevationSource with the list of GeoTIFFs provided as a parameter. Create a new Surface, get its list of elevation sources and add the rasterElevationSource to it. Finally, set the surface as the base surface of the ArcGISScene:
// create an elevation source from the GeoTIFF (raster) collection
var rasterElevationSource = new RasterElevationSource(geoTiffFiles);

// create a surface, get its elevation sources, and add the raster elevation source to the collection
var surface = new Surface();
surface.getElevationSources().add(rasterElevationSource);
// set the surface to the scene
arcGISScene.setBaseSurface(surface);
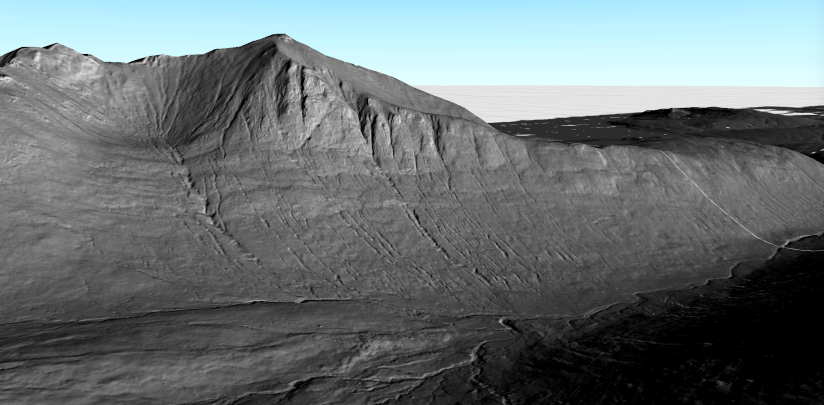
And tada, that’s it! In only a few lines of geospatial code, a hillshade effect is rendered quickly and easily using the open source LiDAR data. We’ve also created a 3D surface, altogether creating a simple, high resolution 3D digital twin of the topography of the Isle of Arran. All in code, using the ArcGIS Runtime API for Java.
You can also find the source code for this blog on Github: clone this to run the application on your machine.
Summary
As when using ArcGIS Pro, visual analysis of this data running in an ArcGIS Runtime native application is invaluable for desktop studies. You can customise this application even further by exploring the functionality that the native geospatial APIs from Esri give you, or integrate it into your workflow to create powerful geospatial applications.
If you’re a GIS professional interested in coding, I hope you feel inspired and empowered to give it a go!
Where next?
In the next blog in this series, we’ll explore how to take this geospatial application further. In its current form, it acts as a 3D digital twin of the landscape on Arran but the application has much more potential.
For example, we can add a widget to dynamically change the hillshade renderer’s lighting angles/azimuth to tease further features out of the landscape. Beyond visual effects, we can set viewpoints at key locations to navigate across the island for a virtual field trip…the possibilities are endless!
If there’s another geospatial workflow you’d like to see translated from ArcGIS Pro to ArcGIS Runtime, please leave a comment.

Article Discussion: