What is an AEC Project Delivery Subscription?
In the past, there have been some challenges with collaborating and getting deliverables from AEC firms to their clients. ASP licensing was previously available, but that requires firms to take on the security of accessing data and its associated liability. There are also multi-tenant agreements that allow you to deliver COTS applications to customers, but it takes time and money to get all the necessary contracts signed. There’s a lot of risk in governing one environment containing sensitive data for many customers.
An AEC Project Delivery subscription can provide an isolated ArcGIS Online organization that allows you to manage the GIS collaboration environment for a project. Leveraging your existing ArcGIS Enterprise or ArcGIS Online deployment and adding a Project Delivery Subscription allows you and your customers to work together in sync throughout the project lifecycle. These environments seamlessly integrate with your current GIS workflows and processes.
Each Project Delivery Subscription consists of an ArcGIS Online subscription, an ArcGIS Hub Basic site, and two Creator user type licenses, each with 500 service credits. One license should be kept within the AEC user group and the other can be given to the customer. Additional users (or user types) can be added at standard ArcGIS Online user license pricing.
About using distributed collaboration for an AEC Project Delivery Subscription
For your customers to securely access your data and deliverables via an ArcGIS Online Project Delivery Subscription, you must publish the content directly to ArcGIS Online or copy it to ArcGIS Online via distributed collaboration. Collaboration allows you to share and sync data between ArcGIS Enterprise and ArcGIS Online, as well as ArcGIS Enterprise to ArcGIS Enterprise. While there is an option to sync data from Enterprise to ArcGIS Online by referencing the Enterprise item, your customers cannot view it because they don’t have credentials to your internal ArcGIS Enterprise portal . For this reason, you must sync content to ArcGIS Online by copying it, not by creating an item that references your internal portal.
In the collaboration, either environment can be the source of the replication, but the destination cannot edit the data from the source. It is essentially, a one-way editing workflow. Edits made to a feature service by the source owner can be synchronized, one way, to receiving participants.
The steps that follow will help you set up and configure a collaboration between an AEC firm’s ArcGIS Enterprise deployment and its ArcGIS Online subscription. Once the data has been published and copied to ArcGIS Online, it can be shared further to the Project Delivery Subscription.

Once the project data has been copied via collaboration to ArcGIS Online, it can then be shared with your customer (the AEC Project Delivery Subscription organization) through group sharing. You can invite users from an external organization into a group containing your project deliverables.

Using collaboration hosts and workspaces
When setting up a collaboration between ArcGIS Enterprise and ArcGIS Online, ArcGIS Online is always the host and ArcGIS Enterprise is the guest. This means the collaboration is initiated from within your ArcGIS Online organization. The collaboration you create can support multiple workspaces. You can have one collaboration between your ArcGIS Online organization and Enterprise portal and at least one workspace for every AEC Project Delivery Subscription you want to send data to. You can have multiple workspaces in a single collaboration, and each independent workspace is set to send, receive, or send and receive between ArcGIS Enterprise and ArcGIS Online. Before you can create a collaboration or workspace, it’s recommended that you name and create the groups you will need.
Create groups in ArcGIS Enterprise to support a Project Delivery Subscription
At a glance, you’ll need to be able to see a group’s name and know its role in the project delivery workflow. It’s recommended that you include the project name and intended audience in the title. Below, you will use Project X as an example in the creation of the following groups.

Project X to Online – In ArcGIS Enterprise, this group is connected to the collaboration you are about to set up. This group is for sending and receiving content to and from your firm’s ArcGIS Online organization. Anything placed in the group is synced to ArcGIS Online (there are some limitations).
Create groups in your ArcGIS Online organization to support a Project Delivery Subscription
Project X to Enterprise (internal) – When you set up the collaboration, you choose a group that will send content to ArcGIS Enterprise as well as receive content from ArcGIS Enterprise, both via one-way data copy. Some items cannot be copied from Enterprise to ArcGIS Online, such as map and image services. Those items are shared by reference instead and still require ArcGIS Enterprise credentials to access. Read the distributed collaboration FAQ for details about what cannot be synced from ArcGIS Online to Enterprise. You can still place non-compatible items in the group, but they won’t be shared outside your organization.
Project X Working (internal) – This working group is for sharing in-progress maps and apps with your colleagues as a part of their production and design process. You can share configurable apps that contain data from your hosted feature layers, public data, and anything copied or referenced from your Enterprise collaboration. Any work done solely by the AEC firm should be shared here. If a user needs to access an item that is referenced instead of copied, that user must be a member of both ArcGIS Enterprise and ArcGIS Online.
Project X Field Workers (for optional client editing) – If any editing needs to be done by the client, a separate group should be created for that. Remember that an ArcGIS Online user cannot edit data copied from the collaboration, however, data copied from ArcGIS Enterprise can be used as an operational layer or for analysis in all your maps and apps. Share the appropriate ArcGIS Survey123 forms and ArcGIS Collector web maps, and invite users from the AEC Project Delivery Subscription to become members of this optional group.
Project X Deliverables (read-only client deliverables) – This group is for sharing any deliverables with your customer such as data, progress maps, and status updates, but it can also include ArcGIS Dashboards, Web Apps, ArcGIS Hubs, and StoryMaps.
Set up a distributed collaboration between your ArcGIS Online organization and your ArcGIS Enterprise portal
You will now establish the trusted connection between your ArcGIS Enterprise portal and ArcGIS Online organization. First, sign in to ArcGIS Online as an administrator. Collaborations between ArcGIS Online and ArcGIS Enterprise are initiated from ArcGIS Online. Next, click the Organization tab > Edit Settings > Collaborations > Create Collaboration.

Step 1–Name and describe your collaboration
It’s recommended that you name it something relevant so others understand the purpose of the collaboration.

Step 2–Name and describe your initial workspace
You can think of a workspace as a container for a project where your users send and receive data. Multiple workspaces can be created in a collaboration to help segment and organize your projects and open groups to collaborated content.

Step 3–Link a group to the workspace
Identify a group (new or existing) to link to that workspace. This is where members of your organization send and receive collaborated items. Any data shared to this group is synced to the guest (your ArcGIS Enterprise instance).

Step 4–Decide how your feature layers will be shared
This next step determines how your organization will send feature layers to your guests: by reference or as copies. The guest will also make the same choice from their side.
- Selecting References creates a layer item in the recipient’s portal that references back to the original feature layer or feature layer view. This is a good option for collaboration where layers are either shared with everyone or users in one organization have access (login credentials) to the source Enterprise portal.
- Selecting Copies replicates your data and publishes it for your recipients. The owner of the original feature layer can edit the layer and synchronize changes to all participants via sync intervals.

Step 5–Invite your guests
Invite your Enterprise guests by entering the URL of their portal. You can choose whether your guest can send content, receive content, or both.

Once you select Save Invitation, a file automatically downloads. The ArcGIS Enterprise administrator needs this file. They will upload it under the Collaboration tab of their portal and walk through their respective workflow to complete their side of the collaboration.
Step 6–Accept the collaboration invitation in ArcGIS Enterprise
Sign in to ArcGIS Enterprise as an administrator and view the Collaboration tab under Settings. Click Accept Invitation and follow the prompts to browse to the invitation file from ArcGIS Online. You will generate a response file when completed. Send the response file to the ArcGIS Online administrator (to be used in step 8).


Step 7–Choose a group to join to the new workspace
You will now join a group to the workspace by selecting Project X to Online as the group that will send and receive content from ArcGIS Online. Click your new collaboration to see the workspace. Select the Actions button and click Join Workspace. You’re prompted to create or choose a group and decide if you want to share layers by reference or copy.


If your collaboration is sharing feature layers as copies (as shown in step 4), your Enterprise guest is responsible for setting the synchronization interval, determining how often edits for your feature layers are synced with your participants’ items. Be sure to talk with your Enterprise counterpart on how often you want edits to synchronize. When copying data between ArcGIS Enterprise and ArcGIS Online (and vice versa), there is a size limit of 1 GB per layer.
Step 8–Accept your guest
When ArcGIS Enterprise accepts the invitation, a response file is generated. Be sure to accept your Enterprise guest by uploading the response file here.

Step 9–Share data
While you are still in ArcGIS Online, share a hosted feature layer to the Project X to Enterprise group. Then, sign in to your ArcGIS Enterprise instance and browse to your group, Project X to Online. Depending on your sync interval, the feature layer appears in the group with an icon indicating that it was received via collaboration.
Unless delete protection is enabled, this copy exists until it is deleted or unshared by the host. Depending on the delete protection selection, if the collaboration is removed without unsharing the item, the copy remains in the host and guest but no longer syncs. The opposite is also true, if you share a feature service to Project X to Online, it is copied to ArcGIS Online.
If you receive an error and your data has been synced by reference instead of copied, review this collaboration FAQ for solutions.
Purchase and set up an AEC Project Delivery Subscription
An AEC Project Delivery Subscription is essentially another ArcGIS Online organization that you are the administrator of. You can customize and brand the organization to create an intuitive customer project portal. After purchasing an AEC Project Delivery Subscription, you will receive an email asking you to activate your subscription. The subscription includes two Creator user type licenses, one of which you will use to set up and configure the organization as its administrator. The other is for your client.
Step 1–Activate your AEC Project Delivery Subscription
From the automated email generated after the purchase, click the link to activate your subscription. The Sign In page appears, where you create an account. This is your administrative account for your new Project Delivery Subscription.
Step 2–Configure your website
After you have completed the sign-up process, the Set Up Your Organization page appears. Provide the full name and a short domain for your organization’s URL (example.maps.arcgis.com). Accept or configure the remaining defaults.
Step 3–Configure client credentials
Add your client to your project delivery organization without sending invitations. The password is temporary and can be updated by your client after they sign in to ArcGIS Online. Select Creator as the user type (included with the subscription) and set the role to User or Publisher. By default, those roles can join external groups.
Step 4–Confirm user privileges
Users in this project delivery organization are invited to join a group owned by your firm’s ArcGIS Online organization. For these users to participate in a group as an external user (a group where they are not a member of the host organization), the user must be assigned the privilege to join external groups in their role. The default Publisher and User roles have this privilege enabled, whereas the default Viewer role does not have this privilege.
Step 5–Make profiles publicly viewable
When you invite these users to join the deliverables group, you are inviting members from an outside organization. Group managers can invite any user to a group if they know the invitee’s ArcGIS Online user name. Since your AEC firm will be inviting uses from another ArcGIS Online organization, change the option of who can see your profiles to everyone (public).

Send data to an AEC Project Delivery Subscription via group sharing
You will now share data to your customer via Project Delivery Subscription.
Gather any layers, maps, and apps that you want to share to your customer and share them to the group, Project X Deliverables. Make sure it does not contain any layers that have been synced by reference from the collaboration with your Enterprise portal. If you expect your client to update data, create the optional group Project X Field Workers and share your editable maps and layers.
Within the group, click Members and click Invite users.
Invite the users belonging to your Project Delivery Subscription. By default, there are two Creators that can be invited. Make sure to turn the filter toggle off to search for members outside of your organization.

The Project Delivery Subscription users must sign in to ArcGIS Online and accept the invitation. After accepting, they will see the Project X Deliverables group and have access to the data and maps inside of it. Any updates that are made to data and maps stored in Project X Deliverables or Project X Field Workers will be available to the Project Delivery Subscription users immediately.
When a project is completed, your customer may opt to take over the subscription and continue managing as their own ArcGIS Online environment. Work with your Esri® representative through the transition process.
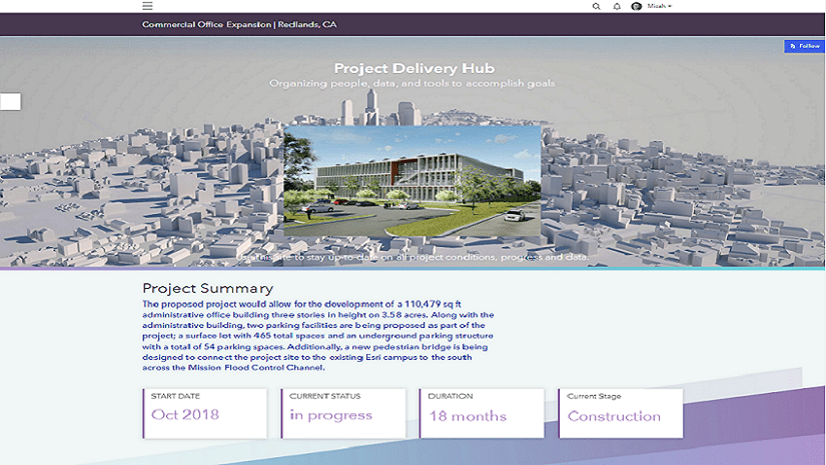
Improved Project Delivery
Using your current investment in GIS, you can modernize your workflows to deliver high-quality deliverables, leading to more satisfied customers. Use an AEC Project Delivery Subscription to collaborate with your stakeholders in a secure system to provide up-to-date information about project status. If this method is successful for you, you can create a template environment and use automation scripts to deploy pre-configured organizations, groups and apps for multiple projects.


Commenting is not enabled for this article.