Clear and timely communication is important and there are easy ways for your organization to broadcast news and notices to members and visitors to your site.
Your ArcGIS Online and ArcGIS Enterprise organization includes settings for access notices and information banners. Each serve different communication needs and purposes, but both provide a mechanism to deliver timely and direct information to your audience.
This tutorial details the steps you need to follow to configure information banners and access notices. Note that you must be a default administrators or have the correct privileges to configure these.
What information banners do
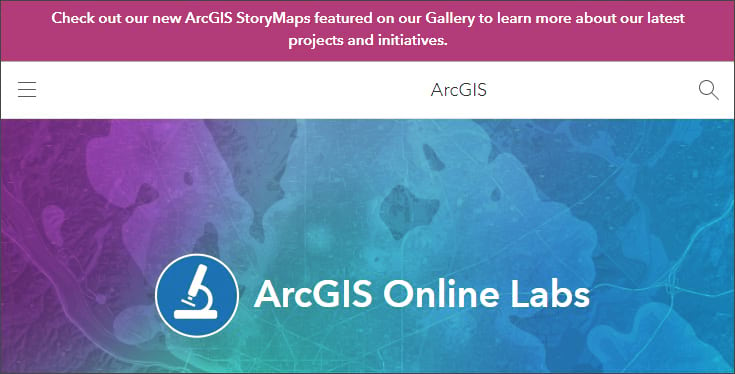
You can use information banners to alert all users who visit your organization home about your site’s status, news, or changes in content. For example, you can inform visitors about maintenance updates, newly added content, or other changes to your organization.
Information banner messages appear at the top and bottom of your site pages. The banner appears on the Home, Gallery, Map Viewer, Scene Viewer, Notebook, Groups, Content, and Organization pages (see Configure your home page navigation bar and galleries for more information).
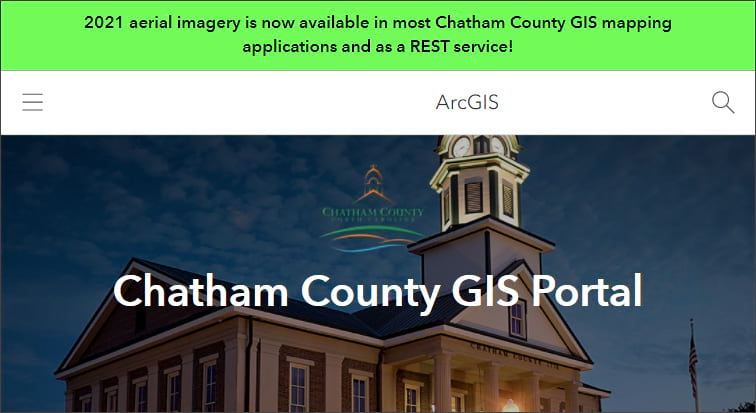
Below is an example of an information banner that notifies visitors to the Chatham County GIS Portal of new aerial imagery:
Configure information banner
Follow these steps to configure an information banner.
Step 1 — Sign in to your account.
You will need to be the default administrator or or have the correct privileges to continue.
Step 2 — Click the Organization tab, then click Settings.

Step 3 — Click the Security tab, then scroll down to find the Information banner section.
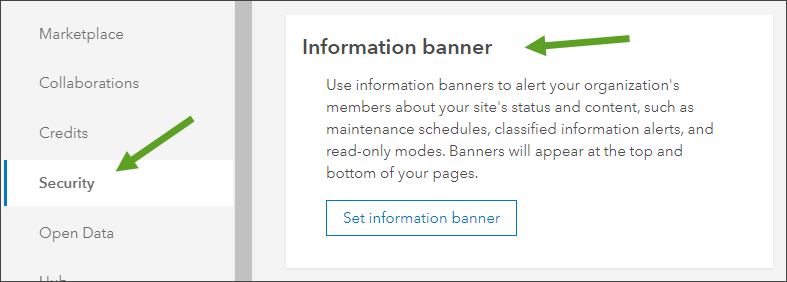
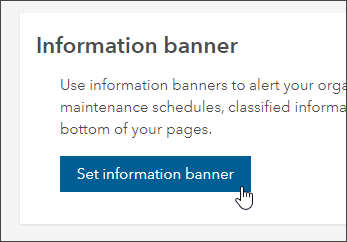
Step 4 — Click Set information banner.
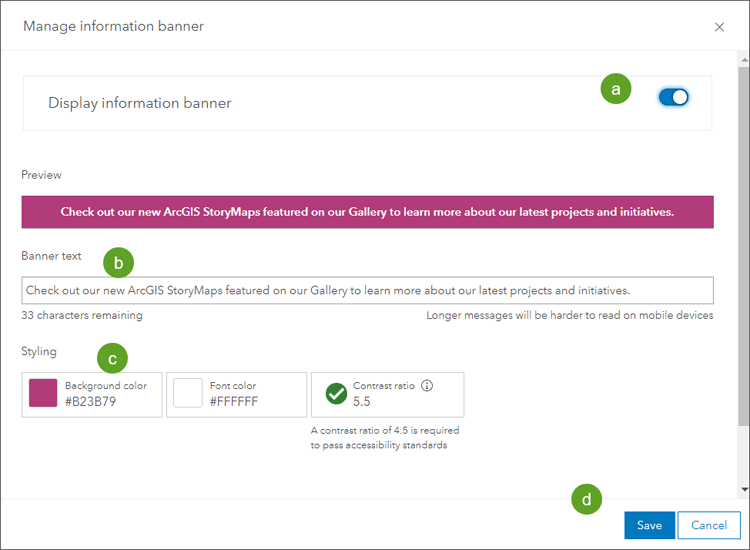
Step 5 — Complete the Information banner configuration.
a – Toggle the access notice on.
b – Add banner text.
c – Adjust styling.
Set the font and background color, check the contrast ratio for best accessibility.
d – Click Save when finished.
The information banner configured above is shown below.
To remove or edit the banner, return to settings and click Edit information banner.
What access notices do
Access notices provide a notice of terms that are displayed to organization members or to all users that must be accepted before they can proceed to your site.
An access notice can be configured to display whenever someone visits your home page. It can be used to display an access notice for any visitor, only organization members, or both. The notices can be tailored for each audience.
If configured for all users, the notice will be displayed when anyone visits your site. If configured for members only, the notice will display after members sign in. Notices can be configured with an accept/decline or ok button.
Access notices for members will be displayed at each sign in. Access notices for all visitors to your organization will not be displayed again for the remainder of the browser session. If you configure both, members will see two notices.
Configure an access notice
You can configure a notice for visitors, members, or both, and can choose an accept/decline button or an ok button. Follow these steps to configure an access notice.
Step 1 — Sign in to your account.
You will need to be the default administrator or or have the correct privileges to continue.
Step 2 — Click the Organization tab and then click Settings.

Step 3 — Click the Security tab, then scroll down to find the Access notice section.
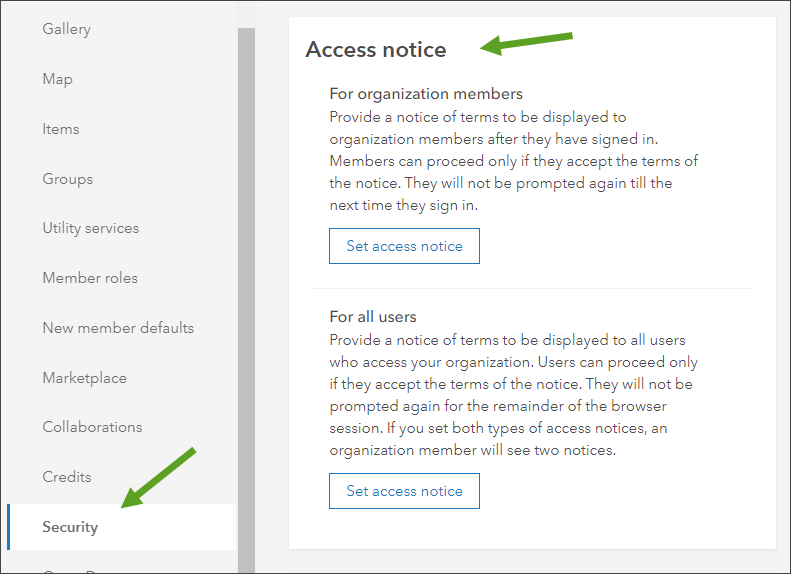
Step 4 — Determine if you want to configure a notice for organization members, for all visitors to your site, or both. Click Set access notice for the intended audience.

Step 5 — Complete the access notice.
a – Toggle the access notice on.
b – Add a notice title.
c – Enter the notice text.
d – Choose whether to display an Accept and Decline button, or an Ok button.
e – Click Save when finished.
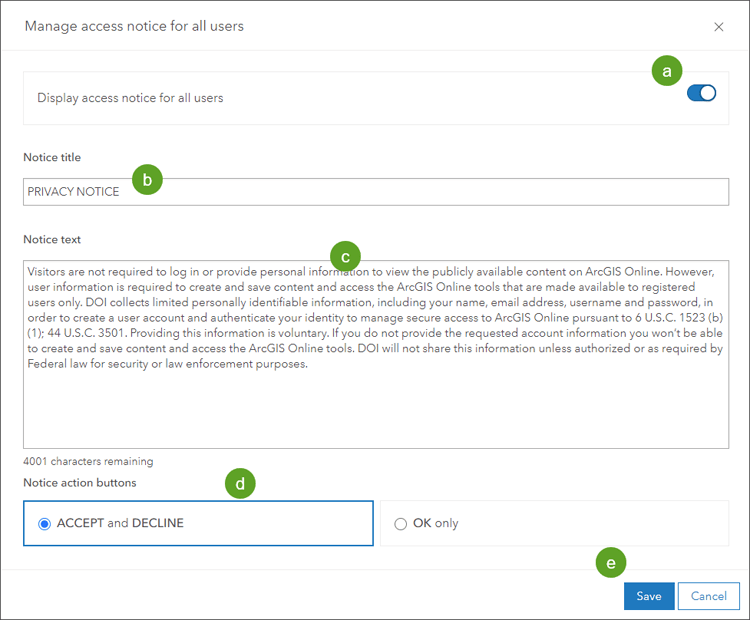
The access notice configured above is shown below.
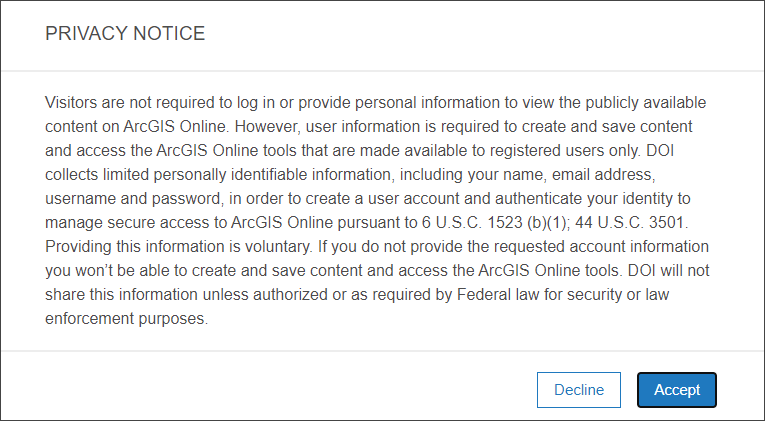
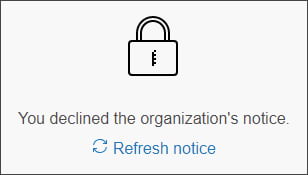
If accept/decline is used, Accept must be clicked to continue on to the site. Otherwise, the following message appears, providing the visitor an opportunity to refresh and review the notice to accept it.
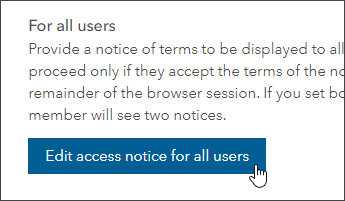
To remove or edit the notice, return to the settings and click Edit access notice.
More information
For more information, see the following:

Commenting is not enabled for this article.