The home page is the landing page of your organization’s website and serves as a gateway for your user community. Configuring a modern and professional-looking home is not only a best practice, but also a reflection on your organization and the communities you serve. The home page provides helpful resources and content for organization members once they sign in. Your home can also serve as a public destination, showcasing maps, apps and other content to a broad audience.
It’s important to consider what an anonymous public visitor and a member of your organization experiences when they reach your site. Across the top of your home page is the navigation bar which displays different links if you are an anonymous visitor or a signed-in member. By default, an anonymous (public) visitor will see the following navigation bar links:

After signing in, members of your organization see the following:

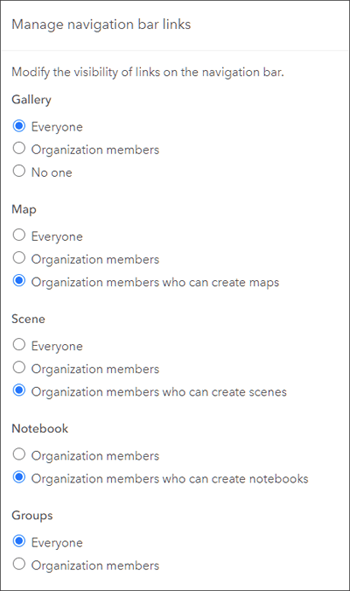
You can also specify which links are displayed on your navigation bar and when they are visible. For example, you can display the Gallery link to everyone, hide it completely, or only display it for members after they sign in.
In addition, two of the links—Gallery and Groups—can be configured to display a specific collection of content. Configuring these links (if you choose to make them visible) with good content is often overlooked, but doing so is an important part of your overall home page experience.
Default administrators and those with the appropriate privileges can configure the navigation bar as described below.
Manage Navigation bar links
You can modify the visibility of links on the home page Navigation bar by following these steps.
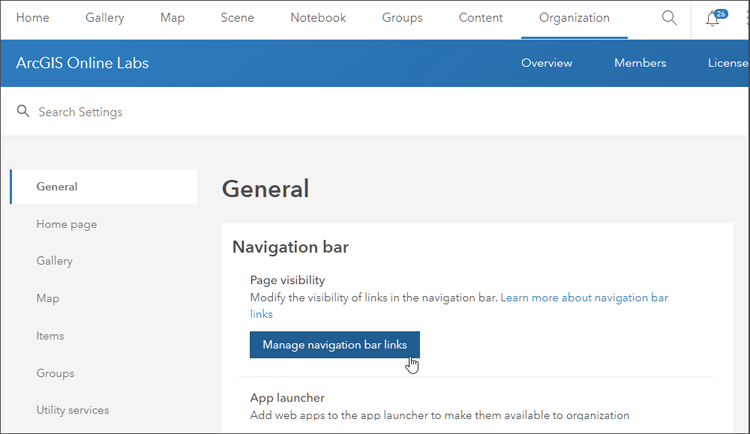
Step 1 — In your organization Settings, go to the General tab and locate the Navigation bar section. Click Manage navigation bar links.
Step 2 — Toggle the visibility settings for the Navigation bar links as desired.
Step 3 — Click Save when finished. You will see a confirmation that the home page link visibility has been updated.

Configure the Gallery
By default, the Gallery displays all organization items, though public visitors will only see publicly shared items. Rather than present a random collection of content, you can control what is presented by configuring the Gallery tab to display selected content managed in a group. To configure the Gallery, follow these four steps.
Step 1 — Create a group that will contain your Gallery content. The group must be public, but content in the group can be both public and visible to organization members only. Public visitors will only see the publicly shared content.
Once you have created the group, share your content into the group to display on the Gallery. For more information on creating groups, see Create groups.
Next, you will configure the Gallery to display the contents of the group created in this step.
Step 2 — In the organization Settings, open the Gallery tab to view the current settings.
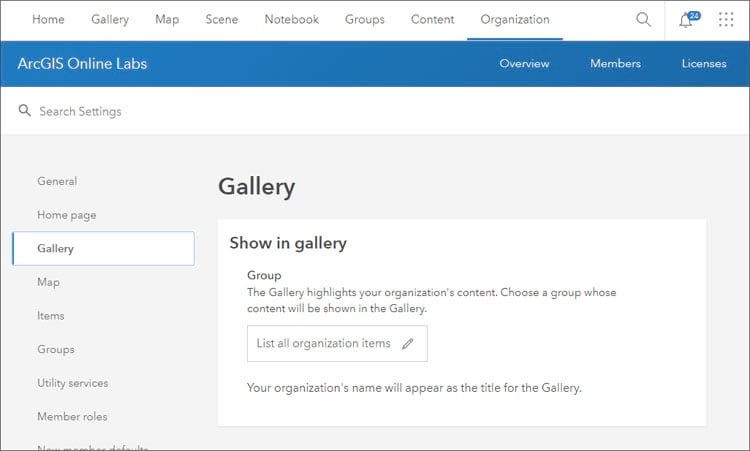
Step 3 — Click the pencil to display a dropdown of available groups.
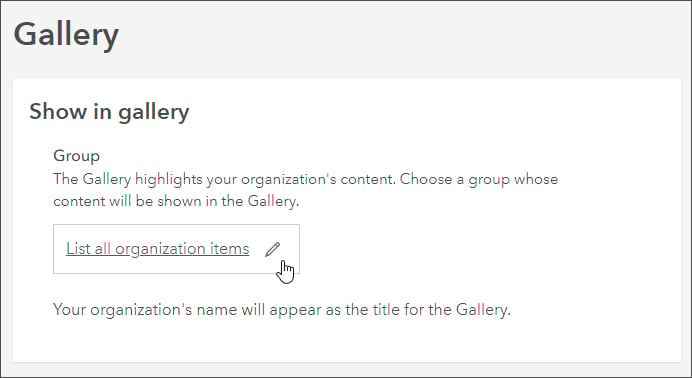
Step 4 — Choose the group to populate the Gallery from the dropdown list.
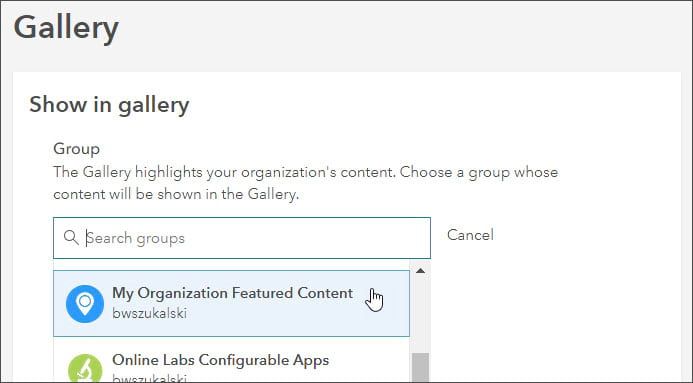
Once you select the group, you will receive a confirmation that the Gallery setting has been updated.

Configure Groups
By default, the Groups tab displays a collection of groups selected by Esri. You can replace the defaults with your own groups, or combine them. To configure the Group gallery, follow these steps.
Step 1 — In the organization Settings, open the Groups tab to view the current settings.
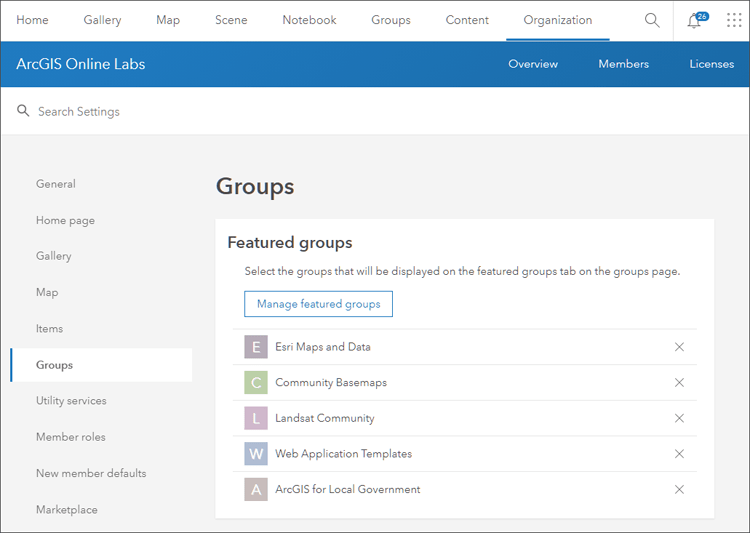
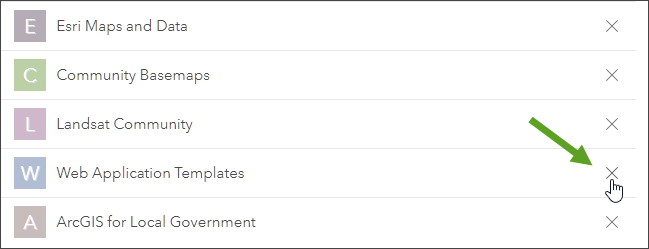
Step 2 — To remove one, or all the default groups, click the X to the right of the group.
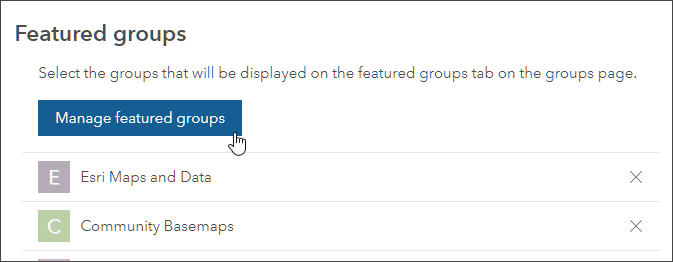
Step 3 — To add your own groups, click Manage featured groups.
Step 4 — Select one or more groups from the list of all groups in your organization.
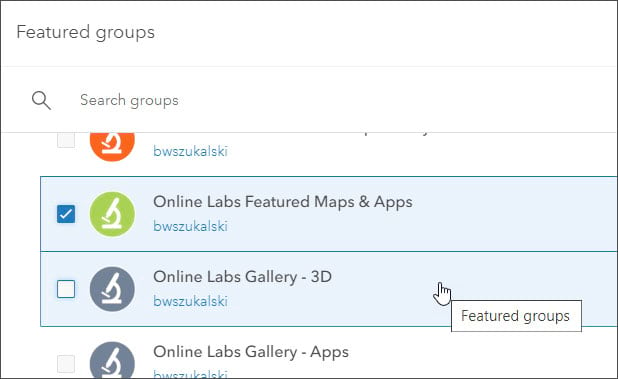
Step 5 — Click Save when finished. You will see a confirmation that the Groups gallery setting has been updated.

Note: The groups you have chosen will be displayed on the Groups tab for public visitors to your home page. After signing in, members will see a collection of groups they own or are members of. The featured groups configured above will be available to members in Featured Groups in the Groups tab after they sign in.

Going the extra mile
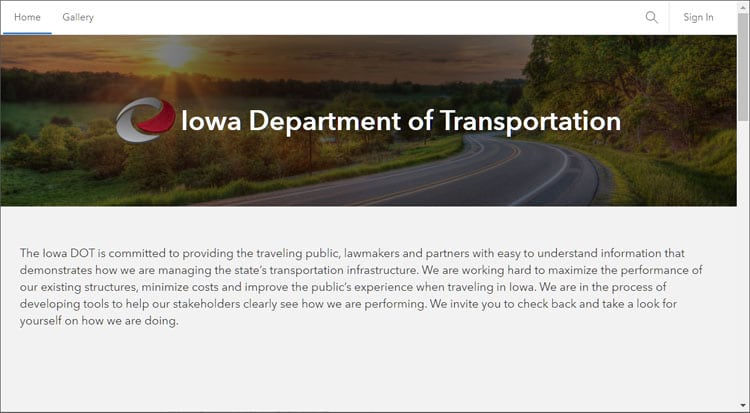
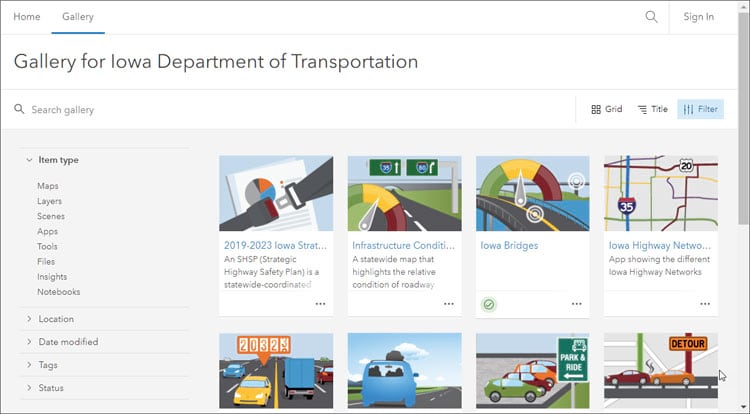
The Iowa Department of Transportation organization home follows best practices. Not only is the home page cleanly designed, it also includes customized Navigation bar link visibility and a configured Gallery link as described above.
Organization home page:
Organization Gallery tab:
Summary
With a few simple steps you can configure a much better experience for both public visitors and organization members. Use the configurations detailed in the steps above to configure a great experience.
More information
For more information see:
- Create groups
- Configure groups
- Configure home page
- Declutter your organization’s Navigation bar
- Create a great home page for your organization
This blog article was originally published on August 3, 2020, and has been updated.

Commenting is not enabled for this article.