Note: This article was originally published on January 27, 2023 by Princess Guzman and Liz Todd, and has been updated. The most recent updates to this article reflect changes to the organization status dashboard in ArcGIS Online.
Credits are the currency of ArcGIS, and are consumed for specific transactions, such as performing analytics and storing features. You can consume credits when working in ArcGIS Online or when interacting with ArcGIS Online while using other ArcGIS products such as ArcGIS Pro, ArcGIS Enterprise, and ArcGIS Business Analyst.
ArcGIS Online offers tools and workflows that help you manage credits and monitor credit usage in your ArcGIS Online organization. This article offers credit management tips and best practices for organization administrators and members.
Tips for administrators
1. Enable credit budgeting
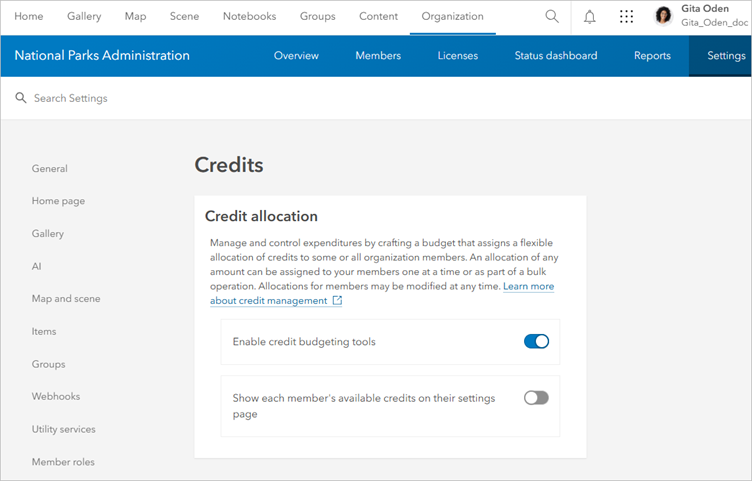
Administrators can allocate credits to users by enabling credit budgeting, which has the following benefits:
- Allows administrators to assign a specific quantity of credits to each member. Credit budgets can be assigned to members during the invitation process or at any time through the Organization page Members tab.
- Allows members to see their available credits on their settings page.
- Gives members the flexibility to use credits any way they choose.
- Displays an additional column of information on the Organization page Members tab that shows administrators the number of credits remaining for each member.
- Helps members avoid mistakes by preventing transactions that would consume too many credits.
Turn on credit budgeting by clicking Organization > Settings > Credits, and turning on the Enable credit budgeting tools toggle button. You also have the option of showing each member’s available credits on their settings page.
2. Create custom member roles with privileges
When administrators know which tools members need, they can create and assign custom member roles with privileges to limit access to credit-consuming tools.
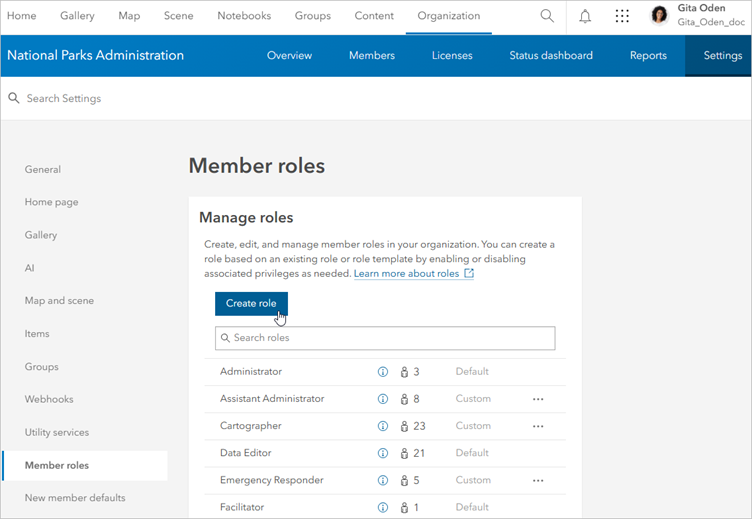
Create custom roles by clicking Organization > Settings > Member roles > Create role.
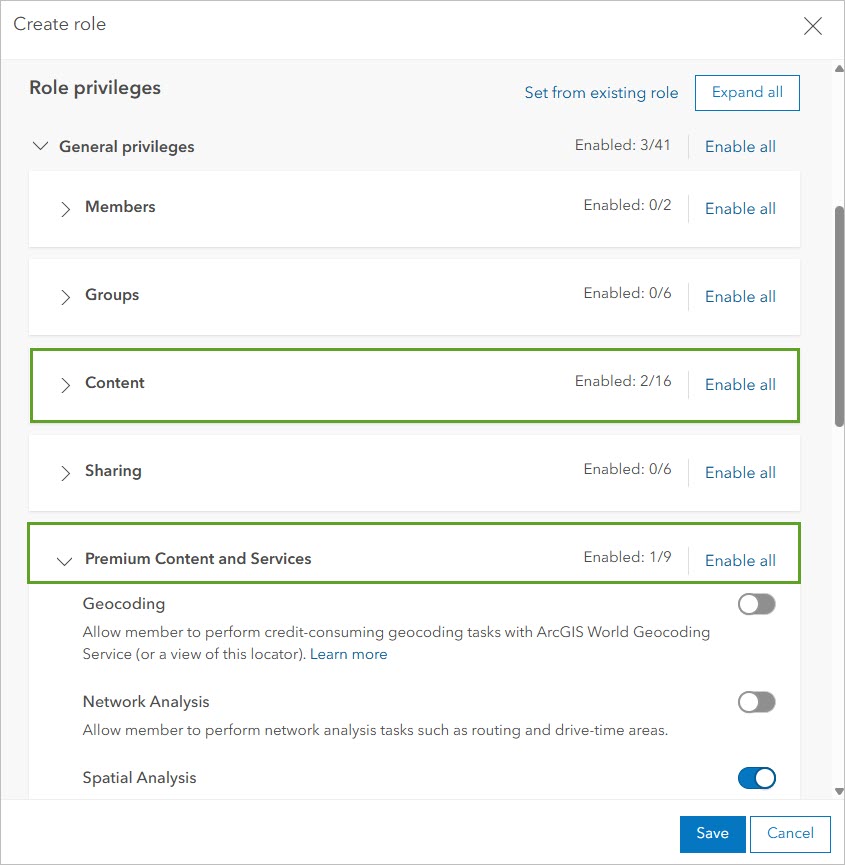
When creating a custom role, administrators can control access to credit-consuming tools and content by enabling and disabling privileges in the Premium Content and Services section—such as Geocoding, Network Analysis, and Demographics—under General privileges. Administrators can use the privileges listed in the Content section—such as Create, update, and delete, Publish hosted feature layers, and Publish hosted scene layers—also under General privileges.
3. Monitor organizational usage
Administrators can monitor their members’ credit usage using tools and information on the Organization page. The following are some ways to monitor credit usage in your organization:
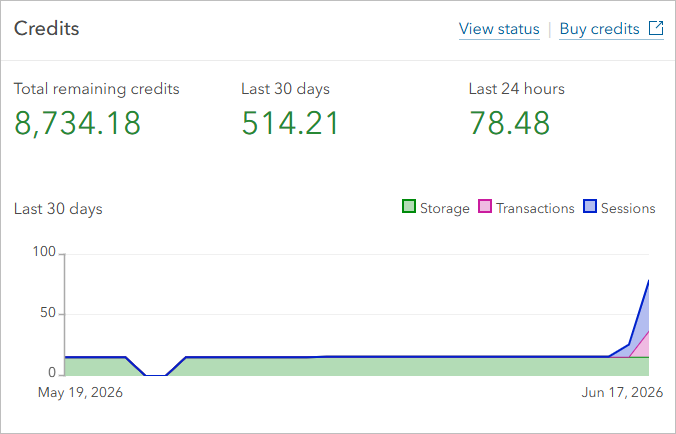
See a snapshot of your organization’s credit usage
Go to the Organization > Overview tab to get a quick view of credit usage information in the organization.
Use the status dashboard
Go to the Organization > Status dashboard tab to see credit usage over time, credit usage by type, and other information.
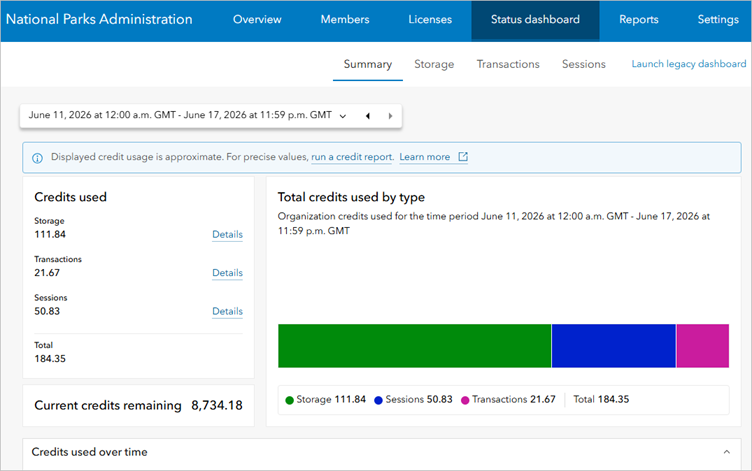
The status dashboard is organized into four tabs: Summary, Storage, Transactions, and Sessions. Use the pre-set and custom date range options, page filters, and drill-throughs on the various tabs to access specific credit usage information—for example, the number of credits used for network analysis in the last 7 days.
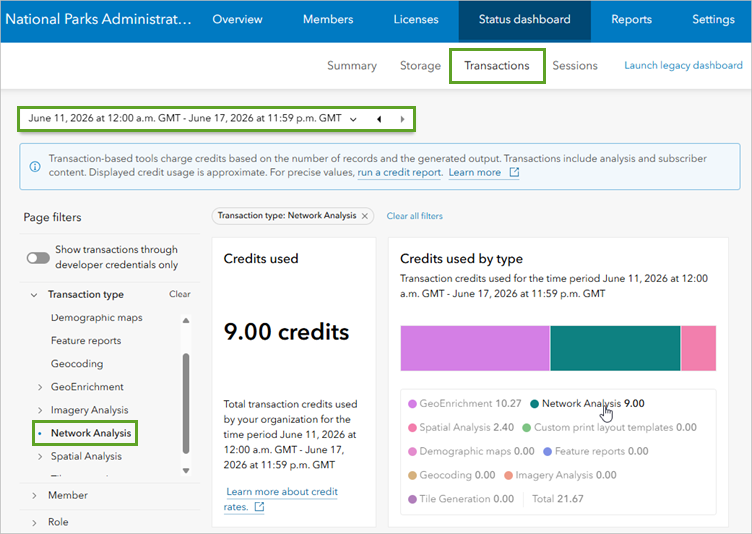
Tip: For the most precise and up-to-date credit usage information, run a credit report (Organization > Reports).
Monitor storage credit usage
Use the Storage tab of the organization status dashboard to get detailed information about storage credit usage in the organization.
The Items using the most storage credits table includes a list of items in the organization, with the number of storage credits used for each item, the item owner, item view count, and when the item was last viewed. You can download this information as a CSV file to save and share as needed. For more information, see the How to manage storage credits in your organization blog article.
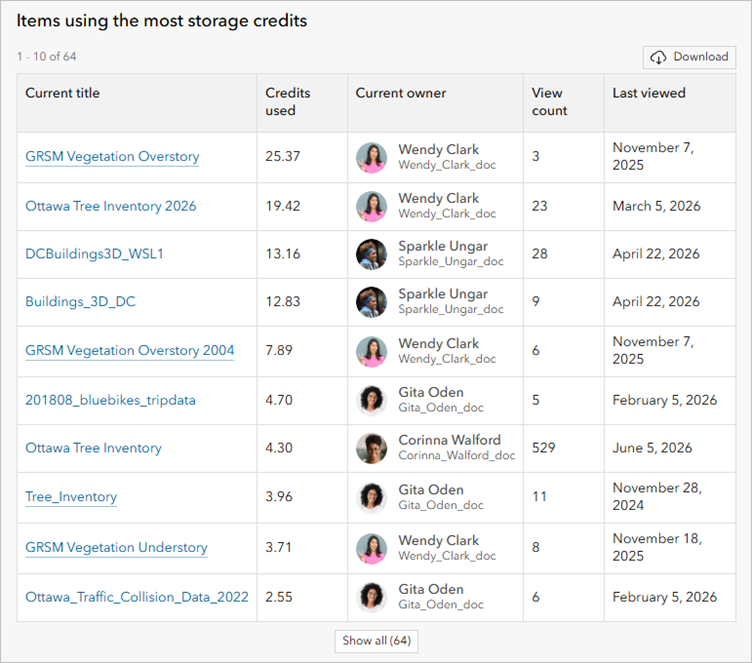
Tip: If you want to see a full list of items in the organization with additional information about each item, run an item report (Organization > Reports).
Monitor your ArcGIS Online organization’s email notifications
Administrators will receive an email notification when a member has consumed all their credits (when credit budgeting is enabled), when the organization has consumed 75% or more of its credits, and when the organization has consumed all its credits. Additional service credits are sold in blocks of 1,000 and can be purchased at any time through the Esri Store.
Tips for everyone
Organization members who are not administrators can also help with credit management by applying the following tips:
1. Monitor your usage
Visit your settings page to see the number of credits available to you. (If you don’t see this information, ask your administrator to enable it in the organization’s credit settings.)
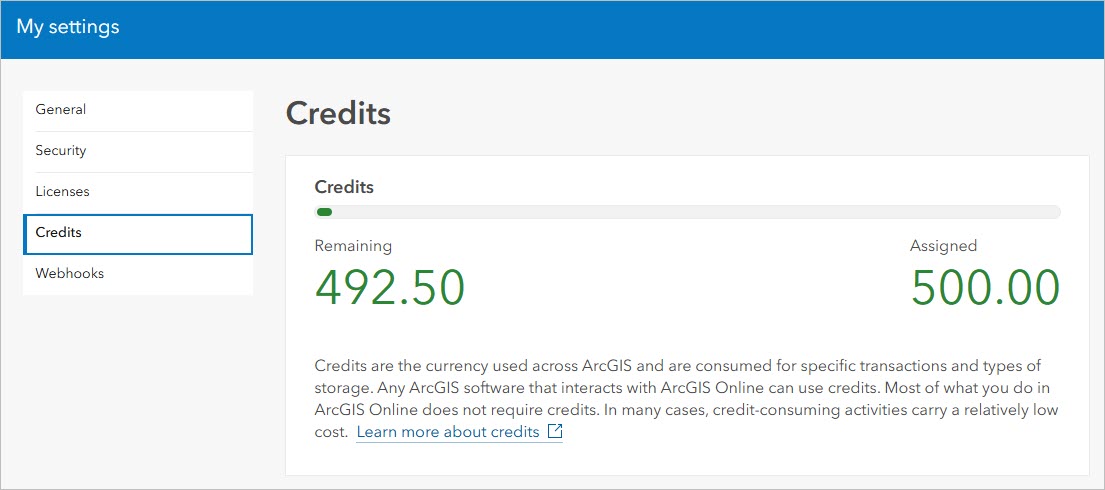
2. Know how many credits the transaction requires
The following are some tips to help members estimate how many credits their transactions will consume:
Run the credit estimator
Before running an analysis tool in Map Viewer, you can use the credit estimator to calculate the expected number of credits you will use in the transaction. Click Estimate credits to see the number of credits that will be used when you run the tool.
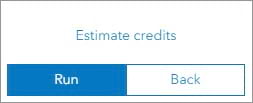
You can also apply filter expressions and modify the display extent and other tool options to reduce the number of credits that will be consumed. For more information, see Tips for managing credits consumed by analysis tools.
Be aware of item storage costs
Feature storage is the only credit-consuming service that cannot be calculated with the credit estimator. As mentioned in the previous section, feature storage is calculated for the organization, not individual members, and is charged hourly. If you are concerned about storing a large or complex item, upload the item and ask an administrator to run an item report in an hour to check the item’s storage cost. If you see that the item is consuming too many credits, you can modify or delete it.
3. Understand what consumes—and doesn’t consume—credits
Know what capabilities consume credits and at what rate. This informative table includes a list of credit-consuming capabilities, the rate of consumption, as well as examples of where the capability is used.
Learn more
To learn more about credit management in ArcGIS Online, refer to the following resources:
- Credits overview (web page)
- ArcGIS Online Credits (video series)
- Understand credits (help documentation)
- Configure credits (help documentation)
- Understand credits for spatial analysis (help documentation)
- View status dashboard (help documentation)
- Create reports (help documentation)
- Supercharge your ArcGIS Online organization management with reports (blog article)
- Tips for managing credits consumed by analysis tools (blog article)
- Purchase additional credits (web page)



Commenting is not enabled for this article.