In ArcGIS Online and ArcGIS Enterprise organizations, administrators and members use groups for a variety of purposes, such as organizing content or members related to specific projects, workflows, and initiatives. Before creating a group, it’s important for the group owner to determine the purpose of the group to ensure that they specify the appropriate group settings. This article outlines common purposes groups serve, and guidelines for creating groups for each purpose. But first, it’s important to know how to create a group in ArcGIS Online and ArcGIS Enterprise, which is described in the first section of the article.

In this article
- Create a group
- Display group content on the home or gallery page, or in apps
- Allow others to update shared items
- Manage members in the organization
- Share content with community groups and the public
- Share content in a partnered collaboration (ArcGIS Online)
- Share content in a distributed collaboration
- Link a group to an external group
- Export and import content (ArcGIS Enterprise)
- Learn more

Create a group
The following steps outline the basic workflow for creating groups in ArcGIS:
1-Verify that you are signed in to ArcGIS and have privileges to create groups.
2-At the top of the website, click Groups and click Create group.
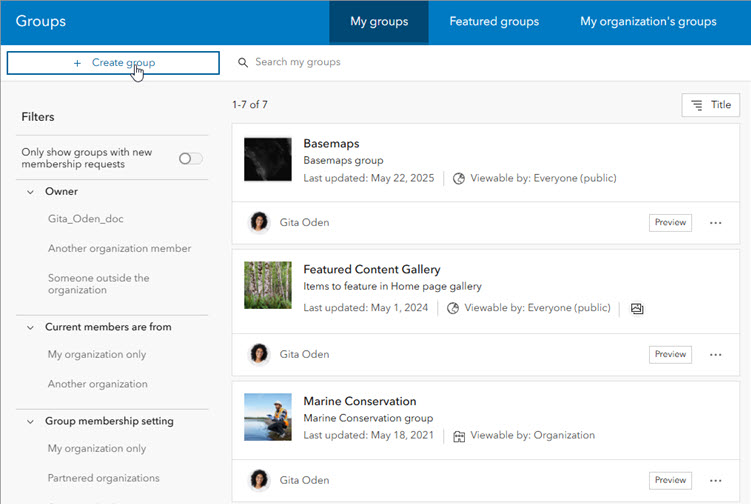
3-Upload a thumbnail to represent the group and provide a group name, tags, and optionally a short summary.
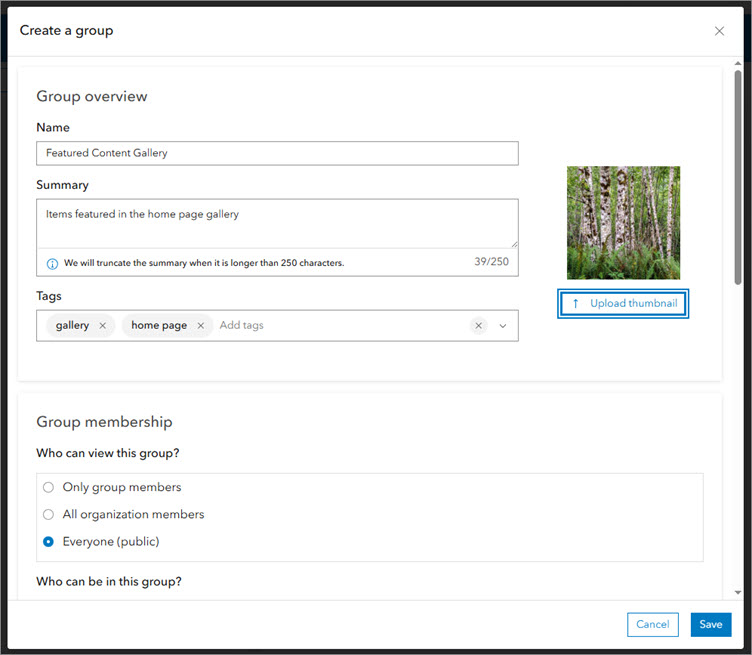
4-In the Group membership section, select options for each of the following settings:
- Who can view this group?
- Who can be in this group?
- How can people join this group?
- Who can contribute content?
- Who can see the full list of members on the group’s Members tab?
Note: This setting is only visible if you are signed in as a default administrator and are not linking your group to an external group.
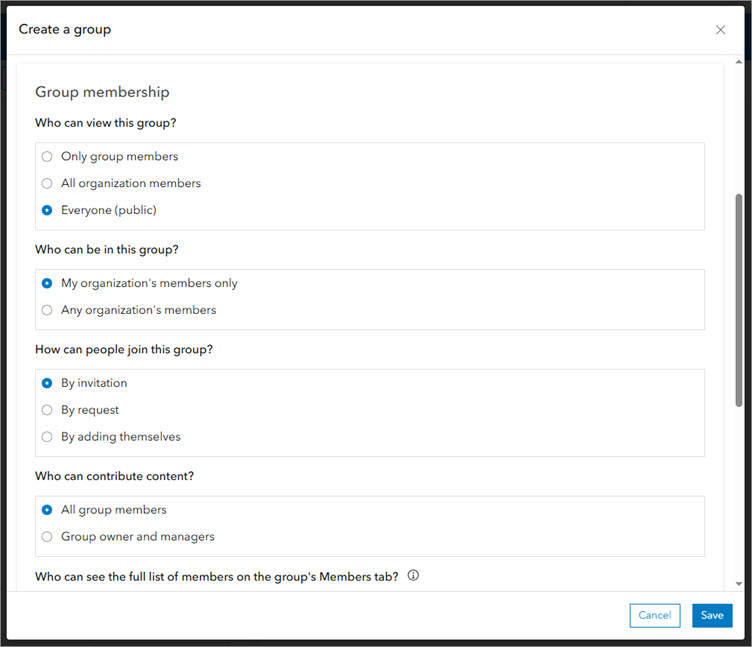
Note: The sections below provide guidelines for choosing the appropriate options for your group’s purpose.
5-In the Group designations section, enable any of the following group options:
- Shared update
- Administrative group
- Open data
The sections below provide guidelines for choosing the appropriate group designations for your group’s purpose.
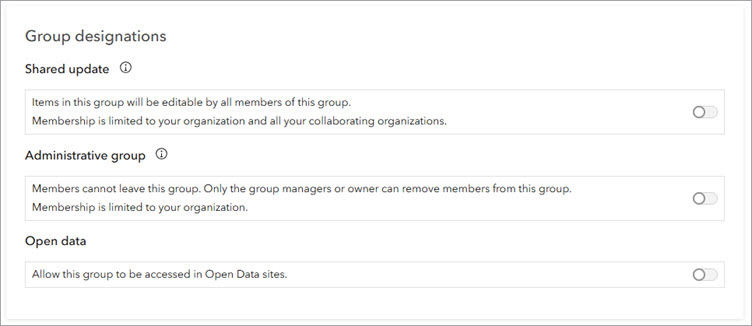
Note: The above image reflects the setting descriptions that appear in ArcGIS Online. Membership limitations for the first two designations do not apply to ArcGIS Enterprise.
6-Click Save.
Tip: To prevent accidental deletion of important groups, it’s recommended that you enable delete protection in the Deletion management section on the Settings tab of the group page.
For more details about creating groups, visit the ArcGIS Online help documentation and the ArcGIS Enterprise help documentation.

Display group content on the home or gallery page, or in apps
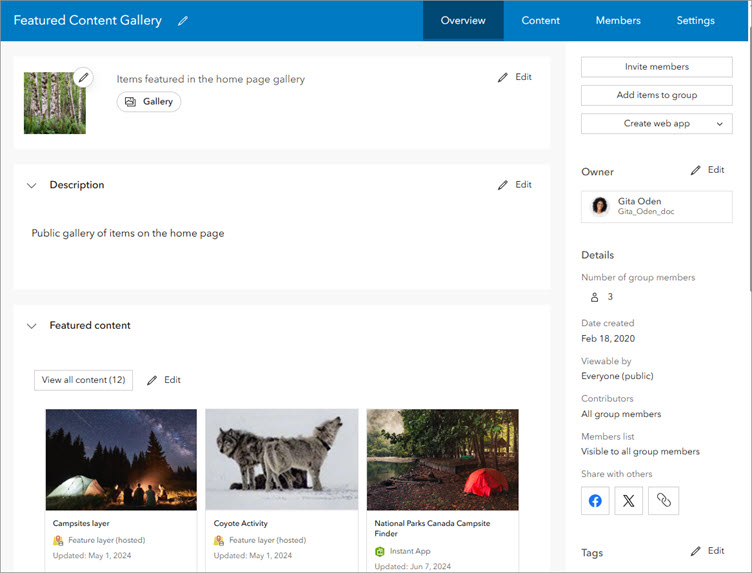
You can use groups to feature content on the organization home page and gallery page, as well as build custom galleries for basemaps and apps. The following are guidelines for creating featured content groups:
- If your organization home page, gallery, or app is accessible by the public, your featured content must also be accessible by the public. When creating the group, choose Everyone (public) for the Who can view this group? Ensure that you share all items with Everyone (public) in addition to sharing the items with the group.
- To restrict group access to organization members, choose All organization members for Who can view this group? and ensure items are shared with the organization as well as the group.
- Choose your featured content group when configuring your gallery page or home page.
Note: In ArcGIS Online, choosing this option allows members of your organization and of partnered organizations to access the group. Partnered collaboration is not supported in ArcGIS Enterprise so choosing this option allows members of your ArcGIS Enterprise organization to find and view the group.

Allow others to update shared items
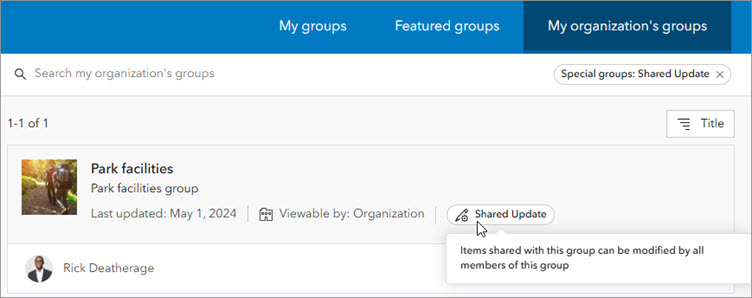
Organizations often use groups to collaborate with other members on content for a specific project or initiative—for example, shift workers in operations centers who need to update the maps and layers used in apps and dashboards. When multiple people need to update the same item or set of items, you can create a shared update group. In a shared update group, the item owners maintain ownership of their items, but other group members can make updates to the items, including updating the content and the item details. Follow the guidelines below when creating shared update groups:
- To create a shared update group, you must have the privilege to create groups with update capabilities.
- Under Group designations, enable the Shared update group option. This option is only available when How can people join this group? is set to By invitation or By request and when creating new groups. The setting cannot be changed once the group has been created.
- Carefully consider which members are added to a shared update group. In addition to the ability to update the content and item details of items in a shared group, group members also have elevated privileges, such as the ability to edit the contents of hosted feature layers, append and update a hosted feature layer using the content of a file, alter editor tracking settings, enable or disable attachments, and alter the layer’s schema.

Manage members in the organization
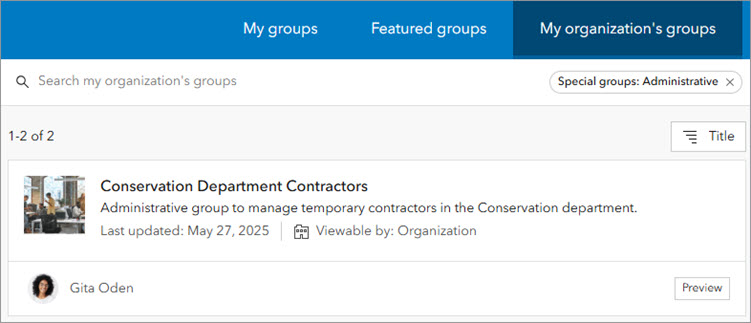
Groups are also useful for organizing, categorizing, and managing members in the organization. For example, you may wish to categorize and manage temporary workers such as interns, or members in different regions or departments of your company. You might also need to manage a temporary project, such as an academic course, with a specific set of members. This is where administrative groups come in.
When you create an administrative group to organize members in your organization, the members are restricted from leaving the group without approval; only group managers and owners can remove members from the group. This allows you to maintain the group until you are ready to delete it at the end of the members’ or project’s lifecycle. The following are guidelines for creating administrative groups:
- To create and own an administrative group, you must be a default administrator or have the privilege to create groups with leaving disallowed.
- Under Group designations, enable the Administrative group option. This option is only available when Who can be in this group? is set to My organization’s members only and when creating new groups. The setting is not available when the group is linked to an external SAML or OpenID Connect group. The setting cannot be changed after the group has been created.

Share content with community groups and the public
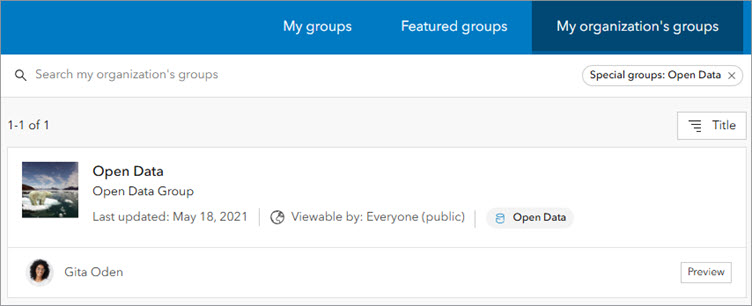
You can use groups to share content with the public or specific community members. In ArcGIS Online and ArcGIS Enterprise organizations, you can share open and secure content through ArcGIS Hub sites, previously referred to as Open Data sites.
Note: An ArcGIS Hub Premium license provides a separate community organization to collaborate with those outside your primary ArcGIS Online organization. This could include volunteers, community group members, and other stakeholders. To share open and secure content internally, ArcGIS Enterprise organizations should use ArcGIS Enterprise Sites.
If you are a default administrator, you can create a group that is visible to the public while restricting who can see the list of group members—for example, in community groups or crowdsourced groups.
The following are guidelines for creating groups for sharing public and community content and for protecting member privacy in public groups:
- To share open data through Hub, first share the data to a public group that is part of a public Hub site. Ensure that Open data option under Group designations is enabled. This makes the data available for search and discovery on the ArcGIS Hub home page.
Note: The Open data option is only available if your organization is configured for open data, when Who can view this group? is set to Everyone (public), and if you have privileges to manage the organization’s website settings.
- To allow group members to add content to the group, ensure that you choose All group members for Who can contribute content?
- To restrict who can see the list of group members, set Who can see the full list of members on the group’s Members tab? to Group owners and managers. Selecting this option ensures that only the group owner and managers, and those with administrative privileges to view all members and groups, can see the full list of group members. Other group members can only see the group owner and group managers listed on the Members tab.
- To allow the community or public to view the shared items using ArcGIS Hub, ensure that you share all items with Everyone (public) in addition to sharing the items with the group.

Share content in a partnered collaboration (ArcGIS Online)
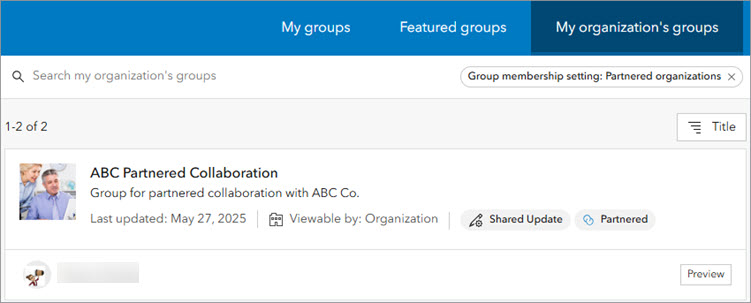
In a partnered collaboration between multiple ArcGIS Online organizations, members share and collaborate on content using groups. If your organization is participating in a partnered collaboration, you must follow the guidelines below when creating collaboration groups:
- For Who can be in this group?, select Organization and partnered collaboration members only.
- Under Group designations, enable the Shared update group option if you want to allow group members to update other group members’ items. This option is only available when you have the privilege to create groups with update capabilities, when How can people join this group? is set to By invitation or By request, and when creating new groups.

Share content in a distributed collaboration
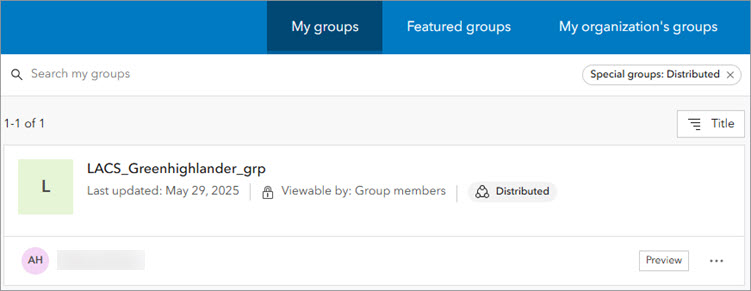
Organizations can link groups to workspaces to share and collaborate on content in a distributed collaboration between ArcGIS Enterprise organizations or an ArcGIS Online and an ArcGIS Enterprise organization. If your organization is participating in a distributed collaboration, follow the guidelines below when creating collaboration groups:
- To create a group to use in a distributed collaboration, you must have administrative privileges to manage the organization’s collaborations.
- For Who can contribute content?, select All group members.
- Under Group designations, enable the Shared update group option if you want to allow group members to update other group members’ items. This option is only available when you have the privilege to create groups with update capabilities, when How can people join this group? is set to By invitation or By request, and when creating new groups.

Link a group to an external group
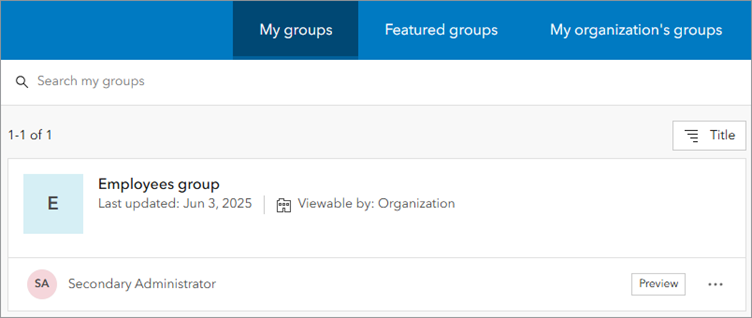
If your organization has implemented organization-specific logins (SAML or OpenID Connect) and enabled external group membership, you can create groups in ArcGIS that are linked to the external groups. Membership in the group is controlled by the identity provider (IdP), which verifies the credentials members use to sign in to ArcGIS.
In ArcGIS Online, supported IdPs include Security Assertion Markup Language (SAML) and OpenID Connect (OIDC). In ArcGIS Enterprise, supported IdPs include Security Assertion Markup Language (SAML) and OpenID Connect (OIDC), Windows Active Directory (AD), and Lightweight Directory Access Protocol (LDAP).
The following are guidelines for creating groups linked to external groups:
- To create a group to connect to a SAML-based group or an OpenID Connect-based group, you must be an administrator with the privilege to link to organization-specific groups.
- For Who can be in this group?, select My organization’s members only.
- Depending on the type of external group you are linking to, choose one of the following for How can people join this group?:
- Being a member of a SAML group—Membership is controlled by an external group managed by a SAML 2.0 IdP. Each user’s membership in the group is defined in the SAML assertion response received from the IdP every time the user successfully signs in.
- Being a member of an OpenID Connect group—Membership is controlled by an external group managed by an OIDC IdP. Each user’s membership in the group is defined in the group’s claim response received from the identity provider every time the user successfully signs in.
- Being a member of an Active Directory group (ArcGIS Enterprise only)—Membership is controlled by an external group managed by an AD IdP. Each user’s membership in the group is defined in the groups claim response received from the IdP every time the user successfully signs in.
- Being a member of an LDAP group (ArcGIS Enterprise only)—Membership is controlled by an external group managed by an LDAP IdP. Each user’s membership in the group is defined in the groups claim response received from the IdP every time the user successfully signs in.
- In ArcGIS Online or ArcGIS Enterprise, provide a group name that matches the exact value of the external SAML group as it is returned in the attribute value of the SAML assertion.
- When linking to an OIDC group in ArcGIS Online or ArcGIS Enterprise, provide a group name that matches the exact value of the external OpenID Connect group.
- When linking to an AD group in ArcGIS Enterprise, provide a group name that matches the exact value of the external AD group.
- When linking to an LDAP group in ArcGIS Enterprise, provide a group name that matches the exact value of the external LDAP group.

Export and import content (ArcGIS Enterprise)
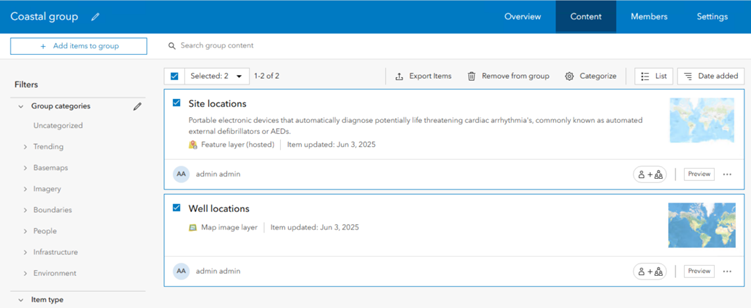
Members of an ArcGIS Enterprise organization may need to export and import items for reasons including the following:
- To migrate content across isolated environments, such as from development to staging to production or across disconnected environments
- To create backups of a subset of content and restore from those backups
You can export items shared with a group to an export package (.epk) and use the package to import the items into groups in the same or different organizations. When creating a group to export or import items, follow the guidelines below:
- You must be signed in as a default administrator to create the group.
- If you are exporting items to a different organization, the items in the group must also be shared with the public.

Learn more
Explore the following resources to learn more about using groups in ArcGIS.
ArcGIS Online
- Create groups
- Share items
- Configure gallery
- Configure home page
- Enable Open Data
- Overview of ArcGIS Hub
- Make public content more discoverable
- Use partnered collaborations
- Use distributed collaborations
- Set up SAML logins
- Set up OpenID Connect logins
- Privileges granted to roles
ArcGIS Enterprise
- Create groups
- Share items
- Configure gallery
- Configure home page
- Set up access and sharing
- Share content with collaboration groups
- Configure a SAML-compliant identity provider with a portal
- Configure OpenID Connect logins
- Portal authentication configuration
- Export and import group content
- Privileges granted to roles


Article Discussion: