One of the problems we often encounter when working with optical imagery is the presence of clouds and shadows, as they can block the ground information in the image. For a small area, we can wait for the next clear image. However, for a large area covered by multiple footprints, especially in regions such as islands or tropical areas where cloudy days are frequent, it is close to impossible to get any clear images. In practice, we use multiple scenes collected within a time window to create a cloud-free image composite.
The new Geometric Median in ArcGIS Pro 3.1 is a raster function for an image composition workflow. It calculates the best pixel approximation in spectral space by minimizing the sum of distances to all overlapping pixels. This helps to reduce the contribution of outlier pixels and produce a better image composite while maintaining the spectral relationship between bands. I am going to show you how to apply this new function to create a cloud-free image composite from a stack of Landsat images.
Study area and data
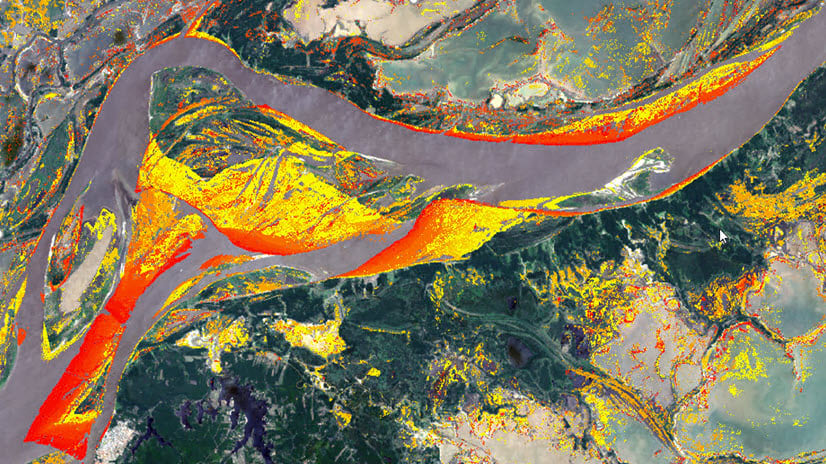
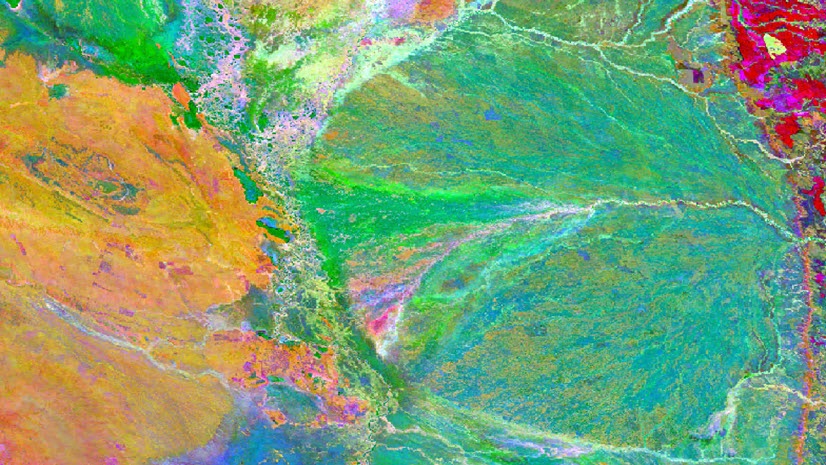
The study area is Tasmania Island, the southernmost state of Australia where the majority of the islands are covered with forests, with some mixed agriculture uses on the northern coast and in the main valley system running through eastern Tasmania. Our goal is to map the island using Landsat scenes for 2021. The island is covered by 12 Landsat footprints (below left), and a total of 121 usable images were chosen from Landsat 8 and Landsat 9 in the Landsat Collection 2. I used a cloud cover criterion to be less than 60 percent to ensure each location is covered by clear pixels. The picture on the right shows some examples.

I am going to create a composite out of these images using the new Geometric Median raster function in an ArcPy workflow. Code snippets for creating a cloud-free image cube are also provided at the end. For those who favor a manual workflow, the corresponding tools and function chains that are used in this workflow will also be covered.
Step 1: Create an image collection
The first step is to create a raster collection from the image stack. Although a raster collection object can be created directly from the source files using ArcPy, I like to use geoprocessing tools to first create a mosaic dataset, a persisted raster collection, as this has benefits for both the ArcPy workflow and the manual workflow. Specifically, I’ll use a Multiband processing template for the Add Rasters to Mosaic Dataset tool. This Multiband template will combine both surface reflectance bands and the QA band into one raster, allowing you to define and apply the cloud mask. I’ll start with importing modules and defining the Image Analyst license:

Next, I’ll create a mosaic dataset and add data from the source images in a folder. It’ll add the surface reflectance and QA bands of Landsat 8 and Landsat 9 images, and then I will create a raster collection object from the mosaic dataset. Now I have the raster collection with 121 rasters.

Refers to this help topic for the manual workflow to create a mosaic dataset.
Step 2: Mask clouds and shadows
To create a better image composite, I’ll remove clouds and shadows using the QA band provided in the Landsat product. The QA categories are defined using a bit index where 0 represents Fill, 1 for Dilated Cloud, 2 for Cirrus, 3 for Cloud, and 4 for Cloud Shadow. These can be found in the Landsat Collection 2 product documentation (table 6-2, page 13). The QA bits can be interpreted using the Transpose Bits raster function to create a QA mask. The code below defines a RemoveCloud function that creates a QA mask and applies it on data bands. This function will then be used to process each item in the raster collection using the Map method of the raster collection object.

For a manual workflow, below is the corresponding raster function chain for removing clouds and shadows, which can be applied to the mosaic dataset using the Raster Functions Batch Editor. This will mask the cloud and shadows for each raster in the mosaic dataset.

Step 3: Generate a cloud-free image composite
After cloud removal, the rasters in the collection will have a lot of NoData holes. The next step is to create a composite from these rasters. The new Geometric Median raster function is a numerical approach that runs iteratively to approximate a best result based on the criteria you defined. Parameter epsilon defines the accuracy—for example, the iteration will stop when the results from the two consecutive runs are close or when it exceeds the maximum number of iterations. I’ll use the default values and then save it to a cloud raster format.

Now I have the image composite generated from the 121 images, seamless and cloud-free.

For a manually workflow, you can define a function template using the Geometric Median function and apply it in the Generate Raster From Raster Function geoprocessing tool to create a cloud-free image composite.

Create a cloud-free image cube
If you need to process data into one composite per month or one composite per year, you can use a group field, process images within each group, and create a cloud-free image cube. Complete the following steps after you finish removing clouds and shadows for the raster collection in step 2:
1.Add a new field called year, populate this field with the year values extracted in ‘StdTime’ field, and group by this new field:

2. Get the unique value list from the group field using the keys method and apply Geometric Median function to each group. During this processing, prepare the raster, name, and year lists, which will be used in the next step.

3. Create a raster collection from the three lists, convert it to a multidimensional raster, and save it as a multidimensional CRF. This will be your analysis-ready image cube.

Conclusions and discussions
You might wonder whether applying QA mask is a required step or not. For datasets that have fewer cloudy images, the algorithm may be able to avoid the outlier pixels without a QA mask. However, using a QA mask when it is available will create a better composite.
ArcGIS also offers other ways to compose pixels, such as calculating mean, calculating median out of the overlap pixels, or using NDVI to find a greenness pixel. These less computational intensive methods can be alternative approaches to meet various requirements, but Geometric Median can maintain spectral relationships between bands which is advantageous for analysis workflow.

Article Discussion: