Use ArcGIS Pro UI capabilities first to define your classification, then use a little custom GP tool to convert the result to a generic raster function template for ArcGIS Pro, ArcGIS Image Server, and ArcGIS Online Image Services.
Raster classification and a meaningful legend help you understand data and communicate results. The ArcGIS Pro classify raster workflow supports you in defining meaningful classification for any raster layer. With the help of a custom tool, the result can then be used across the ArcGIS system.
Disclaimers
The toolbox provided only supports the Classify renderer.
Though it accepts all color models defined in the input, the output color model is always translated to RGB plus Alpha.


The Toolbox is provided “as is” to show what can be done. It is not supported and will not be guaranteed to be maintained or updated.
Create a classified raster template
Complete the following steps to create a base template:
-
Add any raster to ArcGIS Pro that contains suitable data for classification.
This could be elevation, velocity, temperature, or another type of data that already is classified into unique values that you want to display in a certain way. - Set the layer to display in Stretch mode, so the capabilities of classification are available in ArcGIS Pro.
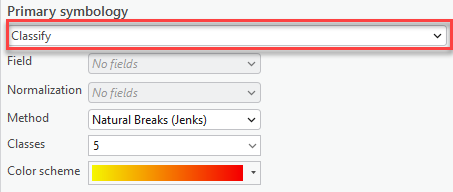
- Open the Symbology pane for this layer and switch to the Classify category to define a classification to use.
- Export this classification into a raster function template in the Symbology pane.
- In the Raster Functions pane, name and categorize the template in the custom raster functions section.
- Use the standard export capability to export the template to an .rft file stored on disk. See Export symbology as a raster function template.
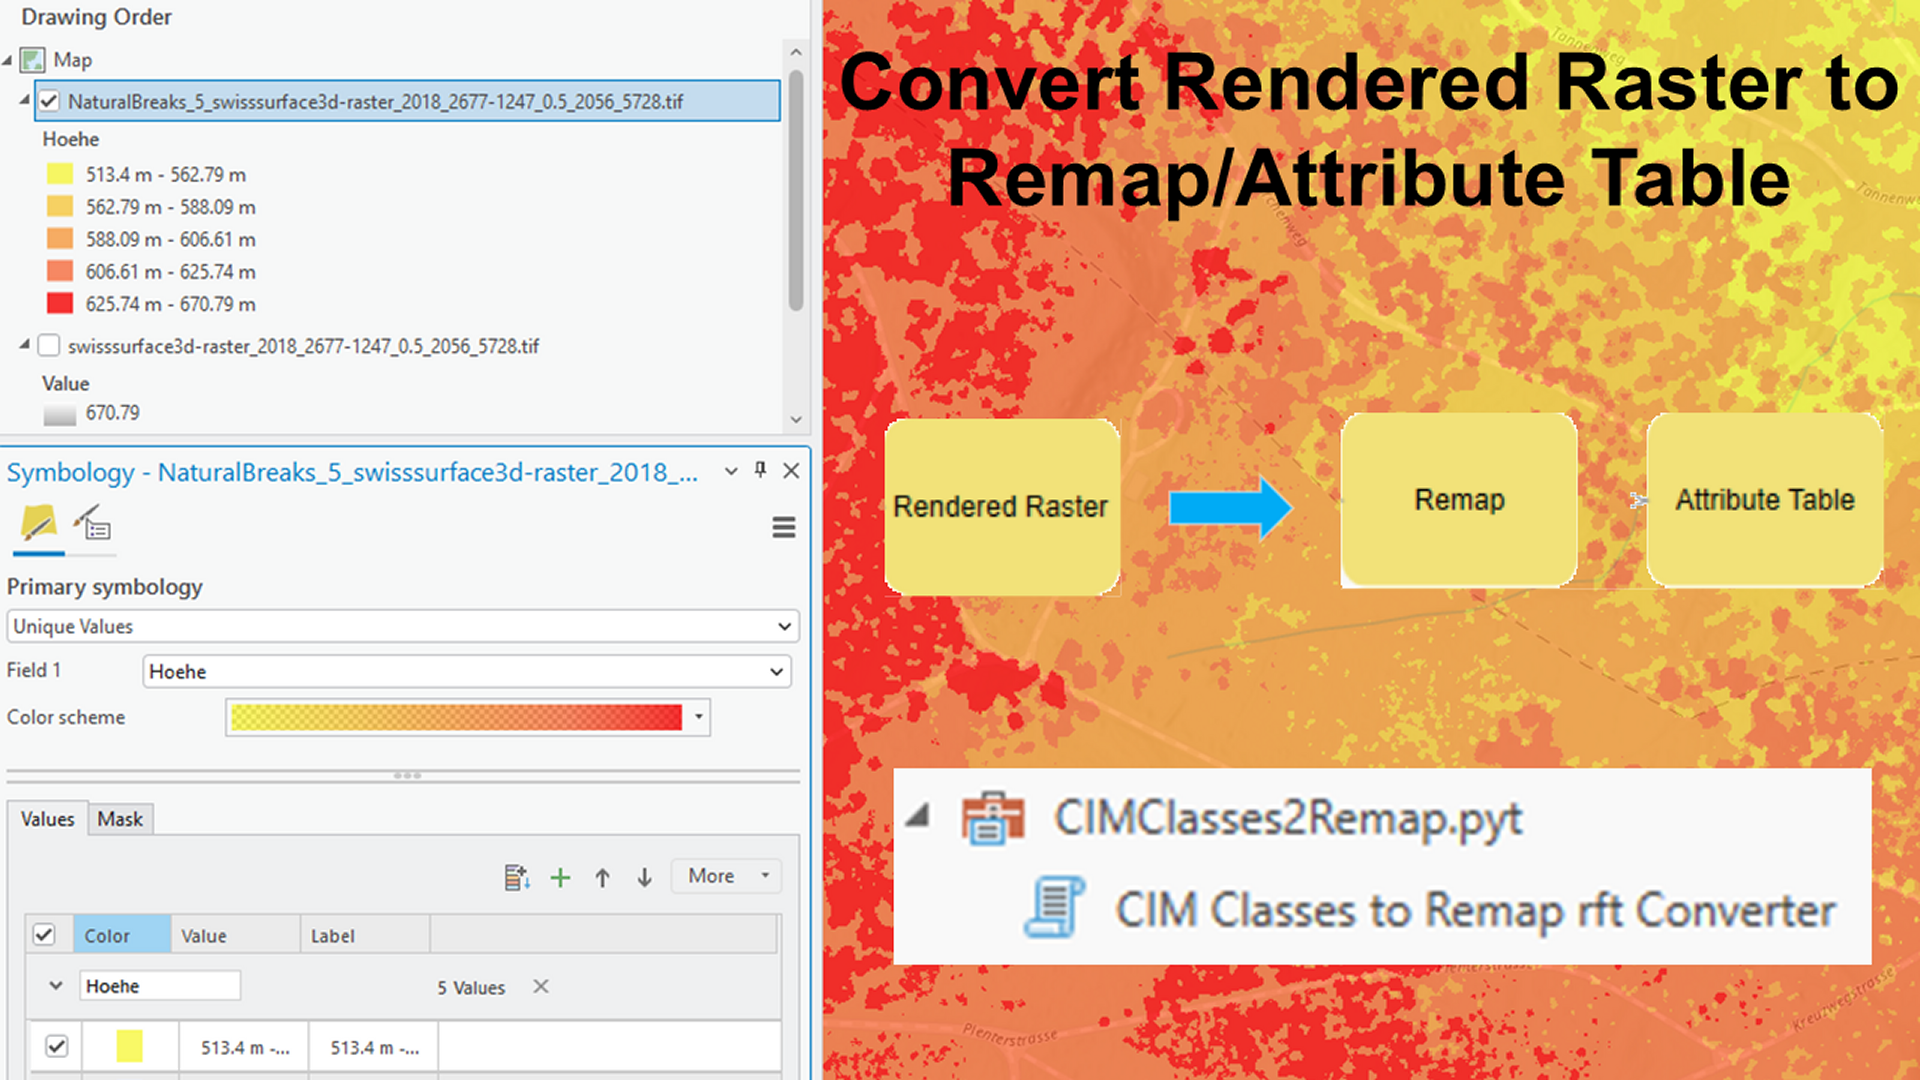
- To proceed, download the encrypted Python toolbox from ArcGIS Online, save it, and add it to ArcGIS Pro as a toolbox, resulting in this view in the Catalog pane:
- Run the CIM Classes to Remap rft Converter script tool.
- Specify the raster function template you exported as the input you want to convert.
- In the File Outputs section, specify an output .rft file, or keep the default. Optionally, you can output .csv files that represent the remap table and the attribute table generated and used after conversion.
- Optionally, in the final section of the tool, set arguments and capabilities:
- Specify the number of decimal places.
For a clearer legend display, the values can be rounded by the specified number of decimals. - Type a name for the template to display in ArcGIS Pro, ArcGIS Server, and ArcGIS Online.
- Set the legend header text to display. However, see the note below before editing this value.
- Type a measurement unit string that will be added to the legend values.
- Import it back into ArcGIS Pro as a custom raster function template, upload it to ArcGIS Online, or apply it to datasets to serve with Image Server.


The symbology of the layer switches to a default classification that you can adjust. Learn more about symbology for imagery in the help documentation.
For example, assume this is the classification wanted:


If you open the exported .rft.xml file in a text editor, you see that the classes, legend items, and color definitions are encoded inside a rendered raster function, which is a noneditable ArcGIS internal raster function. Consequently, when loading this raster function template into the raster function template editor, the model will look similar to the following:

When you double-click the Rendered Raster box, you will not see your classification in the UI. When applying the raster function in ArcGIS Pro, Image Server, or ArcGIS Online, the data will show the right classification, but the legend will only display as a standard RGB legend:

ArcGIS Pro allows you to classify rasters and define the class properties – which can be stored in raster function templates with the rendered raster function – but reapplying this function does not return the full legend.
Alternatively, you can combine the Remap and Attribute Table raster functions, which is less versatile in defining the classes and symbols, but will return the full legend when applied.
The solution is to map the rendered raster .xml file to the remap and attribute table .xml file, which you can do using the sample tool, but only for Classify renderers.

After adding the .rft file, a requirements check and analysis will be performed and reported in the File Information text line. If the .rft file does not pass this test, it cannot be converted.


In this example, with the settings applied above, the resulting template is now converted and stored on disk.

When you open it in the raster function editor, you will now see the Remap and Attribute Table function boxes.

When applying the function chain to the original raster (again, based on the stretch display of it), the display and legend now look similar to the following:

In this screenshot, you can see the following:
- The legend header is what you specified in the Legend Header String parameter of the tool.
- The numbers are rounded to the number of decimals specified in the Decimal Places parameter.
- There is a unit string added after every value as specified in the Unit String parameter.
The resulting template can be used–and will behave identically–in ArcGIS Pro, with Image Services, and with ArcGIS Online raster services.
Note: The default value for the Legend Header String parameter is ClassName. Changing it with this tool will result in a working raster function template; however, you cannot edit the attribute table function in the raster function template editor, as the name of the node in the .xml file is not recognized by the editor. If you intend to edit the attribute table interactively, leave the Legend Header String parameter set to ClassName.
Interested in other articles on ArcGIS Imagery Capabilities?
How about reading Unlocking the Power of Image Analysis in ArcGIS Pro: What You Might Not Know

Article Discussion: