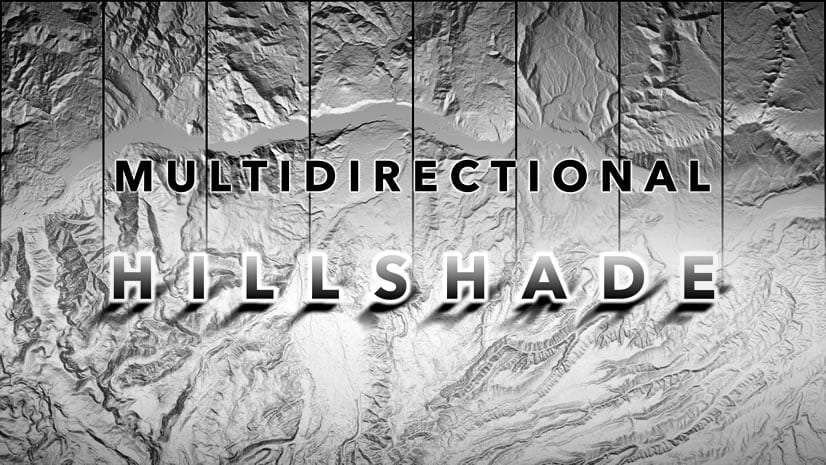
There is something meditative and wonderful about seeing…and making…hillshades. A nice hillshade can turn a map from something…not hillshaded…to something dripping with tactile charm. And there are all sorts of tones and techniques out there, each with a bit of a different feel. Here’s a playlist of 38 (and counting) videos showing different ways to make, use, and misuse, the decadent illusion of shaded relief.
Here are some previews of a standard hillshade compared to the method we’ll make here…

And another of the myriad cool things about blend modes, is the ability to blend the hillshade into a basemap or data layer. So an imagery basemap looks like this…

Here is a video walking through the steps to create ambient lighting for a realistic and useful hillshade.
0:00 Intro that just jumps right into the before/after goodies.
0:30 I’ve decided to include thank-you’s (in the form of a fake sponsorship message) to teachers I’ve had as a tiny way to say thanks. This video is sponsored by Mrs. Beach, who taught me English and creative writing. Thanks Mrs. Beach!
1:02 Using the “statistics” raster function, I make two copies of the original DEM. One with a 10 pixel blur and one with a 20 pixel blur. Turn off the blurred layers.
1:44 Run the “hillshade” raster function on all three of the elevation layers (the original DEM and the two blurred versions).
2:10 Apply the “soft light” blend mode to all three hillshade layers.
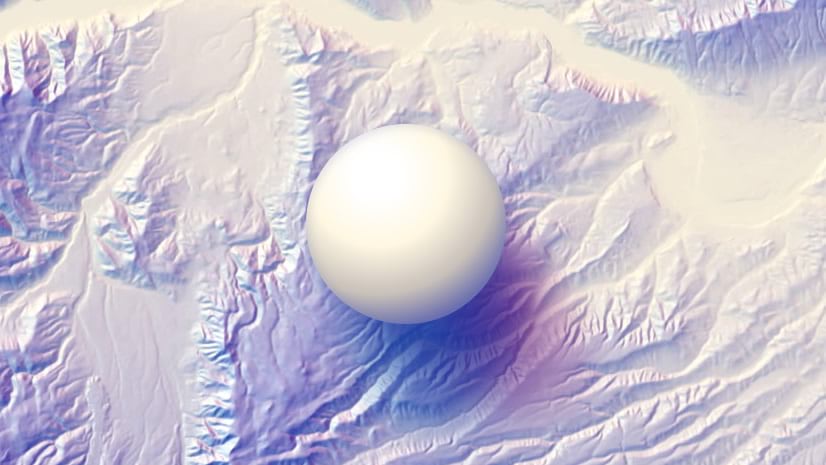
2:49 Run the “slope” raster function on the three elevation layers, and invert their color gradient in the symbology panel.
3:31 Use the “multiply” blend mode on all three slope layers to composite the darkness of the slopes together.
4:09 Create a “hillshade” of the slope layer. Invert the gradient of the result in the symbology panel. The result is an elevation edge-detection.
4:53 Use the “soft light” blend mode on the hillshaded slope layer to crustify the terrain and make plateaus and river channels pop.
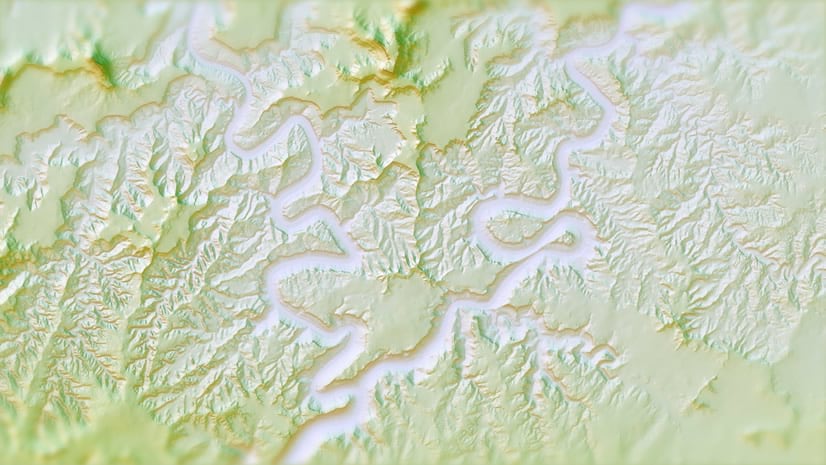
5:29 Optionally, group all the hillshade layers, and add an imagery basemap. Apply an “overlay” blend mode to the hillshade group to really bumpify the imagery.
6:08 Alternatively, try the “luminosity” blend mode on the hillshade group for a nice basemap-colorized hillshade.
…
If some of this looks familiar, it should! It is a refinement (and big simplification of) a handful of components, which you can see the theory around, and steps to create, here…
- Multiscale hillshade: https://youtu.be/4aefnrQJvMg
- Using slope for hillshade: https://youtu.be/4RRcl2_Weds
- Hacking a vertical edge detection to en-crisp-ify terrain: https://youtu.be/BJzt-87HpqY
If you are wondering, “say, can the resulting composite stack of shade layers be smashed together and used in ArcGIS Online?” The answer is yes, and for this you would use the “Manage Tile Cache” geoprocessing tool to create the hillshade tiles locally, then the “Export Tile Cache” geoprocessing tool to push them to ArcGIS Online. Tommy Fauvell has made a really helpful video showing how to do this.
Thanks for watching/trying, friends! If you use this method, or riff on it with your own tweaks, I’d love to see it!
Happy Mapping, John

Article Discussion: