The Census Bureau American Community Survey (ACS) layers in ArcGIS Living Atlas of the World help users understand the continuing changes taking place in their community. The layers cover topics on housing, income, internet access, education, disability, health insurance, and more. Customers can use this data for analysis, mapping, and charting in ArcGIS Business Analyst Web App.
In a future 2022 release of ArcGIS Business Analyst Web App, ArcGIS Living Atlas will have the layer updates and the most recent ACS data. To learn more, read about the Upcoming Updates Coming to American Community Survey Living Atlas Layers blog. To use the current ArcGIS Living Atlas layers in Business Analyst, please see the step-by-step guide in this blog or watch this guided video.
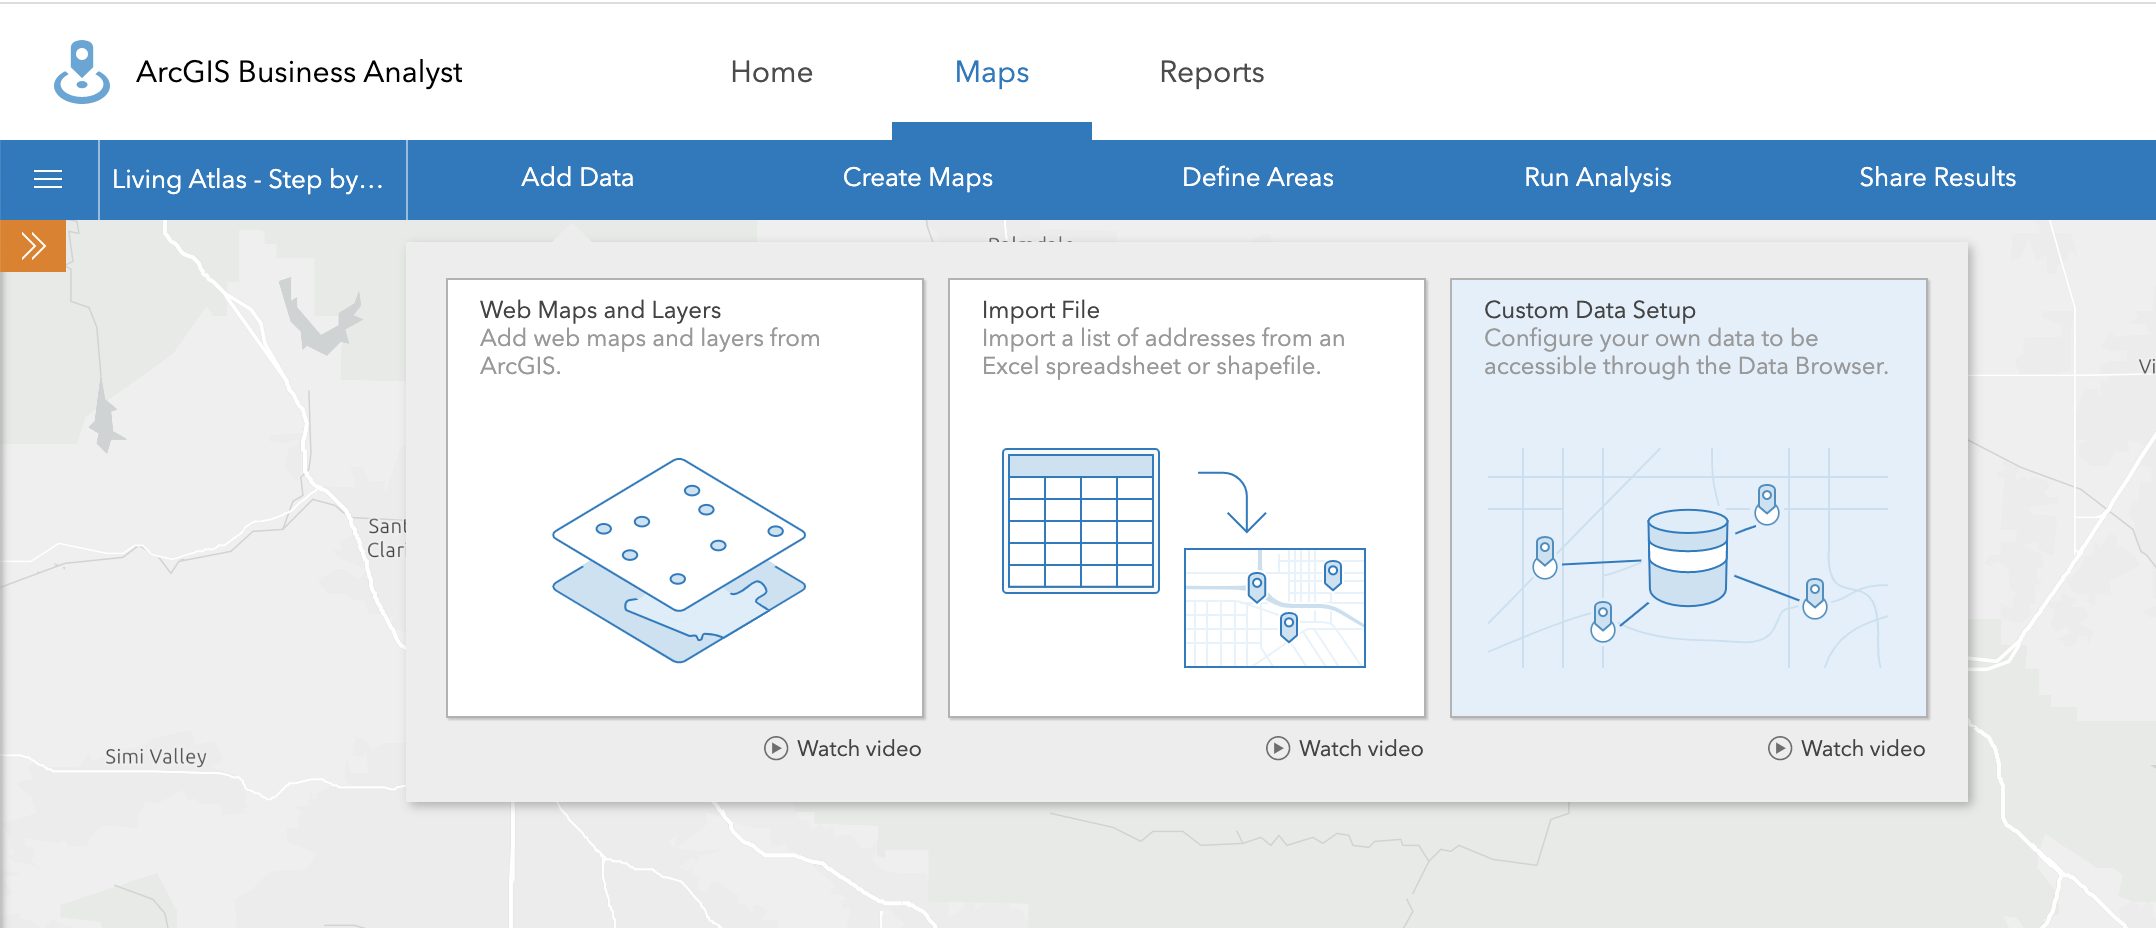
Step 1: Create a Custom Data Setup Workflow
To start, go to the Maps tab, select Add Data, and click the Custom Data Setup workflow.
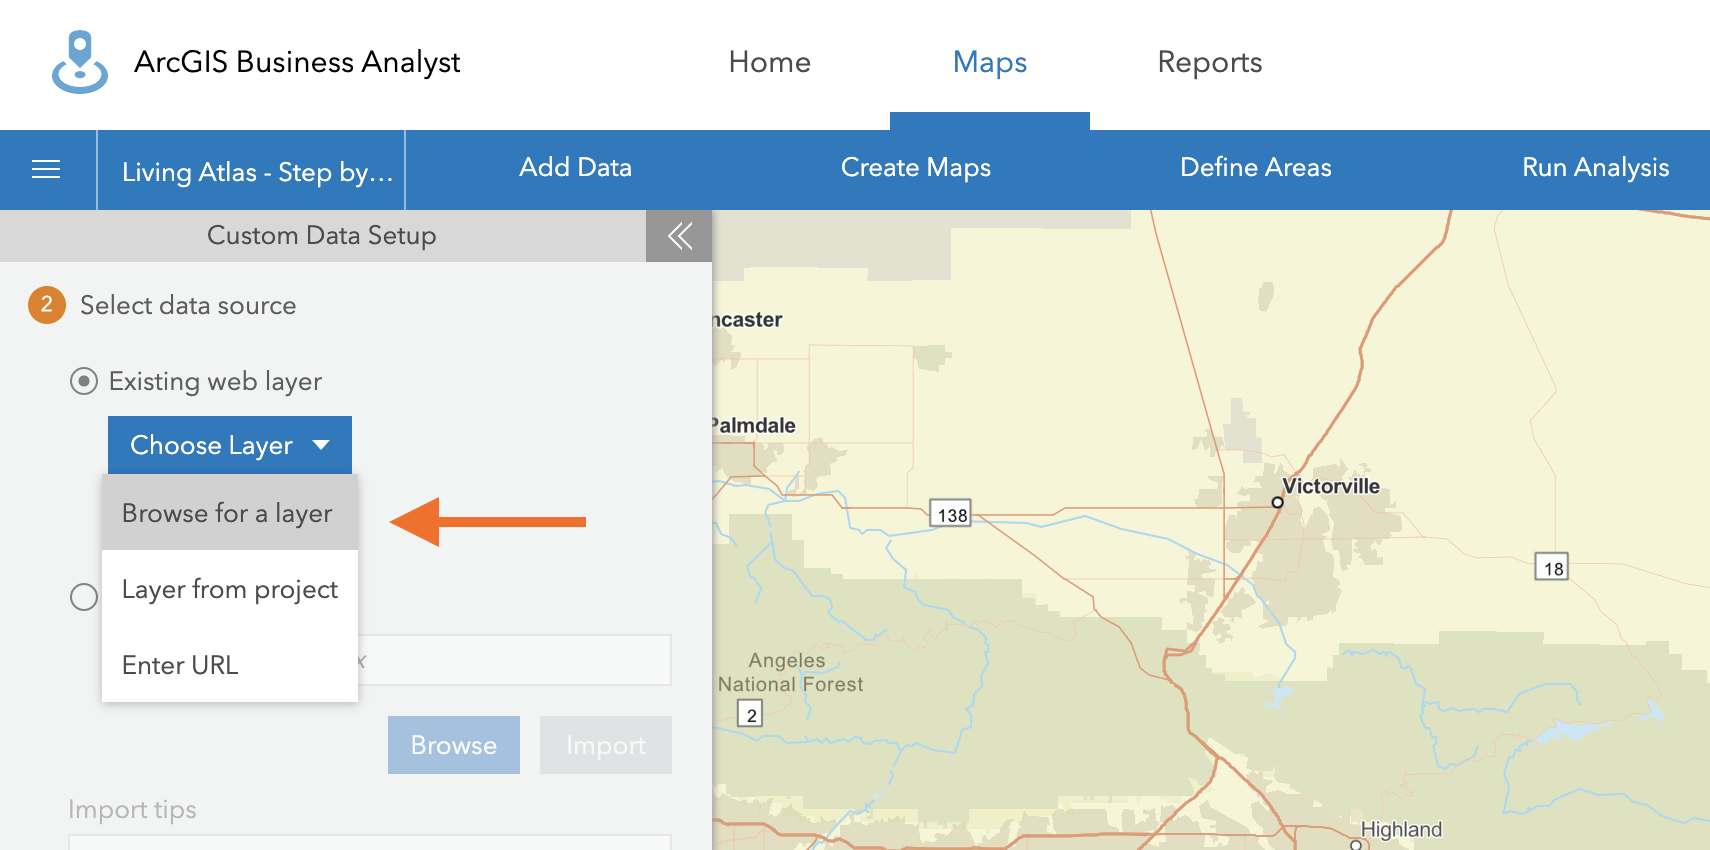
Step 2: Browse for a Layer
Begin by clicking Start Setup. Select the Existing web layer option and Click the Choose Layer button. In the drop-down option, select Browse for a layer.
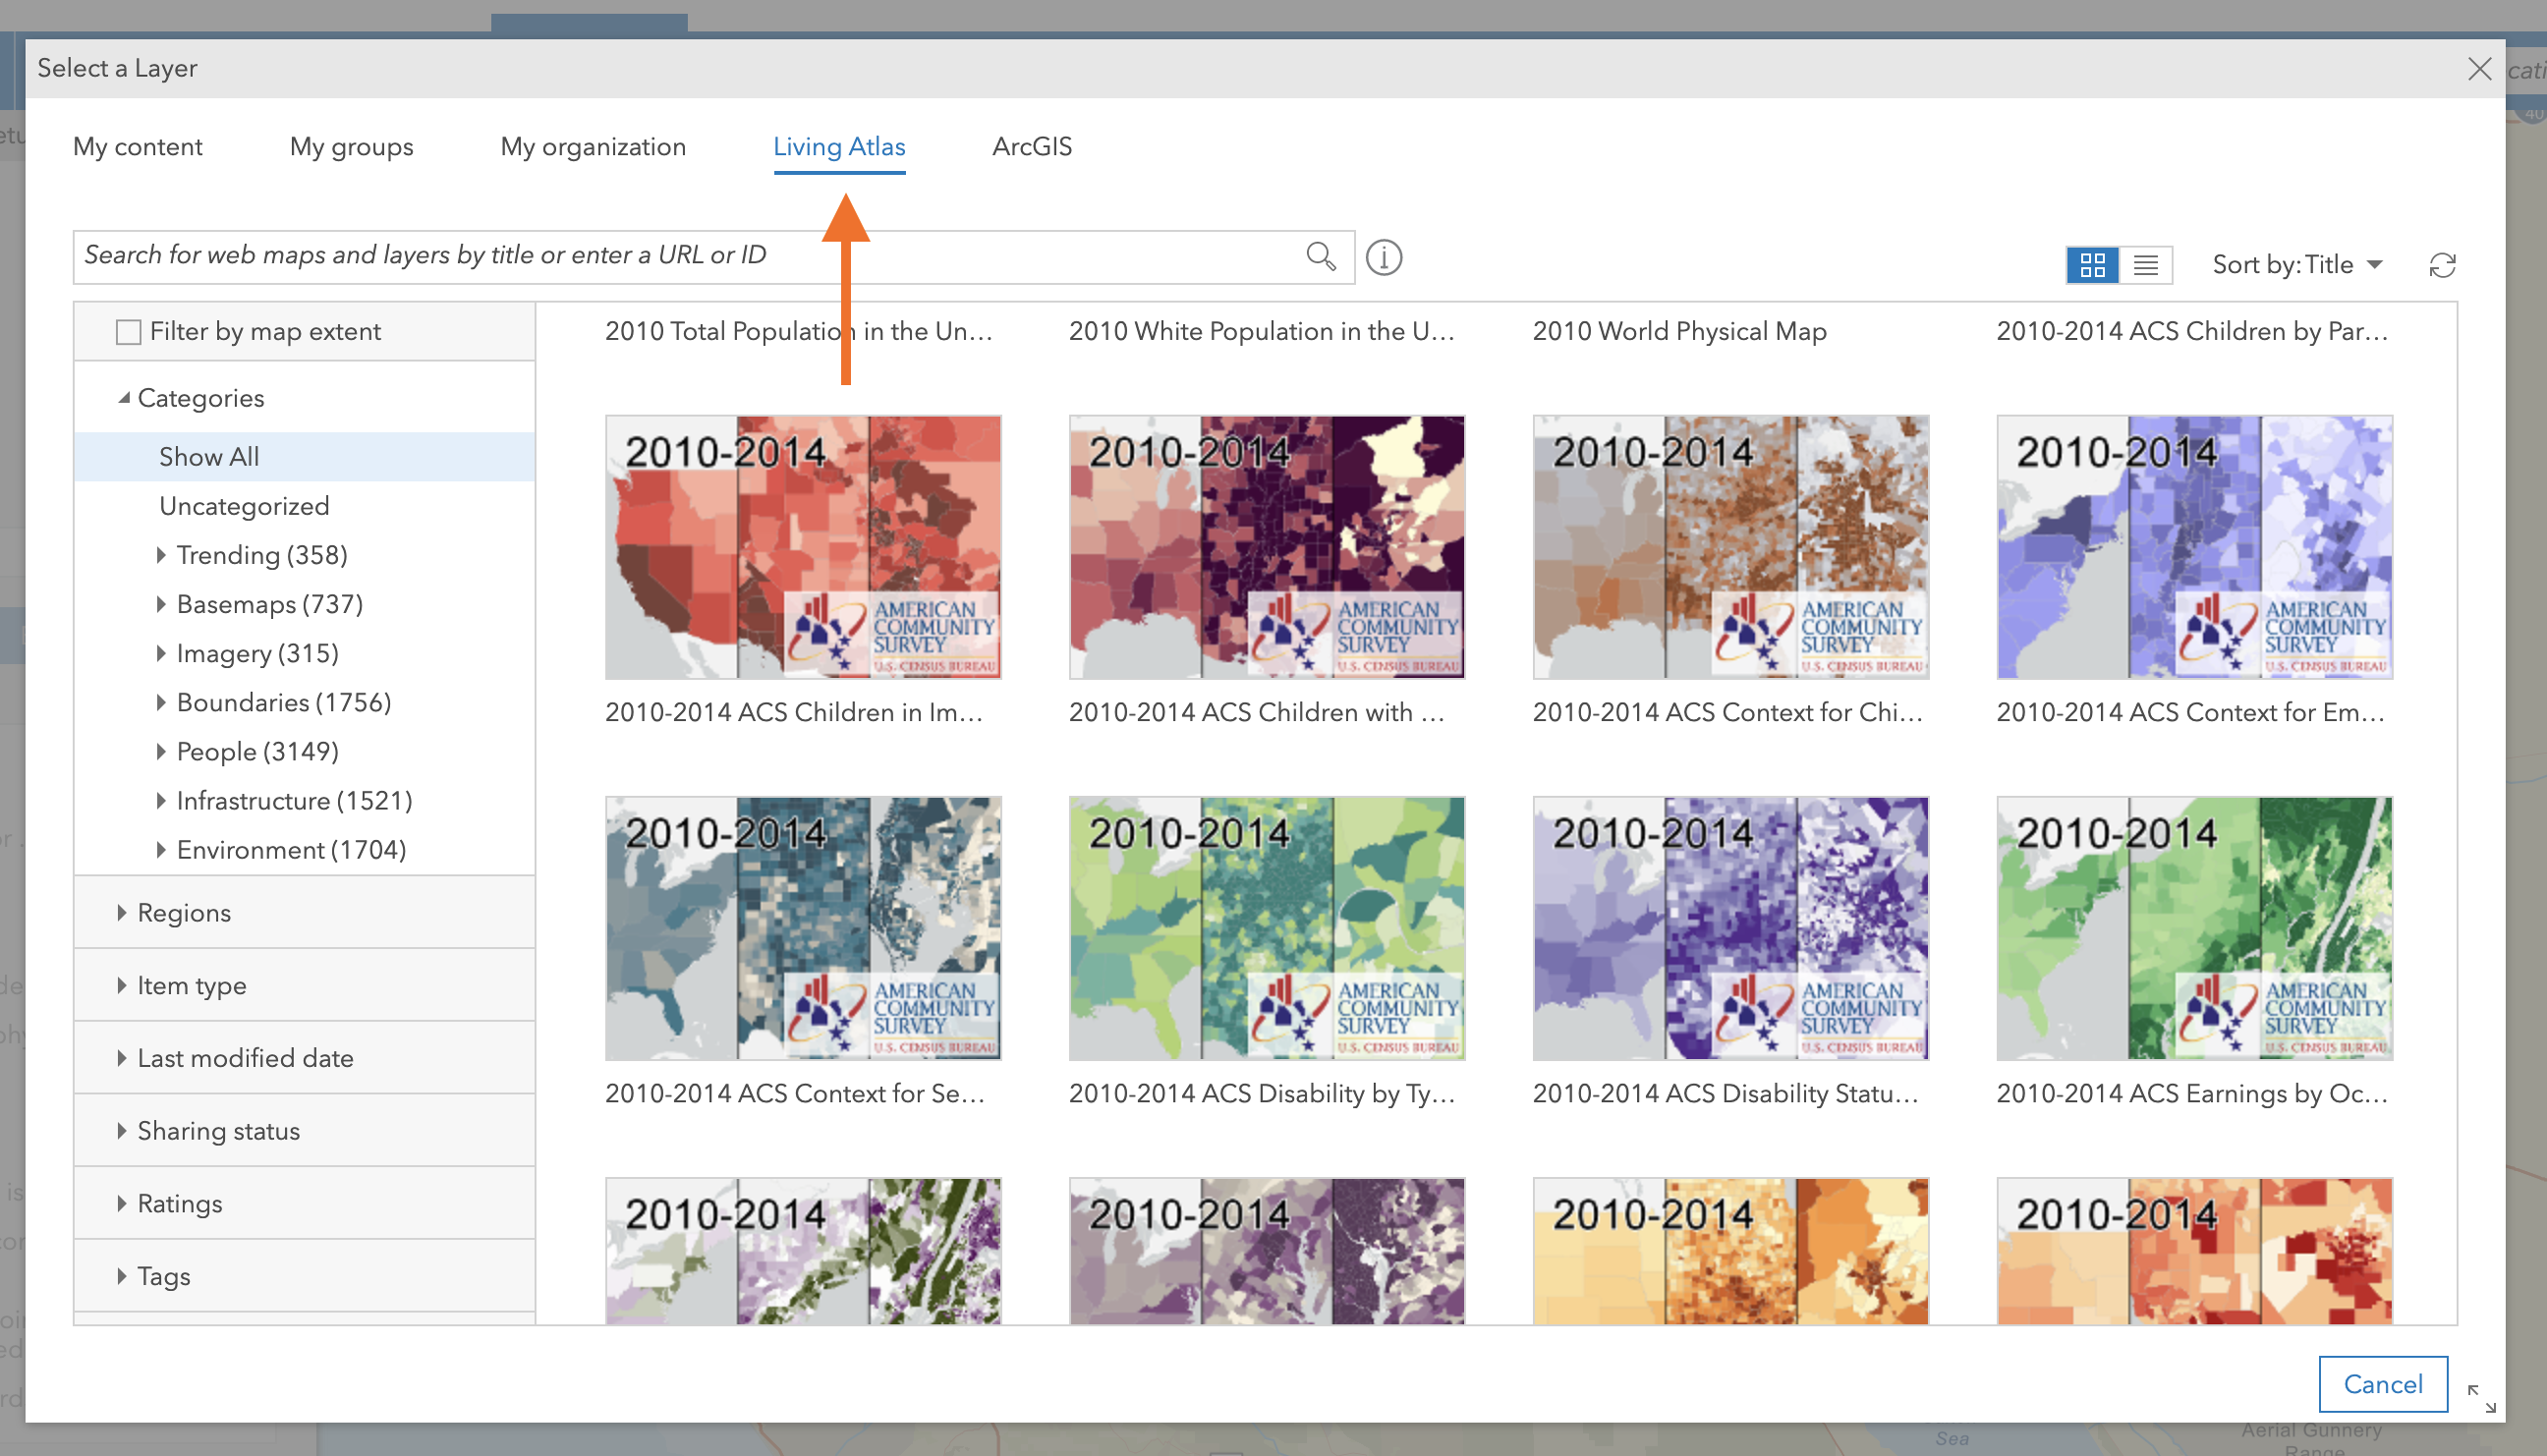
Step 3: Select an ArcGIS Living Atlas Layer
A popup will appear where you can now select the ArcGIS Living Atlas layer. Start my selecting the Living Atlas tab. This is where the ArcGIS Living Atlas layers are located in Business Analyst. You can either search for a topic of interest or go through the different categories that are particular to your workflow. Once you select the specific layer, click Add. A popup will appear to select the type of layer.
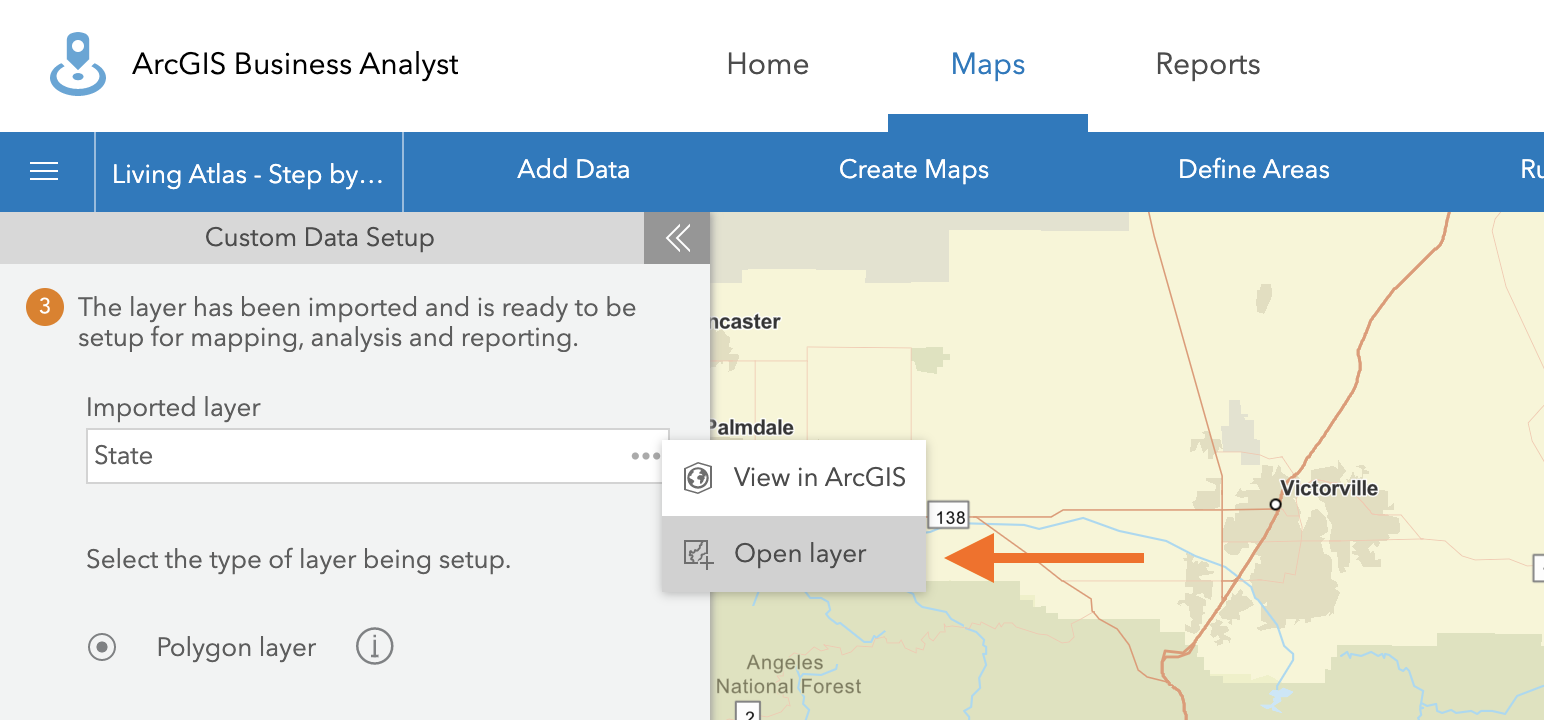
Step 4: Add the Layer to the Existing Map
On the left side, in the Imported layer section, click on the 3-dot action menu and select Open layer to add the layer to the existing map. You will now see the layer in the Legend popup.
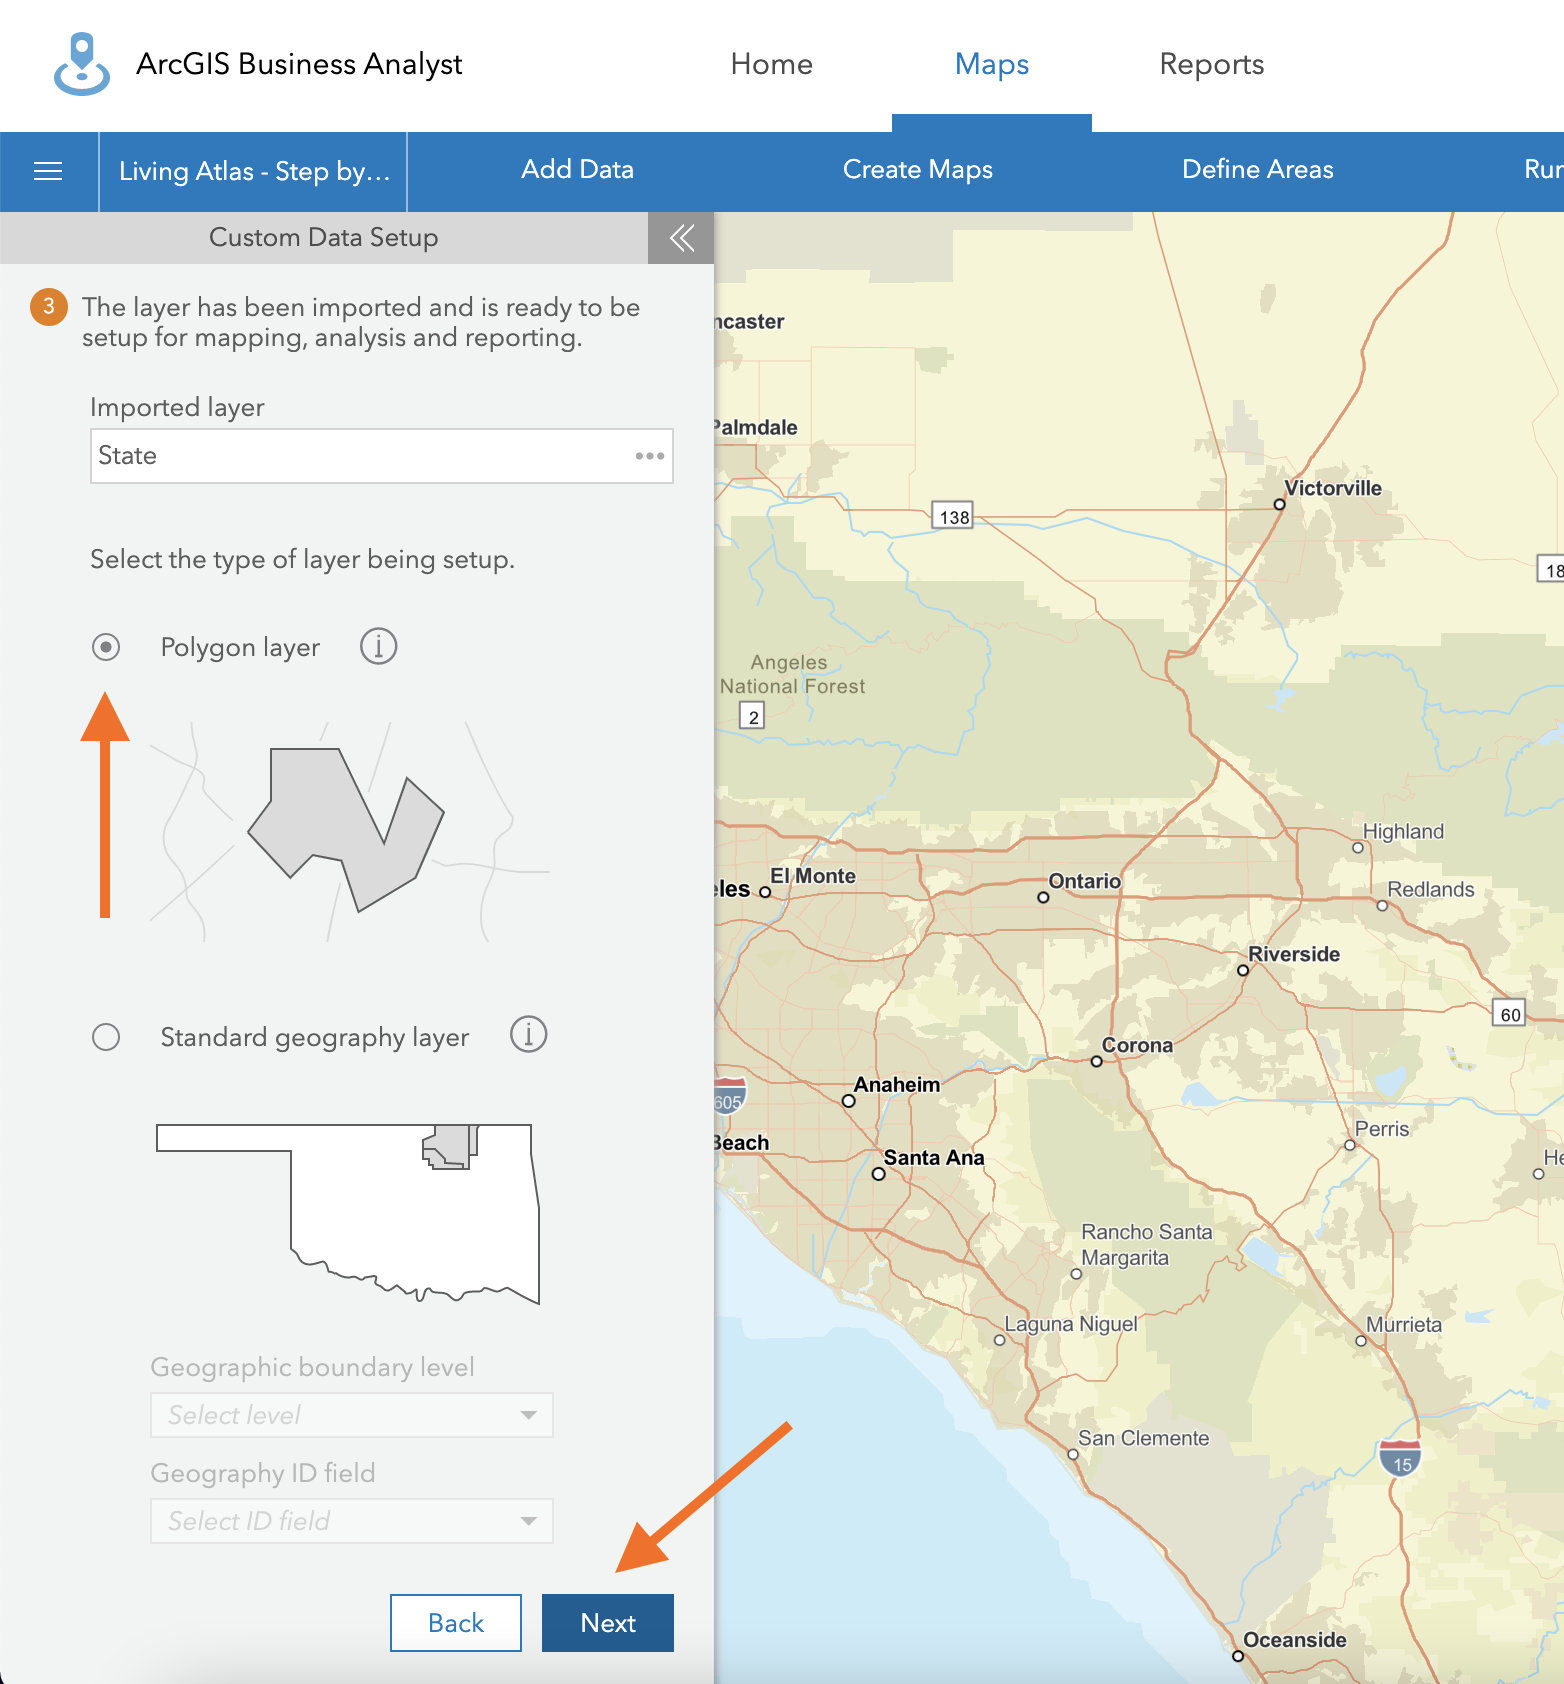
Step 5: Use the Polygon Layer
Select the Polygon layer option and click Next.
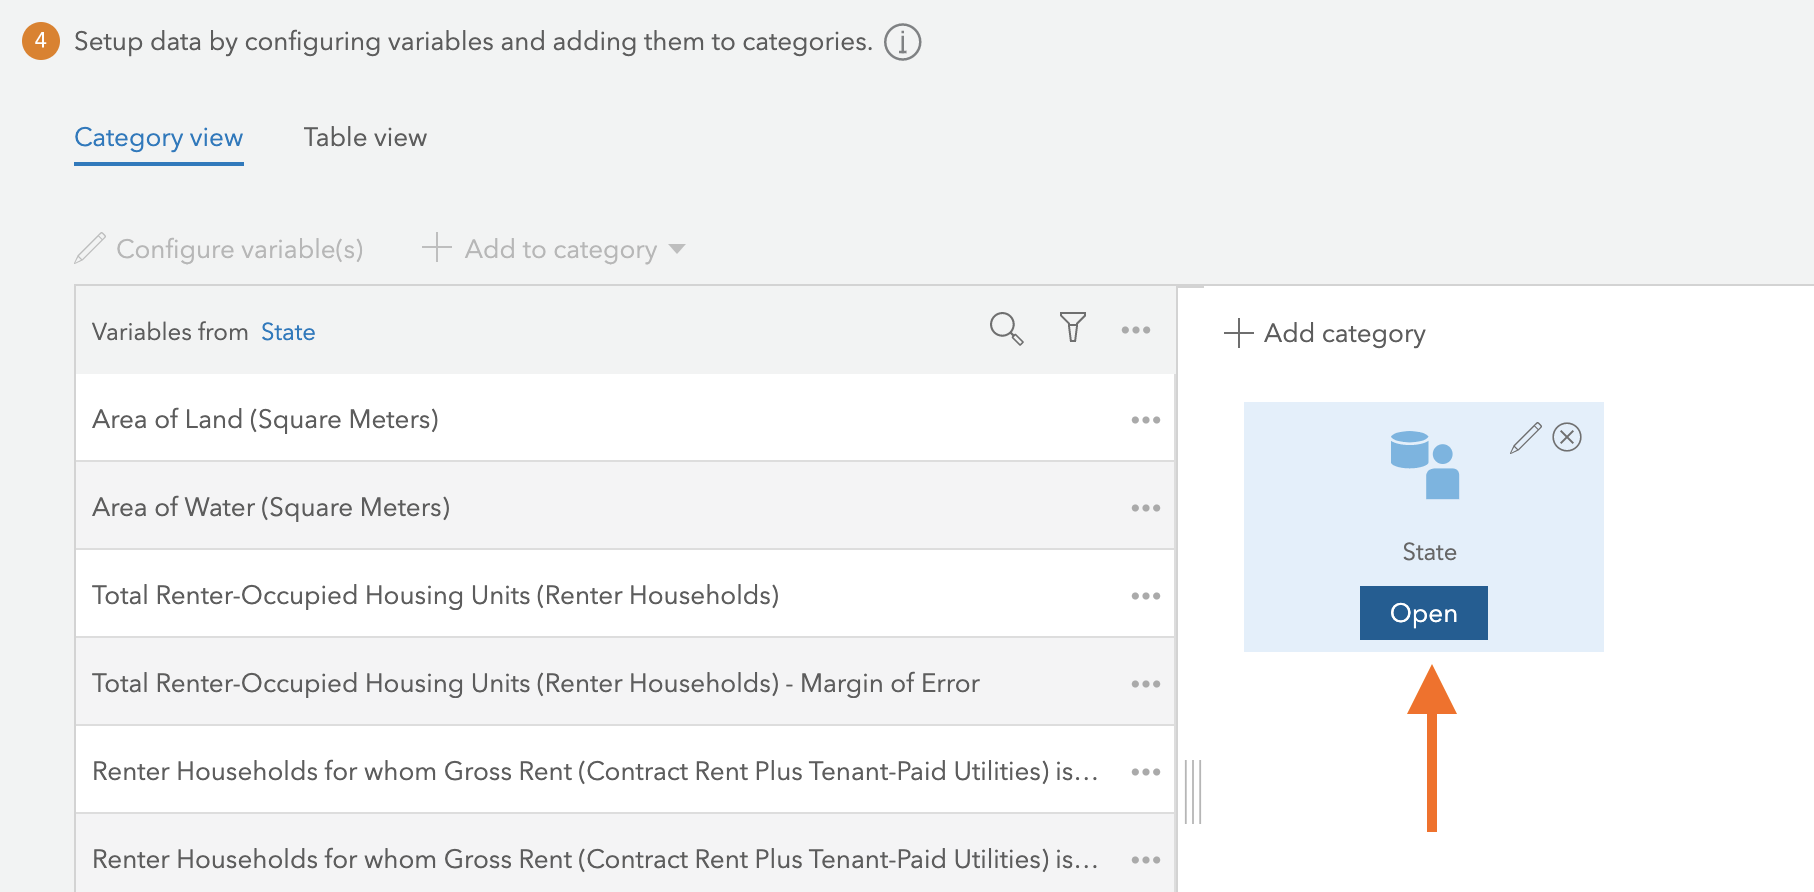
Step 6: Configure Variables to Specific Categories
You can now setup data by configuring variables and adding them to specific categories. Hover over the State category icon and click Open.
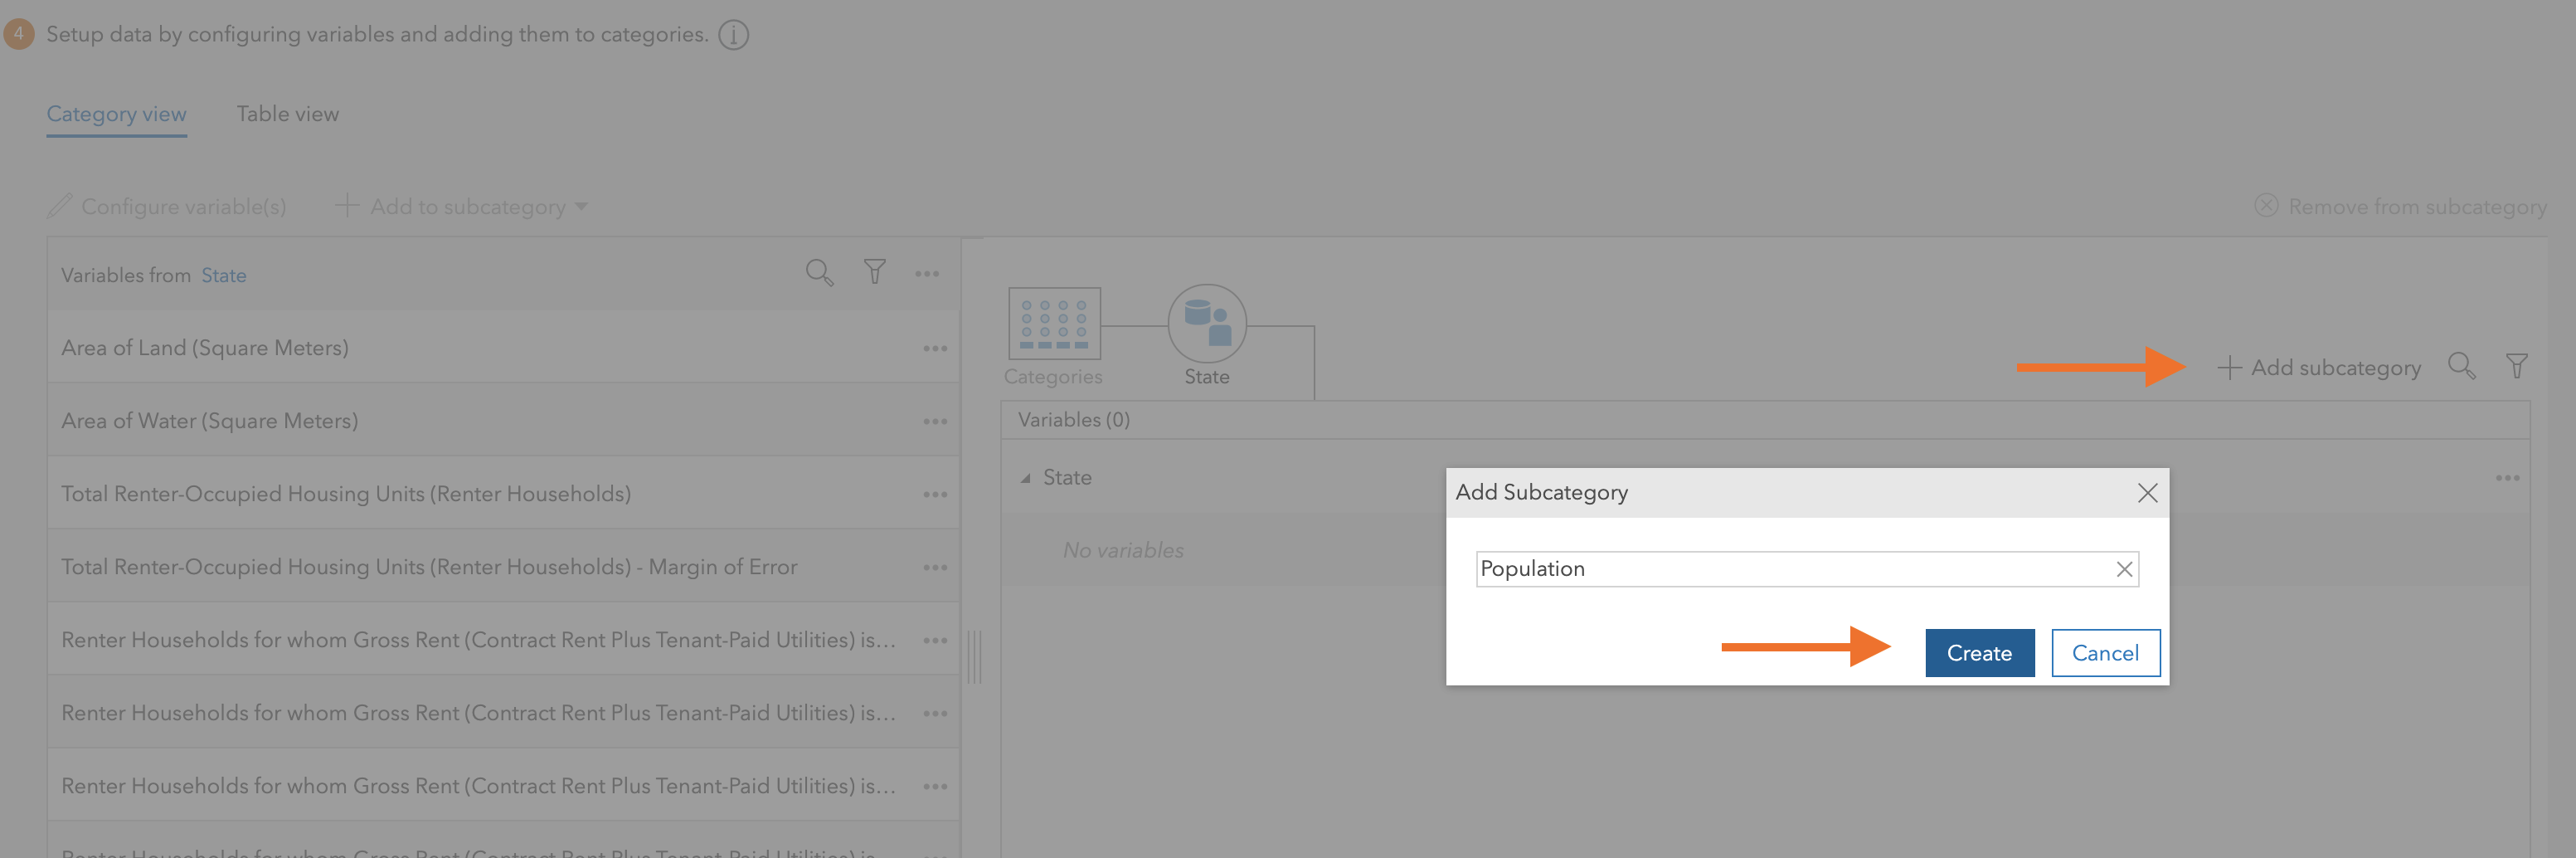
Step 7: Enter New Subcategories
On the right side, click the Add Subcategory button and enter the name of the new subcategory. Once complete, click Create.
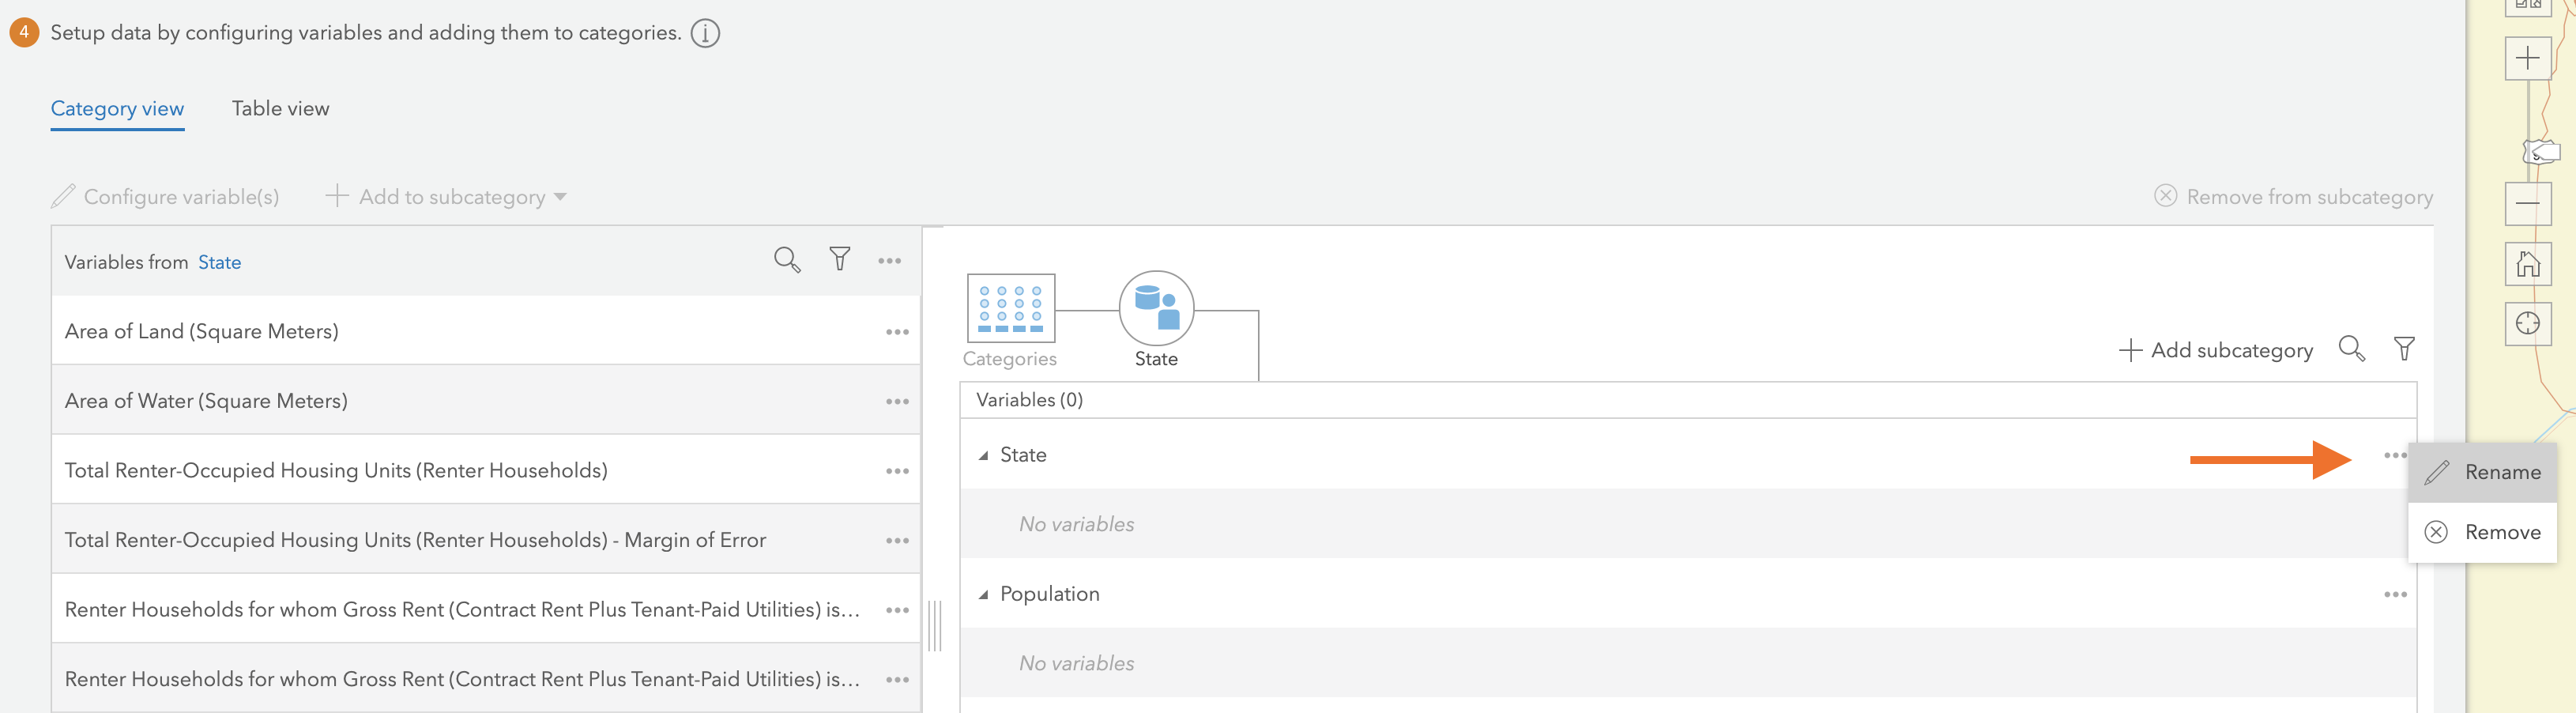
Step 8: Rename Existing Subcategories
You are now able to see the two subcategories created. To rename existing subcategories, click the 3 dot action menu on the right side and select Rename.
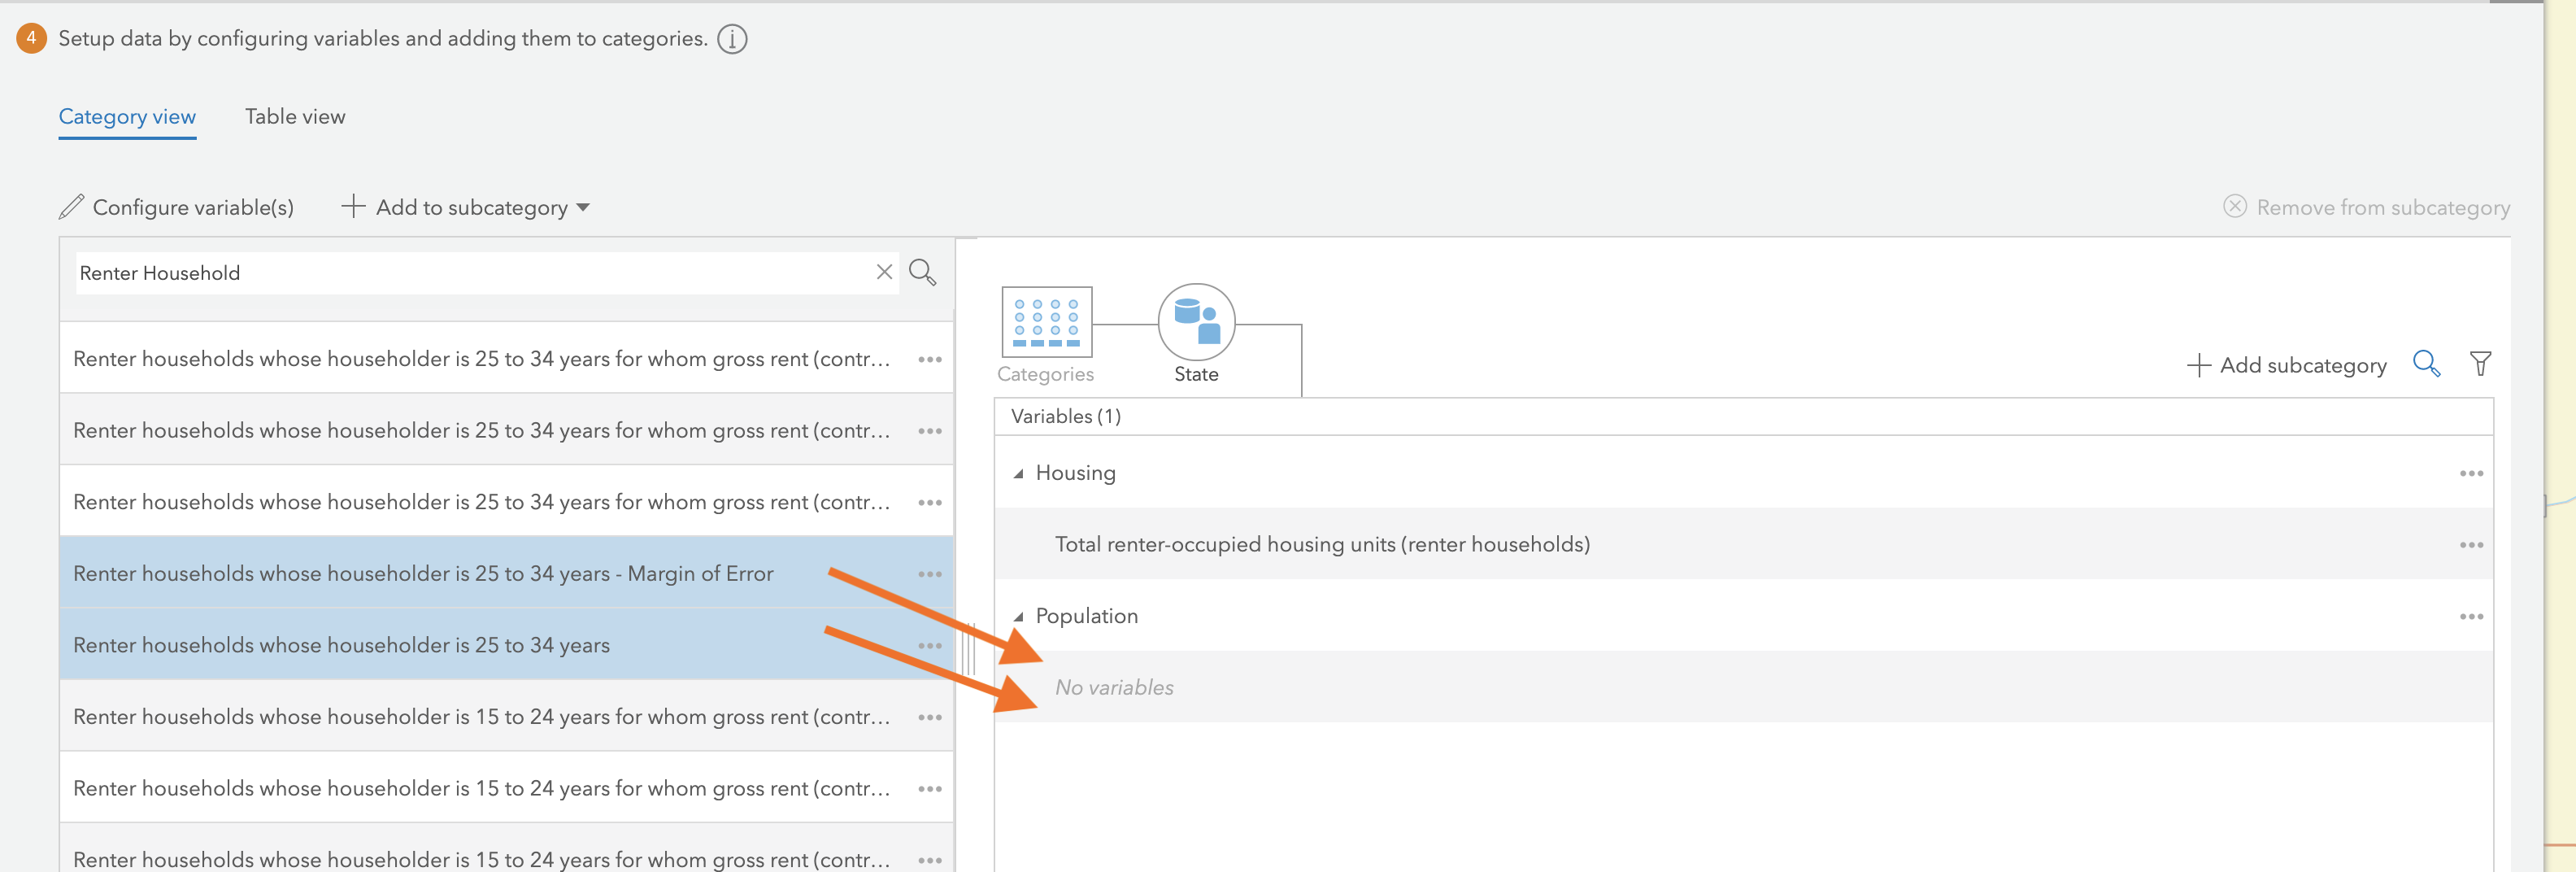
Step 9: Add Variables
You can now add the variables specific to the subcategories created. Drag the variables to each subcategory. You can also hold the Shift key and click multiple variables and drag them over.
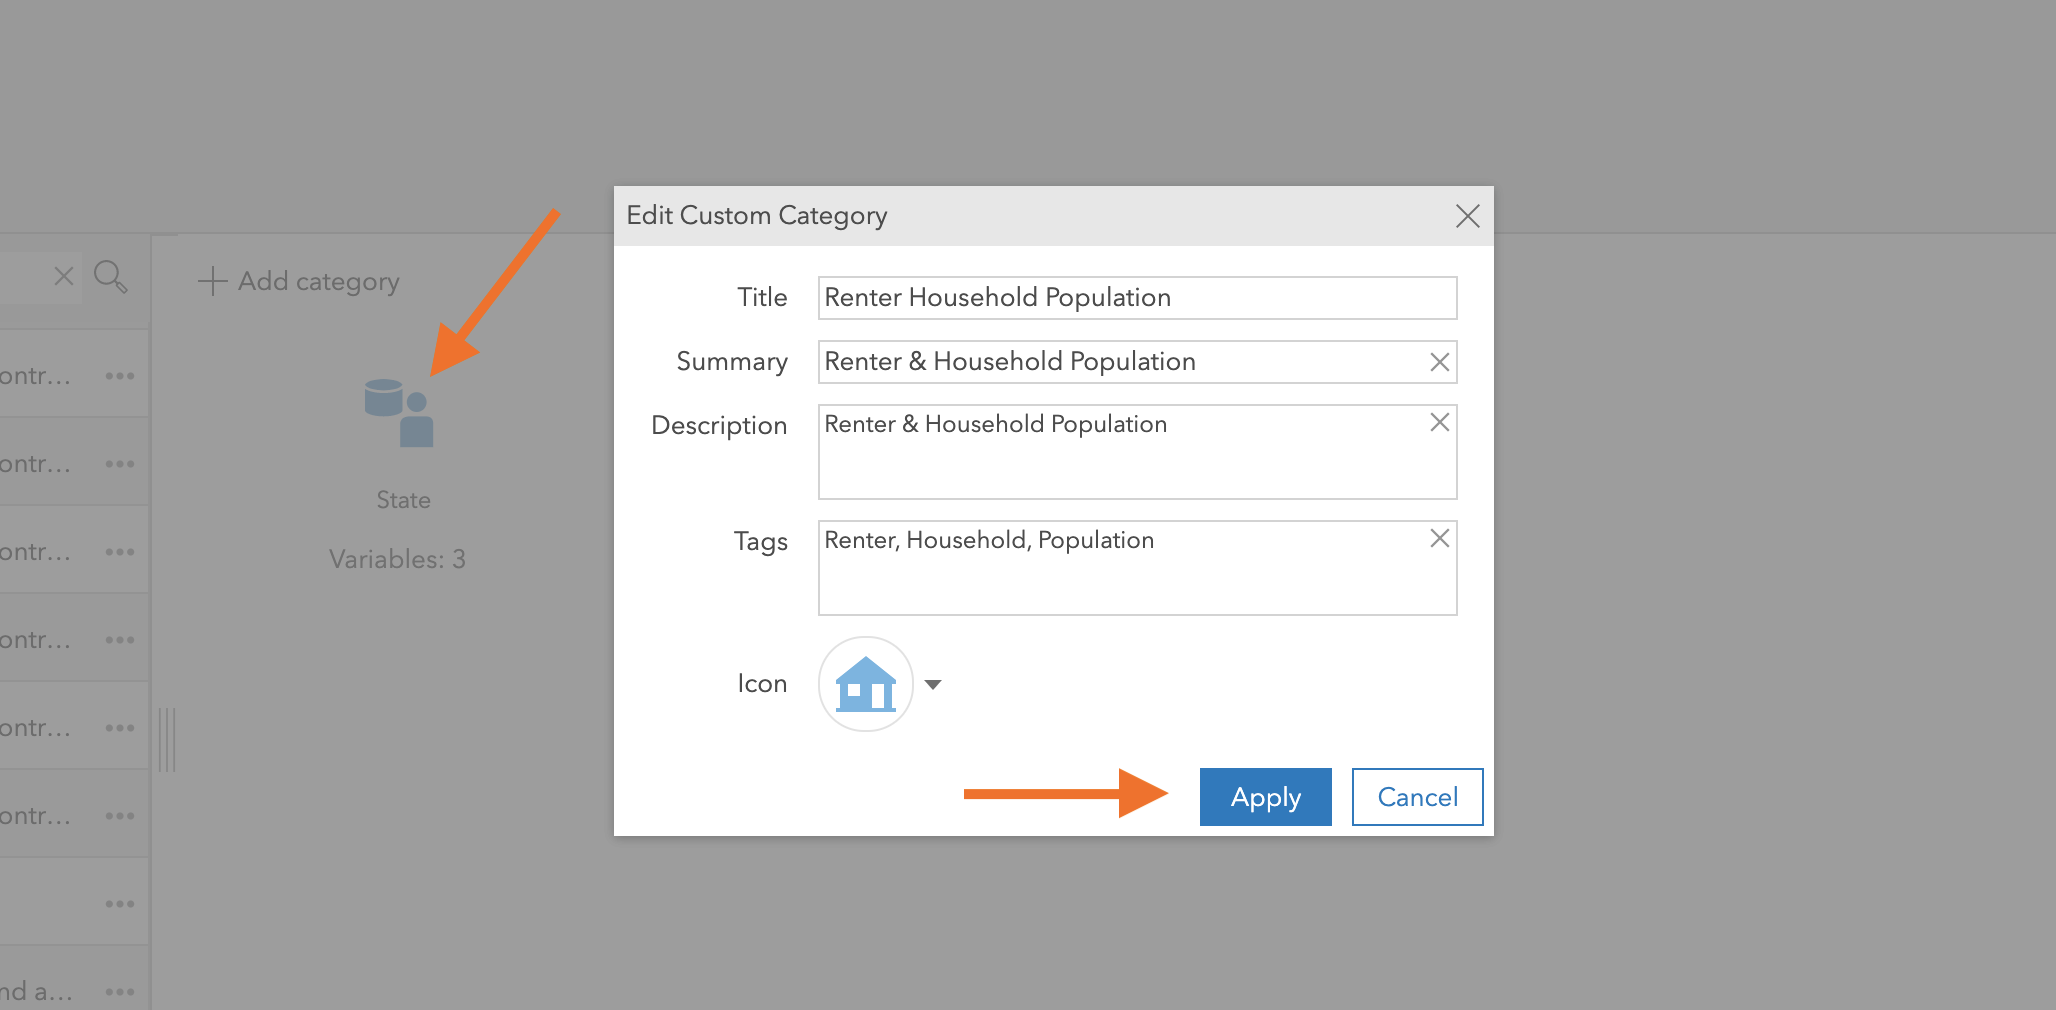
Step 10: Edit Custom Category Details
Click the Category button and hover over the Category icon. Click the edit pencil icon to change the Title, add a Summary, Description, and change the Icon. Once you have edited the details according to your workflow, click Apply.
Step 11: Use the ArcGIS Living Atlas Layer
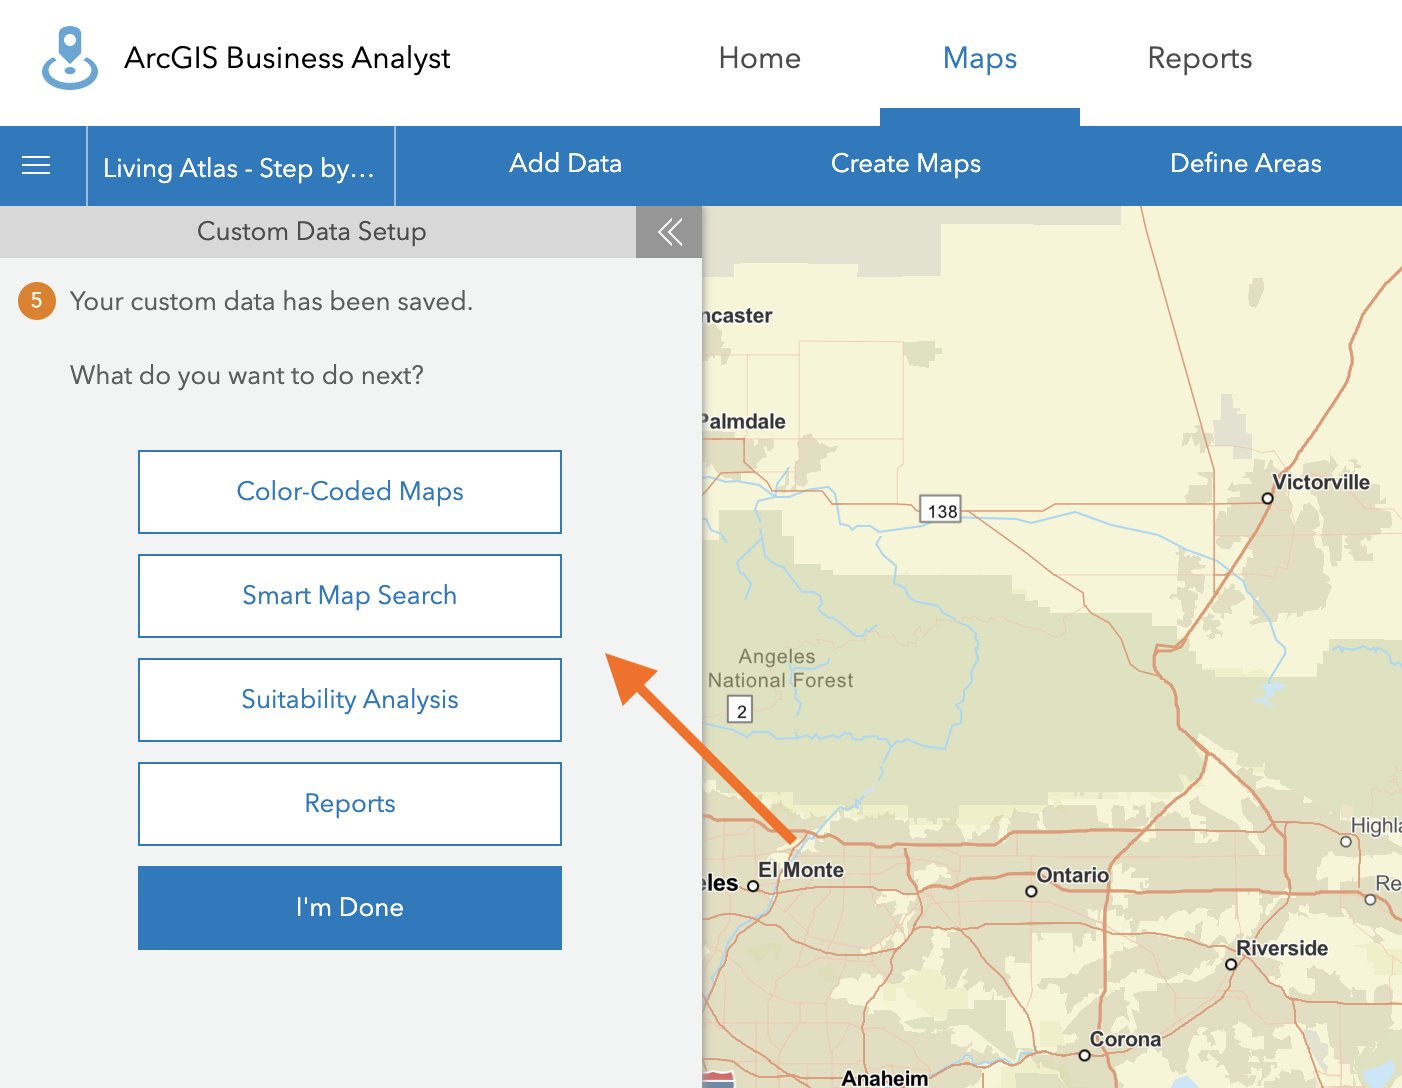
Click Save. You will now have the option to use your ArcGIS Living Atlas layer in these workflows. Once you select the workflow you would use (i.e. Smart Map Search), click on the Browse All Variables option. A Data Browser popup will appear, click on the My Data tab to view the ArcGIS Living Atlas layer you created.
Additional Resources
We hope you enjoy the 11 easy steps on how to add ArcGIS Living Atlas layers in ArcGIS Business Analyst! Please visit the following links for more information regarding ArcGIS Business Analyst:
- Join our LinkedIn Business Analyst User Group
- Join our Business Analyst Esri Community
- Read more Business Analyst blogs at Esri blogs
- Watch Business Analyst videos on YouTube
- Join the Business Analyst places in the Esri Community

Article Discussion: