Multiple choice form elements enable mobile workers to capture more than one response in a single field. This is useful when more than one condition may apply to an asset, inspection, or observation.
When displayed in a pop-up, those selected values appear as a comma-separated list. This format isn’t the most user-friendly way to present information in the field. As the number of responses grows, the list can become hard to read at a glance. (see image)
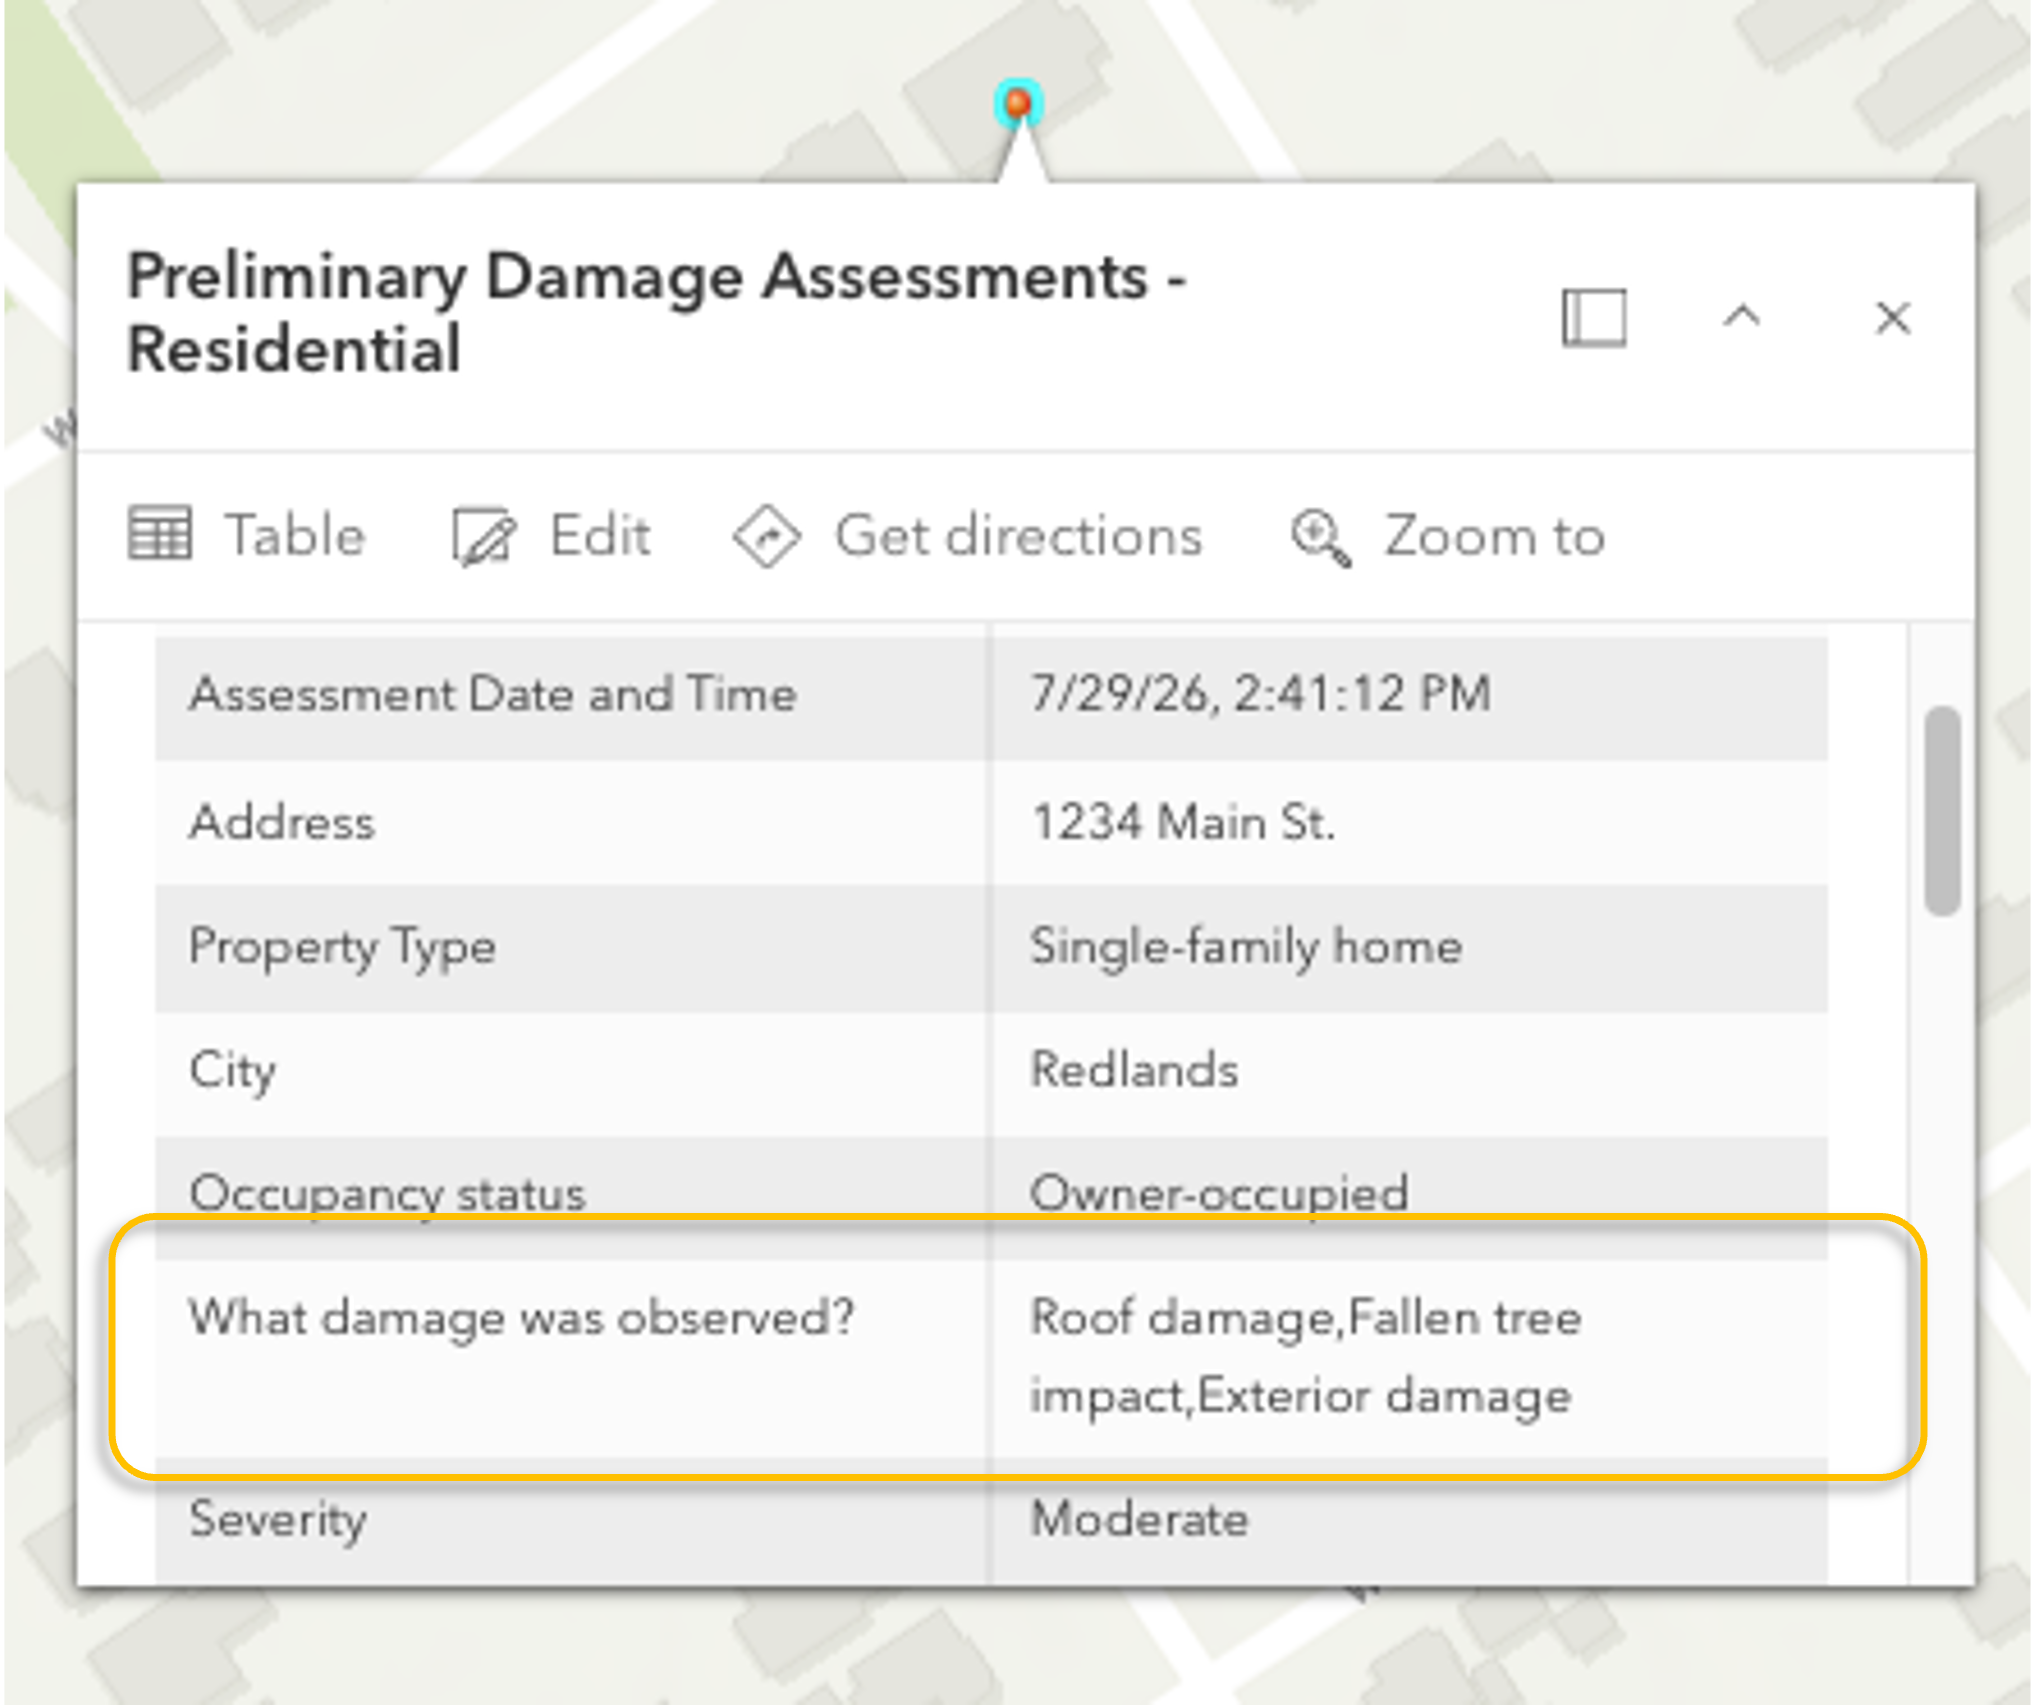
Instead of displaying the raw values in the pop-up, you can use Arcade with HTML to transform those values into a formatted list that is easier to read and highlights the most important information to your mobile workers. In this article, you’ll learn how to create a more polished pop-up experience from multiple choice responses in ArcGIS Field Maps.
Note: If you haven’t worked with a multiple choice form element yet, you can learn more by reading the Build smarter forms in ArcGIS Field Maps with multiple choice and conditional visibility article.
Add Arcade content to the pop-up
To illustrate how this works, let’s use an example of an inspector reporting roof damage to a residential home after a storm. The details of the roof damage were collected using a multiple choice question and stored in a single field.
The Arcade expression below takes those stored values and displays them as a formatted list in the pop-up, as seen in the following image, making the information easier to scan and understand.

Steps to add Arcade content to the pop-up
- Open your map in Map Viewer and select the layer that contains your multiple choice question in the form.
- Click on the Pop-ups icon on the right side panel to open up the Pop-ups configuration panel.
- At the bottom of the panel click on the button “+ Add Content” and select Arcade. This will open the Arcade expression editor.
- Customize and apply the Arcade expression below.
- Click Done.
- Save the map.
You can use the following code as a starting point and configure it with your own data and formatting elements.
Arcade expression:
// CHANGE TO MATCH YOUR DATA
// These are the main values you may need to update.


var damageList = $feature.Roof_Damage_Details;
var title = "Roof Damage Details";
var emptyText = "No roof damage details were recorded.";


// Color and style choices
// These are optional to change.


var listStyle = {
    mainColor: "#7F1D1D",
    accentColor: "#FCA5A5",
    backgroundColor: "#F8FBFF",
    textSize: "15px",
    headertextSize: "20px",
    textFont: "Arial, sans-serif",
    symbol: "✔"
};

// Create an array from the multiple choice input.

var mcList = Split(damageList, ",");

// Define html for entire body.

var html = "";

html += "<div style='font-family:" + listStyle.textFont + "; background-color:" + listStyle.backgroundColor + "; padding:12px; border-radius:8px;'>";

// Define the header.

html += "<div style='font-size:" + listStyle.headertextSize + "; color:" + listStyle.mainColor + "; font-weight:bold; margin-bottom:10px;'>";
html += title;
html += "</div>";

// Show fallback text if no choices were selected.

if (IsEmpty(damageList)) {
    html += "<div style='font-size:" + listStyle.textSize + "; color:#555;'>";
    html += emptyText;
    html += "</div>";
}

// If choices were selected, format each one as a list item.

else {
    for (var i in mcList) {
        var listItem = mcList[i];
        if (listItem != "") {
            html += "<div style='display:flex; align-items:center; margin-bottom:6px;'>";
            html += "<span style='background-color:" + listStyle.accentColor + "; color:" + listStyle.mainColor + "; border-radius:50%; width:22px; height:22px; display:inline-flex; align-items:center; justify-content:center; margin-right:8px; font-weight:bold;'>";
            html += listStyle.symbol;
            html += "</span>";
            html += "<span style='font-size:" + listStyle.textSize + ";'>";
            html += listItem;
            html += "</span>";
            html += "</div>";
        }
    }
}
html += "</div>";

return {
    type: "text",
    text: html
};
Customize the script for your data
If you are new to Arcade, don’t worry. You do not need to understand every line to use it. You only need to update a few values at the top of the script.
Update the field reference (required):
var list = $feature.Roof_Damage_Details;
This is the field that stores the selected values from your multiple choice question. If your field has a different name, replace “Roof_Damage_Details” with the correct field name. If you aren’t sure what it is, you can find it in the Display name in the field properties panel in Field Maps Designer.
Customize the title displayed in the pop-up (optional):
var title = “Roof Damage Details”;
This is the title that labels this section. Add whatever name is appropriate for your workflows.
Customize the message displayed when no damage details have been selected (optional):
var emptyText = “No roof damage details were recorded.”;
And, you’re done! Everything else can remain unchanged unless you want to adjust the colors, fonts, symbols, or other formatting options.
Summary
Multiple choice form elements are a convenient way to capture multiple responses in a single field. By using Arcade with HTML, you can transform raw multiple choice values into a more polished and readable pop-up experience. With a little formatting, important information becomes easier to scan, helping mobile workers quickly understand what was observed in the field.
Want to see it in action? Explore the sample Inland Empire Severe Damage Assessment map used in this article to view the pop-up configuration and test the workflow yourself.
Additional resources
- Learn more about Arcade
- Learn more about configuring pop-ups
- Read Common calculated expressions for ArcGIS Field Maps

Article Discussion: