Check out our companion GitHub repo, which features further documentation and code for all of the examples in this blog post.
Recently, with very little fanfare, the ArcGIS StoryMaps Team released a powerful new feature for developers. This hidden gem is so stealthy, you might not even have noticed it, but it’s a game-changer for the nerds! If you’ve been eager to embed a story directly in a web page, you’ll be excited to learn about the new script embed capability.
But <iframe>…
Wait…Haven’t I always been able to embed a story in my webpage? Isn’t that what <iframe> tags are for? Fair point. The <iframe> tag is a tried-and-true standard for adding external content to your site. It’s ideal for video and other relatively self-contained media, and it may suffice for loading a story into a dedicated space on your page. But in some cases, <iframe> can introduce some frustrating limitations.
The <iframe> element is famously insulated from the rest of the page, making integration between the container and the embedded content tricky. This isolation can lead to clunky user experiences and developer headaches.
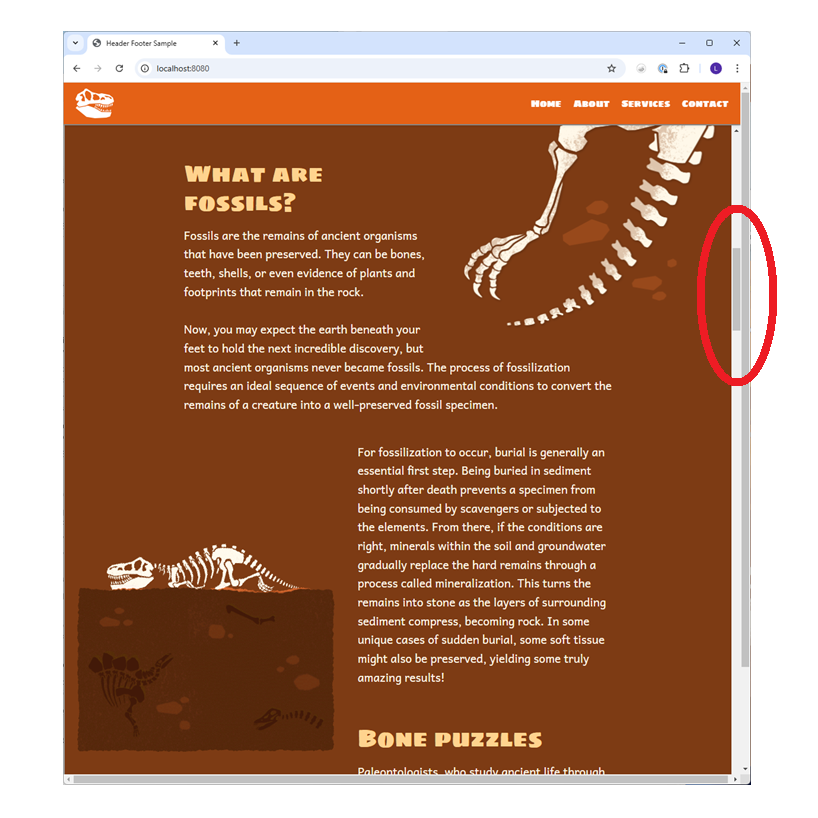
Perhaps the most notorious pitfall of using the <iframe> is the dreaded “double scroll” — that annoying tug-of-war when your story’s vertical scroll sits within your page’s own vertical scroll. This creates a struggle for scroll supremacy that can make your website feel less polished.
Enter Embed via Script
The script embed offers an alternative way to embed a story, freeing you from the limitations of <iframe>. Provided by ArcGIS StoryMaps, this code library links directly into your page and dynamically inserts the story right into your page’s DOM. Once activated, your story and web page content live together in harmony and can interact more seamlessly.
With this setup, you have full access to the story interface through your own CSS and JavaScript. This means more control, easier customization, and a smooth, integrated user experience.
Note: It is important to remember that the story content—including the JSON, resources, and application files—remains hosted in the ArcGIS environment, where you authored the story. As such, your story automatically benefits from any bug fixes, accessibility improvements, and new features we release without your having to redeploy. If you need to manage or edit the story itself, you will continue to do so through the story builder under your ArcGIS StoryMaps account.
Probably better to show rather than tell! Whereas this is what a traditional <iframe> looks like…

…THIS is a script embed!
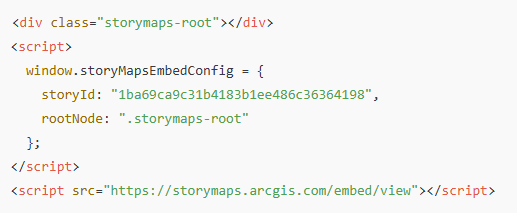
Not fluent in gobbledygook? Here’s what’s happening in the code above:
-
The
<div>element (<div class="storymaps-root">) is the placeholder where the StoryMap will be rendered. -
The first
<script>block sets up configuration details for the embed. This config is stored in the browser’s globalwindowobject. -
The second
<script>tag (<script src="https://storymaps.arcgis.com/embed/view">) loads a script library hosted on ArcGIS.com — the engine that powers the embedded story.
When the page loads, this is the sequence of events:
-
The script library is fetched and executed. It serves as the presentation engine.
-
The script checks for
window.storyMapsEmbedConfig, which provides two key details:
a) ThestoryId, specifying which story to load (in this case,"1ba69ca9c31b4183b1ee486c36364198").
b) TherootNode, a CSS selector (".storymaps-root") that tells the script where to insert the story content. -
The script dynamically loads the story into the specified
<div>. -
Voilà — the StoryMap is now live and running within your web page!
So, what can I do with this capability?
What can you do with this? Frankly, a lot. Because the story presentation is now woven into your web page, you can write JavaScript code to access and manipulate elements of the story. Theoretically, you could ask for the user’s name and then dynamically insert it at the beginning of each paragraph in the story! But just because you can doesn’t mean you should, so here’s a short list of practical use case scenarios:
1) Publish a story under the domain name of your choosing.

Embedding a story in a container page—whether using script embed or another method—offers one automatic benefit right off the bat: You control the URL where the story appears. Instead of the default storymaps.arcgis.com address, your story is presented at a URL that reflects your own domain. This is especially appealing for organizations that want the story to feel like an integrated part of their website—right alongside their other web resources.
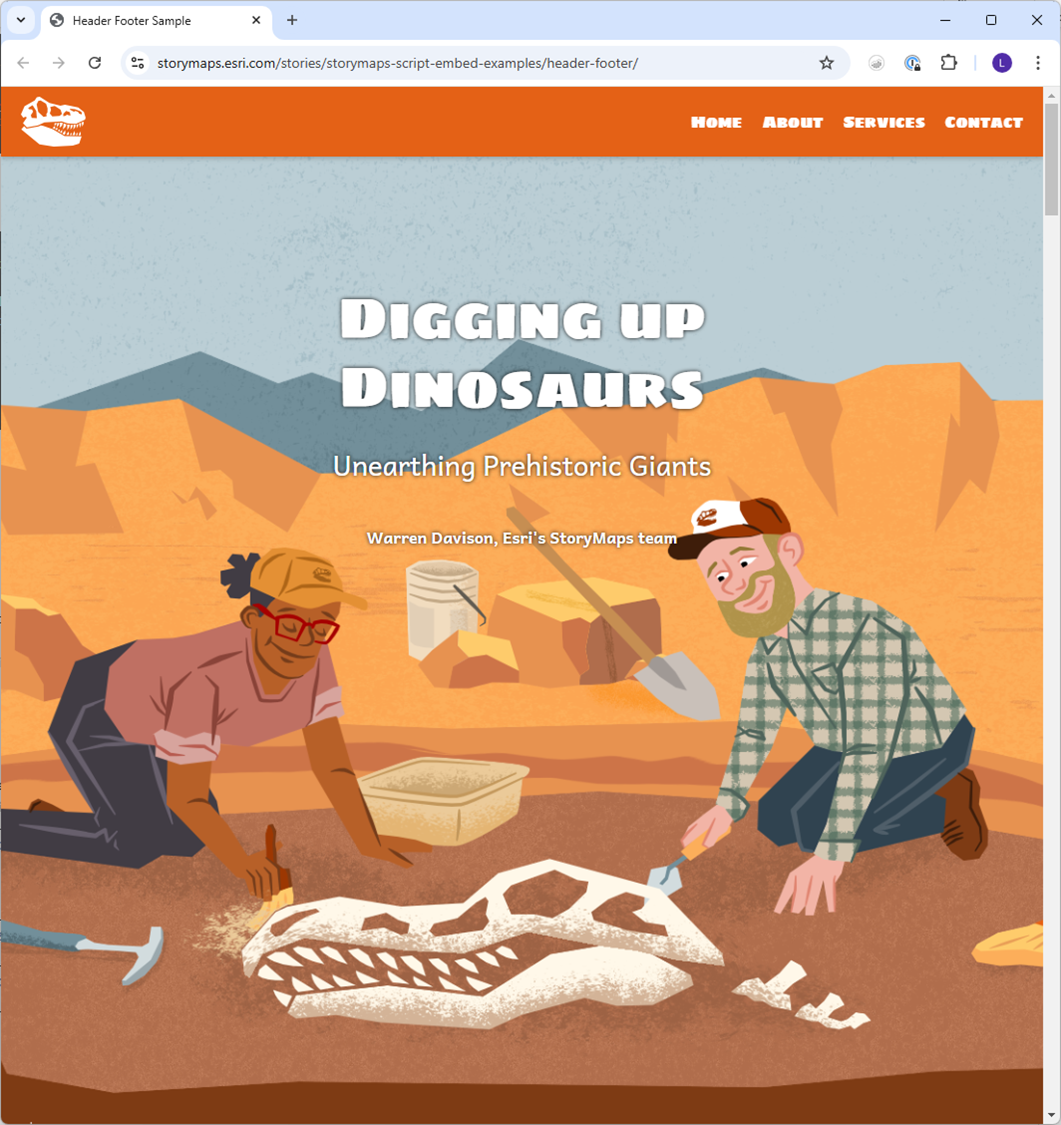
2) Add a branded header and footer to your story.
3) Replace the font library with one of your choosing!
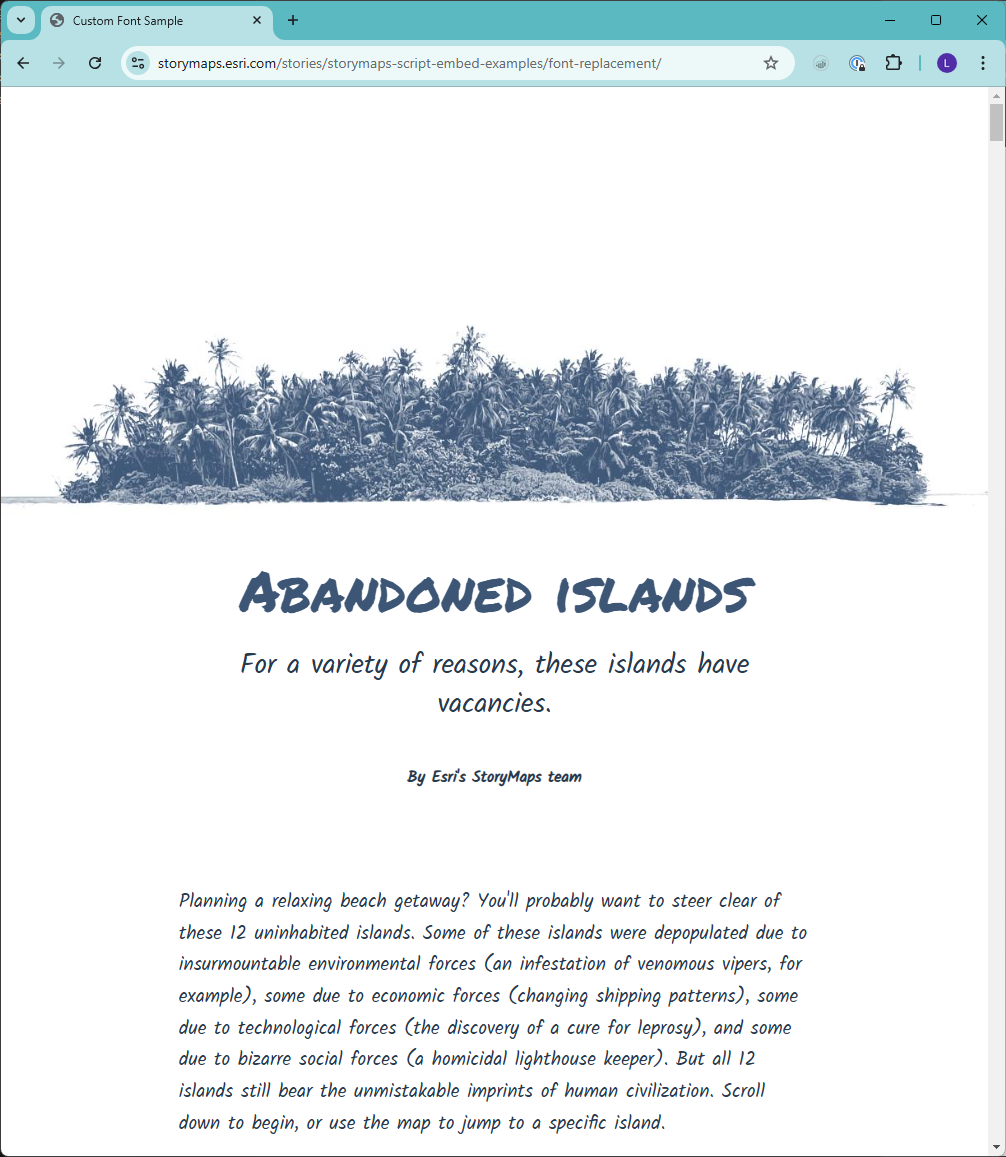
4) Present a splash page!

Getting started
There are only three prerequisites for using script embeds. You’ll need:
- An ArcGIS StoryMaps story to embed (obvi).
- A basic understanding of HTML (knowledge of JavaScript and CSS is recommended).
- Access to a non-ArcGIS hosting environment. This could be your own server, GitHub Pages, or another third-party hosting service like Netlify or Amazon S3.
Once you’ve met those three conditions, it’s time to do some configuring! First, you’ll configure your story and then your host web page.
Story configuration
To configure your story for embed via script:
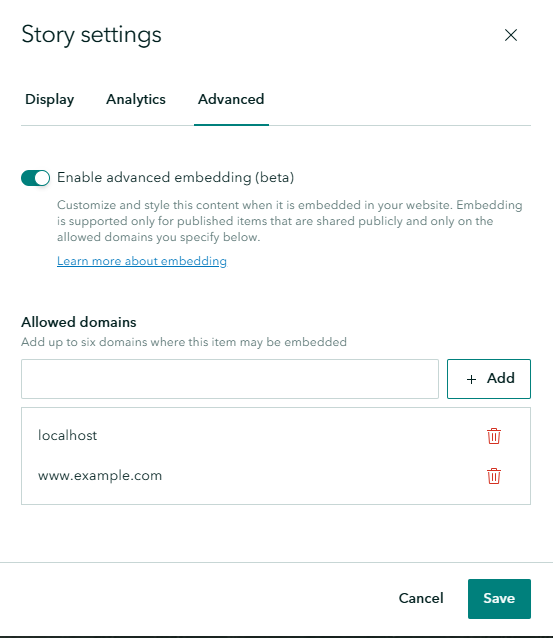
- In edit mode, navigate to the Advanced tab of the Story Settings menu (accessible via the three dots button in the upper right of the builder interface).
- Toggle Enable advanced embedding to allow your story to be embedded via script.
- In the Allowed domains section, add the the domain(s) which hosts your page. Also, if you’re using a development server (e.g. localhost), you’ll want to create an entry for that environment as well.
HTML configuration
In your page, you simply need to insert the story embed code, making sure to specify your story’s id in the configuration. You may recall, the embed snippet looks like this:

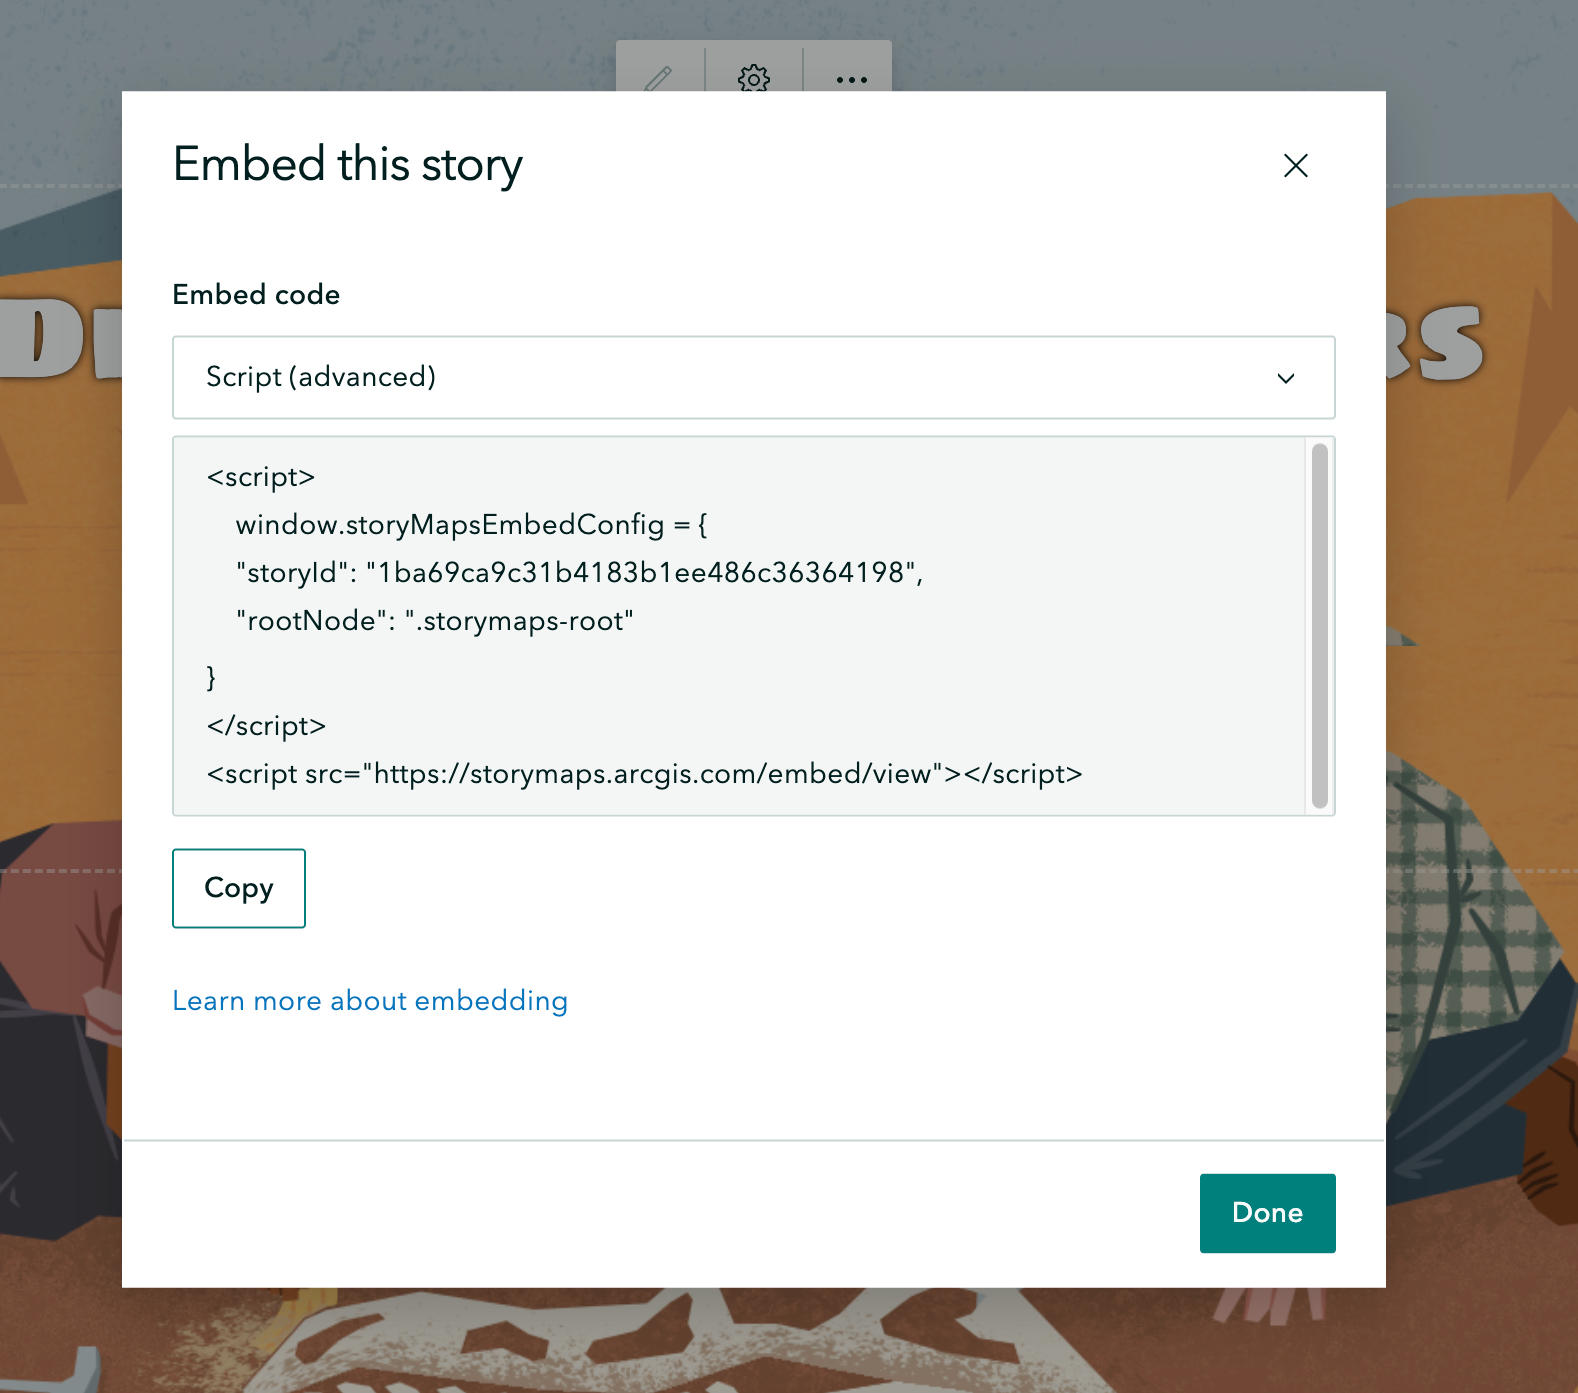
If manually typing the embed code seems too daunting (understandable), there’s an easy way to grab the code snippet, pre-configured for your story. It is available in the builder’s “Embed this story” menu (accessible via the three dots button in the upper right). In the menu, choose “Script” from the dropdown to reveal the snippet.
Note: The script embed option will only appear once you've: 1) configured the story for script embed, 2) published the story, and 3) shared with Everyone.
Further resources
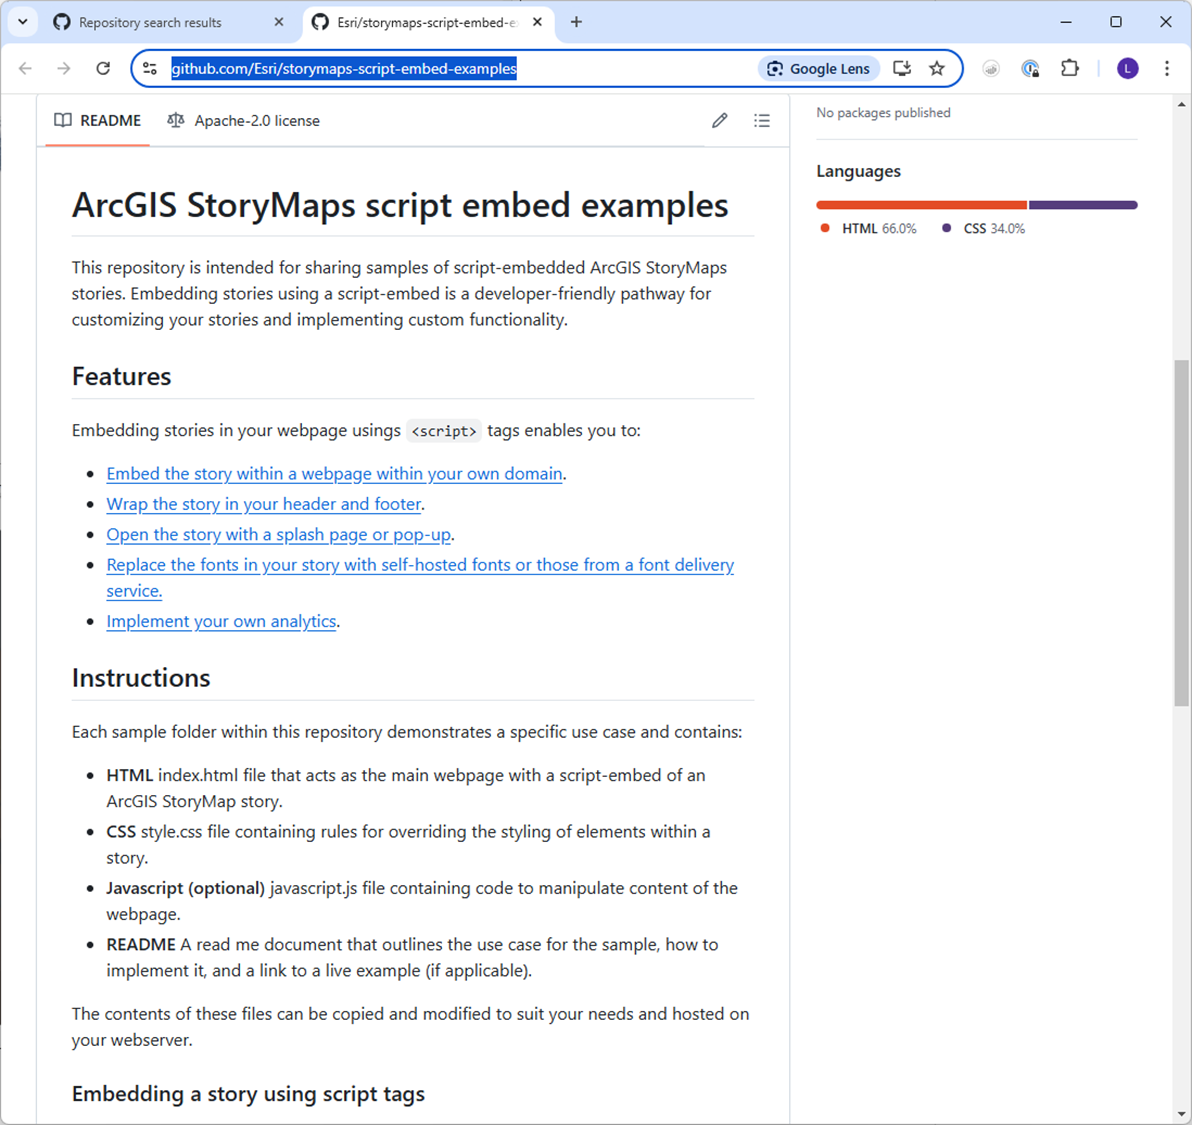
If you’re seeking additional guidance and inspiration for using embed via script, check out this helpful GitHub repository. It’s public and does not require a GitHub account. The repo includes tutorials covering the three examples mentioned above and more.
You might also want to check out Choreographing the dance of the continents, which explains how to use script embed to enable scrolly video!
And in conclusion…
We’re excited about the new script embed capability! It is an effective way to integrate a story into your content, creating professional, interactive experiences. Hopefully it will make your life a little easier, too. Happy embedding!


Hi Laurens! Thanks for the nice feedback! I’m wondering if you’ve tried any of the script embed samples to see how they behave on mobile? Here’s a good one to try: https://www.esri.com/arcgis-blog/products/arcgis-storymaps/constituent-engagement/introducing-story-embeds-via-script#comment-28532
I have been looking into this and the functionality now works as expected. By setting the padding and margin to 0, the app now appears and behaves similarly like the storymap from the original url.
Glad to hear you found a good solution, Laurens! Thanks for your interest!