Introduction
In this walkthrough, you assume the role of a GIS analyst at a small municipal organization who is tasked with implementing your utility network. You want to migrate your data to a utility network so you can leverage its ability to trace and manage your network data. Your organization also integrates your GIS data with analysis tools used by your engineering and operations departments. As a result, you decided to implement a standard model supported by multiple vendors, such as one of Esri’s Utility Network Foundations.
While reviewing the data model, you noticed that the Utility Network Foundations allow you to create associations between different types of features in the network. You know that associations are important because they allow you to represent the relationships between features in a way that allows them to be easily included in tracing and analysis. This tutorial shows you how to migrate existing relationship classes to associations, if you want to use spatial analysis and proximity to create associations you can use the Create Association Records tool and the B_Rules table to create associations.
This tutorial includes instructions and sample data from several different industries, allowing you to follow along with the dataset that you feel most comfortable with. This tutorial will show you how you can migrate data and relationships from your source database to a utility network. The main focus of this tutorial is on how to create associations using existing relationship classes. If you are more interested in the detailed mappings for features and fields, you can find tutorials covering those topics in the additional resources included at the end of this tutorial.
You will find a collection of additional Utility Network data migration resources at the end of this article.
- Create a data migration
- Create a data mapping workbook
- Map feature classes
- Map associations
- Create a data migration workspace
- Conclusion
- Make containment associations
- Map associations fields
- Migrate associations
- Lesson conclusion
- Additional resources

Part 1: Create a data migration
The first step to migrating your data to a standard, preconfigured data model like a Utility Network Foundation is to create high-level data mappings that show how all the data in your source database is migrated to the target model. You will learn how to use tools provided by Esri to create these mappings and turn them into a data migration workspace that can be used with the Esri Data Loading tools.
Section 1: Create a data mapping workbook
In this section you will use the Utility Data Management Support tools to create initial, high-level mappings. The classes you migrate will depend on the industry you select
- Electric: Transformer and Support Structure
- Gas: Pipe and Casing
- Water: Pump and Pump Station
- Wastewater: Pump and Lift Station
- Stormwater: Discharge point and Detention
1. Download the sample data and extract it to a location on your computer, such as your Documents folder.
2. Browse to the location where you extracted the .zip file and open the Data Loading folder. Open the Data Loading project.
3. Expand the Folders on the Catalog pane. Expand the Data Loading folder.
The Data Loading folder is also the project folder. You can tell because of the special icon that appears on the folder.
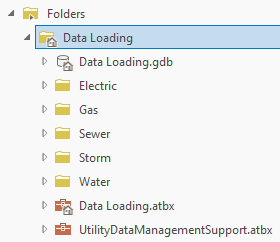
The project includes folders with sample source and target data models for several industries organized by folder. Each of these folders is referred to as the industry folder in the tutorial.
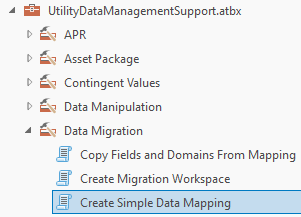
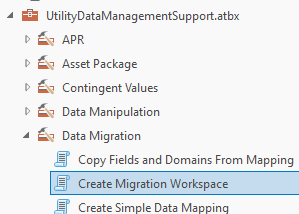
4. On the Catalog pane under the project folder expand the UtilityDataManagementSupport.atbx toolbox. Expand the Data Migration folder. Open the Create Simple Data Mappings tool.
5. Populate the tool using the following parameters:
For Source Dataset, select the utilities geodatabase from the industry folder
For Asset Package, select the asset package geodatabase from the industry folder
For Output Location, select the industry Folder
For Output Folder Name, enter the text Data mappings
Check the box next to Include All Target Classes
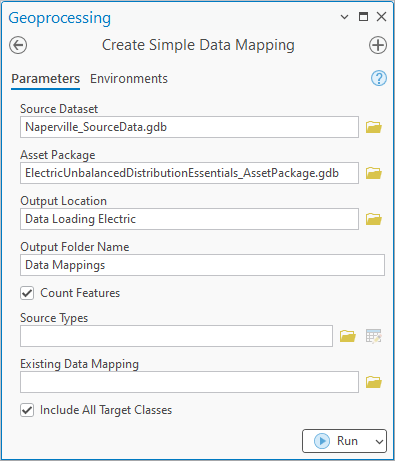
This will create a data mappings workbook for the classes in the source dataset to the classes in the asset package in a new folder in the project.
6. Click Run.
Once the tool is completed you will find a data mapping spreadsheet in the output folder

Section 2: Map Feature Classes
In this section you will create data mappings to migrate the devices and structures in your source database to their corresponding classes in the target asset package. Because the focus of this tutorial is on creating associations, the mappings used for the classes in this section have been simplified. You can find more detailed examples of data mappings in the Additional Resources section at the end of this article.
1. Open the DataMapping workbook in the <industry folder>/Data Mappings/DataMapping.xls.
2. Scroll down to mappings for the structure.
3. Use the dropdowns for the Target Class, Target Subtype, and Target Asset Type columns to populate the structure mappings according to the screenshot below:
 |
 |
 |
 |
 |
4. Scroll down to mappings for the device.
5. Use the dropdowns for the Target Class, Target Subtype, and Target Asset Type columns to populate the device mappings according to the screenshot below:
 |
 |
 |
 |
 |
The last mapping you need to create is for the relationship class between the device and the structure.
Section 3: Map Associations
You decided to start with migrating this device and structure class because they are important to your organization’s network. You know that device feature class has a relationship to the structure feature class that is modeled by storing the Global ID of the structure in a field on the device class.
When migrating relationship classes to the new model you will find that some of the relationships, like those between devices and structures, are designed to be migrated as associations. There will be more discussion about associations in the next module, for this section you will focus on mapping the relationship to become an association.
1. The last mapping you need to create is for the relationship between the device and the structure.
2. Insert a new row after the last row in the spreadsheet by right clicking the header after the last row in the table and selecting Insert.

3. Copy the Source Feature Dataset, Source Type, and Source Class values from one of the device mappings to the new row.
This will create a new mapping for all the devices in the class.
4. Set the Target Class of the new mapping to be C_Associations
If you do not see C_Associations available in the dropdown, you will need to rerun the Create Simple Data Mapping tool with the Include All Target Classes option checked.
 |
 |
 |
 |
 |
You will use this mapping to create the association between the device and structure.
You will determine what kind of association will be created along with the logic for identifying the origin/destination of the association in the detailed data mappings of the migration workspace in the next section.
Section 4: Create a data migration workspace
Now that you have created high-level data mappings for several classes, you need to create a way to define how the all the values for each feature are migrated. One way of doing this is to use the Esri Data Loading tools. The Esri Data Loading tools use what is known as a data migration workspace to define the detailed mappings and translation of data between two databases.
The Utility Data Management Support Tools includes a tool that can turn the simple data mapping workbook you populated into a data migration workspace usable by the Esri Data Loading tools.
1. Open the Create Migration Workspace tool
2. Populate the tool as follows:
For Source Dataset, select the utilities geodatabase from the industry folder
For Asset Package, select the asset package geodatabase from the industry folder
For Data Mapping Spreadsheet, select the DataMappings.xlsx file from the Data Mappings folder in the industry folder
For Service Territory Polygon, select the ServiceTerritory class in the utility geodatabase
For Output Location, select the industry Folder
For Output Folder Name, enter the text Migration Workspace
 |
 |
 |
 |
 |
|
Because this tutorial is focused on creating associations you will accept the rest of the defaults of the tool. When you create the migration workspace for your data migration you should investigate the other parameters on this tool.
3. Click Run.
Conclusion
The Create Migration Workspace tool takes several minutes to run as it creates the migration workspace and creates a copy of the asset package that is reprojected to work with your coordinate system. This migration workspace provides full control of how the data is translated from your source database to the utility network.
Part 2: Make associations
In the previous module you created data mapping for a device class, structure class, and the relationship between the two classes to their corresponding classes in the utility network. In this module you will learn how to create a detailed mapping that will turn the relationship between the device and structure into a containment association.
The type of association you create depends on the Association Role of the structure. Associations to a container require creating a containment association while structures require creating an attachment association.
Section 1: Map association fields
The first step to updating containment associations is to open the data reference workbook created in the data migration workspace you created in the previous module.
1. Navigate to <industry folder>/Migration Workspace/Data Loading Workspace and open the DataReference.xlsx workbook.
This workbook contains links to additional workbooks that contain detailed instructions for each mapping.
2. Open the mapping workbook for C_Associations.
 |
 |
 |
 |
 |
3. Populate the field mappings according to the screenshot below
 |
 |
 |
 |
 |
|
The type of association you create for each relationship depends on your needs, but the most common types are:
- Containment – This is an association between a container and its content.
- Structural Attachment – This is an association between a structure and its content.
- Junction Junction Connectivity – This is a connection between two point features.
- Junction Edge From Connectivity – This is a connection between a point and a line feature on the from end of the line.
- Junction Edge To Connectivity – This is a connection between a point and a line feature on the to end of the line.
- Junction Edge Midspan Connectivity – This is a midspan connection between a point and a line feature
When creating connectivity associations, you also need to specify the terminal id for each network feature.
Because you mapped the association to the destination in the relationship, this will use the Global ID of the feature as the destination Global ID of the association.
This mapping will create an association between each device and structure. Associations allow devices and structures to see their associated features, like relationships. Associations also allow you to include structures in your trace results and subnetwork exports.
You may have noticed that many of the fields on the association mapping are left blank. This is because the domain, feature class, asset group, and asset type of the features for this association are not easily defined in the spreadsheet. In the next module you will learn about a tool that you can run after migrating the data that will calculate the values for you in the migrated database.
Section 2: Migrate Associations
In this section, you will use the Esri Data Loading tools to run the migration workspace. This will migrate the devices, structures, and relationships you mapped from your source data into your asset package.
Once you’ve run the migration you must perform an additional step to populate the associations table in the asset package. You will then run the Sync C Tables Asset Group/Type tool to populate all the required columns on the C_Associations table with the information from the rest of the tables in the target database.
1. Go to the View tab on the Ribbon.
2. Open the Geoprocessing pane.
3. Expand System. Expand Data Management. Expand Data Loading. Select Load Data Using Workspace.
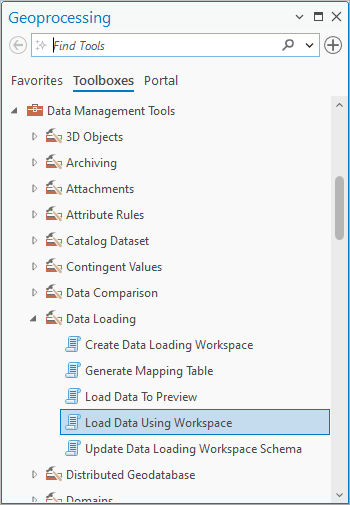
You can also use the Find Tools bar to search for the Load Data Using Workspace tool.
4. Populate the Data Reference Workbook parameter with the DataReference workbook from this module.
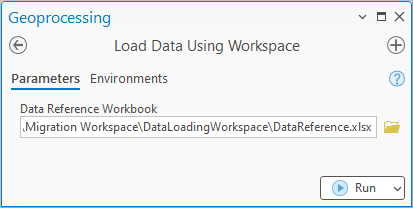
The tool will take several minutes to run.
5. Expand the Asset Package in your Migration Workspace.
6. Right-click the C_Associations Table and select Open Table.
 |
 |
 |
 |
 |
7. Note the number of empty columns.
These are columns that you didn’t provide mappings for. You will now use a tool from the UtilityDataManagementSupportTools toolbox to populate these columns.
8. Close the C_Associations table
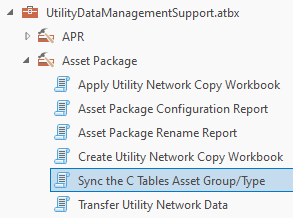
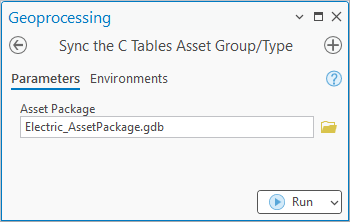
9. Expand the UtilityDataManagementSupport toolbox. Expand Asset Package folder. Open the Sync the C Tables Asset Group/Type tool.
10. Select the current Asset Package and click Run
If the tool fails because it cannot get an exclusive lock, ensure you have closed the Associations table and try again.
11. Open the C_Associations table again
 |
 |
 |
 |
 |
All the domain network, network class, asset group, and asset type columns are now populated.
Lesson conclusion
In this lesson you learned how to create a data migration that can create devices, structures, and associations for a utility network migration. You learned how to use the Create Simple Data Mapping tools to create high level mappings between your source and target database. You also learned how to use the Create Migration Workspace tool to create detailed mappings based on the Data Mapping workbook you populated.
Additional Resources
You can find a complete collection of data migration resources on the ArcGIS Utility Network migration reading list.
This lesson doesn’t include steps for performing the migration. However, you can find videos and instructions for the entire data mapping and migration process on the Deploying a Utility Network Foundation article. You can also find unique instructions and examples for each Utility Network Foundation included in their documentation.
If you want to learn more about populating detailed mappings on feature classes, including how to translate domain values between two models, check out the Load data into a utility network tutorial.
If you want a more detailed, industry-specific look at how to migrate data, several of the Utility Network Foundations now include instructions for data migration:


Commenting is not enabled for this article.