
The monthly Moments of Zen blog series is brought to you by the ArcGIS Living Atlas team. Throughout the series, we will highlight different elements of the latest guidance for your Living Atlas items. Taking care of the small but important details and maintenance on your items helps to increase moments of calmness (or at least, decrease moments of panic) for item users downstream.
Living Atlas releases two or three updates to its Item Detail Guidance per year, around the same time as ArcGIS Online releases. This guidance shares the best practices and recommendations for content (layers, maps, apps, tools) that their creators share in Living Atlas.
This month’s moment of Zen is all about extents.
A moment of zen: Set the Extent on layers and web maps
The extent of your layer or map is the geographic area of interest, or area of coverage.
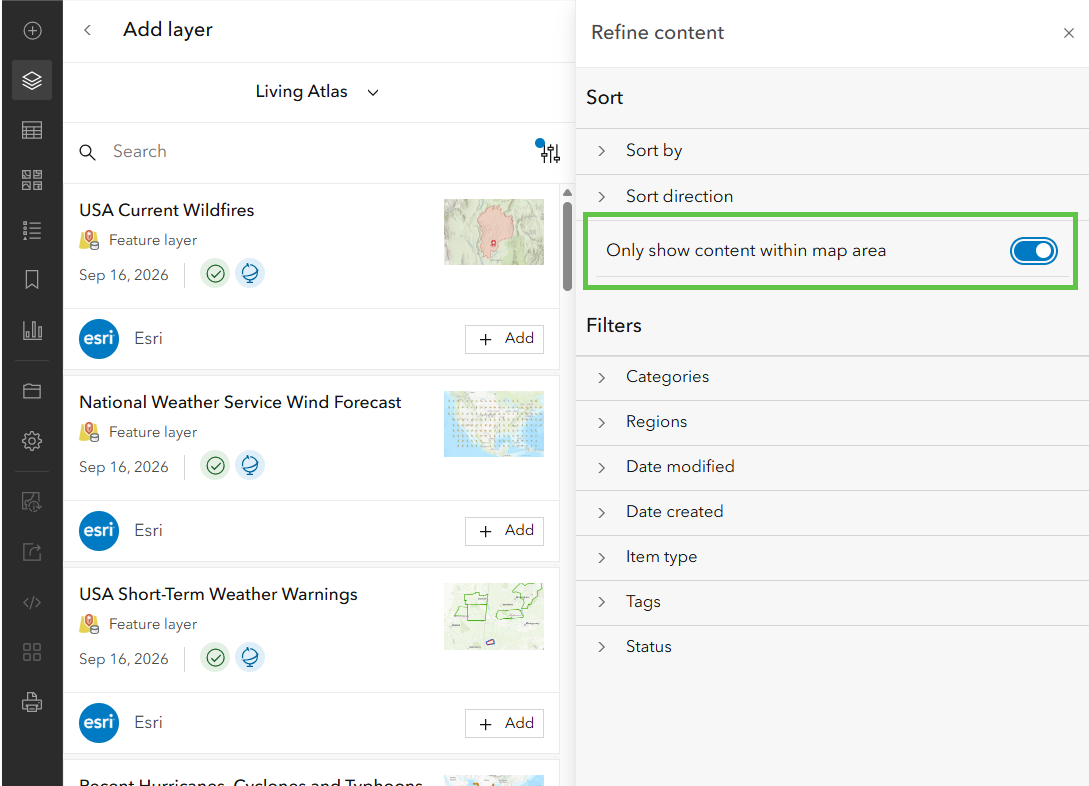
When adding layers into Map Viewer, many analysts filter down to layers they are most interested in by toggling on the “Only show content within the map area” option. The results that appear with this option are all driven by the layers’ defined extent. If you want your layers to appear in search results here, make sure the extent is set.
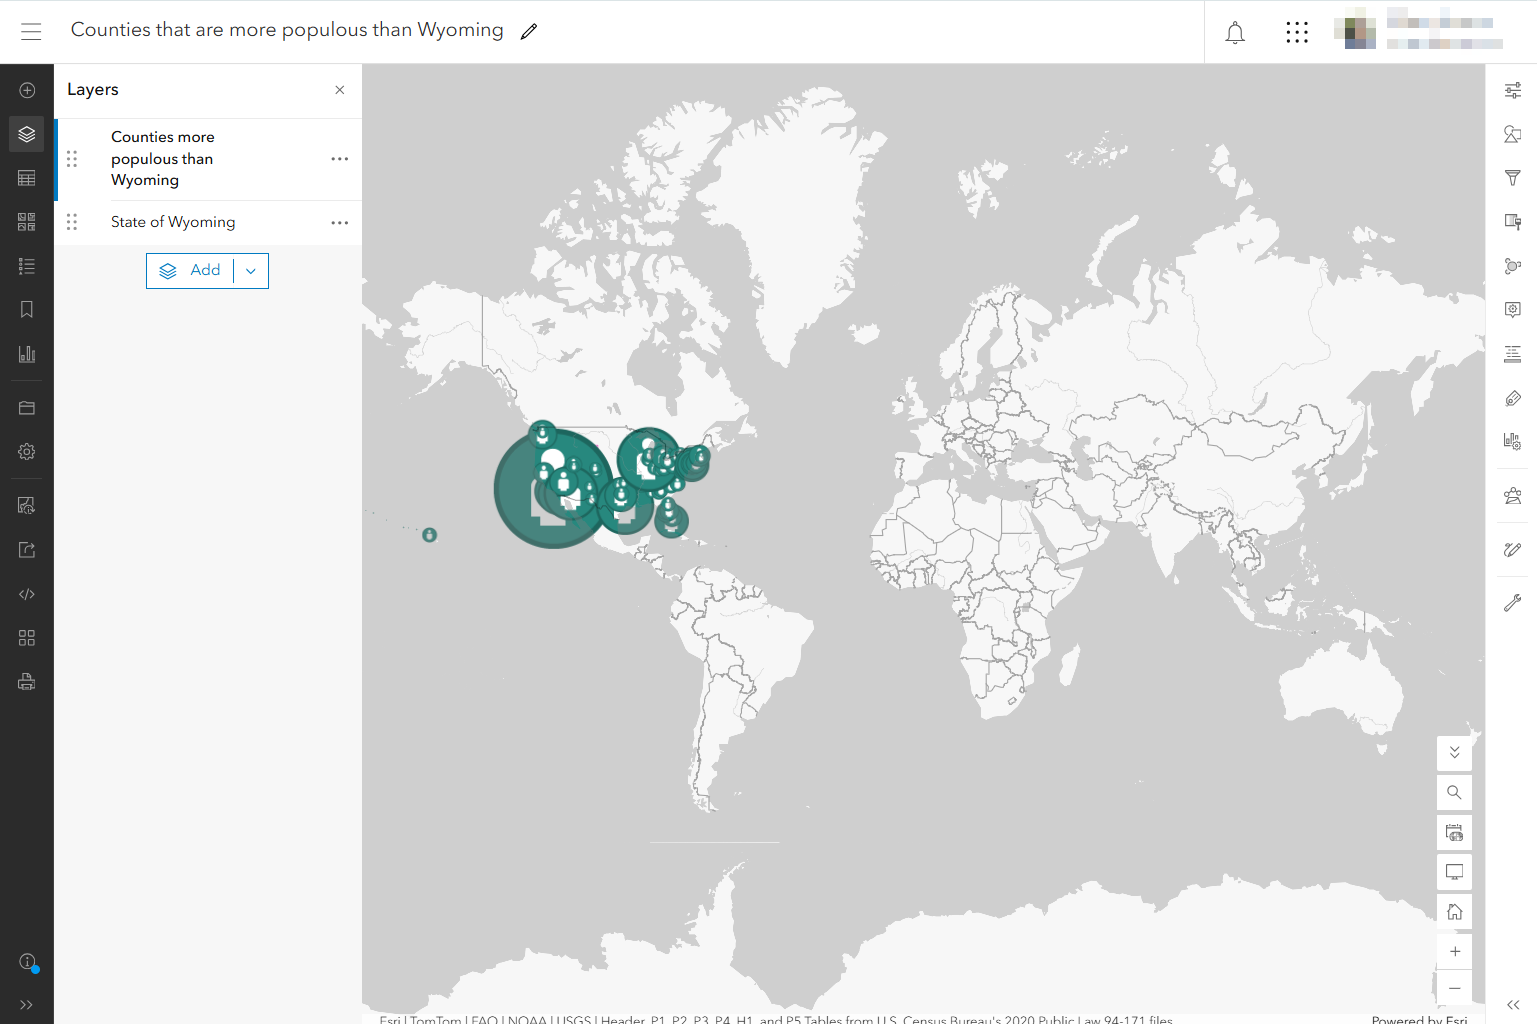
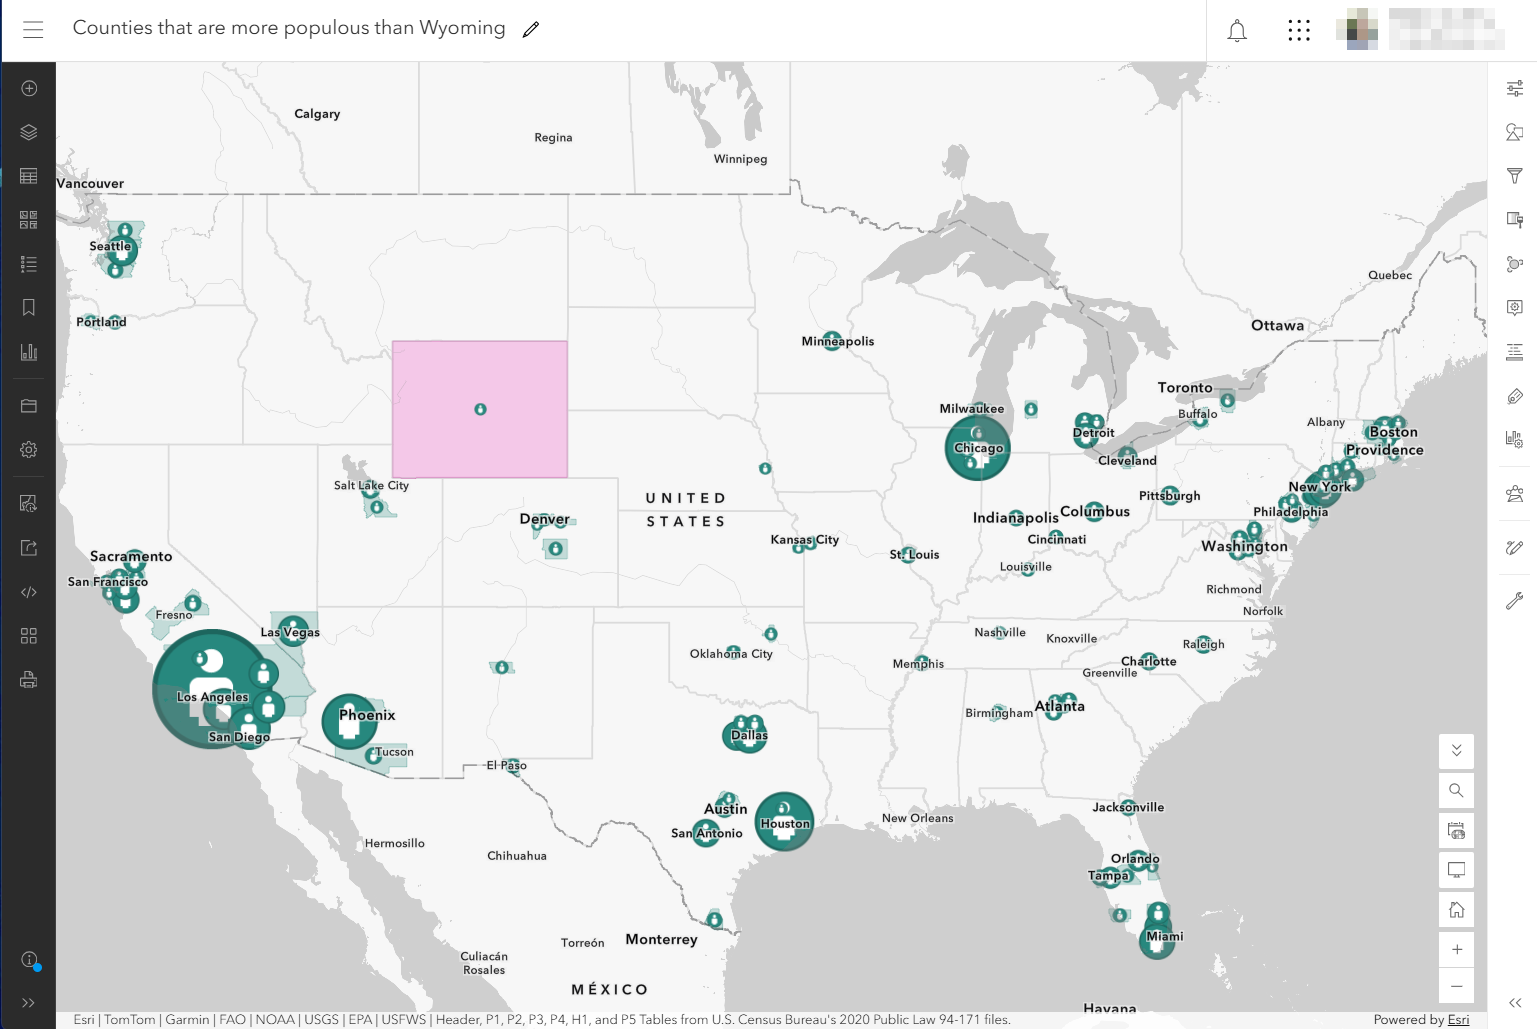
For web maps, the extent drives the area of focus upon opening the map. With no extent set, maps will open up to the whole world, which is unlikely your intended area. By setting your map’s extent to the contiguous 48 states, for example, you are controlling how your map will open up for people, making your maps appear the way you desire.
For example, with no extent set:
Vs. with extent set to contiguous 48 states:
How do you define the context extent for an item?
In the Item’s Settings Tab
You will be prompted to Set extent the first time, or Edit extent in subsequent times. You have a few options here in defining the extent.
- Draw extent by dragging and drawing a bounding box on the map.
- Type in exact coordinate values for the Top & Bottom (Latitude), and Left & Right (Longitude)
- Use your organization’s default extent (most likely set by your ArcGIS Online administrator)
- Create an extent based on the Current features in the layer (only available for hosted feature layers)
- Search for a specific location (available for web maps only)
See the Official Help Doc for more information on any of these.
In the Evaluate and Nominate App.
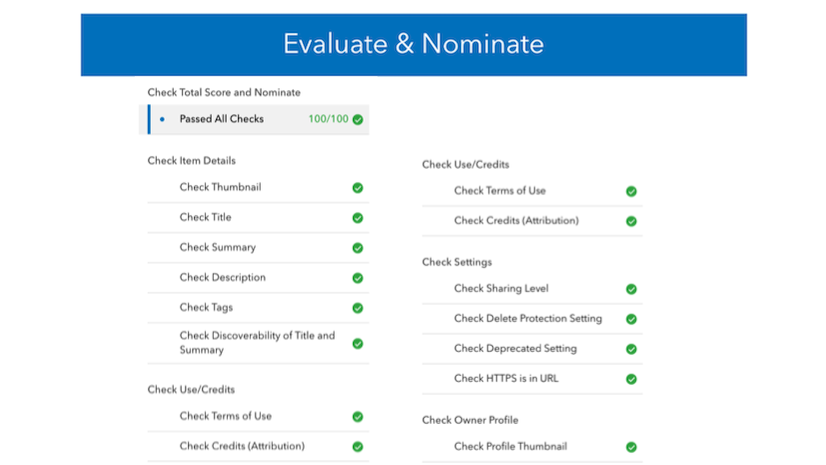
The Living Atlas “Evaluate & Nominate” app lets you evaluate your item against the latest Living Atlas criteria. The evaluation reveals how well your item is using best practices for sharing content to the GIS community. If your organization is an official source for layers, maps, dashboards, or tools, we encourage you to nominate your top-tier items for inclusion in Living Atlas. However, you don’t even have to nominate to Living Atlas to run this evaluation.
Go to the “Contribute” page on the Living Atlas website to find a button that says “Evaluate Your Content.”
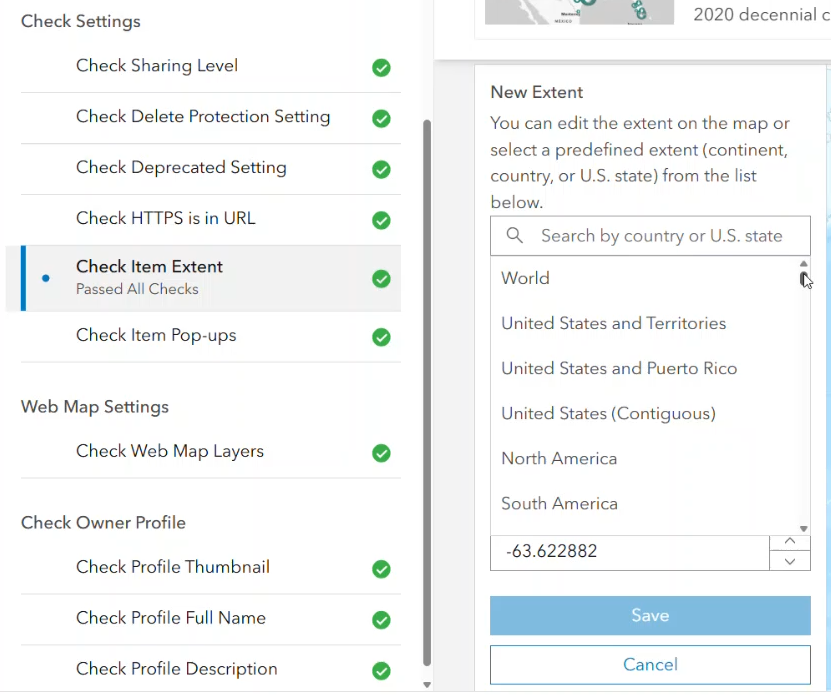
Within the app, you will find guidance on the extent, as well as a pick list of common pre-defined extents to choose from.
In a script
If you’re setting the extent for multiple layers or maps at once, consider using a script or a Notebook to define the exact coordinates. This helps ensure consistency across your collection.
Set your organization’s extent as an adminstrator
If you work for a county or city, and 99% of the layers and maps that your team creates are about your county or city, consider setting the organizational default extent. This way, everyone across your team can use the same settings.
What about other item types?
ArcGIS Online supports many item types beyond layers and web maps: Scenes, Instant Apps, StoryMaps, Dashboards, Hub Sites, Web Experiences, Deep Learning Packages, and Images, just to name a few.
Setting an extent for these items is one more way to declare the location of interest, which helps these items be found in queries based on location. For Deep Learning Packages, the extent is one more way to communicate where the package is fit for use. For an app of a municipal transit system, the extent could be a bounding box around the jurisdiction. If you add a Microsoft Word document that contains a report about Santiago, Chile, or a URL to a news report about Santiago, you can set the geographic extent of those items to a bounding box containing that city. The additional care and attention taken to configure this now will help your items appear in search, both in GUI-based search elements throughout ArcGIS Online, as well as developers’ scripted search queries that look at extent.
What about items that are truly global in coverage?
We do still recommend defining the extent. You can select “World” from the pick list in the Evaluate and Nominate app.
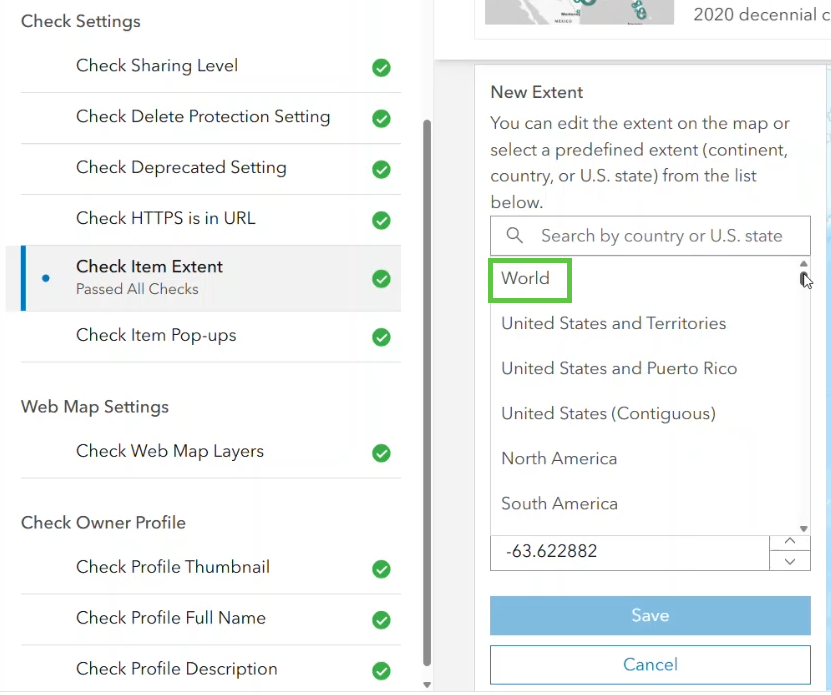
Since ArcGIS Online enables a whole user community to search, query, and find publicly shared items, a defined extent of world will show up differently than no extent, particularly in scripting. Set your items’ extent to create moments of zen for others. It’s a simple way to improve the ArcGIS Online user community experience, one item at a time.
Resources
To continue your Living Atlas journey, visit the following resources:
- Living Atlas product overview page
- Living Atlas blog article collection
- Living Atlas video channel
- Living Atlas on Esri Community
- Living Atlas login page
- Email Living Atlas Curators
Stay tuned for next month’s moment of zen!



Article Discussion: