What is a Group layer
With this release of Map Viewer we will now support exporting and saving Group layers as their own layer items in ArcGIS Online. Group layers are an essential part of maps and scenes from ArcMap, ArcGIS Pro, Maps and Scenes. Map Viewer added support for Group layers in 2020. We like to think of Group layers as things that should remain together because they are conceptually related or meant to work together in a coordinated way. The ability to save an entire Group now, as a single item, and share is a real time saver for authors because it ensures their multi-layer, complex maps get imported by others in the correct way. For example, a map might have five feature layers with a specific stacking order and different blend modes applied to each of them to achieve a specific look. This is all now preserved when saving a Group layer item. This means these settings don’t have to be manually recreated as they normally would by someone who just imported the individual layers.
We no longer need to share multiple individual layers with instructions for how they fit together, we just share a single stack of things that are already all wired up.
Group layers are also great for adding structure to your table of contents by keeping things organized, much like folders on a desktop keep related things together. With Group layers you can easily change the drawing order of the layers by moving the entire Group or sub-group in the layer list.
With the June 2023 release of Map Viewer we expanded upon the standard layer visibility controls of a Group layer. By default, you can use a Group layer to turn all layers visibility within the Group on or off with the parent Group. Now you can set the visibility within a Group to exclusive visibility which sets the visibility of the sub layers to only allow one sub layer on at a time. This control over layer visibility will be supported when saved back to the Group layer item.
How to Create a Group layer
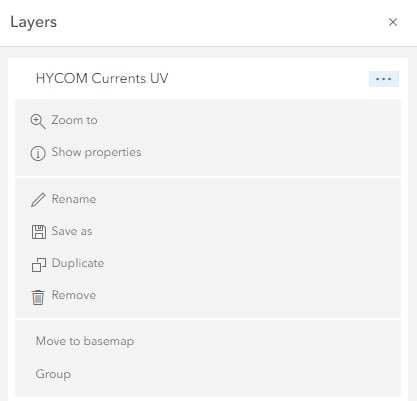
To create a Group layer in your web map. First you will need to start with a layer in the map. Clicking on the options you will see the option to Group.
Next you can add more layers into the Group layer by dragging and dropping into the Group layer. You can also use the option action to Move the layer into an existing Group. This makes placing your layer into a Group easy especially when dealing with nested Groups.
Adding Group layer items to a maps and apps
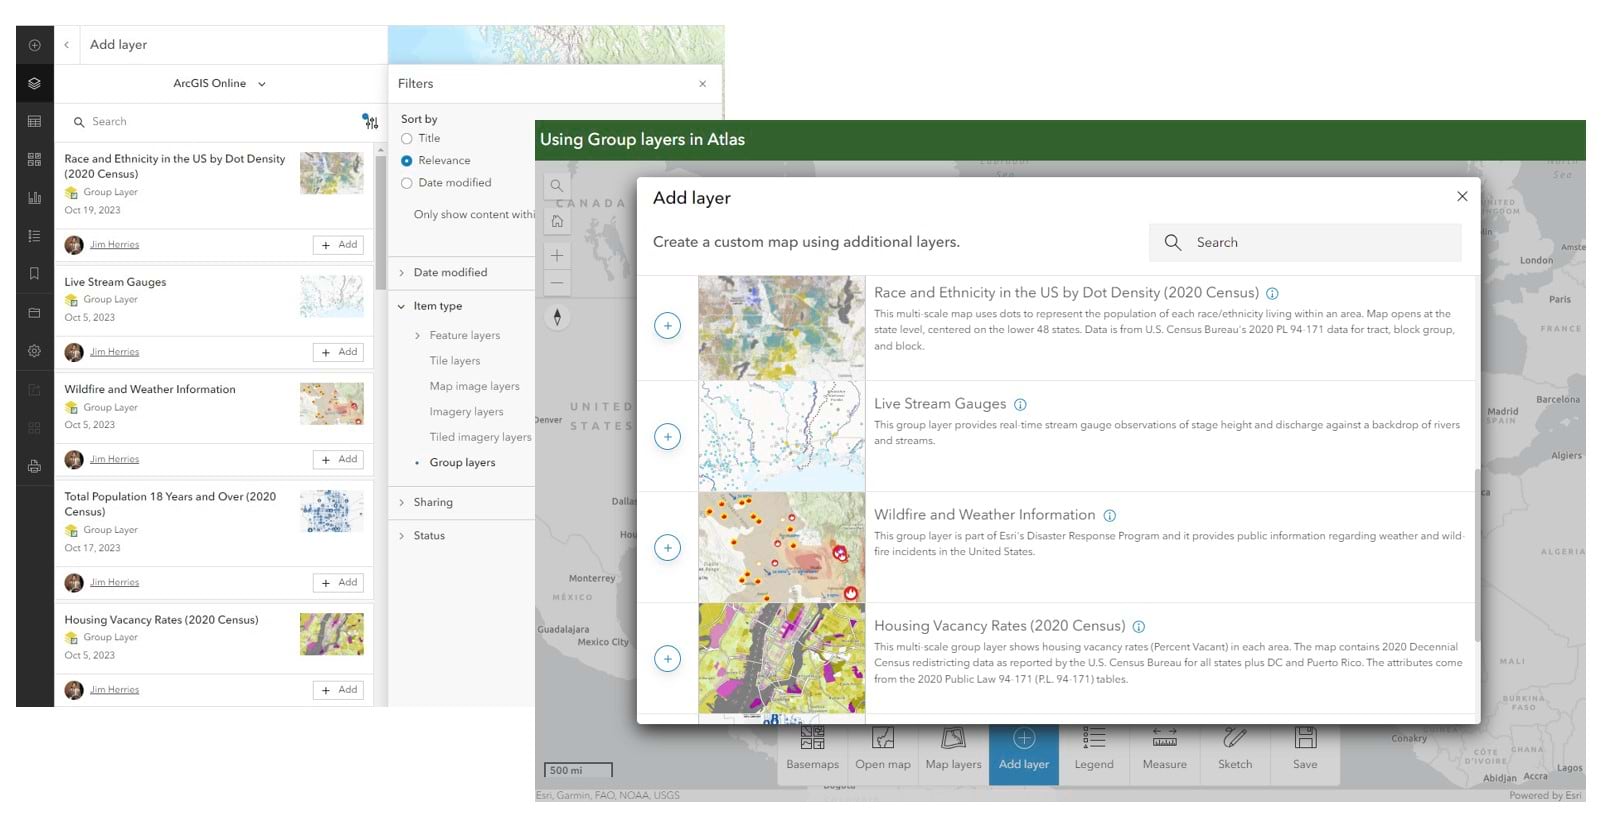
Just like with other layer types, Map Viewer allows you to add these to your maps in a variety of ways. You can add the Group layers through the item details page and via the item browser. And the new Atlas app will also support Group layers in its Add content workflows.
How to Save and Share a Group layer item
Now that layers are within your Group you can click on the options of the Group again and click Save As. This will create a Group layer item with layers.
This follows the same workflow as other supported layer item saving in Map Viewer. Enter in a title, tags and folder placement.

To share the Group layer item go to the Properties panel and under info you will see the Layer Item button, this will open the Group layer item details page. Click on Share and set how you would like to share the Group layer. This will review the layers within the Group and notify you if any layers in the Group layer item need updated shared settings.
Use Cases for Saving Group Layers
As a map author whenever we share a map made from multiple layers it’s often very important that all of those layers stay bundled together. Why? So that things like the “which layers sit above other layers” and “which layers have blend modes applied” and “which layers have coordinated multi-scale behaviors” doesn’t get moved around or lost in the shuffle. Having to recreate those setting manually is tedious at best. Now that we can save Group layers out and share them as a single item, the chance of things getting misplaced goes way down and our productivity goes up.
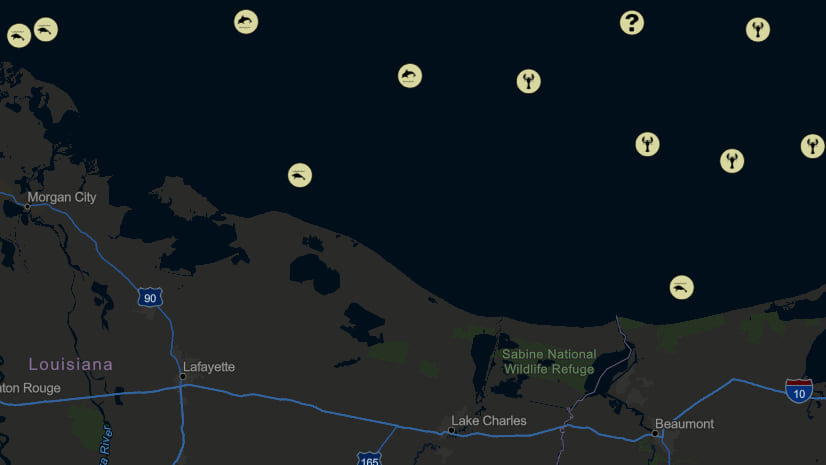
Example 1: Where there is Smoke there is Fire…
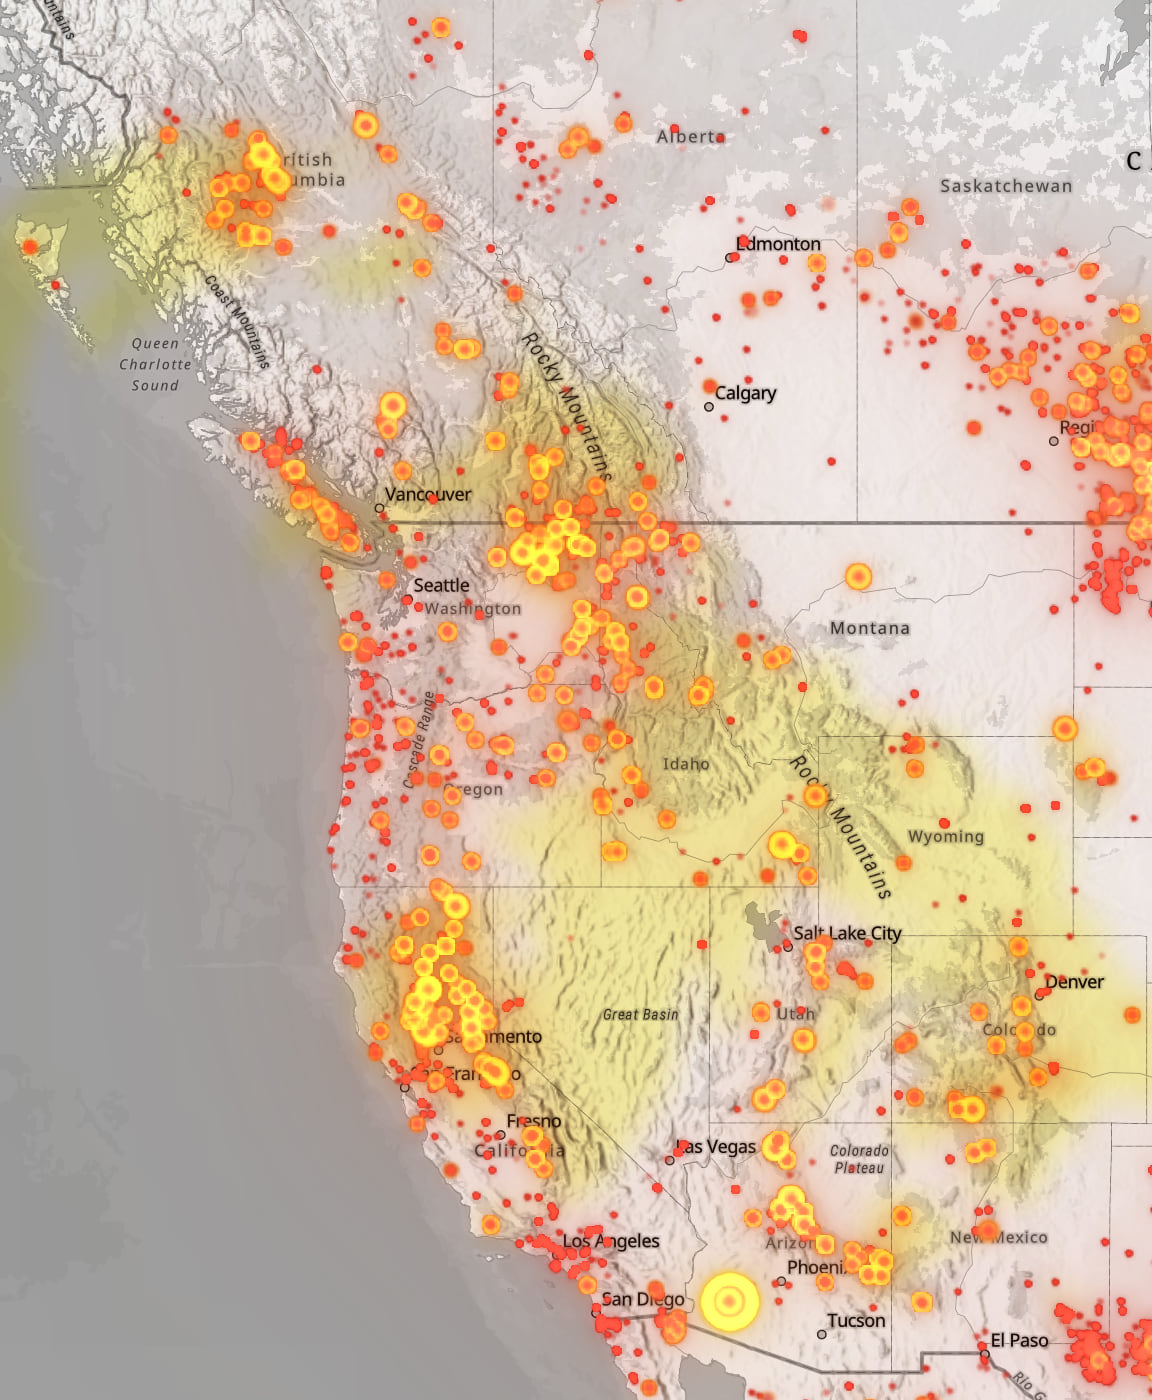
Esri offers many interesting live data streams, including satellite monitoring of wildfires, as seen in the map below. When combined with data from real-time smoke and haze monitoring, the combination of these two datastreams offers a great look at how the places often most impacted by smoke can be hundreds or even thousands of miles downwind from the fires themselves.
Keeping these two layers together, since they are very related, is a good use of Group layers. But beyond this, these layers use a mix of blending and map effects to create a glowy, hazy look which are also preserved when saving the Group layer. Feel free to open this Group layer to see how they work together.
Example 2: Trimming Media Layers with Sketch Masks
One of the cooler ways to use Sketch drawing tools is as an invisible mask to show/hide parts of other layers in the map. For example, when we use scanned paper maps as georeferenced Media Layers we often want to trim away parts of the original print map like the title or border. Here the unneeded parts of this vintage 1941 paper map are being masked by a rectangle drawn in Sketch. Since the media/image and the masking need to travel together as a single item—and use blend modes to make the mask invisible—this is a perfect use case for Group Layers and for saving them out as a single item. Feel free to drop this into your own map and play around with it.

For a look at how this map was made, read this wonderful blog post by Emily Garding.
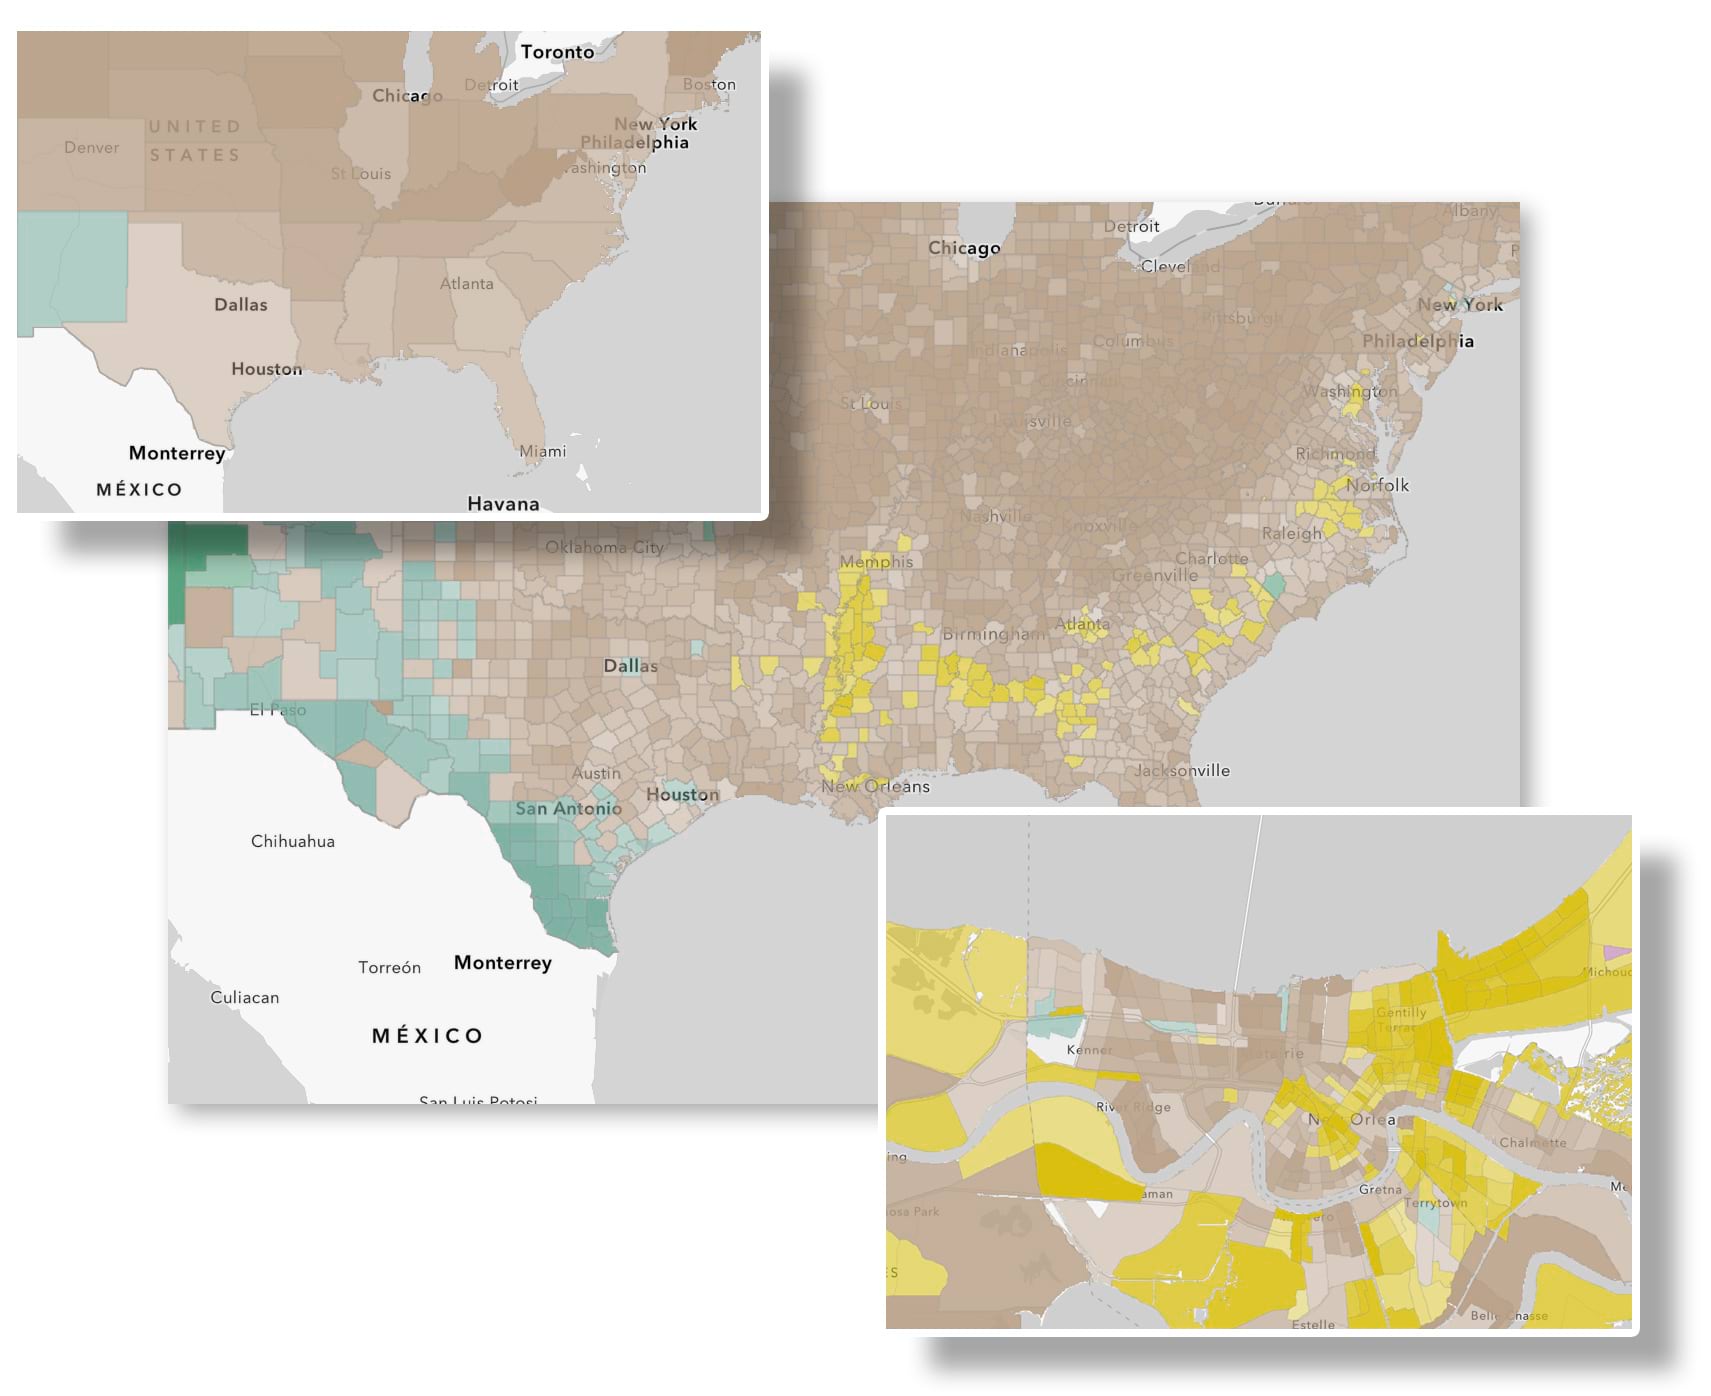
Example 3: Coordinated Multiscale Layers
The ability of web maps to reveal more details as readers zoom in is one of their most useful capabilities. It’s so useful it has become almost expected these days. The way to author a coordinated multiscale map is to first author multiple feature layers optimized and generalized for different spatial scales (e..g, globe, continent, country, …). Second, define the Visible range for each of those layers so that as the readers zooms in they turn on and off at the right time in a coordinated fashion. The easeist way to keep these layers bundled together is with Group layers. And when this Group is saved, now, this coordinated turning on and off of layers at the right time is preserved without any extra work. Open an example of Group layer item here.
Learn more about this American Community Survey data here.
Next Steps
The next time you need to share a collection of map layers be sure to use Group layers to first organize that content and then export it so that the relationship between the layers is preserved. Also look in the future for more development related to Group layers, since these are the first step in a series of planned enhancements including support for Group layer items to be saved out from 3D Scenes, as well as support for opening and creating Group layer items in ArcGIS Pro.
Lastly, there will be a great (and growing) collection of Group layer items in the Living Atlas of the World, so keep an eye out for those. It’s a great place to start exploring what Group layers can do for you.


Great news! Is it possible to overwrite/update an existing group layer, for example, after adding or removing layers to the group?
You can update a group layer item by clicking on Save instead of Save As which will push the latest changes to the group layer to the item. The changes that were saved back to the item will not be seen in maps that have added the group layer item and would require the layer to be re-added because the group layer item is imported directly into the map which means the map will then contain all the layers similarly to the way it would be stored if you would author a group layer in the map. We do have plans to support a way to allow the group layer item in a map to be reset within map viewer which will bring in the latest from the group layer item. Hope this helps!
Hello-
Have any changes been made to allow for the “plans to support a way to allow the group layer item in a map to be reset within map viewer which will bring in the latest from the group layer item.” since this post was created? (we are on AGE, but to know it could be coming there as well, if not yet, would be really helpful.” We use this tool a lot, however are a little frustrated with having to re-add to several web maps that the group has been added to should we need to add/remove or adjusted things like pop-ups to a layer in the group.
Thank you in advance,
Vanessa
Is there any update to the plan to support a way to allow the group layer item in a map to be reset within the map viewer?