The newly released Layer Effects in the Map Viewer add graphics software-like control over our map layers. These Effects include things like dropshadow, tinting, and glow. When combined with Blend Modes, these Effects give us a powerful new degree of artistic control over the look of our maps. If you haven’t read it already, check-out the Part 1 on Effects before jumping in here.
Since Effects can do a lot, this is the second in a series of posts where we show some of what’s possible. While you don’t need to use Layer Effects on every map, they’re a lot of fun to work with and offer many creative possibilities. Give yourself time to experiment and just try combinations of Effects and Blending to see what works.
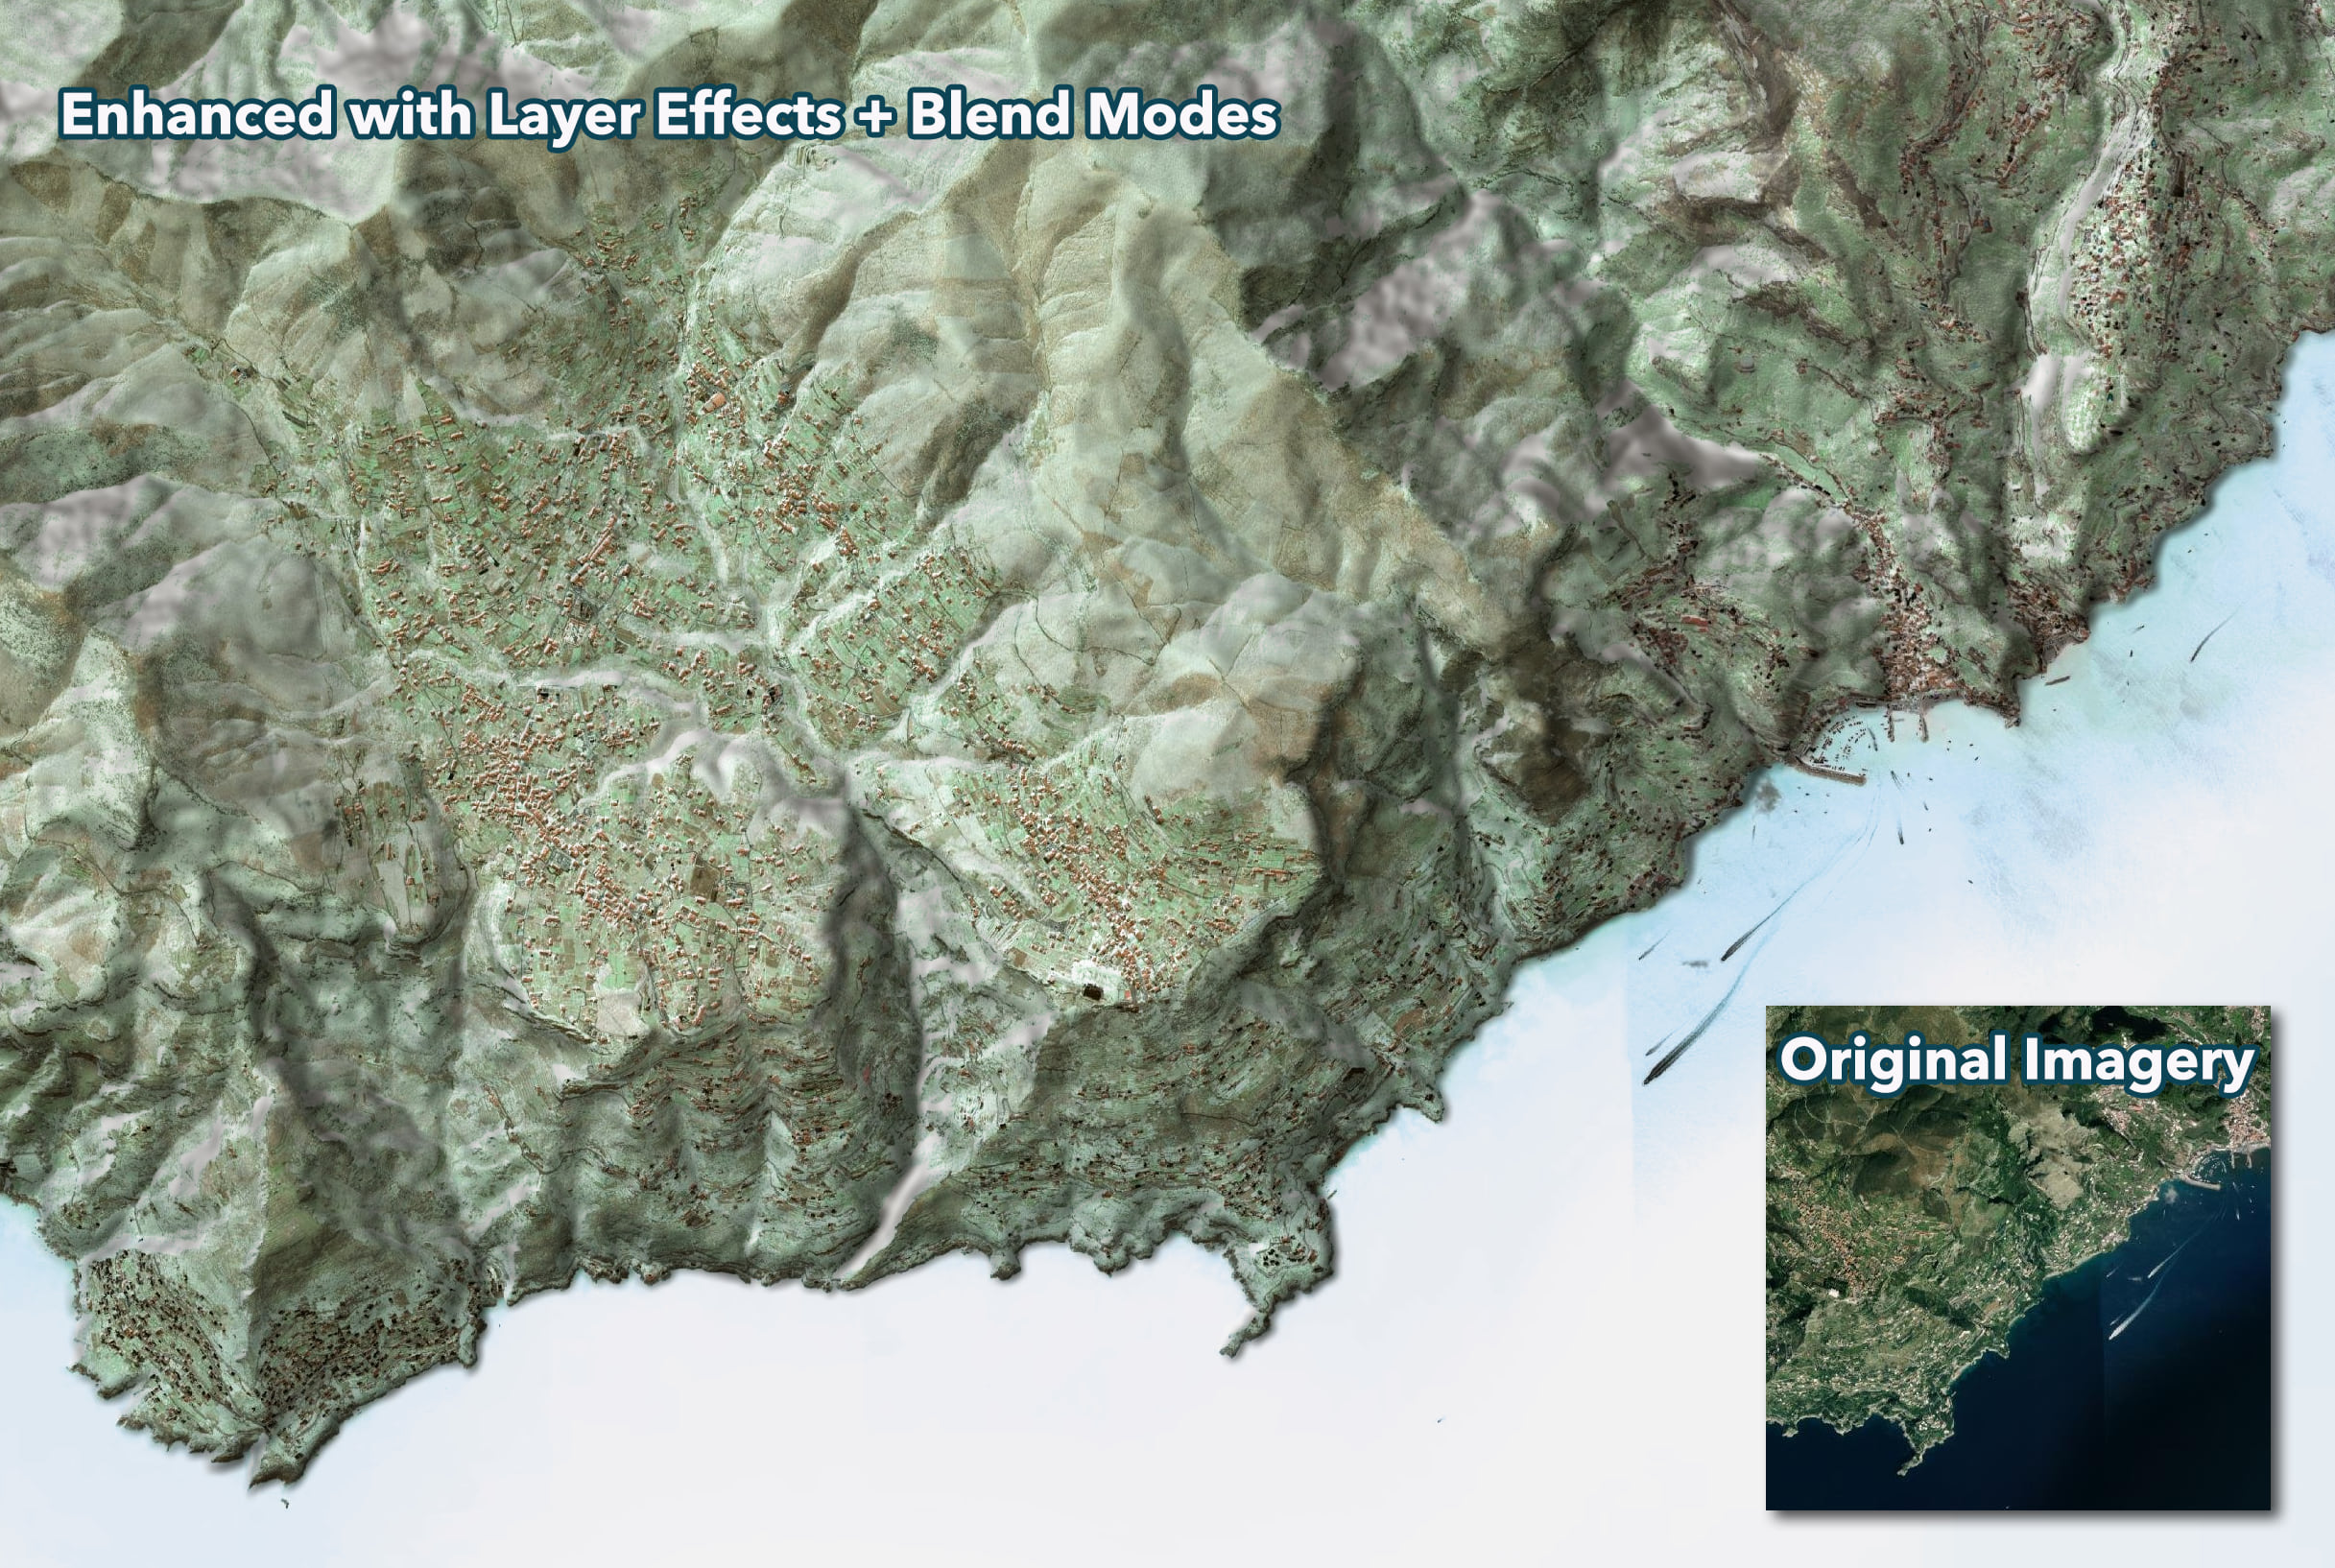
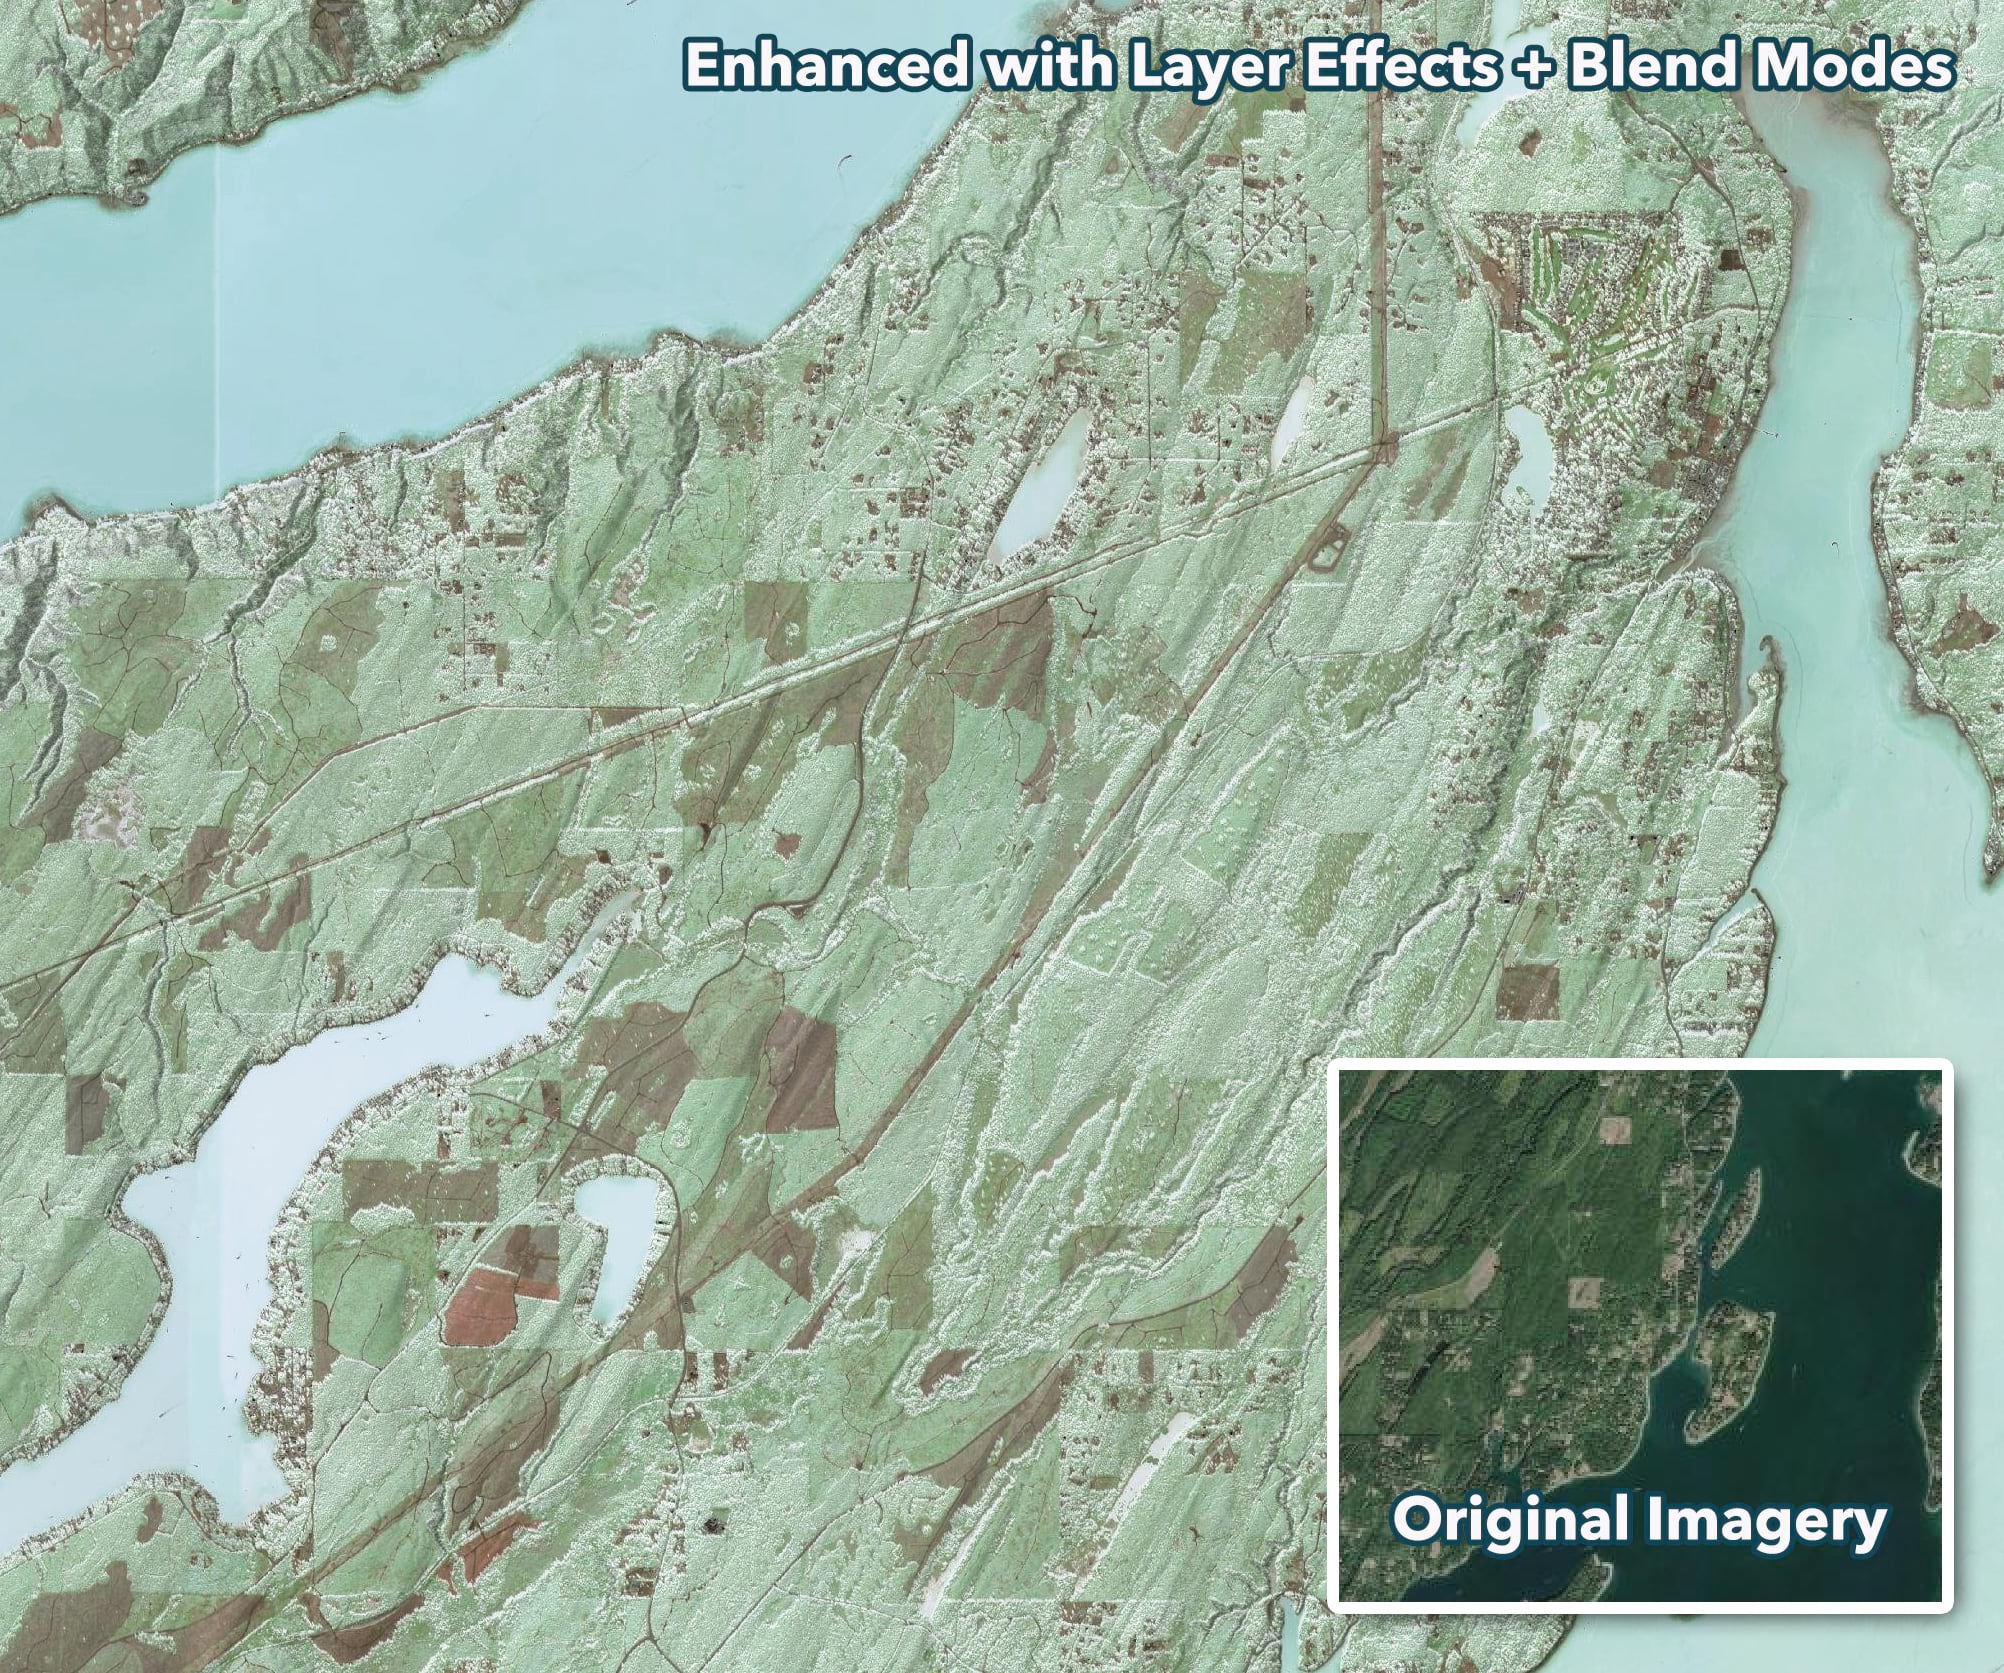
What follows is a deeper dive on one specific technique I’ve used to enhance Esri’s Imagery basemaps, inspired by earlier work from master cartographer John Nelson. While the example I use here is Imagery, these steps work well on many of Esri’s basemaps!
Effects + Basemaps
Since Esri’s basemaps are the workhorse and literal foundation of Web Maps, let’s focus on those today. How do Layer Effects help a basemap? By allowing anyone to create custom-looking, bespoke basemaps in 2 or 3 clicks without having to author them from scratch. Instead, just modify your favorite Esri basemaps to suit your needs. Need it to be darker? Want to change the tint of the water? Need to desaturate a basemap to tone it down? Need to add more pop to the placenames against a busy map? Effects can help with all of these. Use Effects on any part of the basemap: The labels, the detail layers, or the base/imagery.
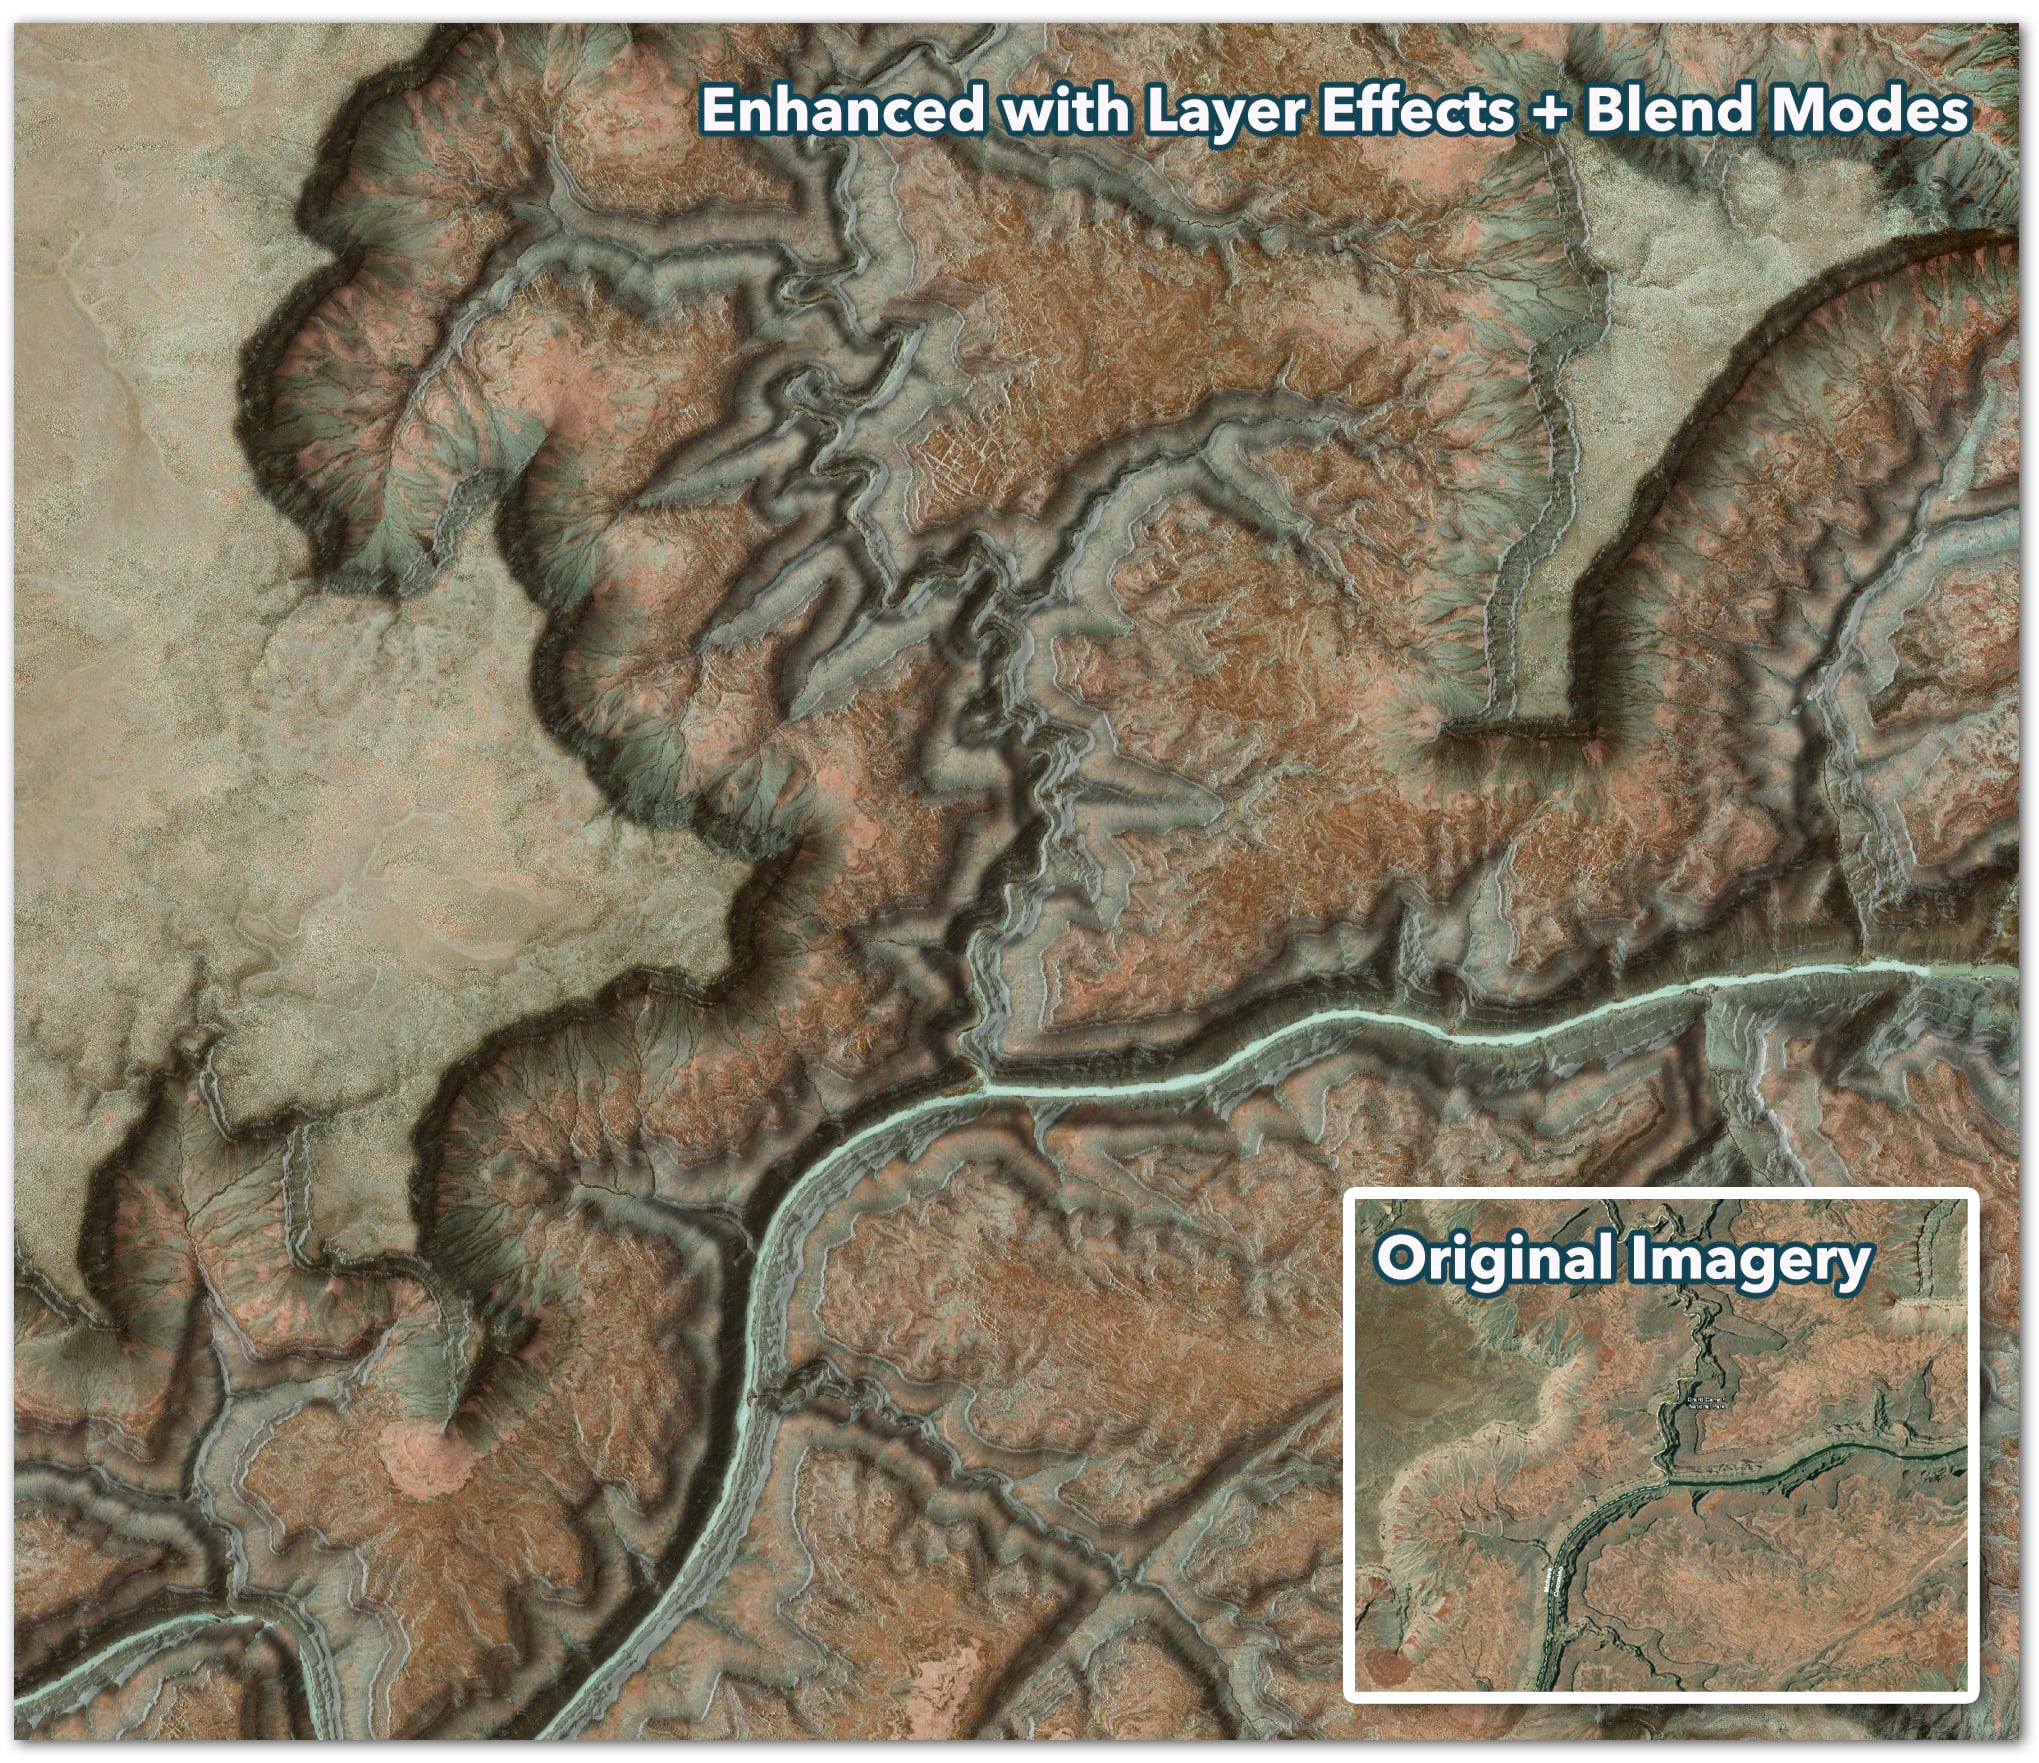
An Enhanced view of the Grand Canyon
Here are the steps to reproduce the images shown above. First, open the Map Viewer. Zoom into a portion of the Grand Canyon in Arizona (use search if you that helps). If it’s not already active, switch to the Imagery Hybrid basemap using the basemap selector.
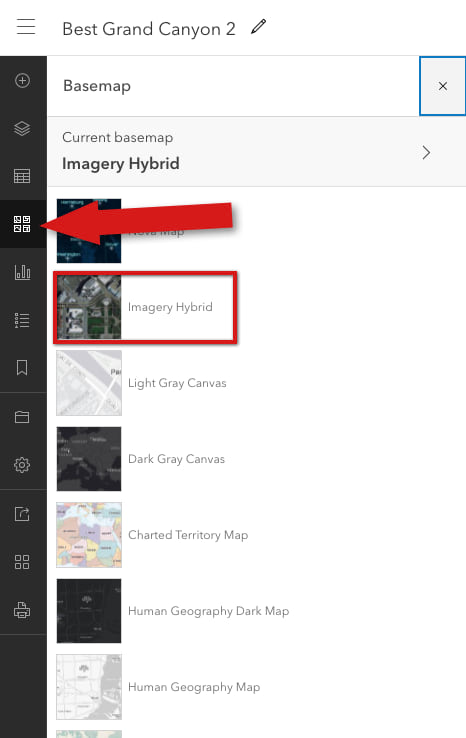
Click Current basemap to drill into the Imagery Hybrid basemap. It has two map layers to it. We can turn off the Reference Layer (with the eyeball) so we can focus just on the landforms.
While still looking at the basemap layers, select the World_Imagery layer to make it active. Click the new Effects icon (looks like 3 stars) in the context menu on the other side of the screen. Here you will see the nine Layer Effects.
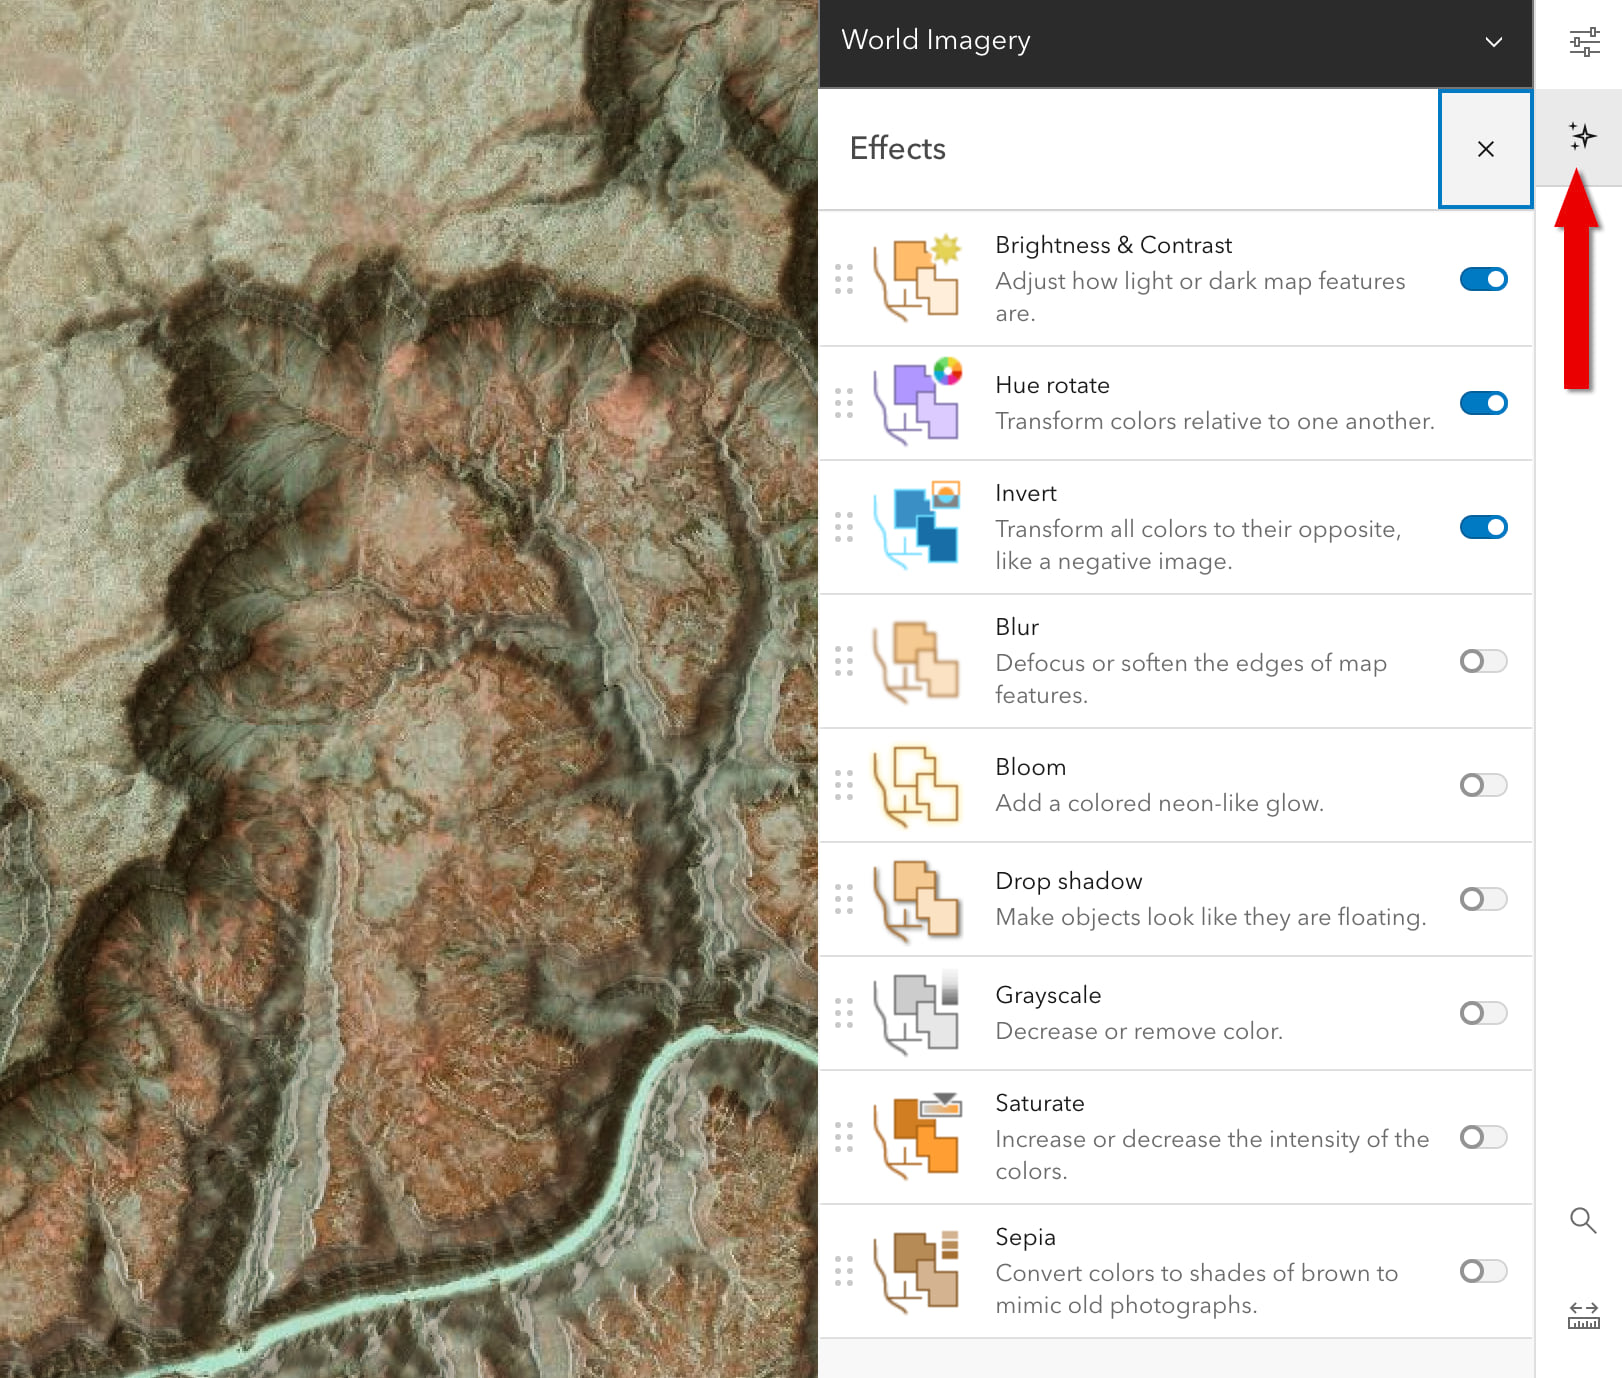
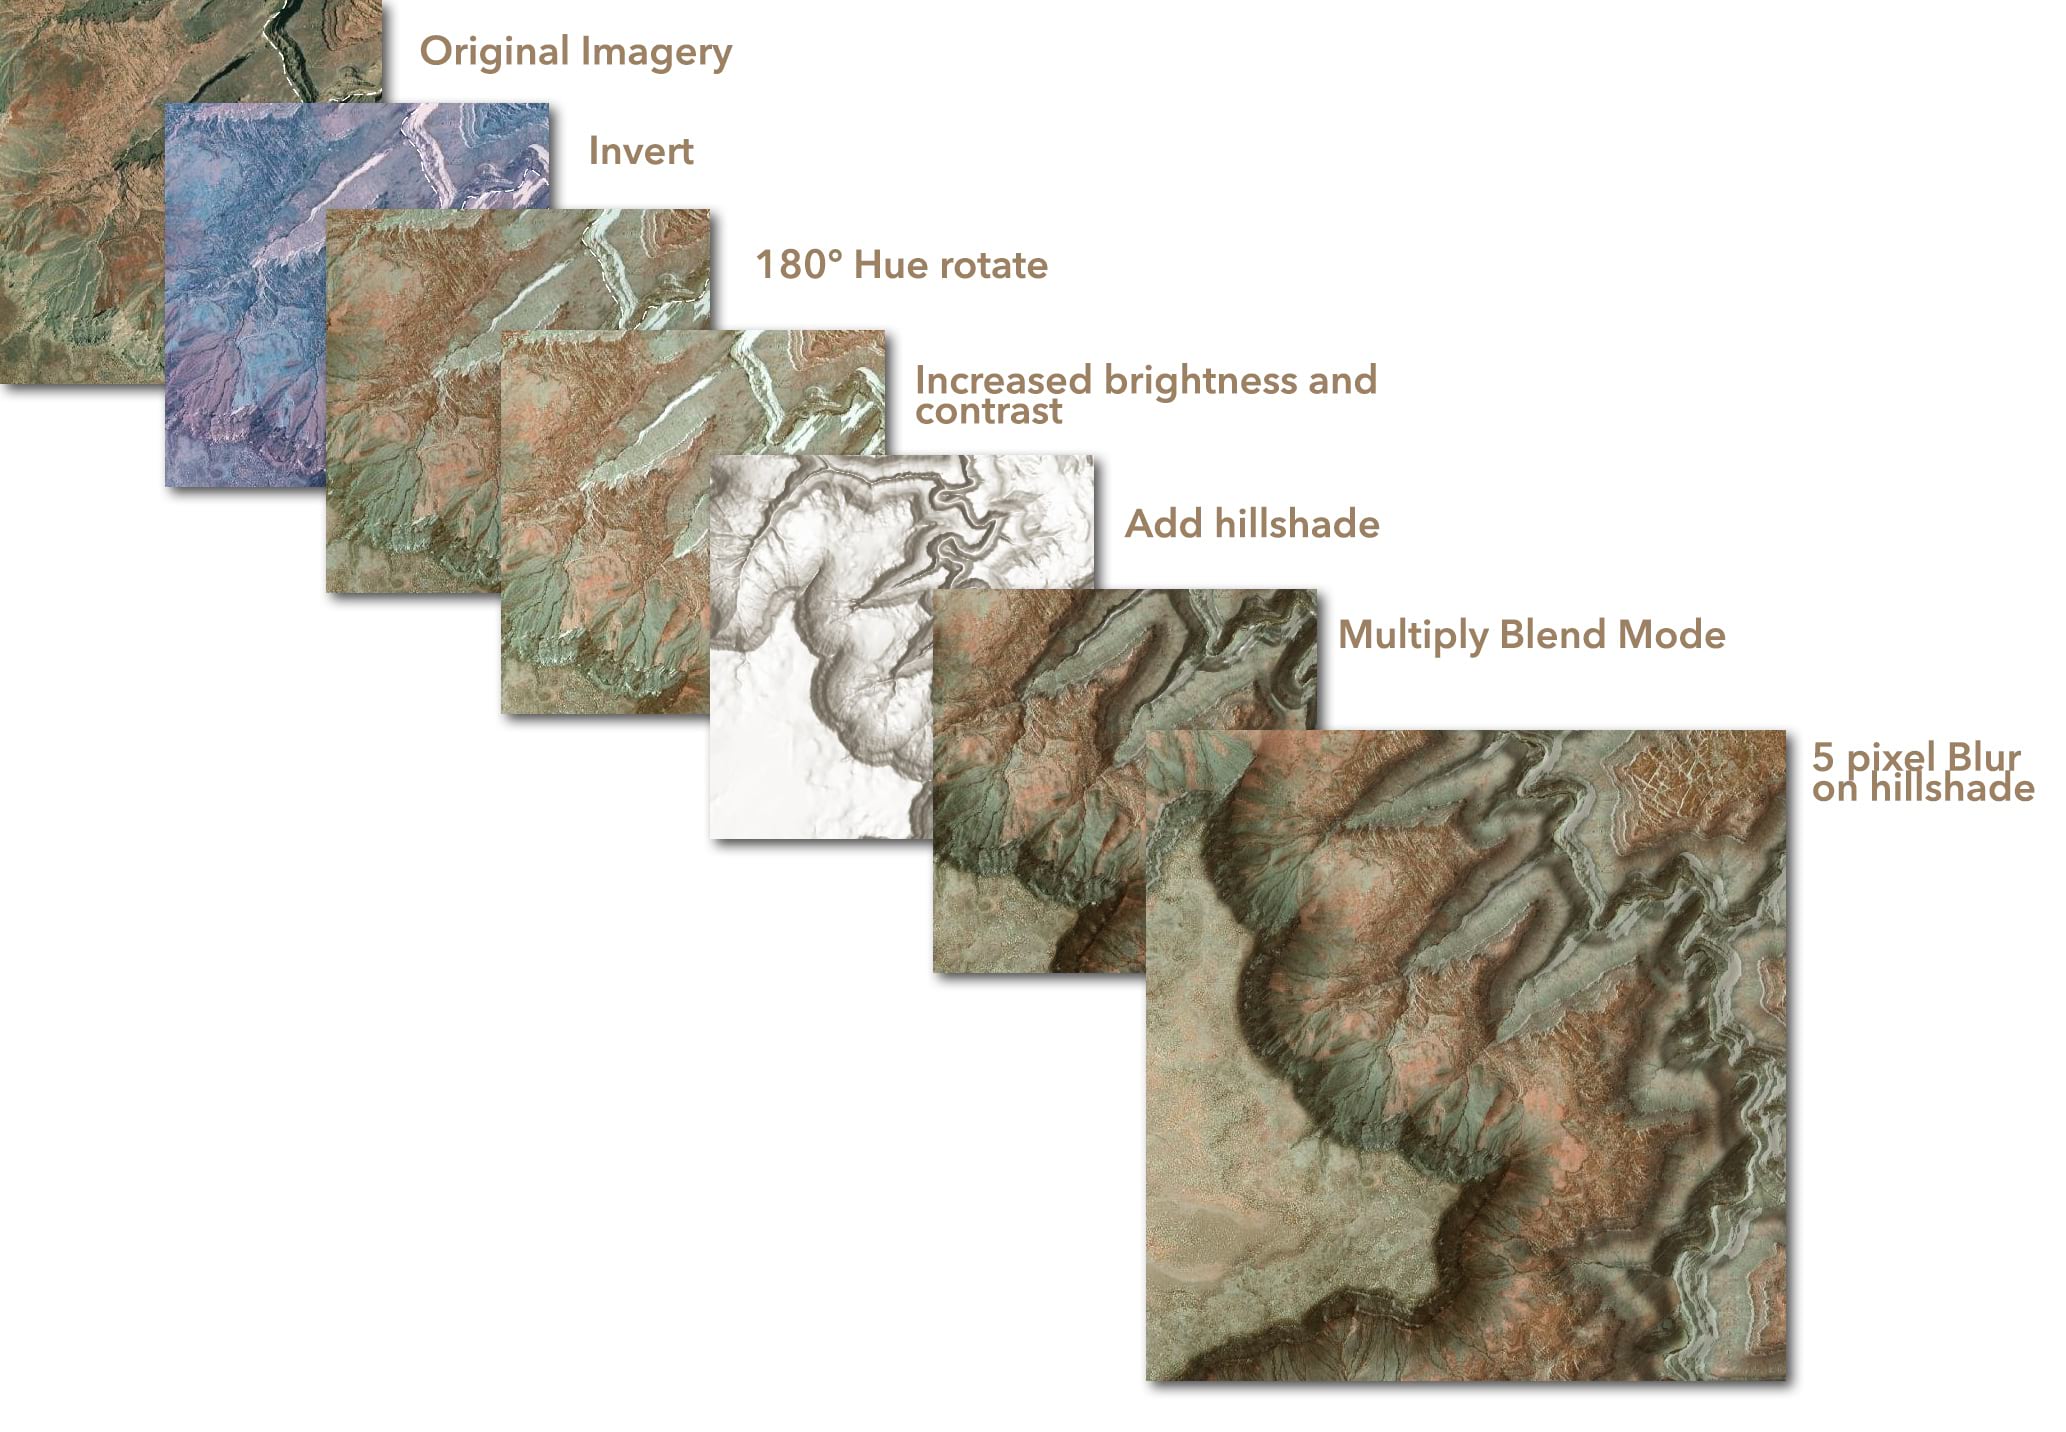
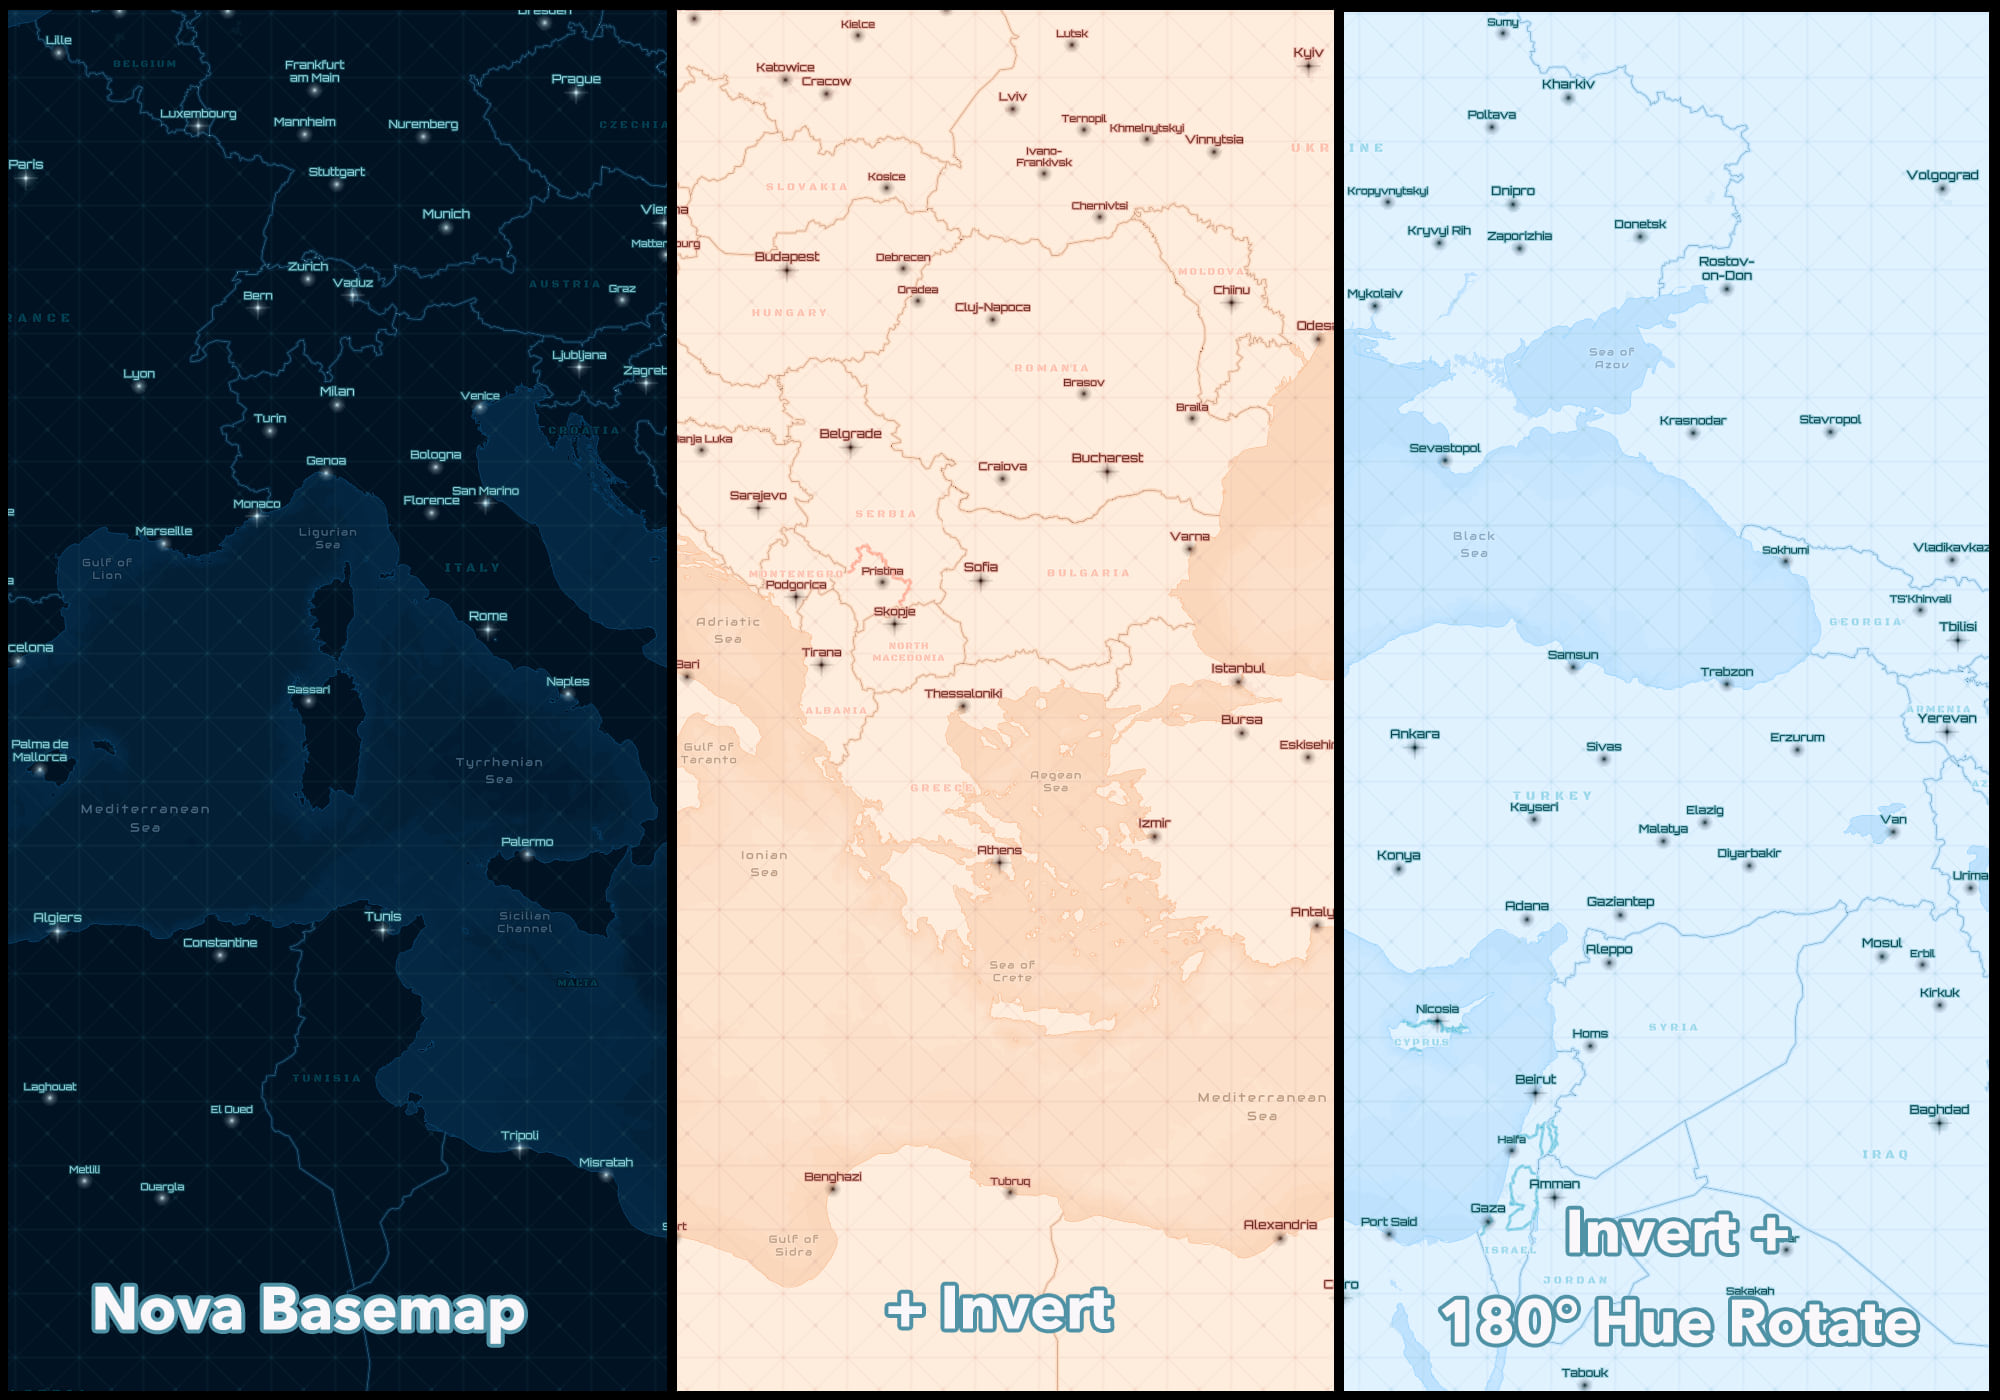
First, turn on Invert to transform each pixel’s color and saturation to its opposite, like a film negative. Then do a 180° Hue rotate to send every pixel’s color back to its original color. Lastly adjust the Brightness & Contrast settings to bring out some shadows. I’d suggest a Brightness of 90 and a Contrast of 125 to start. You can loop back and refine any of this later since Effects can be changed at any time. Put another way, Effects are non-destructive and do not alter the underlying map layers; they’re styling applied to those layers. This means multiple authors can all re-style / re-mix (public) maps without needing to alter the originals.
Did you know you can re-order these effects using the grab handles beside their names! This matters because it changes the order of operations, or, what effect is computed first, second, etc.
Let’s add the Esri’s World Hillshade layer right inside the Hybrid Basemap [aside: being able to add additional layers to an Esri Basemap is super flexible when creating our own custom versions of these maps]. Click + Add layer and search in the Living Atlas for the World Hillshade. If you have Premium access, you could use Esri’s Multidirectional Hillshade as another option. Either will work great.
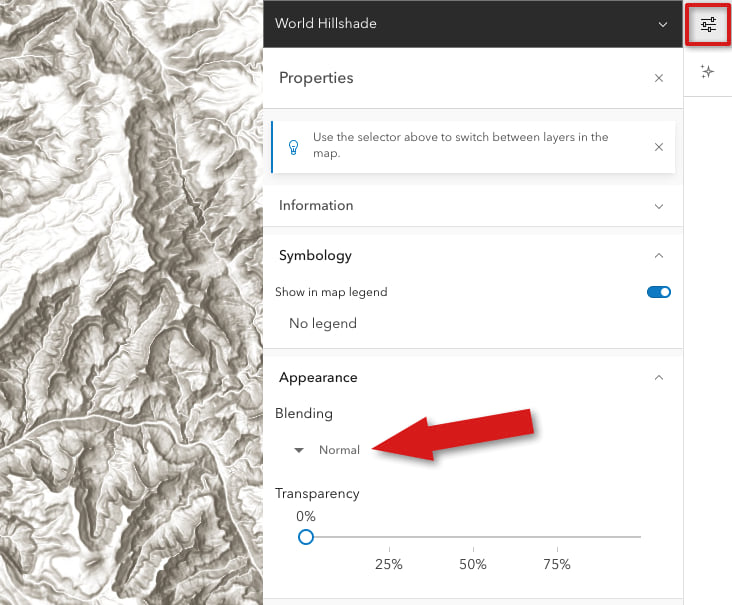
Adding the World Hillshade means we can no longer see the Imagery layer! Not to worry, this is expected. To fix this, when the Hillshade layer is active, use Multiply Blending to merge them together (blending is in the Properties panel).
Last step is a subtle one, but like adding pinch of salt to your caramel candies, it brings everything together! Trust me. We need to slightly Blur the World Hillshade layer to soften its appearance. Select the World Hillshade to make it active and in the Effect Panel add a 5-pixel Blur to it. This tamps down unwanted detail and gives the map a dreamier quality. For me the blur makes it look less digital and more like those wonderful 3D plaster table relief models you can see in many U.S. National Park visitor centers.
View the live map here!
Next Steps
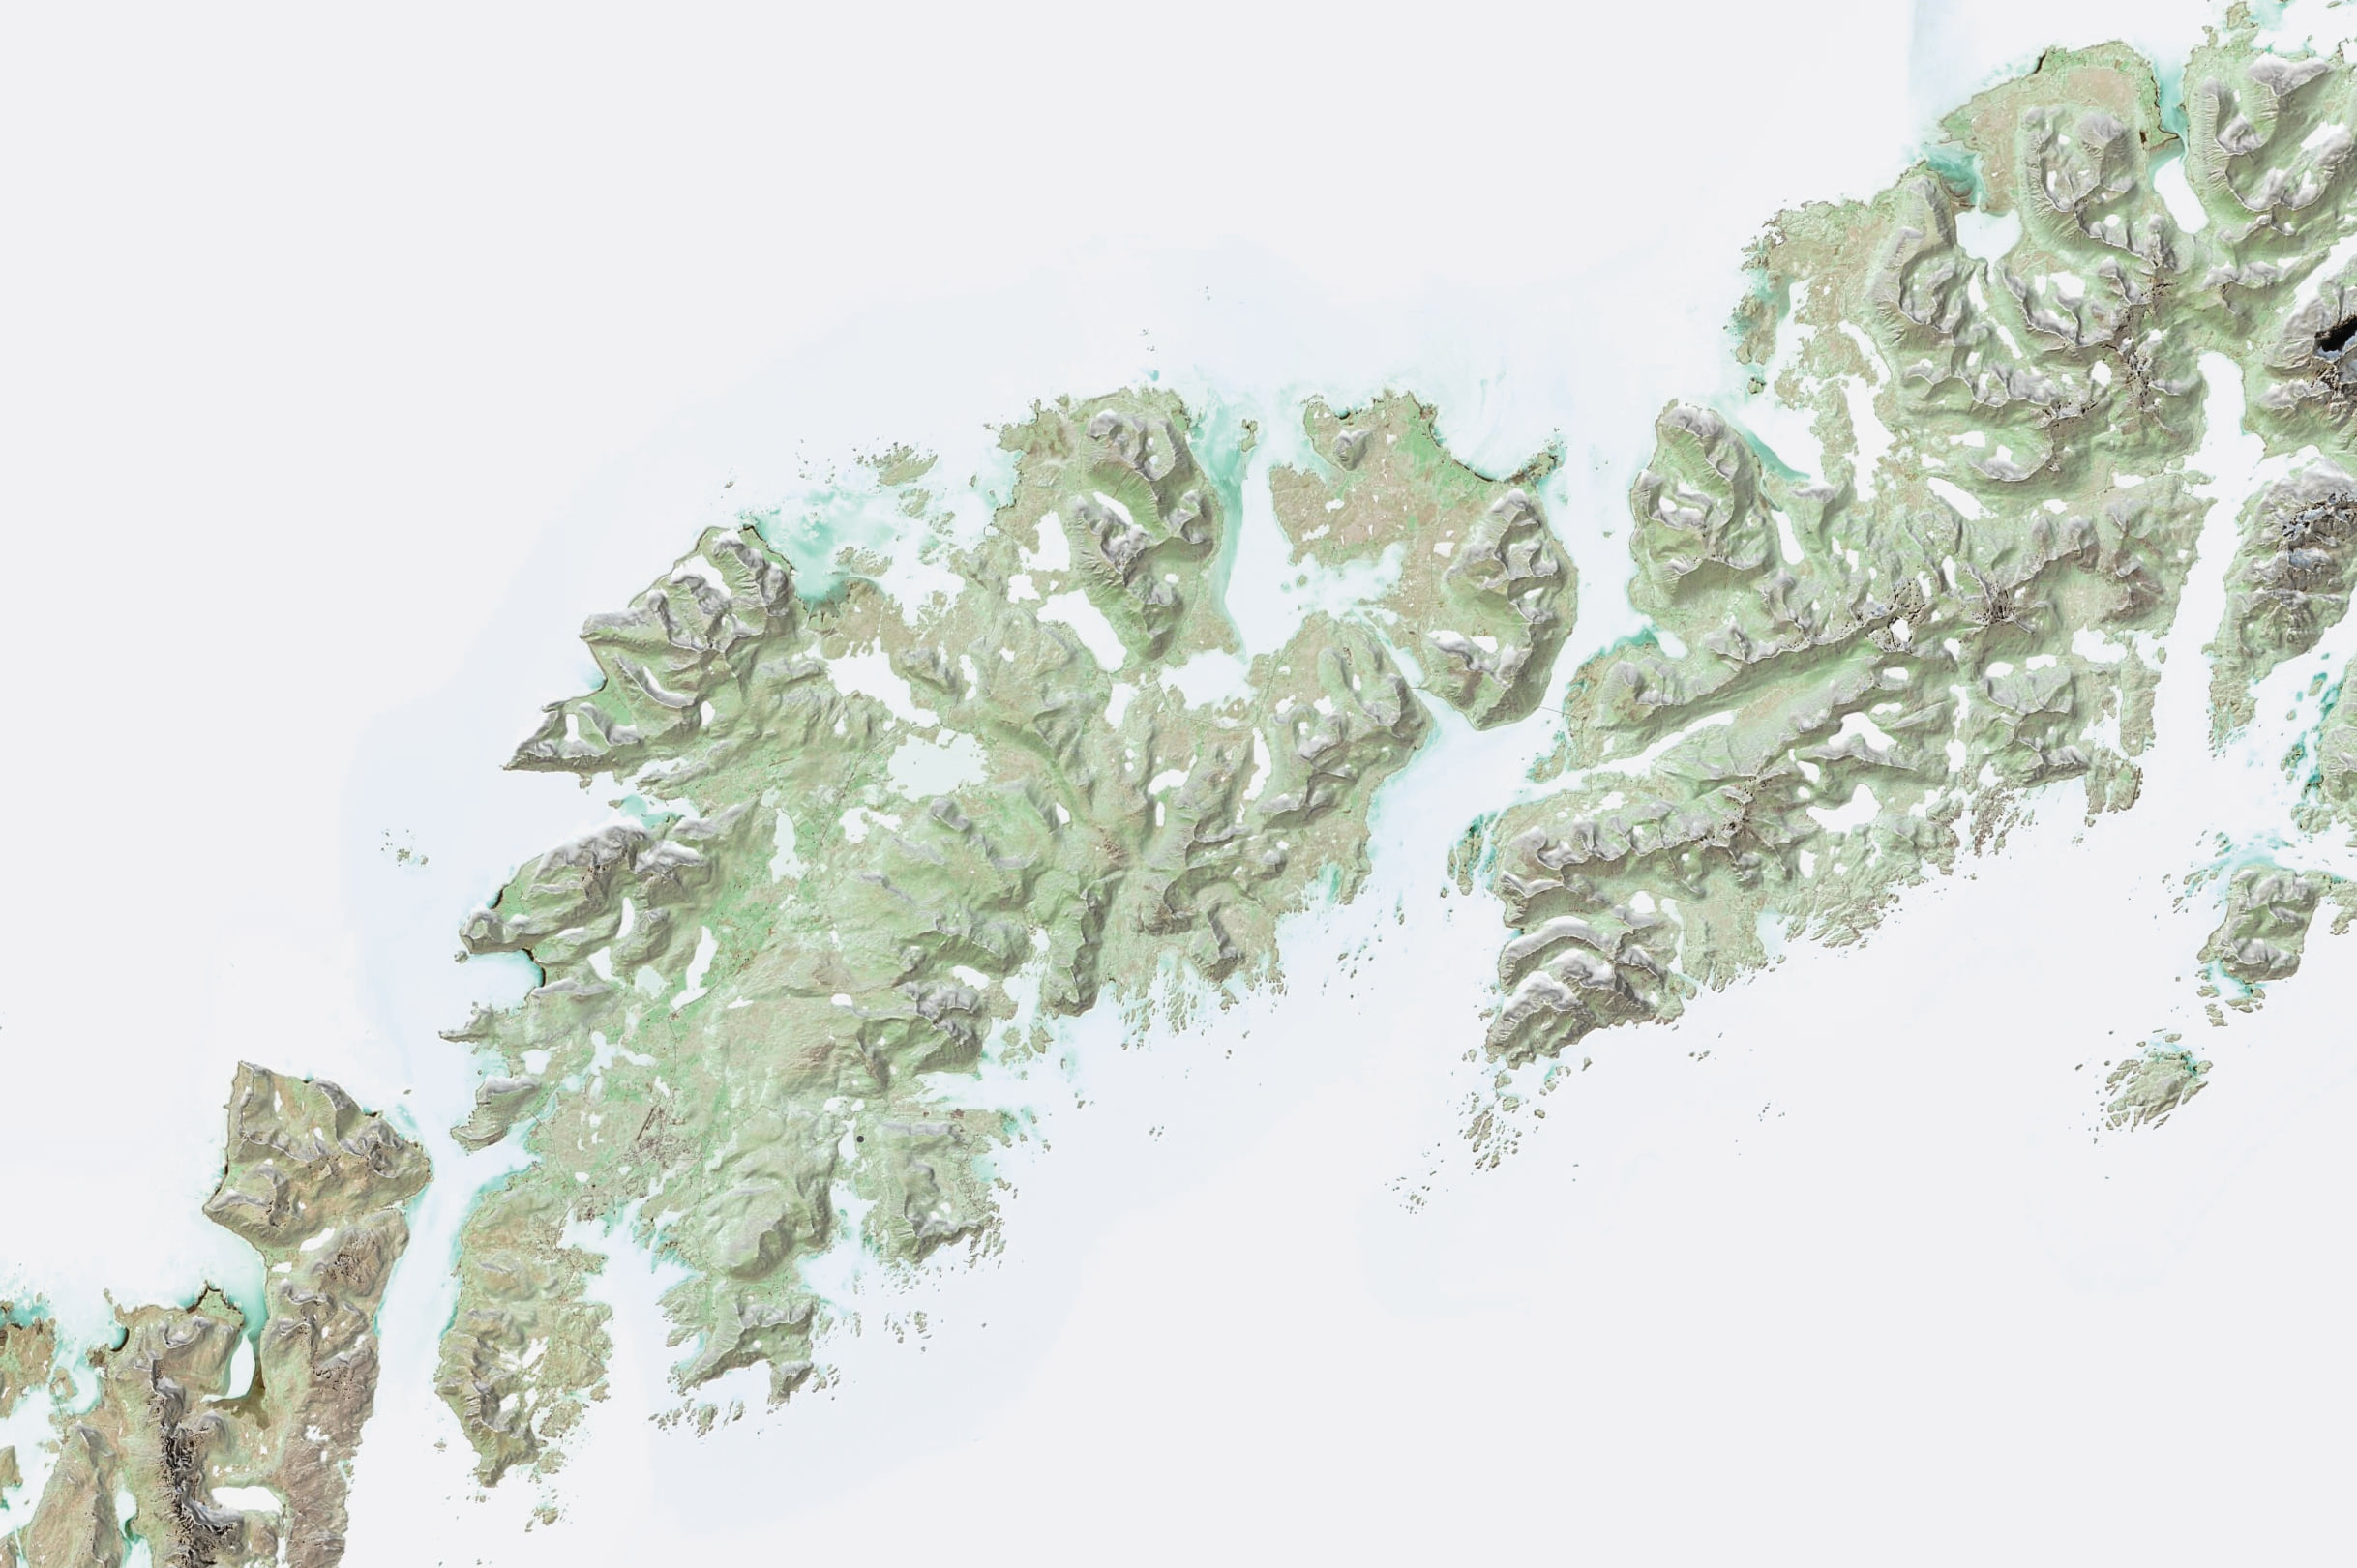
The power of Invert and Invert + Hue Rotate also works on vector basemaps. Throw in Brightness and Contrast, Grayscale, and Sepia and you have the all the tools needed to quickly re-mix Esri’s basemaps to create something unique and suited to your purposes.
Look for future posts here on how to push what’s possible using Layer Effects in the Map Viewer. Happy Mapping!
Thanks goes to John Nelson for introducing us to the “invert + hue rotate” technique, as well as folks who gave feedback along the way: Yann Cabon, Jim Herries, Jeremy Bartley, Marianne Faretta, Russ Roberts, Kristian Ekenes, Adelheid Freitag, and Lisa Berry.

Article Discussion: