Acronyms referenced in this post:
- CPU: Central processing unit
- CUDA: Compute Unified Device Architecture
- DLPK: ArcGIS Pro deep learning model package
- GeoAI: Geospatial Artificial Intelligence
- GPU: Graphics processing unit
- IOM: International Organization for Migration
- POC: Proof of concept
- RAM: Random access memory
In this post, we will cover how to take Esri’s pretrained deep learning models (available through ArcGIS Living Atlas of the World) and refine them with your own training data. This fine-tuning process can increase accuracy in detecting objects or making classifications, by tailoring the model to fit your geography and your imagery source characteristics, including the resolution, bit depth, and number of bands. If you are unfamiliar with the process of setting up a deep learning environment, sizing the relevant and right GPU for your workflow, and running inferencing with ArcGIS Pro, it is recommended that you catch up with the previous blog posts on deep learning before diving into this guide: Deep Learning with ArcGIS Pro Tips & Tricks: Part 1, Part 2, and Part 3.
Interest in deep learning is growing across many sectors that run the gamut of agriculture, natural resources, defense, and more. Esri continues to invest resources to make deep learning accessible to all users, expanding deep learning capabilities across the ArcGIS system.
There are three main workflows for using deep learning within ArcGIS:
- Inferencing with existing, pretrained deep learning packages (dlpks)
- Fine-tuning an existing model
- Training a deep learning model from scratch
For a detailed guide on the first workflow, using the pretrained models, see Deep Learning with ArcGIS Pro Tips & Tricks Part 2.
In this blog post, we will cover how to fine-tune Esri’s existing pretrained deep learning models to fit to your local geography, imagery, or features of interest. This process will take less data, compute resources, and training time than training a new model from scratch.
When to fine-tune a model
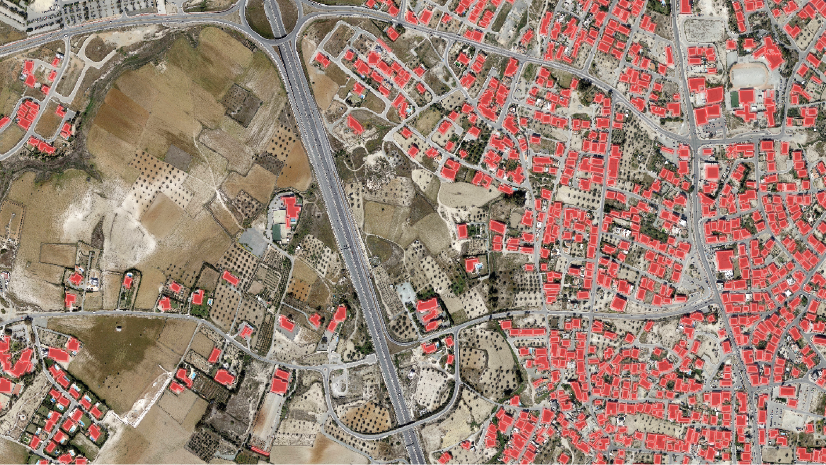
Deep learning models are constrained by the data used to train them. A model trained on Landsat imagery over New York City cannot be expected to return quality results when run on high-resolution imagery over rural Brazil. To get the best outcome from inferencing, the initial training data should be as consistent as possible with the area of interest (AOI). Factors to consider include the landscape, climate, construction patterns (if identifying buildings, are the roofs made of similar materials?), season, and imagery quality and resolution. The pretrained models in ArcGIS Living Atlas are designed to be more broadly applicable than a model you would train yourself, but you may find that none of the models in ArcGIS Living Atlas directly align with your AOI. In this scenario, your options are to create a model from scratch, or fine-tune the existing model with new training data to improve the result. If the initial model couldn’t identify any of the features you were looking for or you had a completely blank output, you likely need to train a new model. But if the model is identifying a few of the correct features, even if it is doing a poor job, it is worth fine-tuning the existing model, as this is the cheaper and faster option. You can also create training data to fine-tune the model and repurpose that training data to create a model from scratch if you are still not achieving the desired results. Below, we will walk through an example in which fine-tuning an existing model was effective for getting an accurate result.
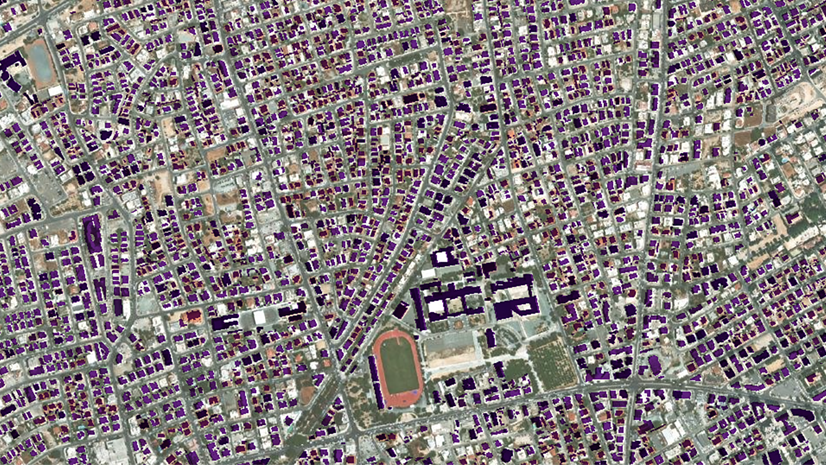
Below is a map of Cox’s Bazar, Bangladesh, showing drone imagery provided by the United Nations International Organization for Migration (IOM). The goal of this project was to extract the locations of Rohingya refugee tents so that aid workers could better track the number of people living in the refugee camp and how they were moving over time. To extract the tent footprints, we first ran Esri’s pretrained, out-of-the-box Building Footprint Extraction – Africa dlpk using the Detect Objects Using Deep Learning geoprocessing tool. The initial result is shown below in blue.

The model is returning some of the tent footprints, but many have been missed, especially in the lower left of the image. Some extra work is needed to improve the output of the deep learning model, so we will use the Building Footprints Extraction – Africa model as a base and fine-tune it to identify the tents in our drone imagery.
Prerequisites for fine-tuning deep learning models
First, verify that you have the necessary hardware, software, and libraries.
GPU availability
Verify that the machine you are working with has an appropriate GPU. Training a deep learning model is more hardware demanding than inferencing (running the model). The bare minimum you will need for fine-tuning a deep learning model is a NVIDIA RTX or NVIDIA Quadro with 8 GB of RAM, or something equivalent. This will allow you to train a model for a small-scale proof of concept, however, if you are preparing for a production workflow, you should look for a higher-performing GPU, such as a NVIDIA V100 GPU with a minimum of 16 GB of RAM. For more information about GPU-powered production environments, check the NVIDIA Data Center GPUs.

CUDA
CUDA toolkit is another essential component to training your deep learning model. CUDA® is a parallel computing platform and programming model developed by NVIDIA for general computing on GPUs. With CUDA, developers can speed up computing applications with the power of GPUs. To install CUDA, visit the CUDA Toolkit download page.
ArcGIS Pro
To train or fine-tune a deep learning model within ArcGIS, you will need ArcGIS Pro and an ArcGIS Image Analyst license. For more details about this topic, visit the Deep learning in ArcGIS Pro page.
Deep learning frameworks for ArcGIS
Finally, you will need to install all the dependent libraries for a deep learning workflow. Esri has packaged these in the deep learning frameworks for ArcGIS Pro. Note that each version of ArcGIS Pro requires specific versions of deep learning libraries. When you upgrade ArcGIS Pro, you need to install the deep learning libraries that correspond to that version of ArcGIS Pro. For the list of libraries required at each version along with other information, see Deep learning frequently asked questions.
For more detailed instructions on the prerequisites for deep learning in ArcGIS Pro, refer to the blog post Deep Learning with ArcGIS Pro Tips & Tricks: Part 1, Deep learning prerequisites section.
Understand the pretrained model
You are now ready to fine-tune an ArcGIS deep learning model (dlpk). For the example workflow, we will be using the Building Footprint Extraction – Africa dlpk, but the same methodology can be applied to any other dlpk.
The inputs
To add new training data to a model, you will need to understand how and with what the original model was trained. Most of the time, this information is included in the dlpk’s metadata or description. If you cannot find the information in the model description on ArcGIS Online or want more information, follow the steps below to access the full dlpk metadata.
- Locate the downloaded deep learning package (ending with the .dlpk extension) in the files on your machine.
- Make a copy of that file. This is essential since you will use the original .dlpk file for fine-tuning.
- If you cannot see file extensions in File Explorer, do the following:
- On the File Explorer main ribbon, click View.
- Under the Show/Hide section, click File name extensions.
- Right-click the copied .dlpk file and click Extract all… to save the contents to your desired location
- In the extracted location, right-click your new .emd file and open with a notepad editor of your choice
- In the .emd file, you will find the following information, which will inform the input parameters for our fine-tuning workflow (see the screen shot below for the contents of the Extract Buildings – Africa model’s .emd file):
- ImageHeight & ImageWidth—These will translate to the Tile Size. In the dlpk, we are using for this example, the value is 400.
- ModelName—This will dictate the metadata format of the training data you will export; in this example, MaskRCNN.
- ExtractBands—This variable shows the number of bands the model was trained with; here, 3 bands (RGB) were used.
- Classes—This defines the number of classes the model extracts, along with their name and value. In this example, there is only one class with the value 1, which must correspond to the building footprints. If we were looking at a land cover classification model, we would see a class for each land cover type. In this case, when we create training data, we will use the value and name “1” to be consistent with the existing training data.
- Cell Size—Resolution of the training data. This information can also be found in the description of the model on ArcGIS Living Atlas. For the Building Footprint Extraction – Africa model page, we can see under Input that the resolution of the imagery is between (10-40 cm). As a best practice, whenever you see a recommended resolution between 10-40 or 10-50, your training data resolution should be 30 cm for optimal training.
- Stride Size—This will define the overlap between exported training data image chips. If you are dealing with limited training data, a stride will be needed to create more chips. However, for our example, with enough training data digitized, a Stride Size of 0 can be used. This will significantly shorten the fine-tuning time by minimizing the amount of disk space occupied by your training data.
Now that we have determined the parameters to use for our fine-tuning, we are ready to create and export the training data for deep learning.

Create training data
In some cases, you will already have data that you can use to train your model, such as an existing building footprint polygon layer. In that case, skip to the next section on exporting training data. If you do not have training data and need to create it from your imagery, we will use the Label Objects for Deep Learning tool. With this tool, we can save our training samples to a feature service so that others in our organization can also contribute samples. The more training samples we create, the more effective our model will be.
- With your imagery selected in the Contents pane, go to the Imagery tab on the top ribbon and click Classification Tools > Label Objects for Deep Learning.
- Click the rectangle tool and draw a shape around a tent in your image.
- When you complete the rectangle, you will be prompted to selection an option for Define Class.
- Leave the Class Options setting on Add New Class.
- Change the Name field to 1 and leave the Value field as 1. Change the color to something you can differentiate from the background imagery.
- We are using these name and value fields to match what we found about the original class in the downloaded .dlpk file above.
- Now you will see your labeled object appear in the bottom panel of the tool. If you select an individual sample from this section, it will be selected on the map and you could delete it with the red x if you wanted to.
- Continue collecting new samples, saving as you go from the Labeled Objects menu. Try to collect samples from different locations around the image to capture any differences in conditions in different locations within the AOI. Also focus on collecting samples over features that were missed when you ran the pretrained model.
- When you are done, click Export Training Data (next to Labeled Objects in the lower half of the tool). There is also a stand-alone geoprocessing tool called Export Training Data for Deep Learning. Both take in the same parameters—follow the instructions in the next section to export your training data.
Prepare the training data
To export our training data, we will use the Export Training Data for Deep Learning (Image Analyst) geoprocessing tool. This tool converts labeled vector or raster data into deep learning training datasets. The output will be a folder of image chips and a folder of metadata files in the specified format. We will be specifying the format as MaskRCNN since that is what we determined from the dlpk metadata above.
Now, we will export training data to fine-tune the Building Footprint Extraction – Africa model:
- Imagery—The imagery (for our workflow, we are using drone imagery made available by IOM) will be used to generate image chips. Image chips are small cropped sections of the input imagery that have been identified (by their intersection with a training polygon) as containing a feature of interest (in this case, a tent). These image chips and their associated metadata will be the input to the model training tool in the next step.
- Training data—The new training data is a feature class with 3,800 polygons identifying the footprints of refugee tents. There is a polygon for each tent that appears in the imagery subset because the model will also learn what is not a tent from the omitted areas. Each tent polygon has an attribute “class” with the value 1, to identify that they are all the same type of feature. A model can also be trained with multiple classes, for example to simultaneously detect adult and juvenile cows. The screen capture below shows the imagery along with the labeled tents.


Now, we are ready to run the Export Training Data for Deep Learning tool. The input parameters we are using reflect what we learned from exploring the metadata of the existing building detection model above. Reference the tool documentation for additional insight into each parameter.
- Input Raster: IOM referenced imagery
- Output Folder: Any directory of your choice on your machine
- Input Feature Class or Classified Raster or Table: Labeled feature class. We used this feature service for this exercise.
- Class Value Field: class field. This is the field referencing the class (“1”) in the above feature class
- Image Format: TIFF format
- Tile Size X: 400
- Tile Size Y: 400
- Stride X: 0
- Stride Y: 0
- Metadata Format: RCNN Masks
- Click Environments Tab:
- Cell Size: 0.3
- Leave all other parameters as default.
- When done click Run to run the tool.

Fine-tune the model
Now, we have exported the training data, so we can use it to fine-tune the deep learning model. For this workflow, we will use the Train Deep Learning Model (Image Analyst) geoprocessing tool with the following input parameters:
- Input Training Data: RefugeeTentsRetrainingData (the output from the Export Training Data for Deep Learning tool)
- Output Model: Any directory of your choice on your machine
- Max Epoch: 100 (Epoch is the number of iterations the tool will take to go over the data)
- Batch size: 16 (Batch size should always be a square root. Increase or decrease this number according to your GPU performance. To monitor your GPU, type the command nvidia-smi -l 5. This will ensure that your GPU reports back the usage every five seconds.)
- Pre-trained Model: Input the .dlpk file downloaded from ArcGIS Living Atlas.
- Stop when model stops improving: Checked
- Freeze Model: Checked
- Click the Environments tab:
- Processor Type: GPU
- GPU ID: 0 (or whatever the GPU ID returned from running the nvidia-smi command)
- Leave all other parameters as default.
- When done, click Run to run the tool.


Inference with the output fine-tuned model
Finally, we are ready to use our model for inferencing. To do so, we will use the Detect Objects Using Deep Learning (Image Analyst) geoprocessing tool.
In this final stage of the deep learning workflow, we will run the fine-tuned deep learning model on the raster over a Rohingya refugee camp to extract a feature class containing polygons over each building/tent visible in the imagery.
Keep in mind that the input parameter values for inferencing will vary for different projects according to your machine specs, GPU, imagery resolution, and size of the features you are trying to detect. Determining the optimal parameters for your inferencing workflow can take some trial and error. To test different settings, go to the Environments tab of the tool and set the processing extent to a small area so you can quickly process a test area and adapt your parameters accordingly. The following parameters were used for the Rohingya tent detection model, and we have included links to the data and model if you would like to test this workflow yourself.
- Input Raster: Imagery with a resolution between 10-40 cm.
- Output Detected Objects: Any file geodatabase directory of your choice on your machine. (Note that in the screen capture below, we used a naming convention in which we named the output feature class with the different parameters used in the tool. This will help us figure out what are the best parameters to use when comparing the results.)
- Model Definition: New .dlpk file generated in the Train Deep Learning Model step. You can download the .dlpk file that we fine-tuned to detect tents from this link.
- Arguments Name:
- padding: 128
- batch_size: 16. Note that if you are using the same machine for training and inferencing, you can try a higher batch size for inferencing than the one used in training.
- threshold: 0.5 (Equivalent to 50 percent, meaning if the model is 50 percent certain that the extracted feature is a tent, it will include it in the output. Use a lower value to get a more complete picture of the detected features. You can always filter out features below a certain confidence later in the QA/QC process. To learn more about QA/QC, refer to Deep Learning with ArcGIS Pro Tips & Tricks Part 3)
- return_bboxes: False (input True if you want to return bounding box polygons around the detected features).
- tile_size: 400 (This will be the same tile size used when exporting training data for deep learning. If your imagery contains features that vary in area, it may be worth experimenting with different tile_size inputs. Multiply or divide the training data tile size by 2 and visually check for the results.)
- Non Maximum Suppression: Not checked
- Click the Environments tab:
- Cell Size: 0.3
- Processor Type: GPU
- GPU ID: 0 (or whatever is the GPU ID returned from nvidia-smi)
- Leave all other parameters as default.
- When done, click Run to run the tool.


QA/QC
Once the inferencing is complete, an optional QA/QC step that we used for the Rohingya tent project is to run the Non Maximum Suppression (Image Analyst) geoprocessing tool. This tool removes overlapping features. For this project, we filtered out features that had 5 percent or more of their area overlapping another feature.
You can examine the results of this workflow in the screen capture below, or explore the Rohingya Refugee Camps Tents web map.


In this blog post, we discussed when you should consider fine-tuning an existing deep learning model versus using the out–of–the–box version or creating your own from scratch. For cases in which fine-tuning will produce the best output, we covered the technical prerequisites, steps, and input parameters for the workflow. For those who want to try fine-tuning a deep learning model for themselves, we have included links to download the data used for the Rohingya tent project in the steps above. Or, download another pretrained model from ArcGIS Living Atlas and create your own training data to adapt it to your imagery and use case. Keep an eye on the ArcGIS Blog for announcements of new pretrained models and additional tips for working with GeoAI in ArcGIS.


Article Discussion: