The September 2020 ArcGIS Online update introduced the new Navigation Boundary tool into the configurable app experience. Defining an extent that map viewers will see is one of the first things that cartographers and GIS professionals are taught to do when building a printed map. This new capability in configurable apps brings this concept to interactive mapping by focusing viewers on the relevant locations and minimizing distractions from other areas of the map.
The Navigation Boundary tool allows application authors to define a map boundary that only includes areas relevant to the data in the map. For instance, if a map contains data about Yosemite National Park, defining the visible extent prevents map viewers from navigating out of the park boundaries and into surrounding national forests. The area an author chooses can be as small as a neighborhood or as large as a continent depending on how they prefer to tailor the experience of the app.
Use the steps below to get started with the Navigation Boundary tool in the Media Map application template.
Step 1: Create a map
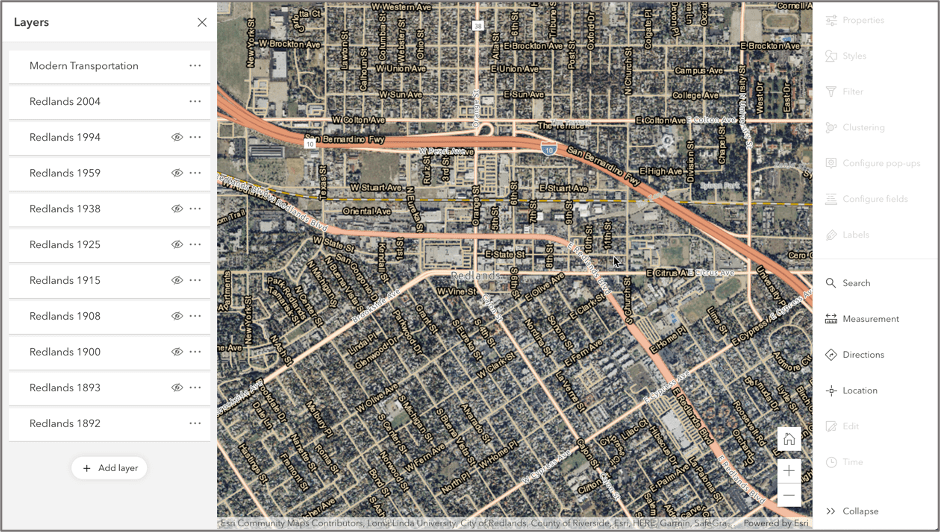
Building a configurable app with a defined map boundary starts with creating a map. Add data that is concentrated in a specific geographic region to your web map. This example uses historic maps and imagery data for the city of Redlands, California (Image 1). Set your map to the view that you want to be the default extent of your application and save the map.
Step 2: Choose an app template
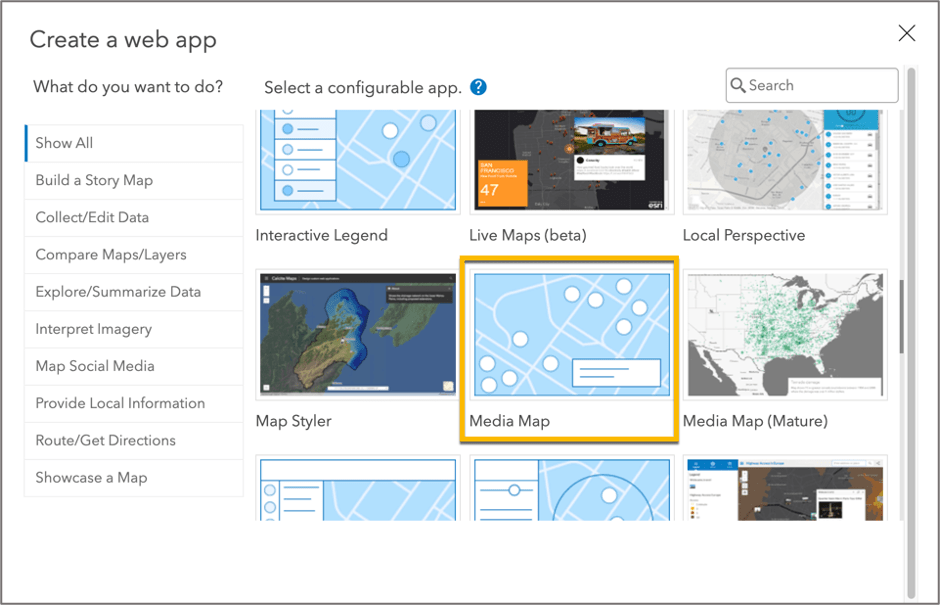
Browse to the Item Details page of your map, click Create Web App, and choose Configurable Apps. While this example uses Media Map, Navigation Boundary is also available in Attachment Viewer, Interactive Legend, Minimalist, Nearby, and Zone Lookup. Select Media Map and click Create Web App (Image 2).
Step 3: Configure Navigation Boundary settings
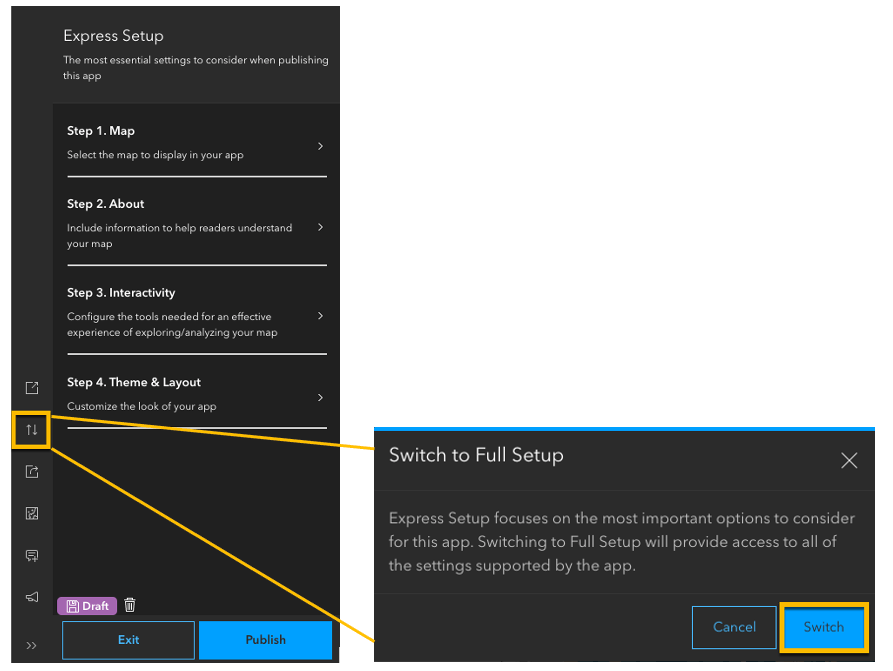
As a part of the updated configuration experience, the application opens in Express Setup, which contains the most essential settings for configuring the app. The Navigation Boundary settings are located in Full Setup, which contains all settings available in this application. To switch to the Full Setup experience, click the Switch to Full Setup button on the left hand side Action Bar (Image 3).
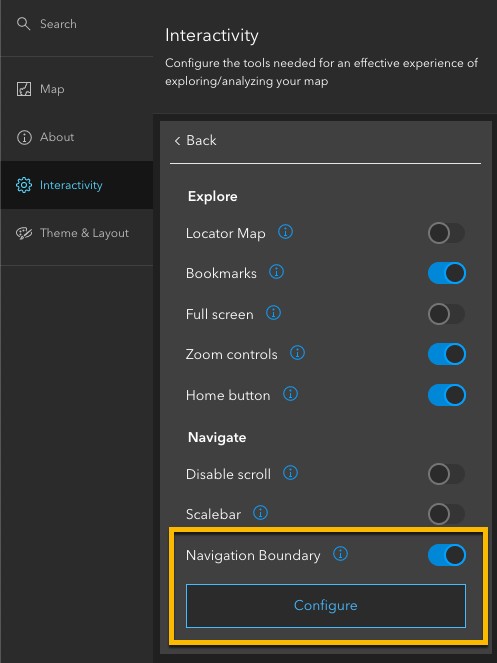
Once in the Full Setup experience, click Interactivity and browse to the Navigate section to locate the Navigation Boundary setting (Image 4).
Enabling Navigation Boundary opens the Configure Navigation Boundary window with following options (Image 5):
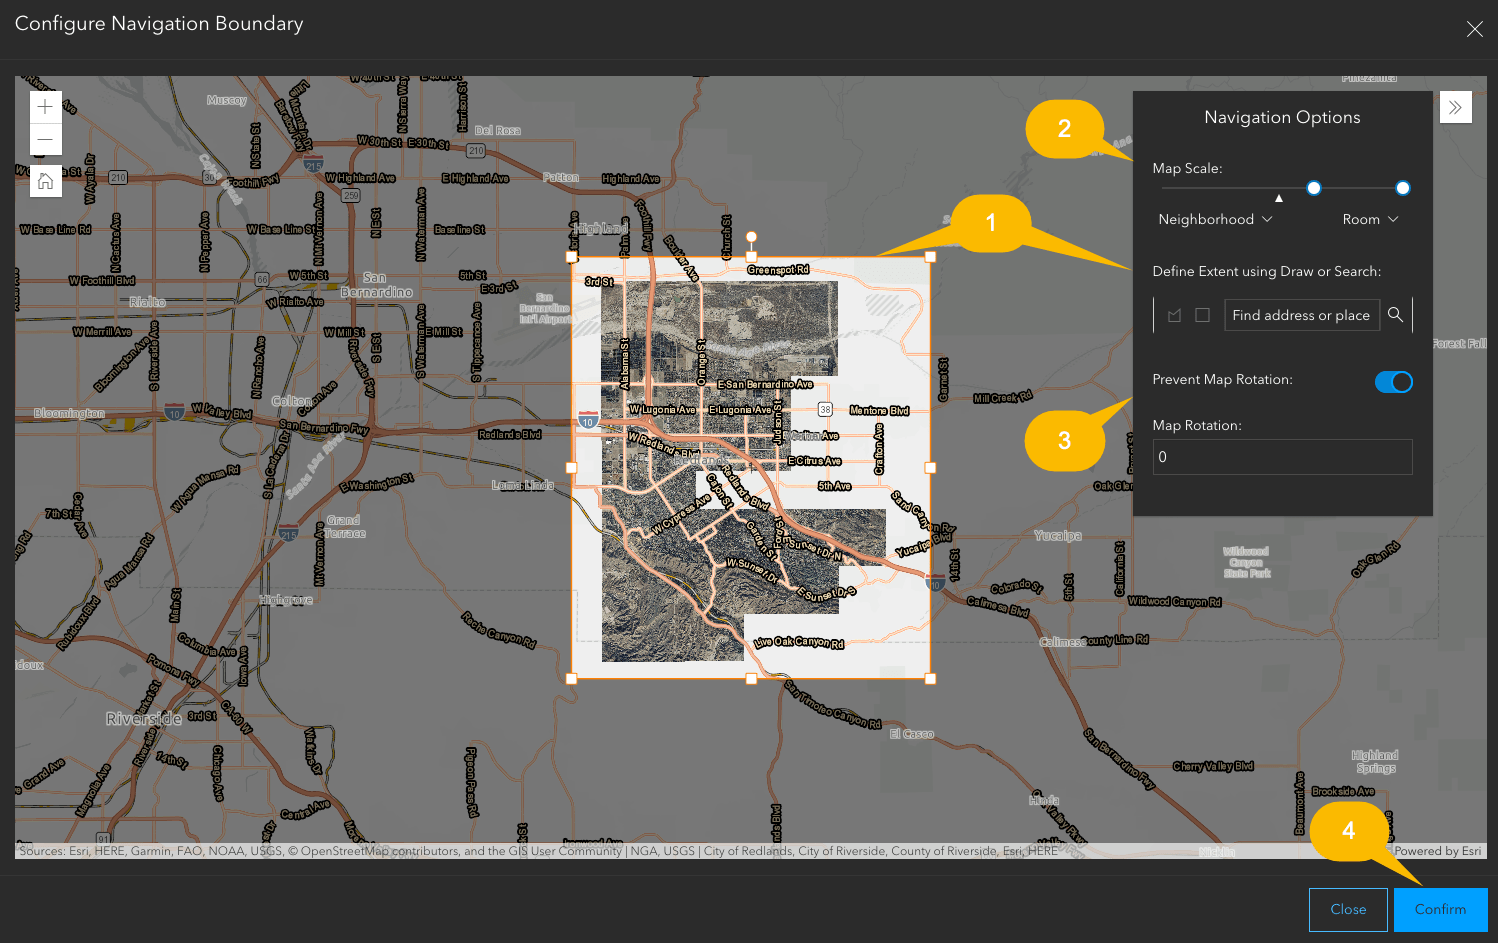
- Drawing Tool and Search options to specify the boundary area
- Map Scale slider to specify maximum and minimum zoom levels in the map
- Map Rotation options and settings
- Confirm button to save settings in the Configure Navigation Boundary window to the application draft
In this window, the Drawing Tool is used to specify the geographic area to which panning on the map will be limited. App authors can choose to draw a polygon or a rectangle in the map to create the map boundary area. Further, there is the option to search for and center on a particular location. In this example, the map area is set to include only the city of Redlands (Image 6).

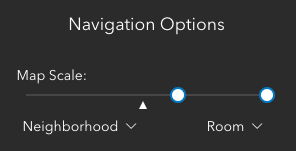
Next, use the Map Scale slider to set the range within which viewers can to zoom in and out of the map area (Image 7). The arrow below the slider indicates the current scale at which the author is viewing the map within the configuration window. This example sets the visibility range from the Neighborhood zoom level (1:20,000) to the Room zoom level (1:400).
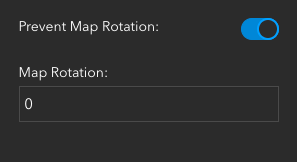
Finally, the author can choose to configure the Map Rotation settings. By default, Prevent Map Rotation is checked off, allowing application users to rotate the web map in the application. Checking this option on disallows users from rotating the map. Authors also have the option to set a Map Rotation value to present the data and geographic area at a different angle. In this example, Prevent Map Rotation is checked on and the Map Rotation value is set to 0 in order to preserve the current orientation of the data (Image 8).
Click Confirm to close the Configure Navigation Boundary window and preview the updates made to the application.
Step 4: Complete and publish app
Explore the remaining settings in Media Map to add more functionality to your app. In this example, the Layer List is enabled and set to open at the start of the application, giving viewers the option to view multiple imagery layers and turn them on and off. The Bookmark tool allows viewers to navigate to notable areas in city using bookmarks configured in Map Viewer. The Basemap toggle button allows viewers to observe the data on a different basemap. Finally, the Swipe tool is configured to allow viewers to swipe the most recent imagery over the historic imagery. The completed sample application can be found here (Image 9).

Once remaining settings are configured in the app, the app is ready to be published and shared. Browse to the bottom of the configuration panel and click Publish to open the Publish window (Image 10).
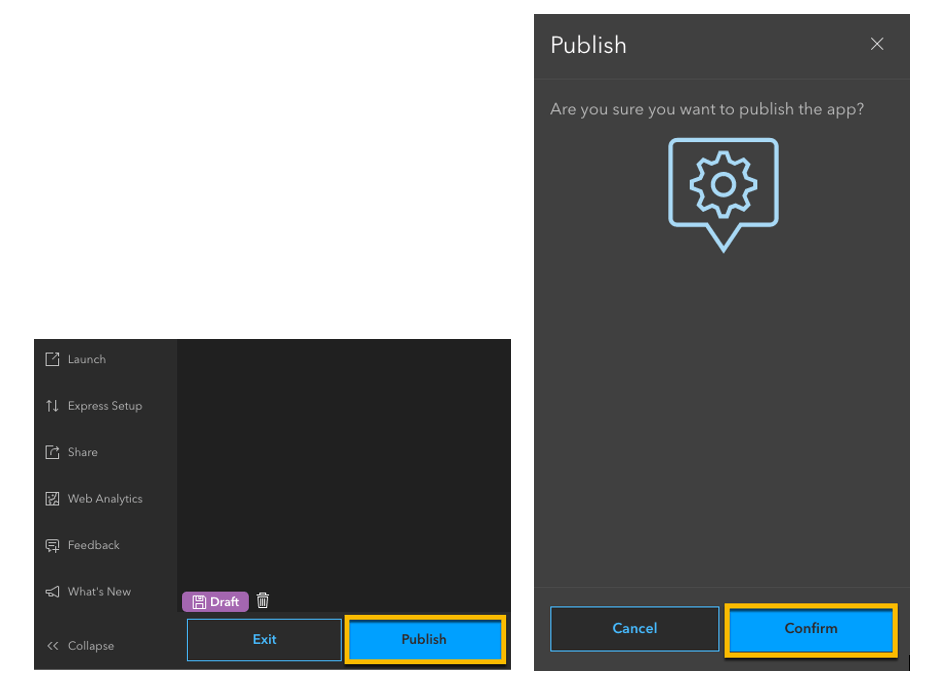
Click Confirm to save all settings and publish the application. The app is now ready to be shared. You can share what you build and keep sharing your ideas with us on GeoNet.


Article Discussion: