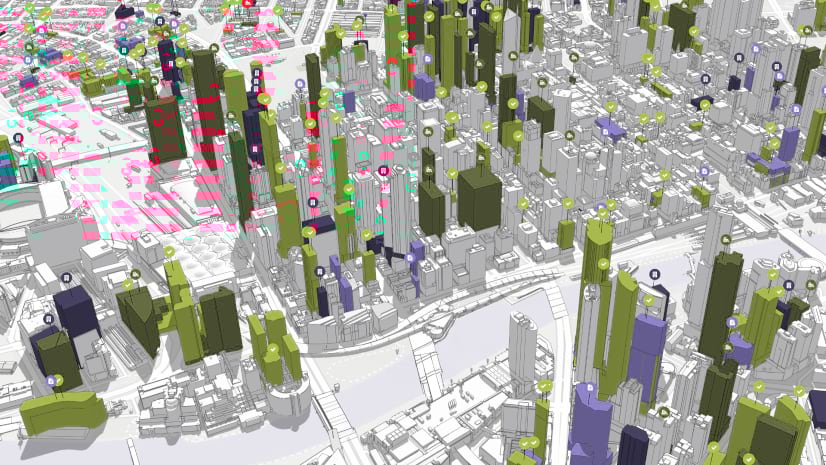
ArcGIS Urban lets planners create digital zoning maps and sketch 3D models to build a virtual representation of their community. These models are not only helpful for communicating complex planning scenarios, but they can also help make data-informed decisions. And, thanks to its integration with ArcGIS Urban, planners and their GIS teams can use ArcGIS Pro to grow their urban model to new heights with deeper analysis on the suitability of projects and plans.
Parcel data is foundational to creating urban models with ArcGIS Urban, just as it is to any zoning or land use plan. In this guide, you’ll learn how to use ArcGIS Pro to enrich your parcel layers by assigning a type to each edge of your parcel. You’ll also learn how to quickly translate your setback parameters for your zoning data, which makes a big impact in your ArcGIS Urban application.
If you would like to learn how to load data into ArcGIS Urban, visit the blog: Load Data into ArcGIS Urban via the Web
Pre-requisite
This blog is suggested for frequent users of ArcGIS Pro who are comfortable with Toolboxes, Geoprocessing Tools and Field Calculator.
Processing parcels is useful because it assigns a type to each edge of your parcel, like front street, side interior or rear street. This means parameters you have based on the edges of parcels will be recognized in ArcGIS Urban.
To prepare your parcels for ArcGIS Urban, you’ll need the following:
- ArcGIS Urban Connector toolbox
- Parcel feature layer (please ensure it does not have overlapping or duplicate parcels)
- Street Centerline feature layer
Download ArcGIS Urban Connector
The ArcGIS Urban Connector is a Python toolbox that can be used to access and maintain an ArcGIS urban model in ArcGIS Pro. We’ll be utilizing a few tools to process our parcels and get them ready to load into ArcGIS Urban. Follow these steps to begin:
- Visit the Urban Connector page in ArcGIS Online and download the toolbox.
- Unzip the downloaded folder on your local computer.
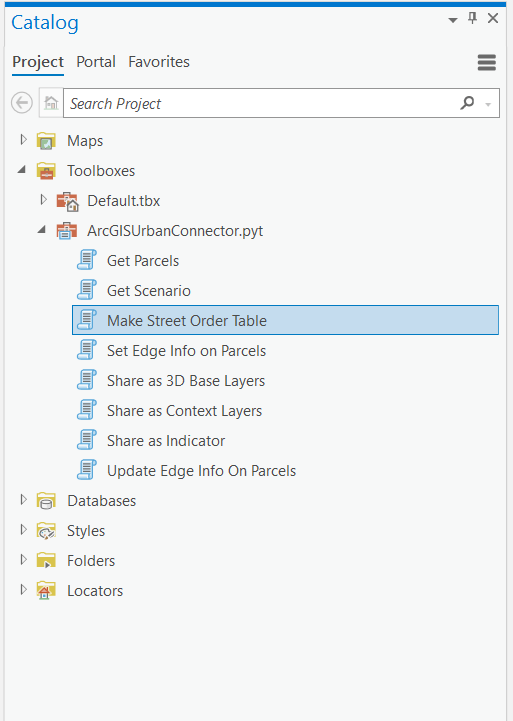
- In ArcGIS Pro, in the Catalog pane, right click on toolboxes and select Add Toolbox. Browse to the ArcGIS Urban Connector folder, select the toolbox. ArcGISUrbanConnector.pyt and click OK to add it as a Connection.
- Expand the toolbox to view the python tools.
Parcel edge configuration
Before edge types can be assigned to parcels, streets need to be ranked. The tool Make Street Order Table creates a table that summarizes your streets based on a field you select, so you can rank them. This table will be necessary for the next tool.
Make Street Order Table
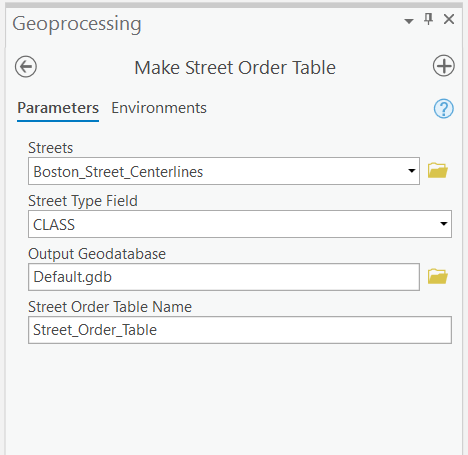
Expand the ArcGISUrbanConnector.pyt (python toolbox) and double click on the tool Make Street Order Table.
-
- Streets: Choose your Street Centerline feature layer.
- Street Type Field: Choose the Field to summarize your streets on (typically a street classification type)*.
- Output Geodatabase: Choose a geodatabase to save the Street Order Table.
- Street Order Table Name: The name of the output table.
- Click Run. When finished, the table will be added to your project.
| * RoadClass | |
| Code | Name |
| Freeway | Freeway |
| Highway | Highway |
| Major Arterial | Major Arterial |
| Minor Arterial | Minor Arterial |
| Collector | Collector |
| Local | Local |
| Service | Service |
| Ramp | Ramp |
| 4WD | 4WD |
| Recreation | Recreation |
| Resource | Resource |
| Ferry | Ferry |
| Other | Other |
| Unknown | Unknown |
Rank Street Types
Next, we’ll rank the street types using our new Street Order Table. Ranking street types determines which edge of your parcel will be assigned as front facing. This step preps the Street Order Table for parcel edge assignment.
- In the Contents pane, right click on the Street Order table created in the previous step and select Open.
- Each row represents a different type of street in your streets layer. To rank the street types, double click in the Street Order Field for each row and enter a number between 1 and 10. If you have more street types, you can repeat street order numbers, or you can use a larger range. Any numbers between 1 and 999 will work in the tool.
- Save your edits, go to Edit > Save.

Set Edge Info on Parcels
Now that the Street Order Table is ready, you can run the tool Set Edge Info On Parcels. This tool will create a copy of your parcel data, delete duplicates, repair complex geometry, and assign edge types to your parcels by adding and filling out additional fields.
This tool will assign an edge type (front, side, rear) to each edge of your parcels based on your Street Order Table. The quality of how your Street Centerline data is organized and the ranking you completed will determine the result.
This tool will create the following:
- A duplicate parcel layer, with fields containing processing and parcel edge information.
- A parcel edge line layer containing the type assigned to each edge. This is useful for visualizing edges and editing types.
To process parcel edges:
- Double click on the tool Set Edge Info On Parcels to open it.
- Parcels: your parcels layer (the tool will duplicate this layer).
- Streets: your street centerline layer.
- Order Table: Street Order table created in the previous steps.
- Output Geodatabase: where the output edges layer will be saved.
- Output Edges Name: name of the output edges layer.
- For other options, hover over the information icon next to parameters like “Max Edge Count” and “Front Street Orientation” and adjust accordingly.
- Click Run.
The resulting parcel layer and edges layer will be added to your map.
(Optional) QA/QC Edge Types
If you want to perform QA/QC, or if you need to change the result of the edges, you can do the optional following steps.
The Parcel Edges layer created in the Set Edge Info On Parcels tool is very useful to visualize the edge results and to change the type where necessary. Since ArcGIS Urban reads the JSON field for the parcel edges, we created a tool to make editing the JSON easier.
To modify any edges that were incorrectly assigned:
- Click on the Parcel Edges layer in your Contents to select it (note, this is your Parcel Edges line layer, NOT your parcel polygon layer)
- Right click on the layer to open the attribute table, or click on Attributes in the Map tab in the Selection group.
- In the map, use the select tool to select the edge you’d like to change.
- In the attributes pane, in the EdgeType field, click on the Choose Symbol Class icon.
- Select the appropriate edge type.
- Repeat as necessary to the remaining edges you’d like to edit.
- Save Edits (Edit > Save).
Now that your edge types have been edited, you need to run the tool Update Edge Info On Parcels to change the associated JSON for the parcels.
- Double click on the Update Edge Info On Parcels tool in the ArcGIS Urban Connector toolbox.
- Parcels: your parcels feature class (polygon layer).
- Parcel Edges: your parcel edges feature class that you just edited (line layer).
- Click Run.
Configure Zoning Type Table – Setbacks
Zoning Types is essential data to use ArcGIS Urban effectively and using the excel template provided in ArcGIS Urban makes batch loading your Zoning Types easy. Setbacks are a key parameter in Zoning Types that correspond to parcel edge types. Click here for more information on accessing and using a template
Use the template for Zoning Types to add the values for the six setback options. If no value is provided, setbacks will be set to zero feet or meters, meaning on the parcel line.
If you want to add additional Tiers of setbacks (creating “stepbacks”), this can be done from within the ArcGIS Urban data manager under individual Zoning Types.
Load Zoning Types
Once your Zoning Types table is finished, it’s ready to be shared and loaded into ArcGIS Urban.
- Use this resource to Share a table.
- You can also access the table directly from your machine.
Once it’s a shared feature table or in a location on your computer, complete the following steps in ArcGIS Urban:
- Open the data manager.
- Click System of records and click Zoning types.
- Click the Add button at the upper right.
- Select From feature table to access from ArcGIS Online or From spreadsheet to access from your machine.
- The portal item pick for Import zoning types appears.
- Click the Zoning Types feature table you just shared or navigate to the file on your machine, click Next.
- The Field matching dialog box appears.
- Choose your units in source as either Metric or US Standard.
- Complete the field matching accordingly, focusing on matching your setback fields.
- Click Next.
- The data will load and validate, once finished click OK.
- Open a Zoning Type by clicking the ellipses to the right > Parameters Tab > click the Tier 1 under Tiers & Setbacks. Check your values were loaded correctly.
In this guide, you learned how to enrich your base data to use in ArGIS Urban. You started by processing your parcels to assign a type to each parcel edge, enabling your ArcGIS Urban users to have custom data for each parcel right away. Then you prepped your zoning types data and loaded it into ArcGIS Urban. Taking the steps to prep your data and customize it in this way will make planning work in your ArcGIS Urban model more powerful.
This is the advanced approach to data prep for ArcGIS Urban. If you’d like to learn about the base preparation to deploy an urban model, see Load Data into ArcGIS Urban via the Web.


Article Discussion: