Using the REST service URL to build maps and apps is no longer a best practice. Learn about all the benefits of using an ArcGIS Online item to build maps instead.
How many of us have used Add Data from Path with a REST endpoint or Add layer from URL with the REST endpoint when building a map in Map Viewer in ArcGIS Online?
It’s the typical pattern we were taught to use with Web GIS: find the REST endpoint and then copy and paste it into your project. But when you do that, you’re just making life more difficult for yourself.
What most people don’t realize is that an item hosted on ArcGIS Online is very different from a service (or REST endpoint). You can think of an item as a specific configuration of a service. There can be many different configurations of a service, and each has a unique ID that can be used to easily access the item anywhere in ArcGIS. These unique configurations can add additional valuable information to the baseline service, such as
- Custom cartography
- Configured pop-ups
- Improved metadata and provenance
- Raster functions
- Views (subsets of feature layers)
A Tale of Two Layers
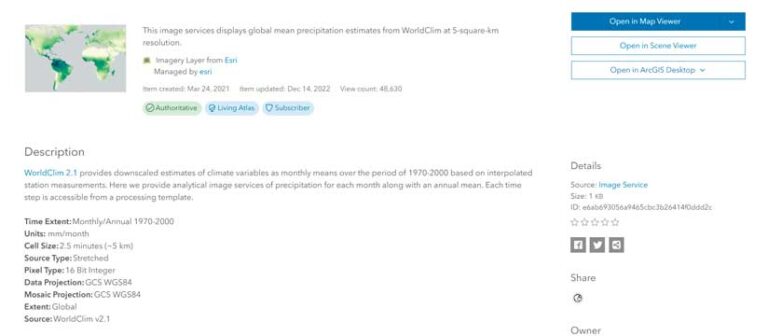
The WorldClim Global Mean Precipitation layer in ArcGIS Living Atlas of the World provides a good example.
Using the REST URL Service
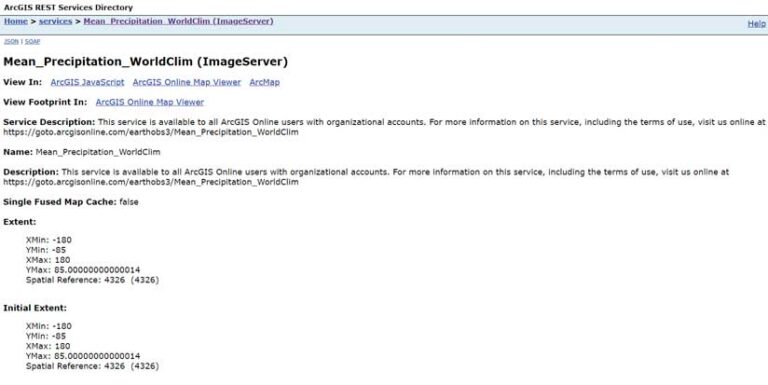
There’s not much useful human readable metadata in the service URL. Sure, information can be added while publishing a service, but it is not displayed in a user-friendly manner. Not to mention, it’s much easier to later edit an item description.
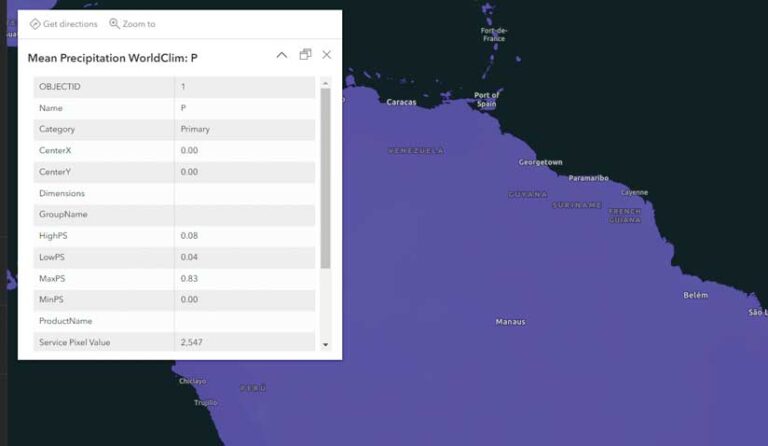
Open the service for the WorldClim Global Mean Precipitation layer in Map Viewer. You will see it uses the default rainbow color ramp, and given the range of the data and its distribution, the map displays as a purple blob. When you click the map, the pop-ups display the default raster value, which is not very informative.
In addition, you can’t see the connection between this layer and the detailed item description. When you click Information in Map Viewer, you’re sent back to the ArcGIS REST Services Directory entry for the REST endpoint rather than the item description for the layer. While you may understand the layer information in the REST directory entry, someone who uses your map may not, so you’re putting them at a disadvantage.
Using the Item Instead
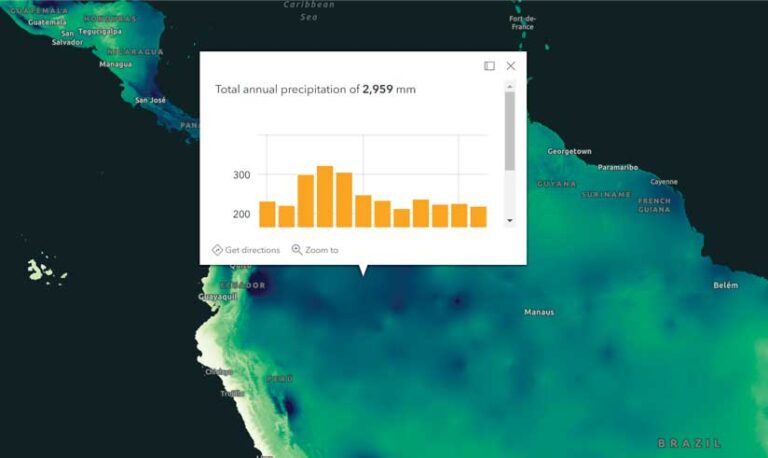
From the item details page for the WorldClim Global Mean Precipitation layer, you can see a detailed description of everything you need to know to use this layer effectively. Open the layer in Map Viewer in ArcGIS Online or ArcGIS Pro from the item details page, and you’ll see custom cartography that clearly defines gradients of precipitation. Preconfigured pop-ups are customized to query the multidimensional information and provide a month-by-month graph of precipitation totals. And when this item is added to a map and saved, you can easily get back to that detailed item description by clicking Information.
A Better Way
So how should I be adding layers?, you might ask. Instead of the REST URL, use the item ID. Every item has an alphanumeric string in its URL; that is its item ID. For the Sentinel-2 10m Land Use/Land Cover Time Series layer in ArcGIS Living Atlas, the URL is www.arcgis.com/home/item.html?id=cfcb7609de5f478eb7666240902d4d3d.
To use this layer in a map, copy the alphanumeric string cfcb7609de5f478eb7666240902d4d3d and paste it when adding a layer from ArcGIS Living Atlas in Map Viewer or paste it into the Catalog search box for Living Atlas in ArcGIS Pro.
In some cases, there isn’t an item for a service, and that’s another pattern that people need to embrace! Luckily, creating one is pretty simple.
If you published from ArcGIS Pro into an ArcGIS organization portal, or if you uploaded a file directly to ArcGIS Online, you are lucky because you already have an item. It just needs to be configured. In Map Viewer, adjust the cartography, configure the pop-ups, and add any aliases in Map Viewer and then right-click the layer and choose Save. Any customizations you made will be saved to the item (but not the service).
There is another important reason for using items. As a map publisher, you can help you support your users by alerting them to changes to layers or their planned retirement via the item page tags and labels. See “A Process for Deprecating Maps and Layers.”
About the author