Interested in sharing content between ArcGIS systems? Curious how these collaborations are set up?
We’ll take an administrative perspective today and demonstrate how to set up a distributed collaboration.
Though our scenario only includes a host and one guest, very similar practices are used when setting up collaborations with multiple guests.
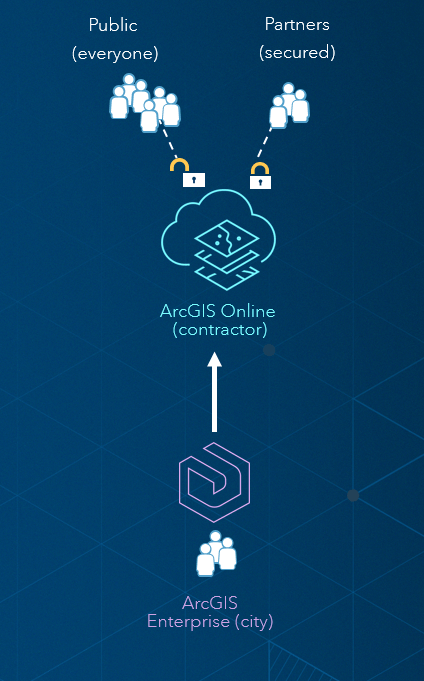
We will use a scenario between an ArcGIS Online organization used by contractors and an ArcGIS Enterprise deployment used by a city for this collaboration. Both the city and contractors are working on a redevelopment project together and are looking for a simple way to share web maps and layers from Enterprise to Online during each stage of the project. Here’s a depiction of the collaboration, where data is shared from the city (in Enterprise) to the contractors (in Online) and made available for different stakeholders, such as partners and the public:
Now, before you get started creating a collaboration, we recommend drafting your needs and workflows with other collaborators. How will your data be shared and to whom? Which organizations need to be participating? Tips on these questions and more will be provided in future blogs – but today will focus on the nuts and bolts.
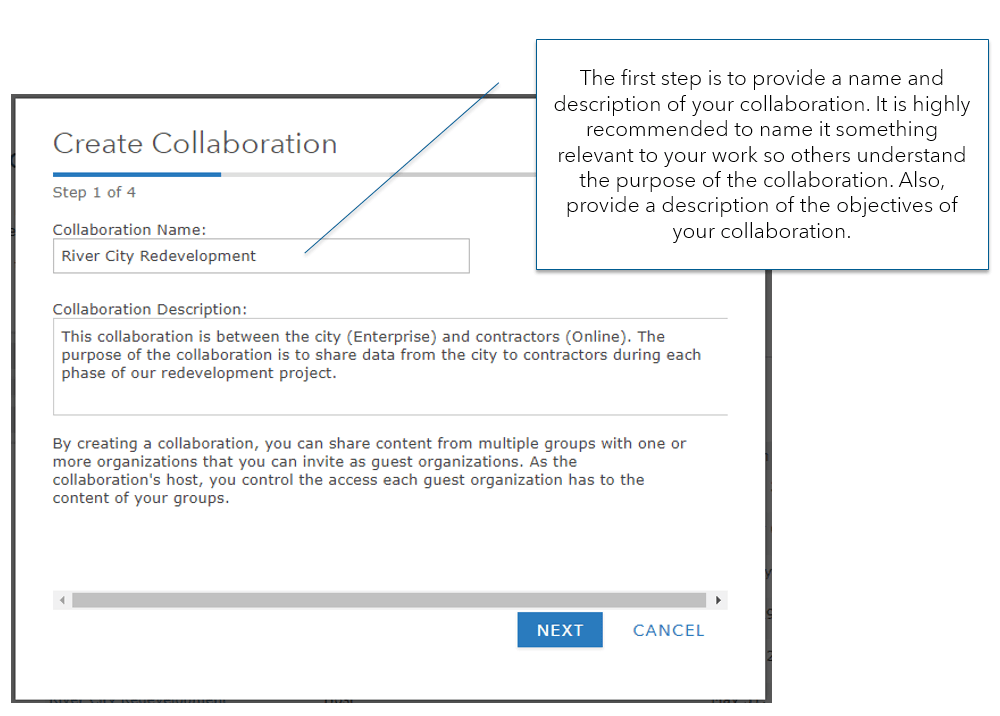
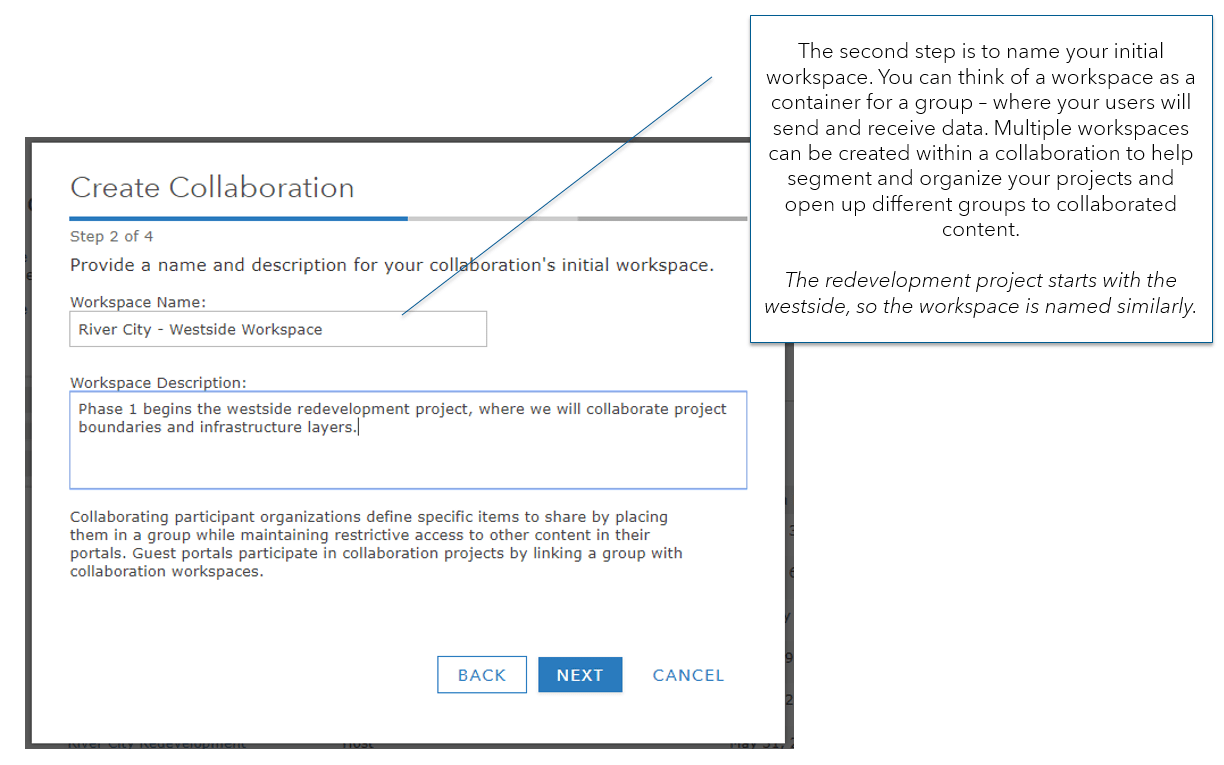
As we walk through administration, general tips are included in the text tooltips and the choices made for the redevelopment project are in screenshots of the setup dialog.
Let’s get started:
- First, log into ArcGIS Online as an administrator. Collaborations between ArcGIS Online and ArcGIS Enterprise are initiated from ArcGIS Online.
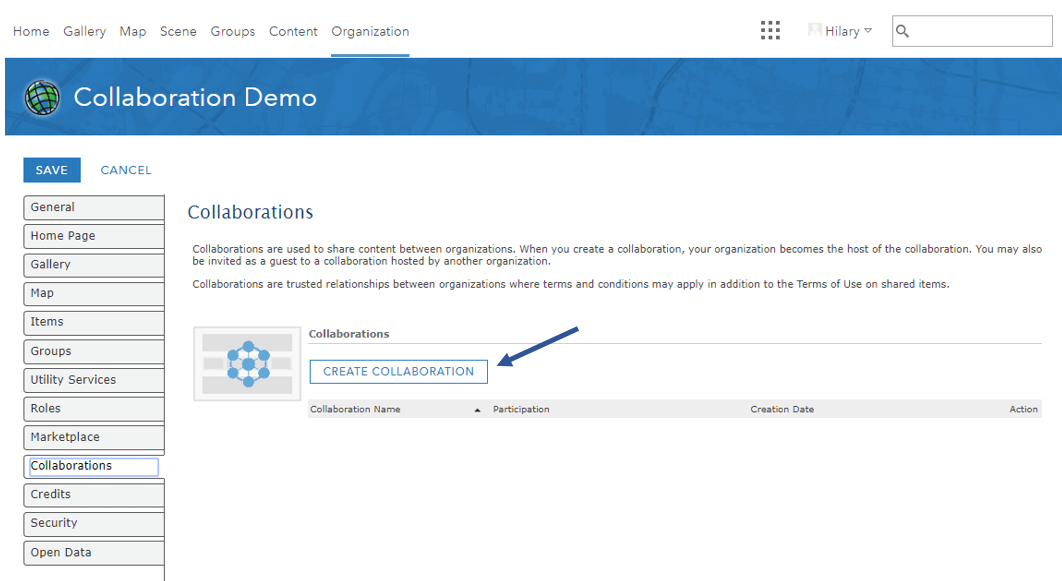
- Next, head to the Organization tab > Edit Settings > Collaborations > and select ‘Create Collaboration’:
Now, the fun begins!
Step 1 – Name and describe your collaboration:
Step 2 – Name and describe your initial workspace:
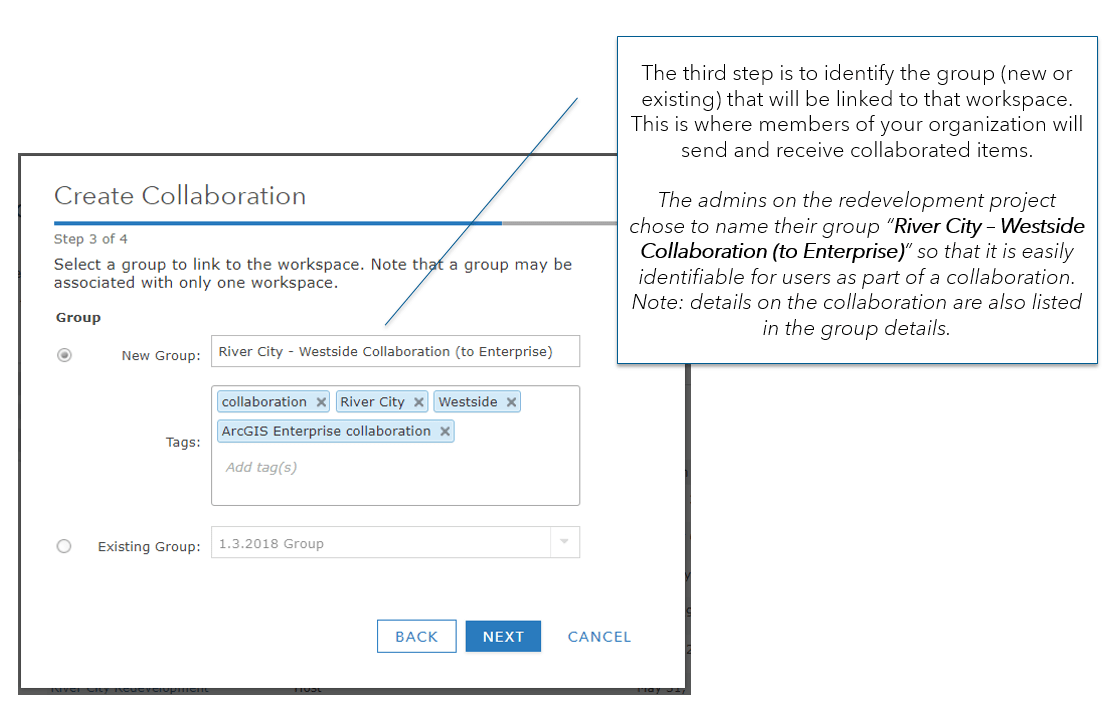
Step 3 – Link a group to the workspace:
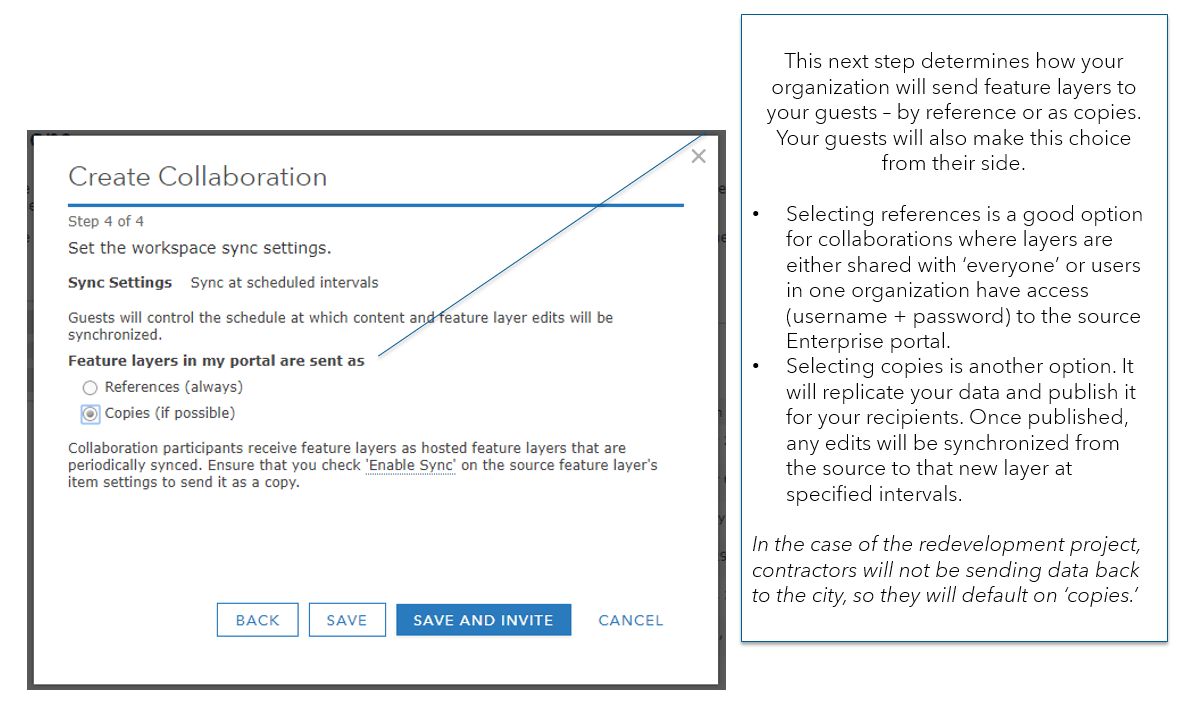
Step 4 – Decide how your feature layers will be shared:
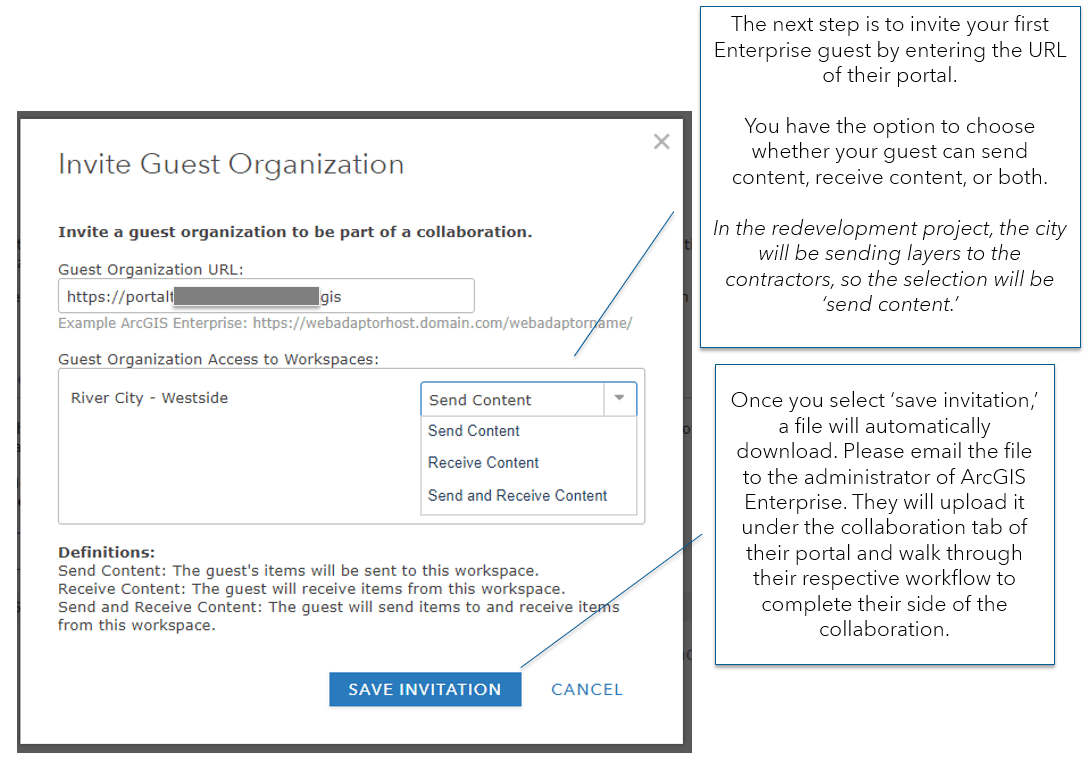
Step 5 – Invite your first guest:
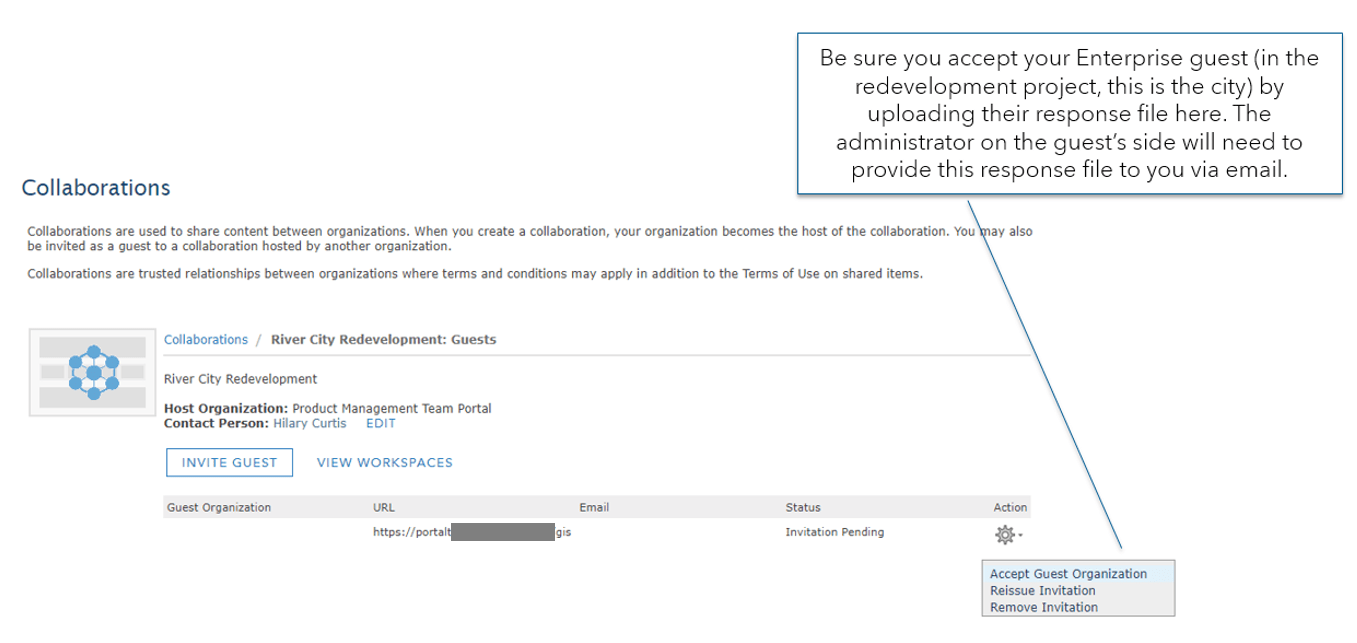
Step 6 – Accept your guest:
Note that if your collaboration is sharing feature layers as copies (as shown in step 4), your Enterprise guest will be responsible for setting the synchronization interval, determining how often edits for your feature layers are synced with your participants’ items. Be sure to talk with your Enterprise counterpart on how often you want edits to synchronize.
A few final notes:
- Once you have uploaded the response file and accepted the guest, your work to set up the collaboration is complete. Be sure to communicate how you set up your collaboration (all the way from the intention of the project to the group that is linked) with members of your organization who will be part of the collaboration.
- Be sure that the ArcGIS Enterprise administrator has completed their side of the collaboration set up as well. This means they will link a group to the workspace, choose how their feature layers are shared, and set the sync interval if sending as copies or at scheduled intervals.
- When copying data between ArcGIS Enterpise and ArcGIS Online (and vice versa), there is a size limit of 1 GB per layer.
Now that the collaboration is complete, the contractors in ArcGIS Online can receive copies of data from the city and use the data in their own web maps and apps to share with a wider audience.
We hope this blog has inspired you to create your own collaboration! Please feel free to reach out to distributedcollaboration@esri.com with any comments or questions. Also be sure to check out our help documentation for additional details:
- ArcGIS Enterprise administration help: http://enterprise.arcgis.com/en/portal/latest/administer/windows/about-distributed-collaboration.htm
- ArcGIS Enterprise user help: http://enterprise.arcgis.com/en/portal/latest/use/about-distributed-collaboration.htm
- ArcGIS Online help: https://doc.arcgis.com/en/arcgis-online/administer/about-distributed-collaboration.htm
Happy collaborating!
The Esri Collaboration Team


Article Discussion: