At 12.0, ArcGIS Mission introduced the new capability called Mission Flows. Flows are tools that alert Mission Managers and mobile mission leads when conditional criteria are met in a given mission. This blog will provide an overview of what mission owners need to know to create, configure, and use Flows.
How Are Flows Accessed
Mission Flows are accessed in the Mission Manager application. Simply navigate to a Mission Details page for the mission you own then select the Mission Flows tab. The tab identifies all Flows created and whether they are active or inactive. Select Open to access the Flows configuration page to get started.

Understanding Mission Flows
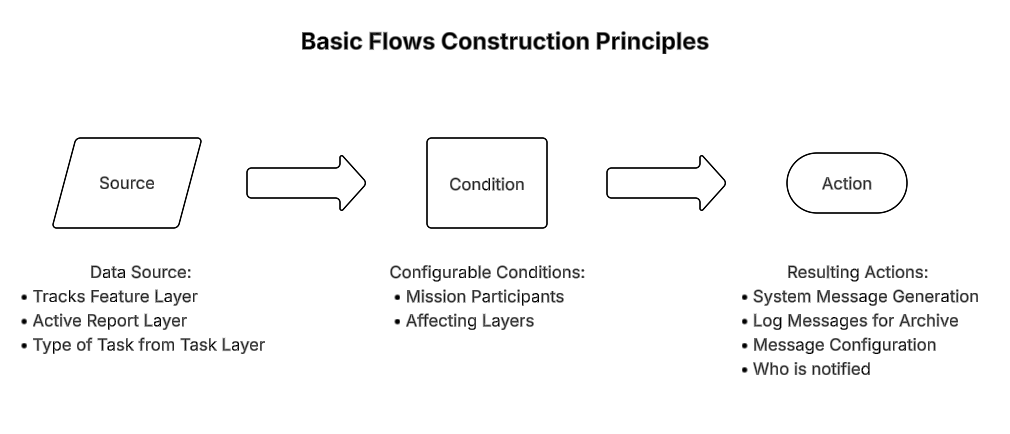
Mission Flows extend communication across ArcGIS Mission in the forms of system messaging and log recording. These flows are constructed by the Mission Owner or Admin and consist of a source of mission data, a condition, and a resulting action.
- Source: the data source that acts as the Flow initiator (i.e. Mission Layers)
- Condition: criteria that drive the enablement of the Flow
- Actions: once the flow condition is met, a user-defined set of information is then passed to mission members
Mission Flow Configuration Options
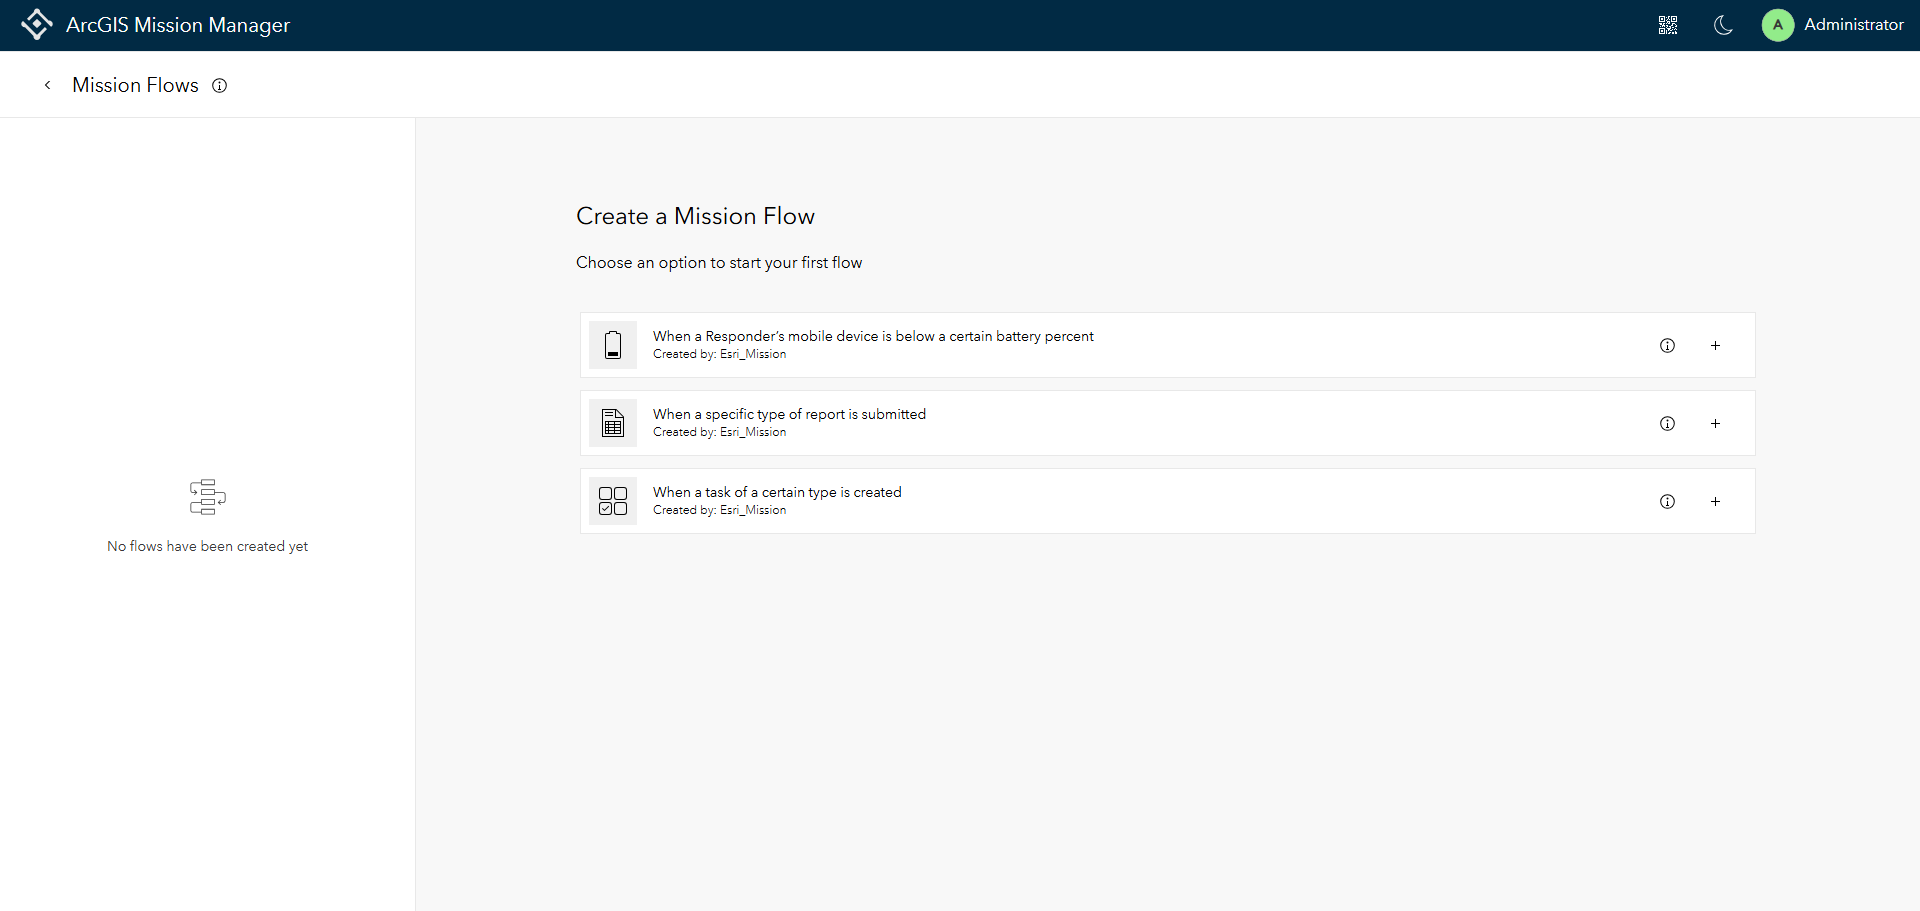
There are three configurable options as of the 12.0 release:
- Battery Flow: When a Responder’s mobile device battery percentage decreases below a certain threshold
- Report Submission Flow: When a specific type of report is submitted
- Task Type Flow: When a task of a certain type is created
All Flows can be started when any or select mission members are designated. Each of these can also produce a system message as well as a log record of the flows action. Custom messages can be configured as well as designating who sees these different messages.
Let’s walk through the three flows together.
Configure a Battery Flow
During a mission, Responders are busy conducting their operational duties. They may not be consistently looking at their mobile devices to notice when their batteries are low and require attention. The Battery Flow, alerts selected Mission Leads and/or the Mission Owner and Mission Admins with a configurable notification message in the event that a mission responders device meets the criteria threshold.
The source initiating the flow is the mission’s Tracks layer, which provides constant updates of all mission members’ location and current battery charge level among other properties. To get started, follow the steps below:
First, select the flow “When a Responder’s mobile device is below a certain percent”. Provide a flow title and description such as “Insufficient Battery Power” followed by a description of the flow when prompted.
Next, select the option to configure the conditions of the flow. The flow can apply to all mission members, or if there are only desired individuals that need monitoring, they can be selected. Follow this action by selecting the desired battery percentage threshold. The threshold can be set at any variable between 0 and 100. It is important to note that the alert will be initiated when the percentage is below the variable set. If the desired value is 30% (the default), the flow would not initiate until the device reads 29% or lower.
Now select the Action section to configure the desired output once all flow conditions are met. Selecting actions allows configuration of a user constructed Message if desired as well as logging every time this action is triggered.
Next, construct a free text message or one with a combination of text and field values. Follow this by determining who should be notified: Mission Owners, Mission Admins, all Mission Leads, and/or selected Mission Leads.
Once the Action is confirmed, you will see an overview of the configuration. To activate the flow, select Set to Active. To start over, select Delete and recreate flow. To edit any part of the flow, select the pencil icons on each block and adjust the parameters.
Report Submission Flow
In some instances, a report of a certain type carries more weight than others in a mission. To enable the report submission flow, open the Mission Flows Tab to the Mission Flows configuration interface. If a flow is already created, it will appear in the left hand pane showing the status. After the first flow in a mission has been created a flow has to be created by selecting the Create New button at the upper right and then select “When a specific type of report is submitted” The following example is using a created report of “Counter UAS Report”
Provide a suitable flow title and description of the flow, such as “CUAS Sighting Flow”.
Select the conditions that need to be met to trigger this action. The flow starts when any mission member or specified mission members submit a report of the specified type. You would then select a report from one of the available reports that are published and active.
Select Actions after the conditions have been established. Actions that can be configured with this particular flow include sending a system message, a broadcast message, or no message. Additionally, a record of the log can be written to the Mission Flows Log.
Next, construct a free text message or a combination of free text and fields.
Finally, determine who should receive this message information to include Mission Owners and Admins, and all mission leads or only selected ones. If a broadcast message is selected, a broadcast will be sent to everyone in the mission.
When the flow is constructed and ready for deployment, set the flow to active. Adjust the flow as necessary.
Task Type Flow
Not all missions contain task types, but when implemented, they can make task management a smooth process. In some cases, one task type may hold more weight than another. To ensure that there is enhanced awareness when a task of a certain type is entered into the system, owners and admins can configure a flow to watch for these actions. This example flow is assuming you have a task type of “Medical Response” designated.
Accessing the Mission Details pane, select Open in Mission Flows and then select Create New. Select “When a task of a certain type of report is submitted”.
Provide a suitable flow title and description of the flow, such as “Medical Task Assignment”.
Select the conditions that need to be met to trigger this action. The flow is started when any mission member or specified mission members assign a task type of “Medical Response”. You would then select the check box for “Medical Response” followed by Done.
Select Actions after the conditions have been established. Actions that can be configured include sending a system message or no message. Additionally, a record of the log can be written to the Mission Flows Log. Next, construct a free text message or a combination of free text and fields. Finally, determine who should receive this message information to include Mission Owners and Admins, and any or all Mission Leads.
How are Mission Flow Messages Accessed
System Messages
Mission Flow messages, if configured for System Messages, will appear in the System Messages pane that is opened by selecting the System Messages icon at the top right of the Mission Analyst screen. As more system messages are generated, the number icon will continue to count up until the system messages are viewed. Once the system messages are viewed, the notification indicator will clear and reset. The System Messages icon is only available to Mission Owners, Admins, and Mission Leads. Mission Leads on mobile devices also have access to system messages and they are accessed by selecting the system messages icon to the left of their avatar.
Log Messages
Mission Flow messages, if configured for log storage, are written to the Mission Flows Logs Table that is located in the Missions contents folder in the “Logs” feature Service. To view these logs, open the “Logs for Mission Item #” and select “Mission Flow Logs”. Once at the layer, select “Data” to see a full table of all of the logged system messages configured for logs. These logs contain a wealth of information that can used for review purposes or incorporated into other ArcGIS products.
Explore the flows options and keep an eye out for other useful informational blogs about ArcGIS Mission. If you have any ideas, submit them to the Esri Community with a tag of ArcGIS Mission.


Article Discussion: