Display noncontiguous geographic locations using our newly released Insets app. Pick from a list of predefined geographic layouts or customize a layout using bookmarks from the map. Predefined mode currently supports layouts for Australia, Canada, Denmark, France, Ireland, Japan, The Netherlands, New Zealand, Portugal, Spain, and the United States, with more on the way in coming releases. Custom mode lets you import bookmarks from your map to automatically generate insets, or you can create brand new insets directly in the app configuration and position them in the layout.
Examples
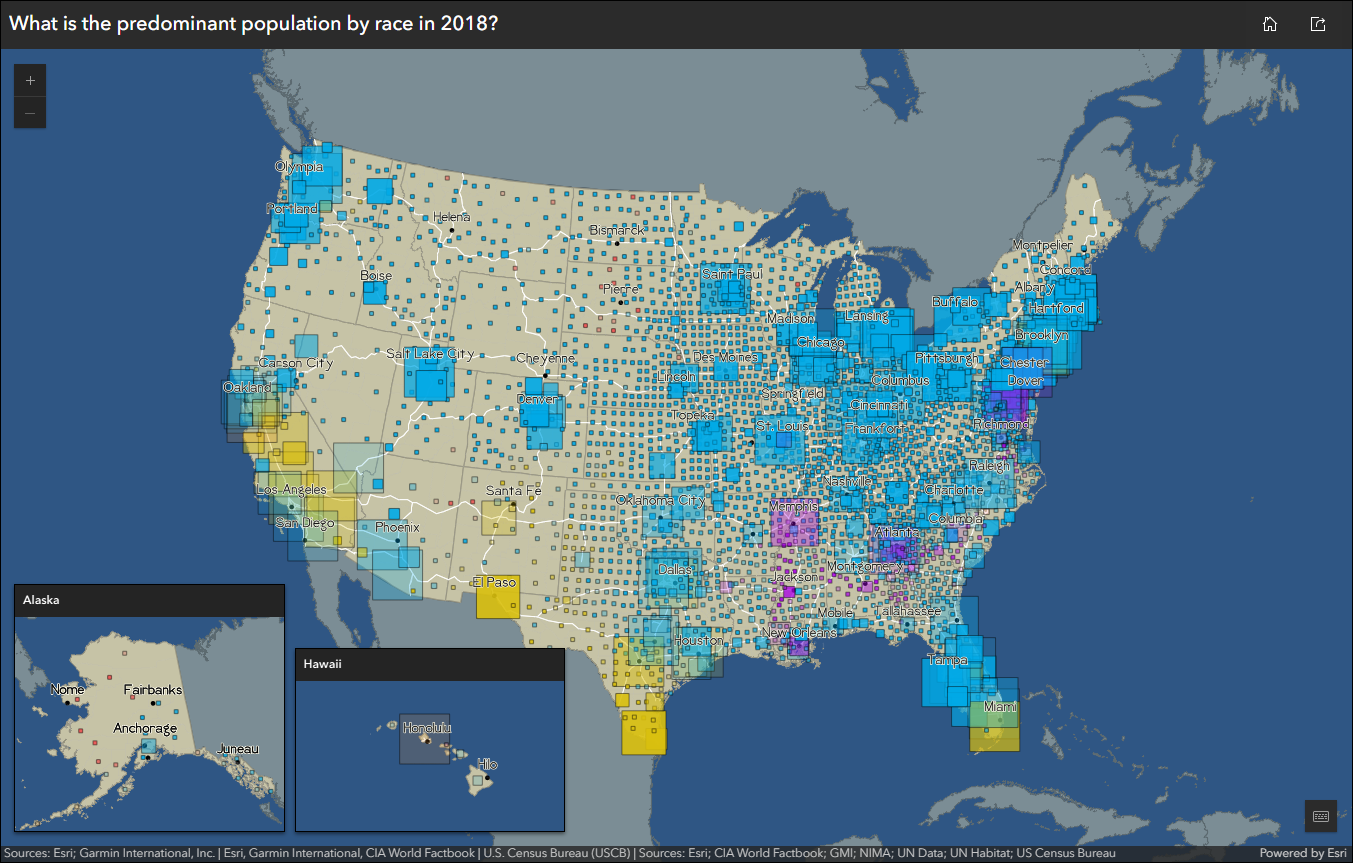
- European Ancestry of Americans using the Contiguous US + Alaska and Hawaii predefined layout

- Where are hospitals in relation to the population in Spain? using the Spain + Canary Islands predefined layout

- Emergency Response Stress Index in the US using a custom layout to show different US cities

- Population Density of Portugal using the Portugal + Azores and Madeira predefined layout

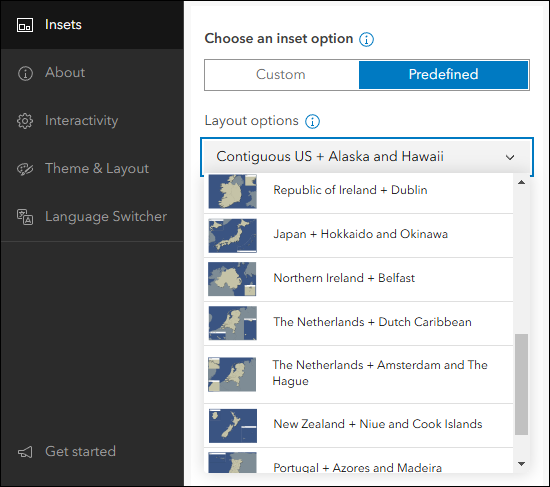
Predefined layouts
Use predefined to quickly select from a list of pre set geographic layouts based on different countries. As of the November 2024 update we have layouts supporting Australia, Canada, Denmark, France, Ireland, Japan, The Netherlands, New Zealand, Portugal, Spain, and the United States, with plans to support more in the near future. These layouts are preset with the country as focus in the main map area and its areas of interest in the inset maps.
A nice advantage of using a predefined layout is that both the main map and the inset maps are each displayed in the appropriate coordinate systems for that location to help lessen map distortion. For example, in many US online maps the state of Alaska is stretched out and distorted when viewed since it is in the same global based coordinate system as the entire web map. In our US layout, Alaska is displayed in Alaska Albers Equal Area Conic inside its own inset map, and the contiguous US is displayed in North America Albers Equal Area Conic in the main map area.

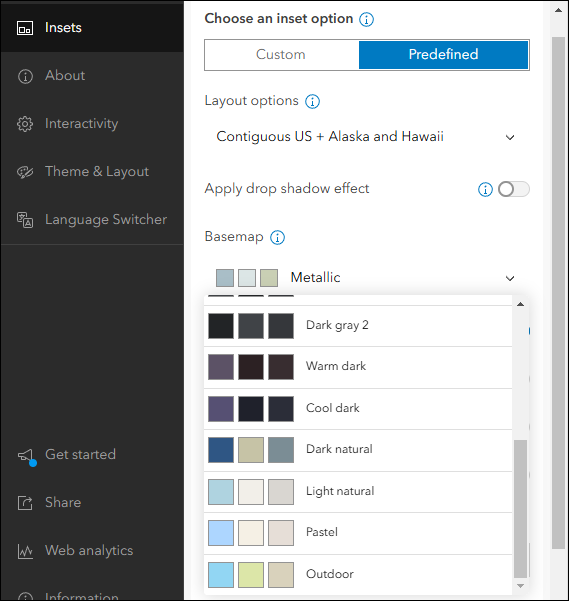
After picking a predefined layout option, choose to apply a drop shadow effect and select a basemap for the map. A drop shadow effect adds emphasis to the map’s features of interest and is applied using the Apply drop shadow effect toggle. The Basemap option offers a drop-down list of 15 choices to best suit the display and symbology of your map’s data.
Furthermore, choose to remove the ocean color from the basemap using the Remove ocean color setting if desired. This can make your map and data stand out more in certain situations. Same thing with Remove cities and Remove roads (US layouts only). These settings give you further control over how the basemap is presented in your app behind your data. Lastly, choose to include title headers that will display the location names above each inset map.


Custom layouts
Create a custom layout when you want to keep the look and feel of your web map and define your own inset locations. A great way to take advantage of the work you’ve done in map viewer is by leveraging bookmarks to automatically create insets. In the app configuration, click Import bookmarks on the Insets tab to see all bookmarks converted into insets in the inset list. Each new inset can be edited from the list, and you can create brand new insets from scratch using the Add inset button above the list.

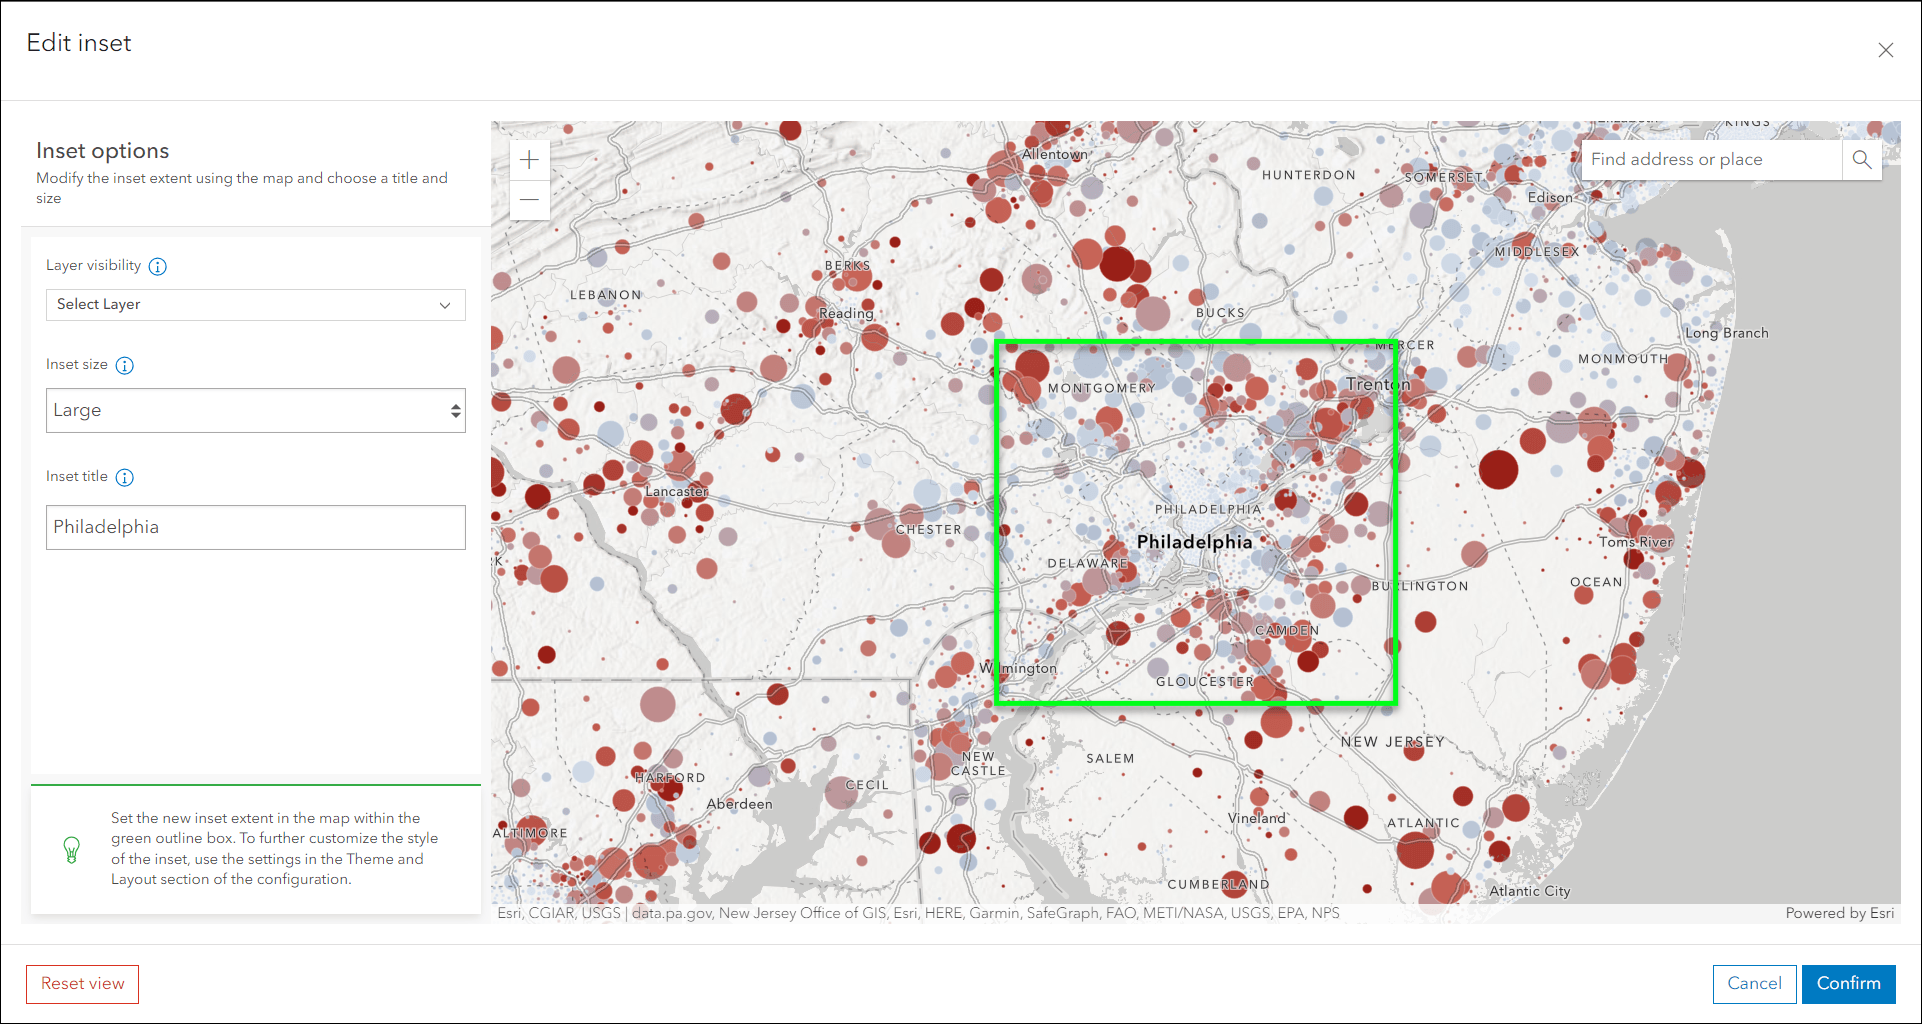
When editing or creating a new inset, use the map area to position the area within the green outline box to mirror how it will show in the inset. Use the Inset size drop down to choose between a large, medium, or small sized inset.
Use the Number of inset windows option to define the number of custom inset windows to display in the app. For example, you may have 6 inset locations you want to include but you only want 2 inset windows to show in the app at a time. You can declare anywhere from 1-4 inset windows to display. Additional insets exceeding the number of inset windows are accessed from the header menus. To change the positioning of your inset windows, use the Position Manager found on the Theme & Layout tab of the app configuration to drag and position them before you publish your app.

Note that you can drag your custom insets in the list to set their priority. Insets at the top that are noted with a blue dot are the ones that the app will display by default and additional insets are accessed from the header menus. This will change depending on how you set the Number of inset windows option.

Lastly, choose to limit app viewers from zooming out and panning away from the area of interest you have set in the inset windows. For example, if your inset location is focused on downtown Louisville to show flood impacts of the Ohio River, you can restrain app viewers from zooming and panning out to a state wide level and getting lost from the app’s focus. Use the Limit map navigation toggle to enable this. Note that zooming in for more detail will still be possible. To return to the default extent the app viewer can click the home icon button located in the top right of the app header. This button is universal so it will return the view back to default for all inset windows and the main map.

Further configuring and theming your app
Provide information about features using the settings on the About tab of the app configuration. Pop-ups are supported in both the main map and the inset windows. Choose a corner of the app to display pop-ups in by setting the Pop-up position option. Also, decide to include a legend, introduction panel, or cover page to introduce your audience to your app and what you are mapping.

Below, clicking to view pop-up information for any features in the main map or in any of the inset windows will open the pop-up in a conveniently docked position in the bottom right corner of the app layout.

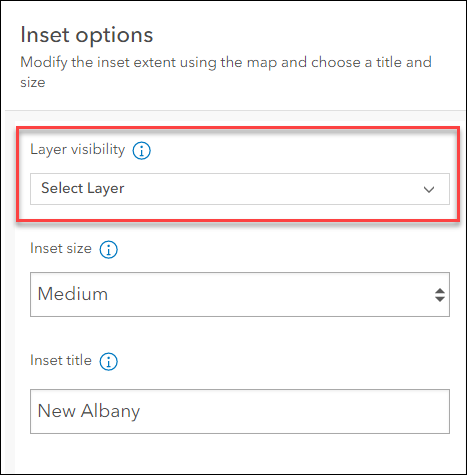
With maps that have multiple layers, control which of them are visible in the inset windows and main map. In Custom layouts, control layer visibility per inset using the Layer visibility setting within each inset edit window. For example, create several custom insets of the same location but alter the layer visibility for each one to detail how different layers impact the area. For Predefined layouts, enable the Layer list tool so that app users can toggle layer visibility throughout when viewing the app.
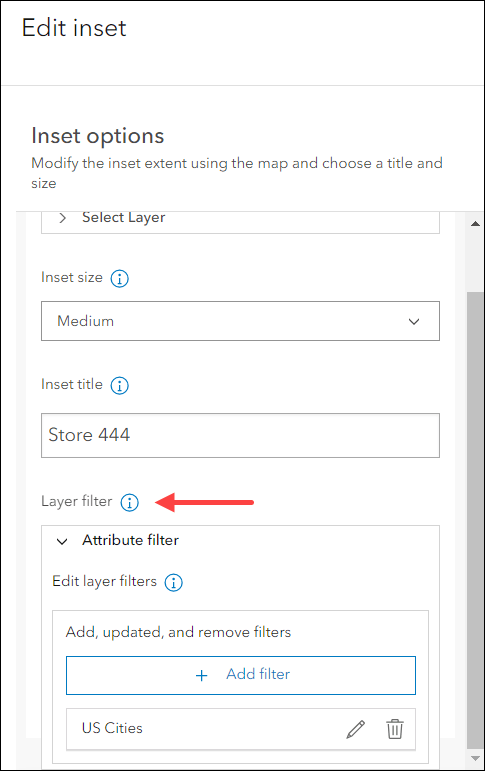
Apply attribute filters to the data in the map to control which features show in insets. When creating custom insets, find the Layer filter setting within the inset’s edit window on the left side panel. Add filters using expressions on any of the layers from your map. These filters will only apply inside that specific inset window in the app. When choosing Predefined layouts, use the Layer filter setting to apply filters to all insets and the main map.
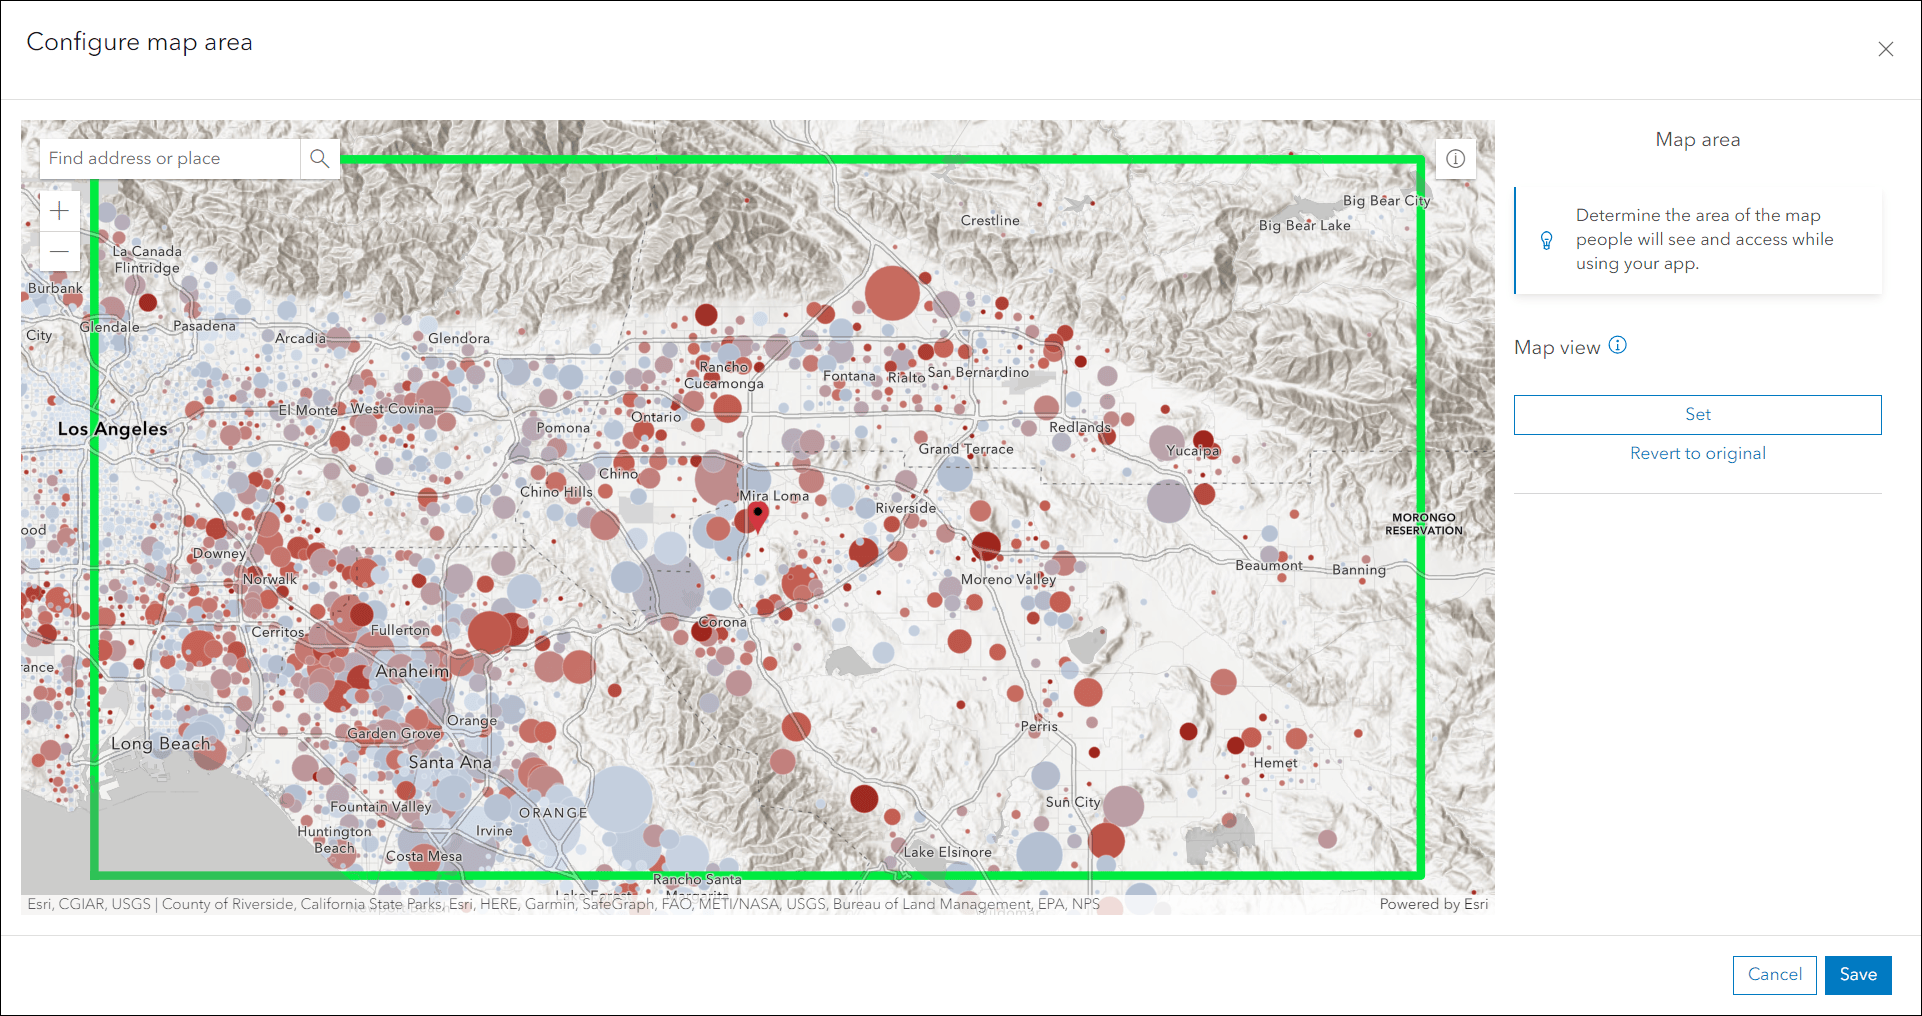
Use the Map area setting so that you can set a new map view to control how your app loads the main map. Since inset windows can take up a large amount of space in the app layout, this setting can come in handy if you want to tweak the initial map view extent so that it loads appropriately. This new initial view only applies to this specific app, it does not override the web map’s initial map view extent and will not affect other apps or places that this map is used. To get started, on the Map tab enable the Map area toggle at the bottom and click Configure. Simply pan and zoom the map to the new view that you want then click the Set button on the right side panel. When satisfied, click Save.
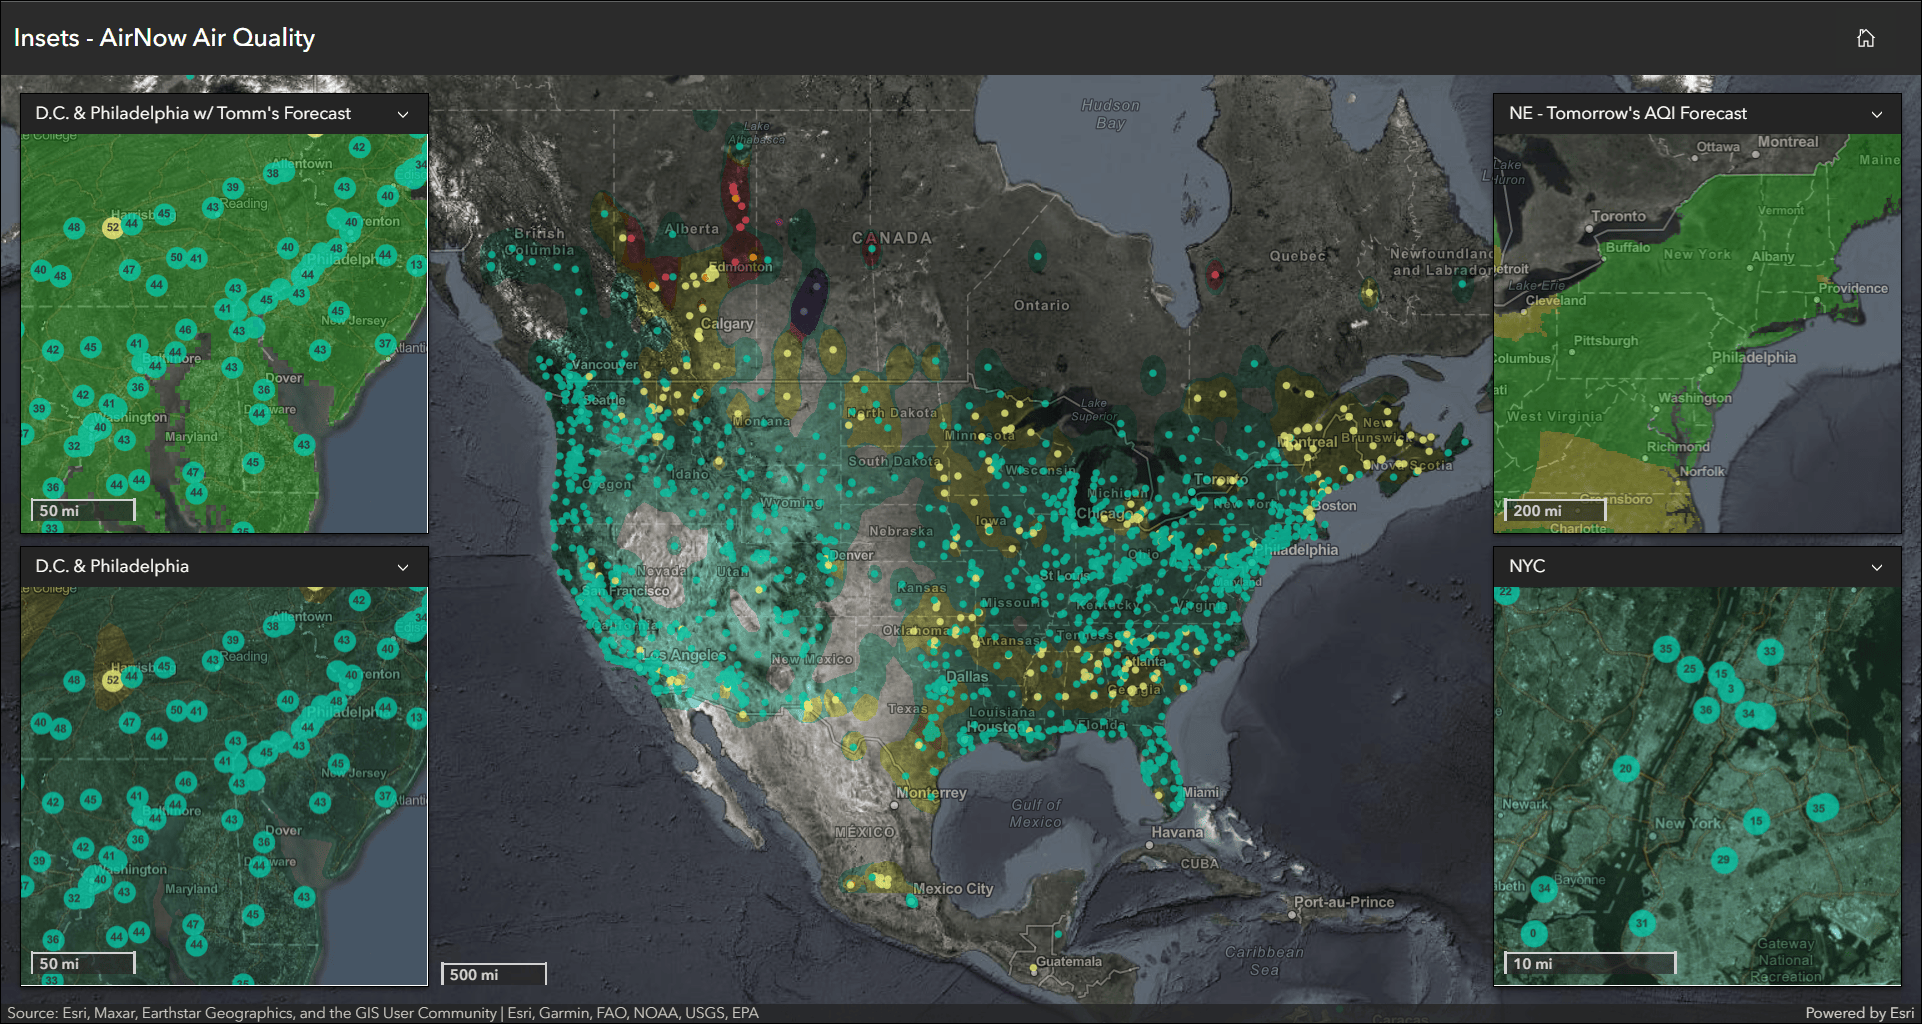
Scale reference can be important when viewing multiple locations at once if different zoom levels are used across locations. Enable Scalebar to include a scalebar for each inset window and the main map. This helps give context into the zoom levels used for each of the areas of interest in relation to each other. Find Scalebar within the Interactivity > Explore/navigate section of the app configuration.
Customize your app by using the options on the Theme & Layout tab of the app configuration. Choose between a light or dark theme for inset headers, pick a font, and pick a color for the main app header.

Choose to keep the inset windows squared in shape or give them a rounded border, as well as determine the outline thickness or remove it entirely. You can also apply a drop shadow effect to the inset windows.

Lastly, use the Position Manager to move tools to set their corresponding position in the app. If you are using a custom layout, the Position Manager will also be where you set the positions of your custom inset windows.

Create your own app
Find Insets and begin configuring your own app from any of the following places:
- On the Content tab of your organization, click Create app > Instant Apps
- In map viewer, click Create app > Instant Apps
- On the item page of a web map, click Create Web App > Instant Apps
- On the Insets item page, sign in to your organization then click Create a Web App
For more details about creating and managing ArcGIS Instant Apps and using the Instant Apps home page, please take a look at our helpful blog, Discover new ways to unleash your map’s potential with ArcGIS Instant Apps.

Hi Matt,
Are there any plans to bring this to experience builder as a widget?
Thanks,
Marc