In 2023, we introduced new field types for storing date and time values in ArcGIS Online. Since then, some of you have asked how you can make the most of these new field types. The recent addition of tools for adding and calculating fields in Map Viewer has made that easier than ever. Now you can add and calculate fields using on these new field types, all within Map Viewer. In this article, we’ll walk you through it step by step.
Date and Time Fields
Previously, ArcGIS Online had only one field type for storing date and time values: the Date field. As a rule, it combines both date and time values. However, not every dataset requires both date and time. Enter Date only and Time only— fields that store dates and times separately.

The Date only field is ideal for tracking events, recording historical data, conducting date-based analysis, or filtering based on dates alone.
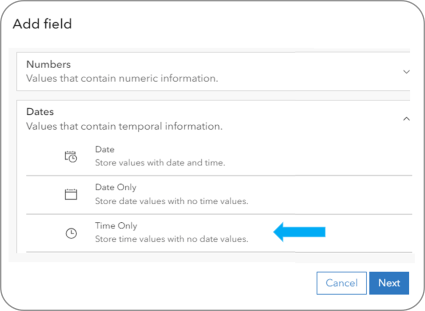
The Time only field stores only time values, without an associated date. It’s great for storing information like business hours, transit schedules, or keeping the time of an event from being subject to conversion*. Having a dedicated time-only field enables you to filter and analyze data based on specific time ranges.
*Date only and Time only fields have a specific advantage- they’re not time zone aware. If you’re familiar with how date and time values are displayed in ArcGIS Online, you may know that date values are adjusted based on the viewer’s time zone. Because there are instances where its essential to preserve the values as-is, the Date only and Time only fields allow you to do just that. The values remain constant, despite the location of the viewer.
Step-by-Step Guide
In this example, we’ll add new Date only and Time only fields to a hosted feature layer in Map Viewer. We’ll calculate the new fields using Arcade expressions based on the existing date field.
Step 1: Add New Fields
1. Open the Fields pane.
2. Click Add field.

Pro Tip: To add, delete, or calculate fields in Map Viewer, you’ll need the proper permissions. To add or delete fields, you must be the layer owner, organization administrator, or a member of a shared update group the item is shared with. To calculate fields, you must be the layer owner or an organization administrator.
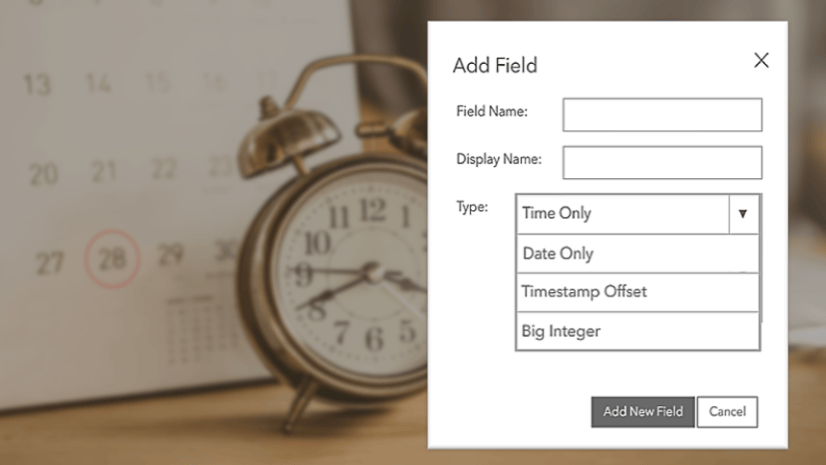
3. In the Add Field pane, expand Dates.
4. Choose Date Only.
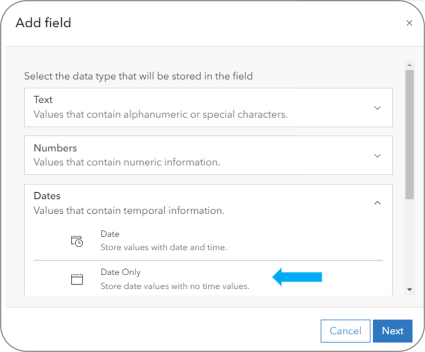
5. Click Next.
6. Give the field a name.
7. Click Add field.
8. Repeat steps 1-7 to add a Time Only field.
Step 2: Calculate the Date Only Field
- Open the Layers pane.
- Next the layer name, click Options (…).
- Click Show table.
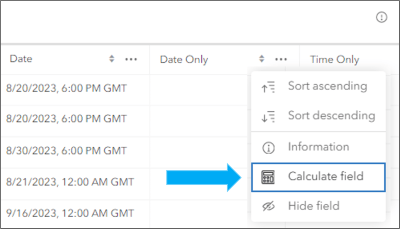
- In the table, scroll to the Date Only field.
- Click Options (…).
- Select Calculate field.
In the Field calculator,
- Select Arcade.
- Optionally, create a filter to calculate values for a subset of features.
- Click Next.
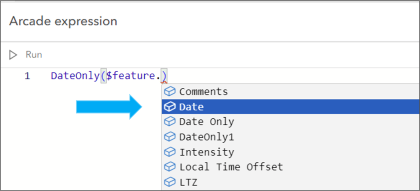
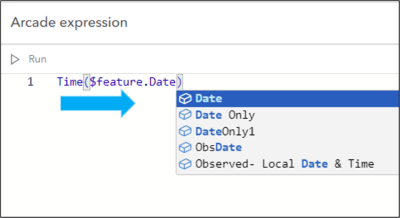
- In the Arcade expression editor, type DateOnly($feature.).
- Select the field Date from the menu
The expression looks something like this: DateOnly($feature.Date).
6. Click Run to test the expression.
7. Click Run calculation.
8. Click Close.
Pro Tip: Prior to calculating fields, filter out any records with Null or Empty values.
Step 3: Calculate the Time Only Field
Repeat the workflow in Step 2 to calculate values for the Time only field. This time, use an expression that returns the Time from the existing date field, like so:
- Time($feature.Date)
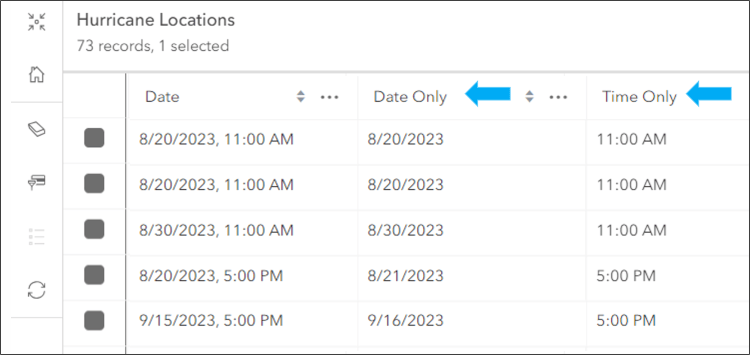
Step 4: Check Out the Results
Open the table to view the new values in the Date only and Time only fields.
Pro Tip: Configure the pop-ups to display the Date only and Time only fields.
Summary
The new Date only and Time only field types offer flexible options for working with date and time data in ArcGIS Online. Using new tools for adding and calculating fields, you can quickly transform old date fields into these new field types within Map Viewer. In this article, we provided step-by-step instructions for converting existing dates into new fields for easier data storage, management, and analysis. We hope you leverage this new functionality to enhance your data management in ArcGIS Online.


Commenting is not enabled for this article.