Date and time data are essential for analyzing patterns and events over time. Whether you’re tracking population changes, weather events, or wildlife observations, it’s important to understand how ArcGIS Online stores and displays temporal data. We’ve got you covered. In this article, we’ll explore things like field types and settings that can help you get more understanding and control over your data.
- Level Up Tip #1: Choose the Right Fields
- Level Up Tip #2: Set the Web Map Time Zone
- Level Up Tip #3: Preserve the Time Zone of the Data
- Level Up Tip #4: Adjust for Daylight Savings Time
How ArcGIS Online stores and displays time
Using a standard Date field in ArcGIS, there are some universal truths to keep in mind:
- Values are stored in UTC.
- If no time is entered, a default time of 12:00 AM (midnight) is automatically assigned.
- Values displayed in popups and tables get converted to the viewer’s device time zone.
These truths can lead to unexpected results. For example, January 1, 2024, at 12:00 AM in New York displays as December 31, 2023, at 10:00 PM on a device in the Mountain time zone. This could impact analysis, or statistics, or just leave you wondering how that happened. In the following sections, we’ll share some tips to help you avoid the confusion.
Tip #1: Choose the right fields
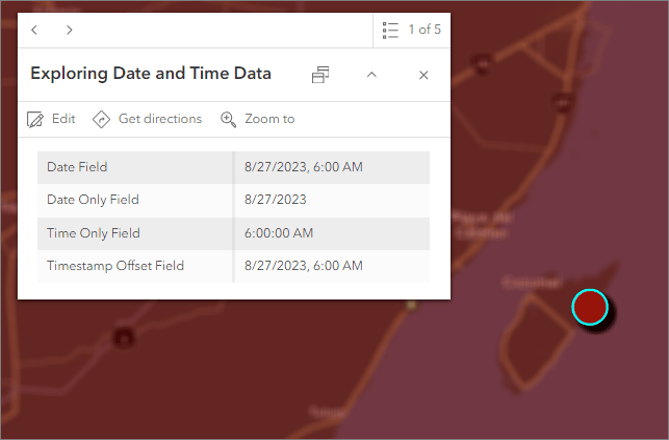
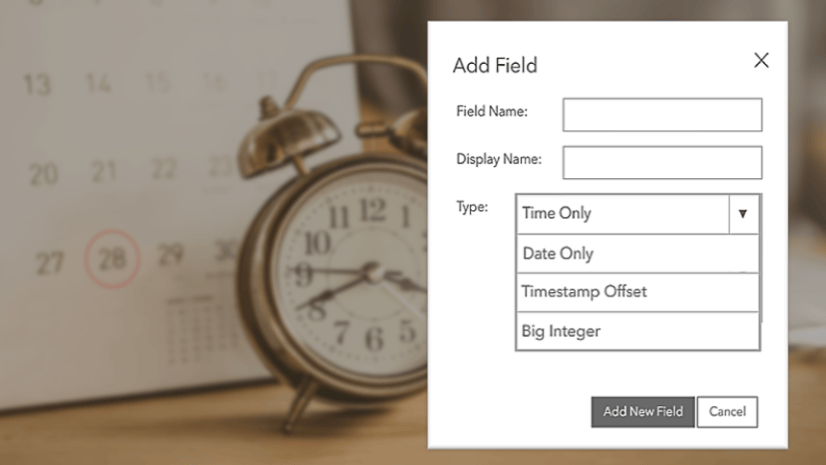
ArcGIS now offers four temporal field types. Choose the right one to meet your needs:
- Date: Stores both date and time together. Always.
- Date only: Stores dates without times, ideal when time is irrelevant.
- Time only: Stores times without dates, useful for schedules and business hours.
- Timestamp offset: Stores date, time, and the time zone offset from UTC, great for data collected across multiple time zones.
For more information on when to use each field type, check out the article New Field Types in ArcGIS Online.
Tip #2: Set the web map time zone
In Map Viewer, you can set a time zone in the Map properties. This gives you more control over how date and time values are displayed across devices.
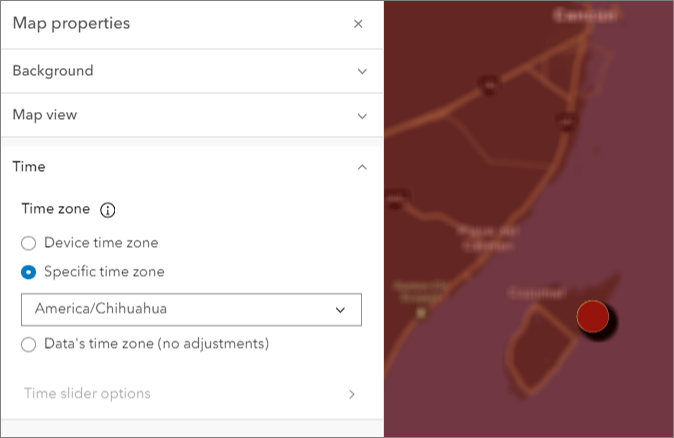
Select one of the following:
- Device time zone: The date and time values are adjusted based on each viewer’s device.
- Specific time zone: The values display in a specified time zone regardless of device time.
- Data’s time zone: Displays the date and time as-is, without adjusting for location. If the layer has a time zone set on it (see tip #3), that will persist under this setting.
For a deeper dive into web map time zones, check out this article.
Tip #3: Preserve the Time Zone
Time zone information can be preserved in a couple of ways:
- Set it at the layer level when publishing data.
- Set it the feature level using the Timestamp offset field.
Layer level
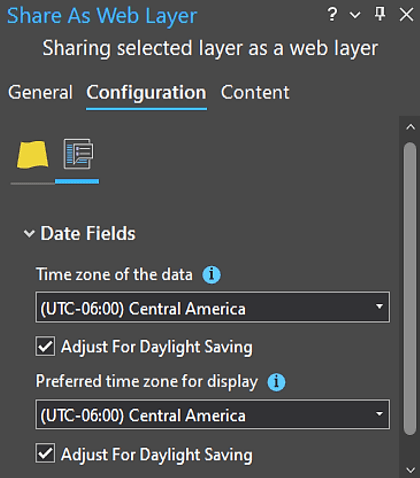
At publishing time, you can set a time zone for the layer. This is handy when A) all of the data was collected in the same time zone, and B) you want to preserve the time zone information with the layer. Note: If you don’t specify a time zone for your data, the time zone defaults to UTC.
Feature level
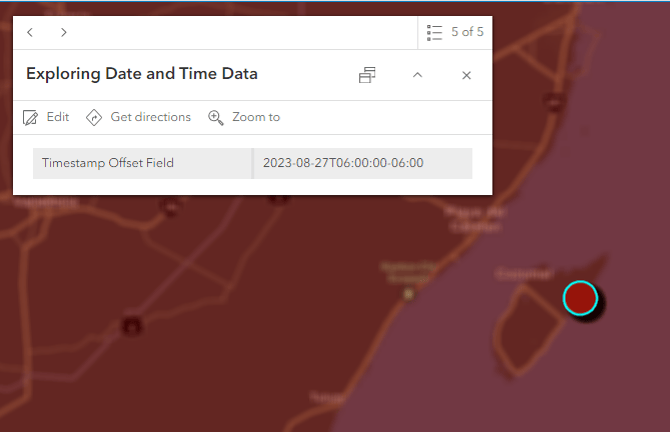
Different time zones can be saved for different features using the Timestamp offset field. This is especially useful for global data sets since you can set the date, time, and time zone for each feature.
Tip #4: Adjust for Daylight Savings Time
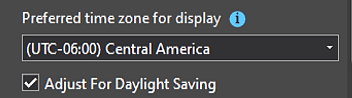
When publishing a layer from ArcGIS Pro, you can adjust for daylight savings time (DST). With the setting enabled, the date and time values are automatically adjusted, forward or back, based on when daylight savings time starts or ends.
Strategies for locking down date and time values
Example 1: Use the right field type
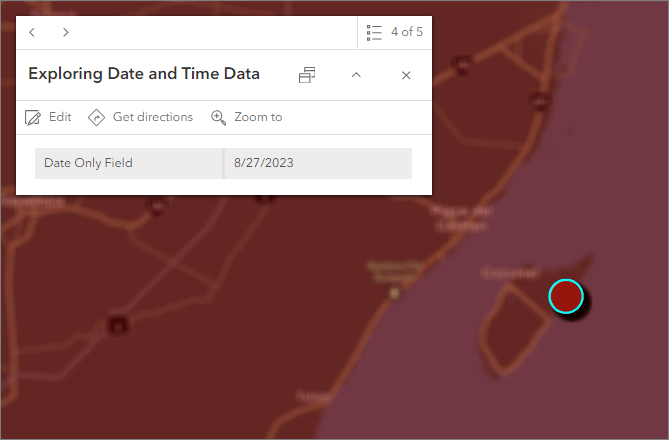
Imagine you’re using a Date field and enter only a date, but no time. You’ll notice a time is added. That’s because Date fields always store both a date and a time. If no time is provided, ArcGIS automatically assigns 12:00 AM (midnight). Tip: If time isn’t important, use a Date only field.
Example 2: Prevent date time adjustments
As you’ve seen, values in Date fields are stored in UTC, and display according to the viewer’s device time zone. While this is often helpful, it can sometimes produce unexpected results. For example, a value entered as 1/1/2023 12:00 am viewed on a device in a time zone 1 hour behind is displayed as 12/31/2022 11:00 pm.
The time, the date, and even the year changed, or rather, the way they display was adjusted. Tip: use a Date only field, or set a web map time zone so dates and times display consistently.
Summary
In this article, we explored universal truths and data management strategies to help you level up your date and time data management powers in ArcGIS Online. You can choose from diffferent approaches based on your data needs and goals. Mapping and editing temporal data can be tricky, but having the right understanding and helpful tools can make it easier. By leveraging features such as field types, web map time zones, and layer publishing options, you can gain greater control over how dates and times are stored and displayed across ArcGIS Online.
ArcGIS Online Help has a wealth of information on working with date and time data. And be sure to join the conversation on Esri Community where you can ask questions, connect with other ArcGIS Users and share your own insights.


Commenting is not enabled for this article.