Map Viewer offers out-of-the-box tools for editing so you can easily update attributes or add new features to a map. We want to keep you up-to-date with the latest tools and features to streamline editing and managing data online. In this article, we’ll explore five tips you can use right away to simplify editing in Map Viewer.

Tip 1: Choose Which Layers Are Editable in the Map
As a data owner or administrator, you may already be familiar with how to enable editing for a hosted feature layer. In addition, you can choose which editable layers are editable in a map. This is really useful for creating an app where you want users to edit specific layers, but not others. Locate the Editing settings in the layer Properties.

Note: Web map Editing settings don’t affect the settings for the layer, they only apply to the layer in that map.
Tip 2: Get More Flexibility with Views
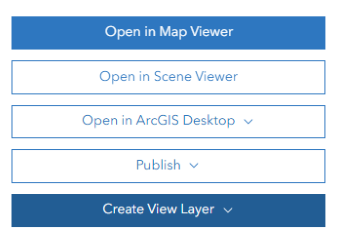
Data can serve many purposes. In some cases, you create a layer for collecting data, while in other cases, you simply want people to view the data on a map. What if you want the same layer to serve both purposes? That’s where Hosted Feature Layer Views, aka views, come into play.
Like a layer, you can control access to the view, tweak the style, and even apply different editing settings to each view. For example, you can create one view that’s visible to the public with no editing allowed, and a separate view for editing in-house. Both views point to the same layer, where edits are applied right away.
Check out this article for a real world example.
Tip 3: Edit Smarter with Forms
You may recall the days when the form was based on the pop-up (ahem, Map Viewer Classic). Now we’ve decoupled forms and pop-ups so that you can more easily direct data collection with intuitive forms that make editing more efficient. You can choose which fields to display, in which order, and take advantage of more advanced functions like calculated expressions and conditional visibility.
You’ll find the Forms  button inside the Configure editing
 menu on the Settings toolbar.

Check out these blog articles for inspiration when authoring forms:
Tip 4: Save Forms
To save a form in Map Viewer, you can either save the form to the map, or to the layer. Saving it to the map means it’s only saved in that map, while saving it to the layer means you can easily use it again in other maps. Anytime you add the layer to a map, the form comes right along with it.

Tip 5: Set up Group Layers
Save time by creating, saving, and even sharing Group Layers. Yep, that’s a thing. You might have a set of layers that you want to use across a series of maps. You can save that group of layers and easily add the entire group to other maps. With Group Layers, you can also leverage features like exclusive visibility and blend modes. Group Layers preserve the properties you configured on each layer in the group so the layers are already set up the way you like when you add them to a map, which can be a huge time saver.

Check out this blog article to learn more about Group Layers.
Summary
In this article, we explored five tips to improve the editing experience in Map Viewer: managing editing settings in the map, creating views, and using forms and group layers. We hope the time-saving tips we explored help you streamline your editing workflows and make editing in Map Viewer even easier. Be sure to join the conversation on Esri Community to share your own thoughts, tips, or experiences.
Can’t get enough? Click here to view the sequel to this article, 5 Tips for Editing in 2025.


Commenting is no longer enabled for this article